Ceiling photoshop

Tags

, ,

Still waiting for the trim to arrive today, but I did try to stain the architectural details that will hang between the drawing room and the dining room.

OLYMPUS DIGITAL CAMERA

Unfortunately, the stain did not take on it, because it seems to be made of cardboard with some plastic-like film. So I mixed a couple colors together and painted them instead.

OLYMPUS DIGITAL CAMERA

Stained and glued in the doorway frame (not the trim yet) and then added these two filagrees.

OLYMPUS DIGITAL CAMERA

OLYMPUS DIGITAL CAMERA

Stained the window and added baseboard underneath (no trim for the window yet, either).

OLYMPUS DIGITAL CAMERA

And then I spent an awfully long time on photoshop, creating the ceiling paper and trim to size.

Entire ceiling

I still need to make the dent around the chimney on the lefthand side and then I can start printing it.

For now, be well.

Advertisement

Photo and trim

Tags

, ,

It’s been an odd day, so not much work on the house today. But I did print out and paste up the last sheet of drawing room wallpaper.

OLYMPUS DIGITAL CAMERA

Then I printed out a little photo of an Edwardian boy to fit in a picture frame.

OLYMPUS DIGITAL CAMERA

I’m not sure where this little guy will end up in the house, but he’ll be somewhere…

OLYMPUS DIGITAL CAMERA

OLYMPUS DIGITAL CAMERA

Then I started the trim work for the drawing room.

OLYMPUS DIGITAL CAMERA

I ran out of the doorway trim and won’t be getting more for a few days, so I had to stop there. But it’s starting to look like a fancy drawing room now…

OLYMPUS DIGITAL CAMERA

Good night.

Photos, paintings, and paper

Tags

, ,

Tonight, I started by printing out some possible paintings for the sitting room, as well as some old photos of two Edwardian people.

OLYMPUS DIGITAL CAMERA

I placed the photos in a tiny double frame I had.

OLYMPUS DIGITAL CAMERA

And set it on the sitting room table. Glad to know this house now has a family associated with it.

OLYMPUS DIGITAL CAMERA

Then I tried out a new, smaller version of the portrait I had tried in the frame over the fireplace.

OLYMPUS DIGITAL CAMERA

It still overwhelmed the room a little too much. So I tried a portrait of a sitting woman (not sized correctly for the frame, but the idea was there).

OLYMPUS DIGITAL CAMERA

That was already better. But then I tried a landscape from the turn of the century.

OLYMPUS DIGITAL CAMERA

This, I really liked, although it would need to be sized a bit bigger to fit the frame.

Then I added the next two sheets of wallpaper to the drawing room.

OLYMPUS DIGITAL CAMERA

Added yet another sheet.

OLYMPUS DIGITAL CAMERA

And then the printer went funny on me and refused to print, so I’ll have to do the last sheet tomorrow. But here’s the drawing room for now.

OLYMPUS DIGITAL CAMERA

I’ve decided against using wainscoting in this room because it cuts the tall lines of the room, and, after all, this IS supposed to be the most elegant and feminine room in the house. But I will add trim around the doorways and along the floor before I get to the ceiling.

And while I was printing out the wallpaper, I also printed out a larger, final version of the landscape painting, which is now in its frame over the sitting room fireplace.

OLYMPUS DIGITAL CAMERA

Good night.

More wallpaper

Tags

, ,

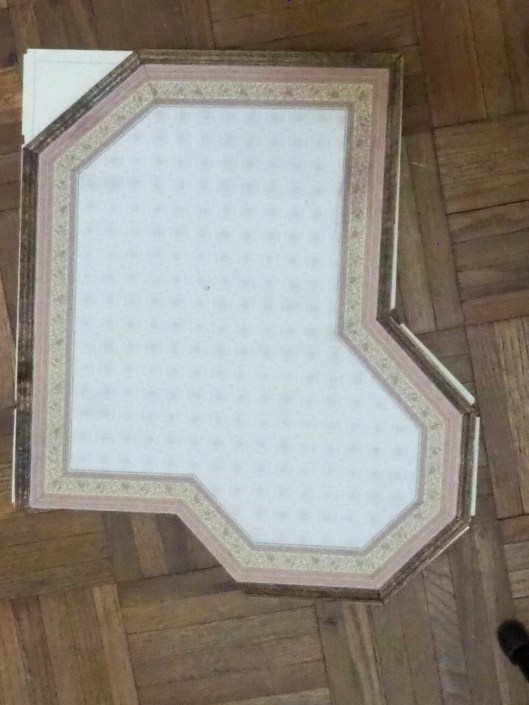
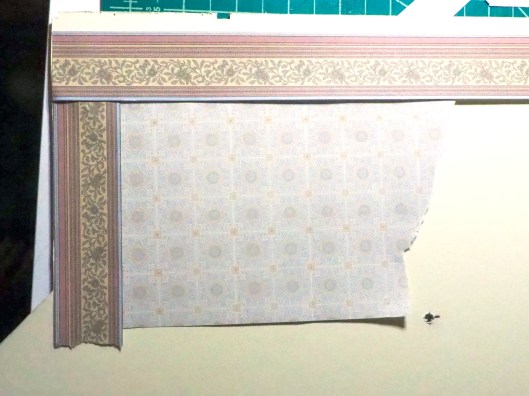
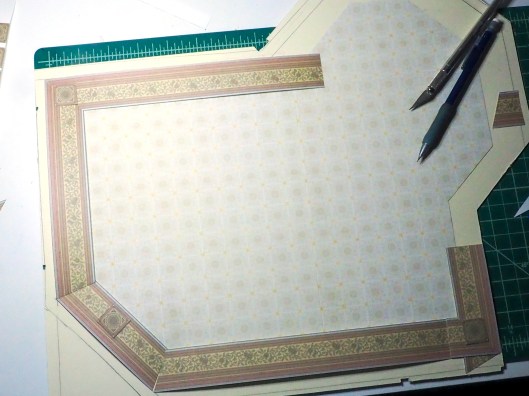
Today I decided that the drawing wallpaper was truly too yellow for my taste. So I made it more cream colored, printed it out, and taped it up to see.

OLYMPUS DIGITAL CAMERA

I liked it a lot better this color. I also added a small piece of trim between the wallpaper and the wallpaper trim as planned, to see what it would be like (I photoshopped it longer in this photo to be able to see it better).

OLYMPUS DIGITAL CAMERA

I decided I didn’t like that at all. So I would not use that in the final design.

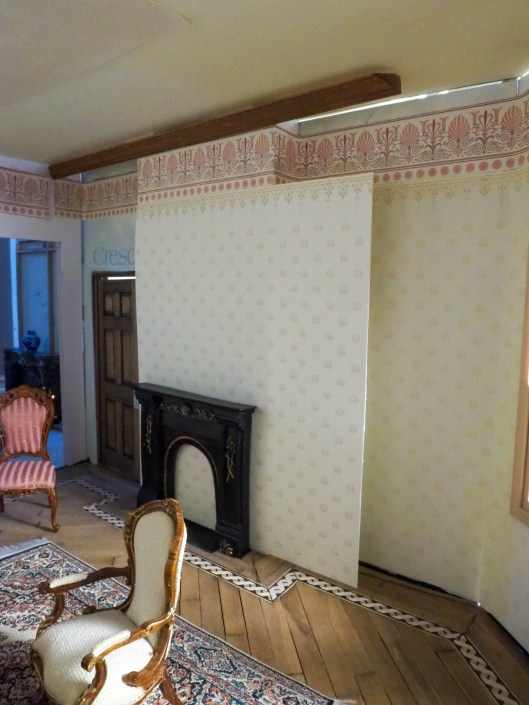
Then I started pulling off the yellowish wallpaper.

OLYMPUS DIGITAL CAMERA

Removing wallpaper is about as much fun on a miniature house as on a real-sized house…except it gets done a lot faster because it’s a lot smaller surface area.

OLYMPUS DIGITAL CAMERA

Although with all the sanding and the pulling, there’s just about as much mess to clean up in the end.

OLYMPUS DIGITAL CAMERA

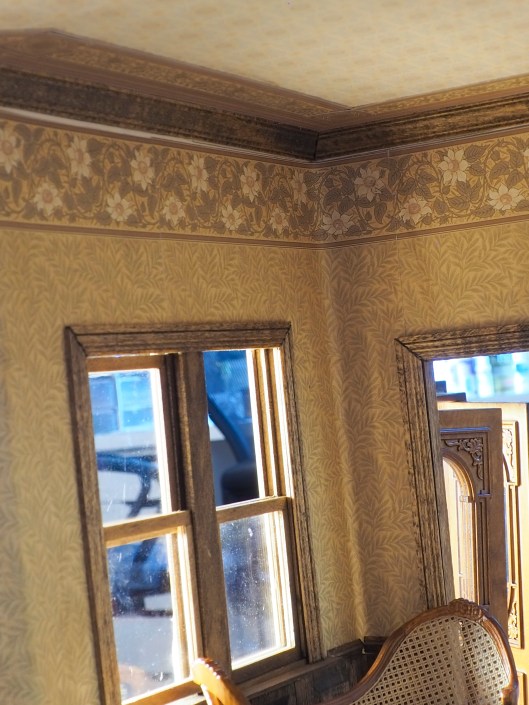
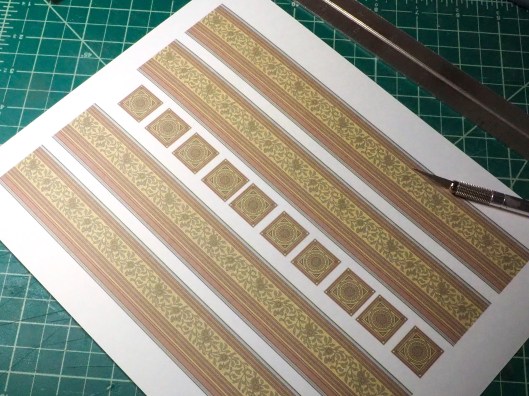
Then I painted just under the trim to take the place of the wooden trim I had decided not to use. Thus any space between the paper and the trim would become a pretty line. (Because of repetition issues, I could not print the trim and the paper together as one.)

OLYMPUS DIGITAL CAMERA

Then I finished gluing on the rest of the trim and put up the first sheet of wallpaper.

OLYMPUS DIGITAL CAMERA

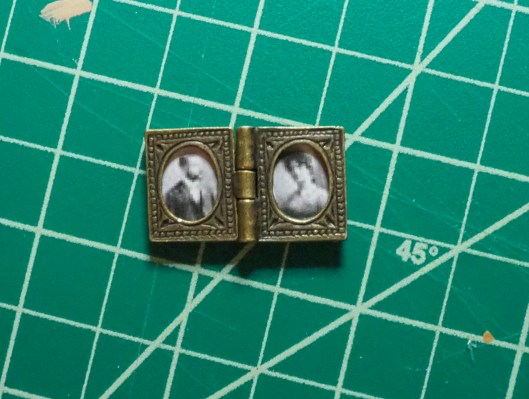
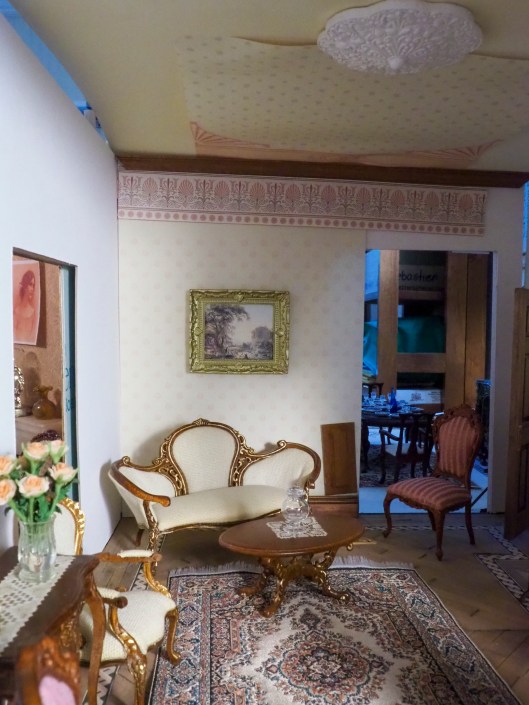
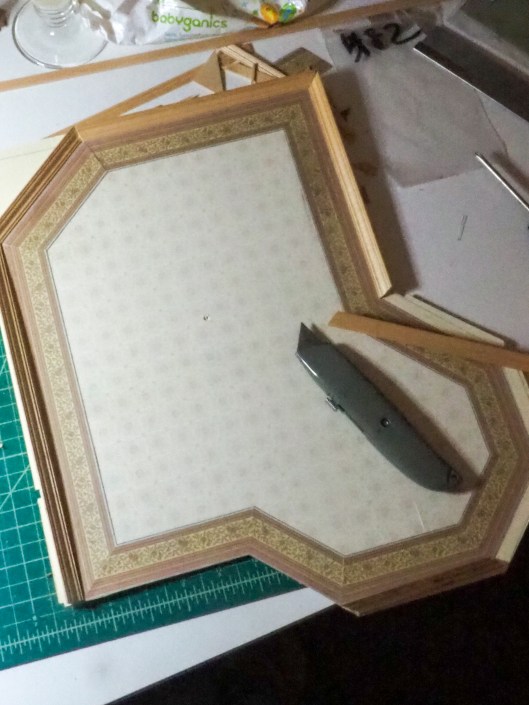
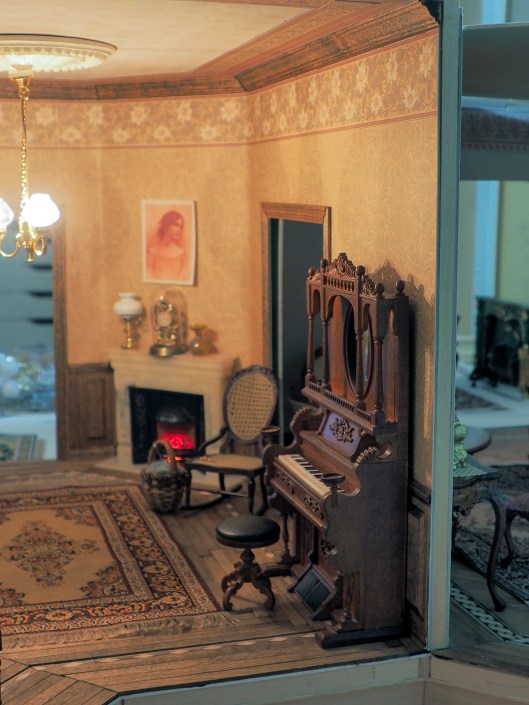
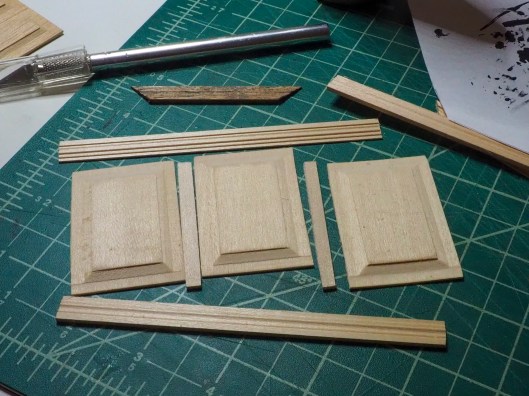
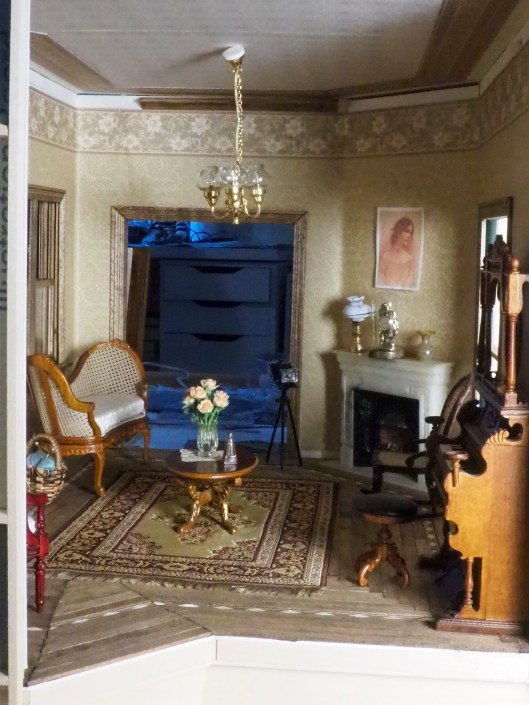
I took a break and tried out a few things that had arrived in the mail today. First, the frame for the painting in the sitting room. I tried two different paintings in it. Not sure which one I’ll use, or if I’ll try something else instead.

OLYMPUS DIGITAL CAMERA

OLYMPUS DIGITAL CAMERA

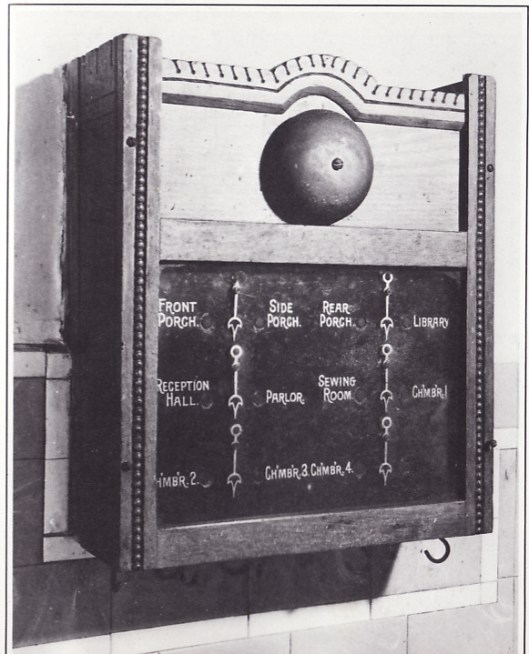
Secondly, I’ve been looking for a long time for something that might work as a servant call box for the kitchen, as well as a kitchen clock. Something a bit like this:

IMG_0013

I found this little, inexpensive and cheaply-made clock online and decided it would do great for the project.

OLYMPUS DIGITAL CAMERA

Took out what was inside,

OLYMPUS DIGITAL CAMERA

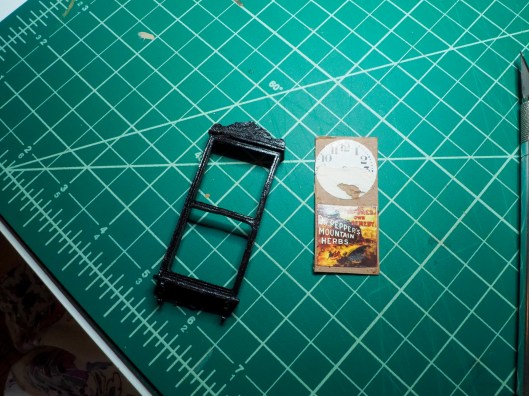
Added a more Victorian-looking clock face.

OLYMPUS DIGITAL CAMERA

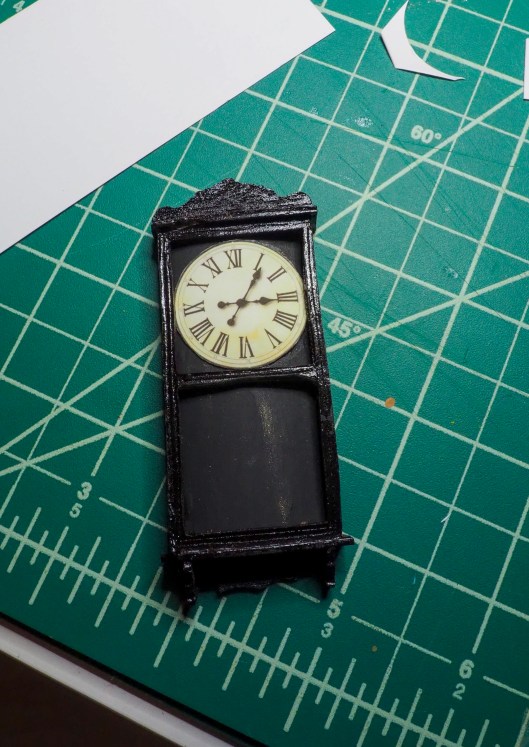
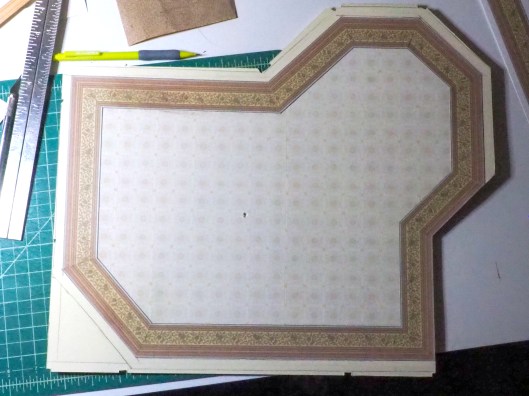
Then created, on photoshop, a servant callbox board that corresponded to all the rooms in the house.

call box

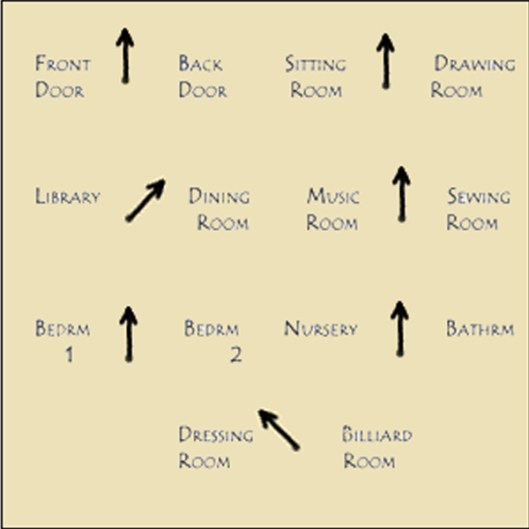
I printed it out and placed it inside as well. It’s written in really tiny print, but with a magnifying glass, you can still read the words.

OLYMPUS DIGITAL CAMERA

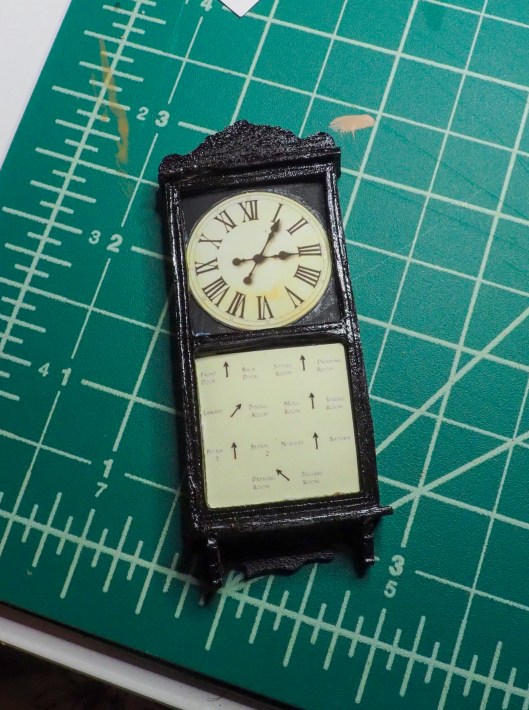
Then I hung it up in the kitchen so the servants could tell who was ringing for them and what time it was…

OLYMPUS DIGITAL CAMERA

OLYMPUS DIGITAL CAMERA

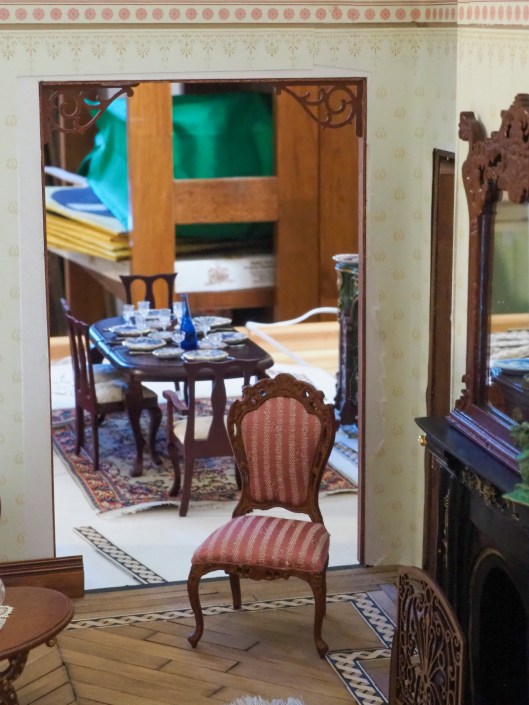
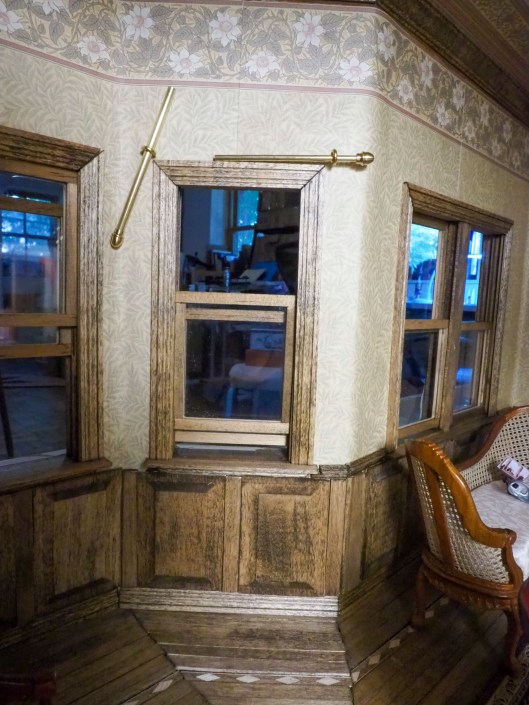
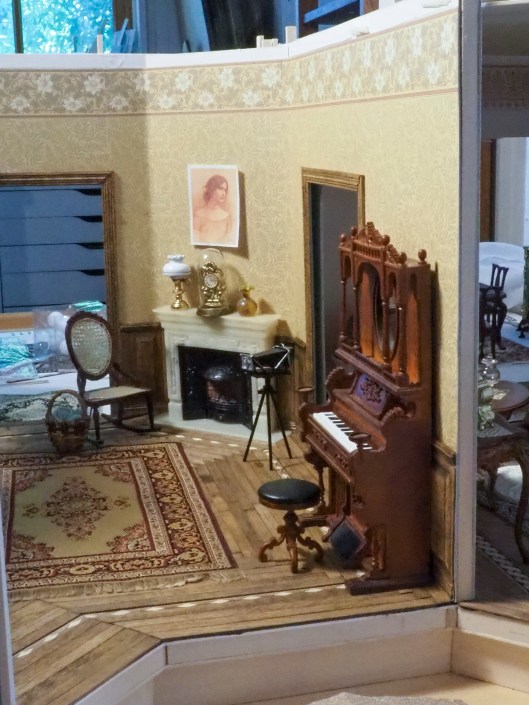
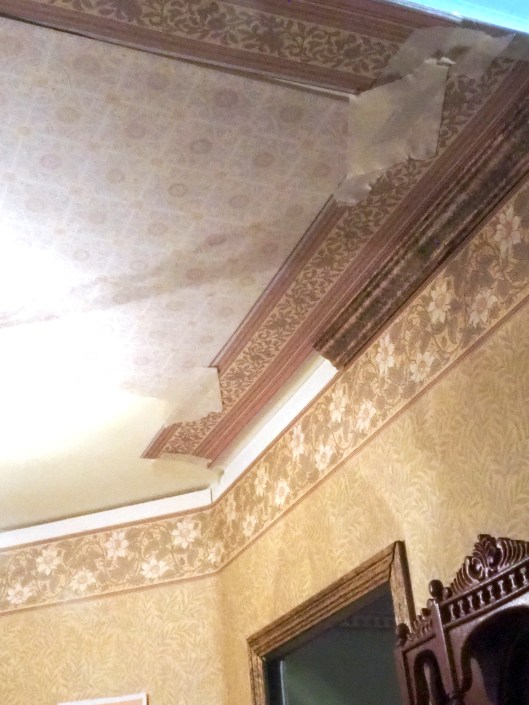
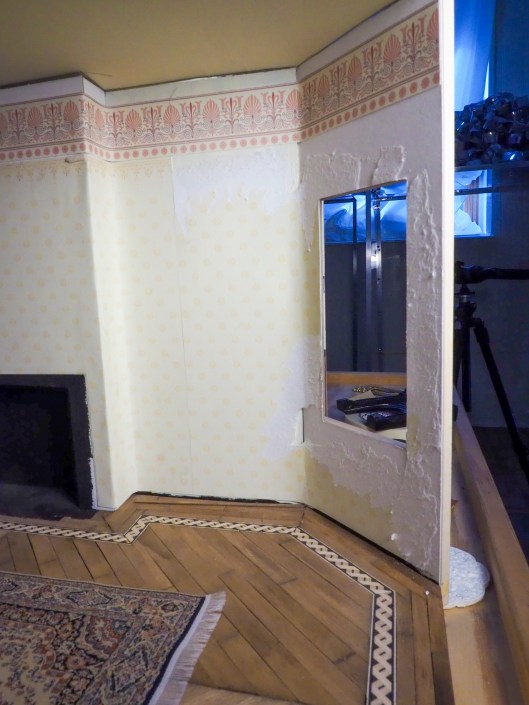
Then I went back to the wallpaper. Added a second sheet around the fireplace.

OLYMPUS DIGITAL CAMERA

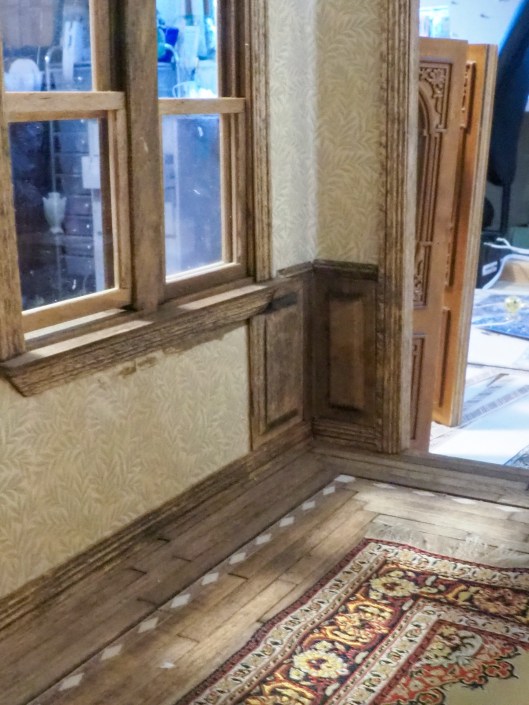
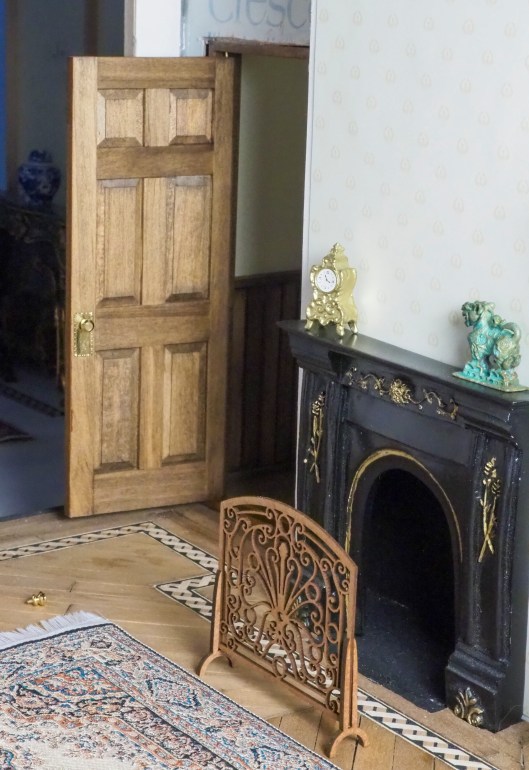
Before doing the next sheet, I had to restain the door leading to the servant’s hallway, since it did not match the rosewood stain that will be used in the drawing room.

OLYMPUS DIGITAL CAMERA

I kept the old stain on the other side of the door, to match the hallway.

OLYMPUS DIGITAL CAMERA

Oh, and I had to add the tiny doorknobs which I had never gotten around to adding.

OLYMPUS DIGITAL CAMERA

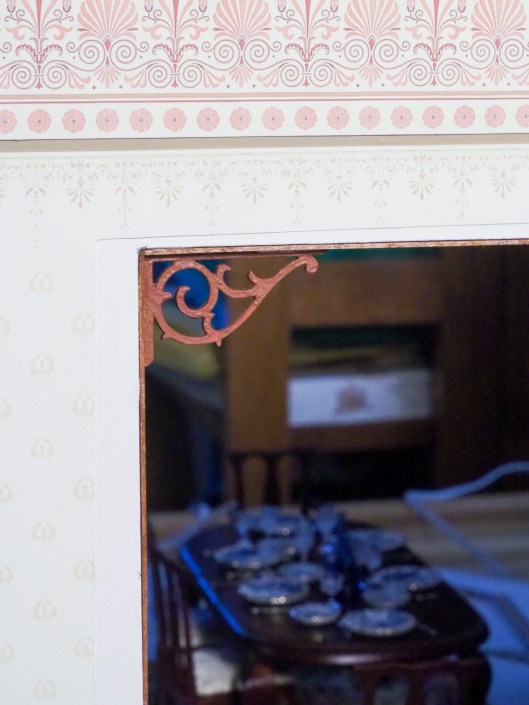
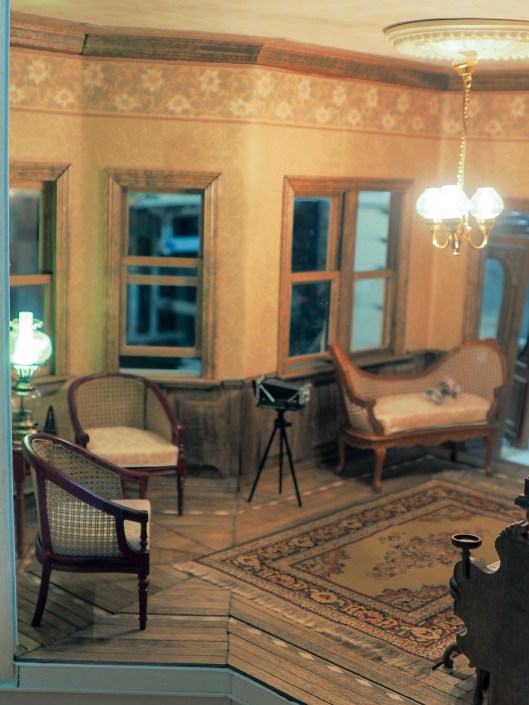
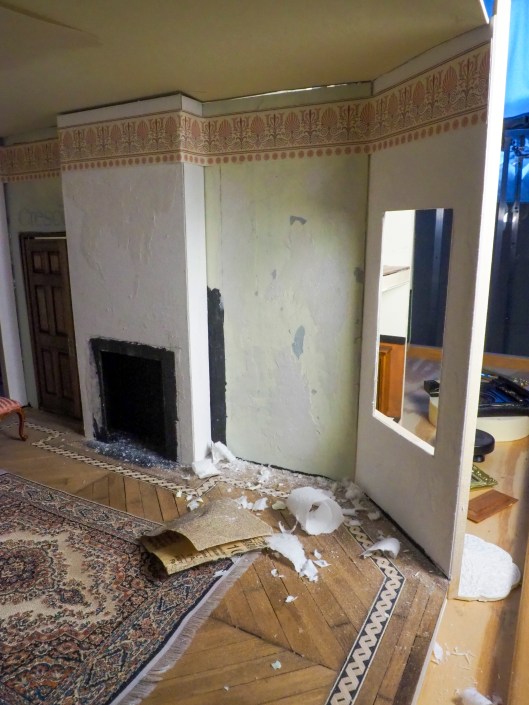
And finally, I added another sheet of wallpaper around the door and corner.

OLYMPUS DIGITAL CAMERA

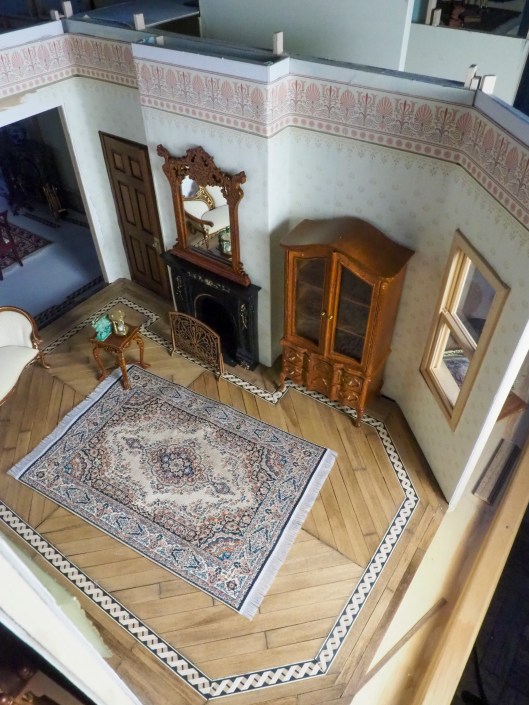
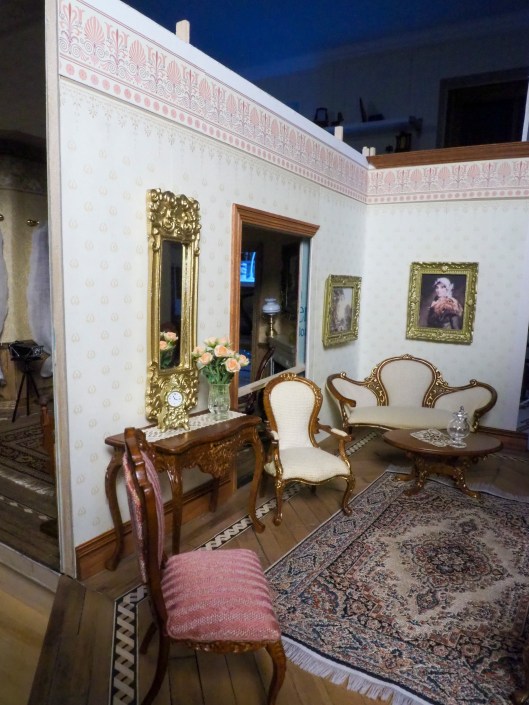
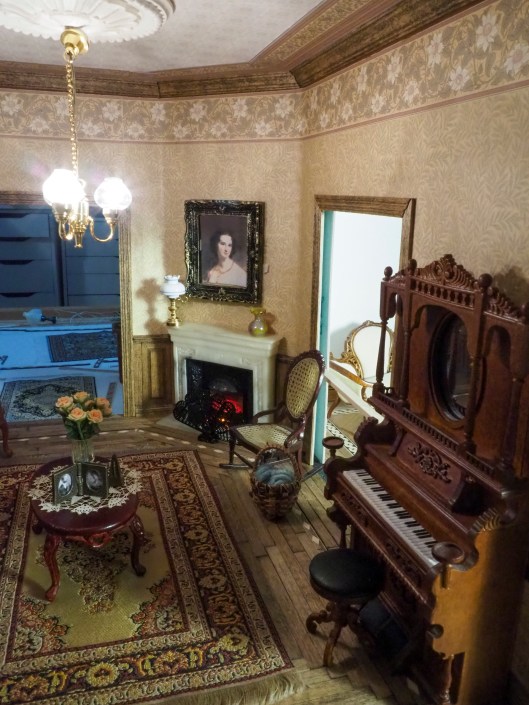
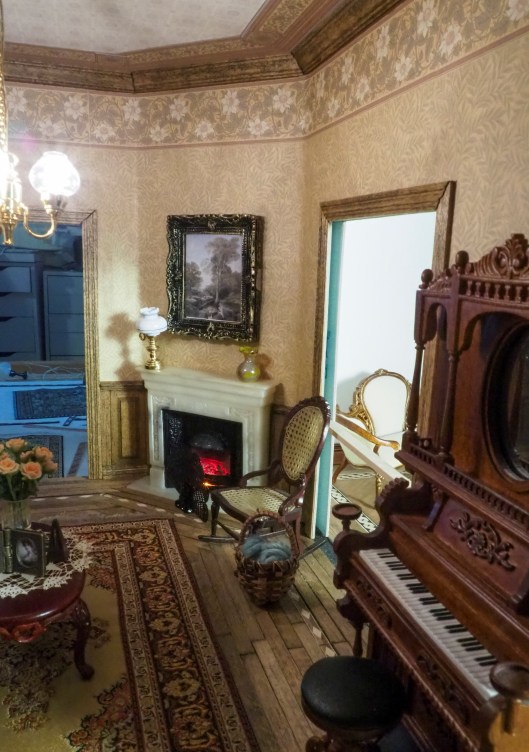
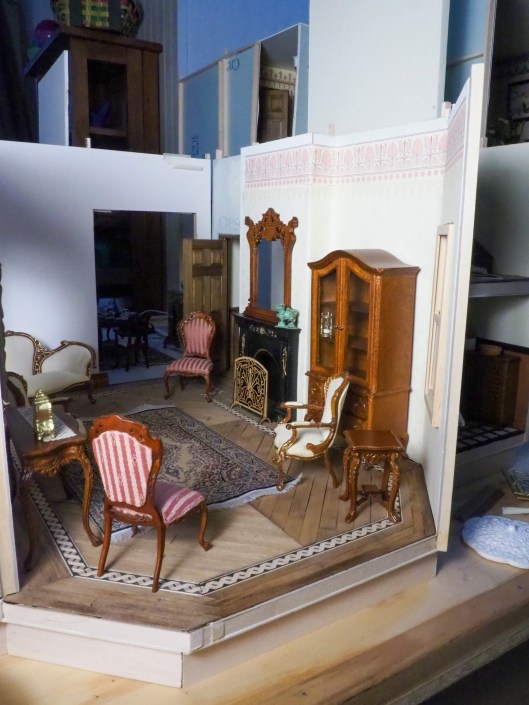
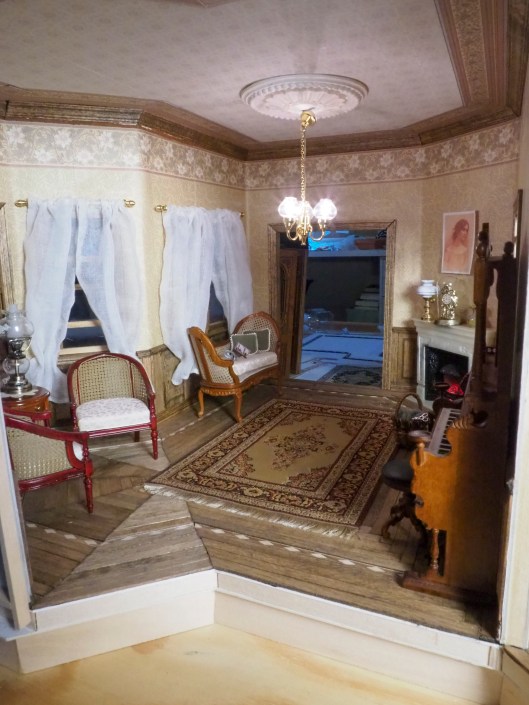
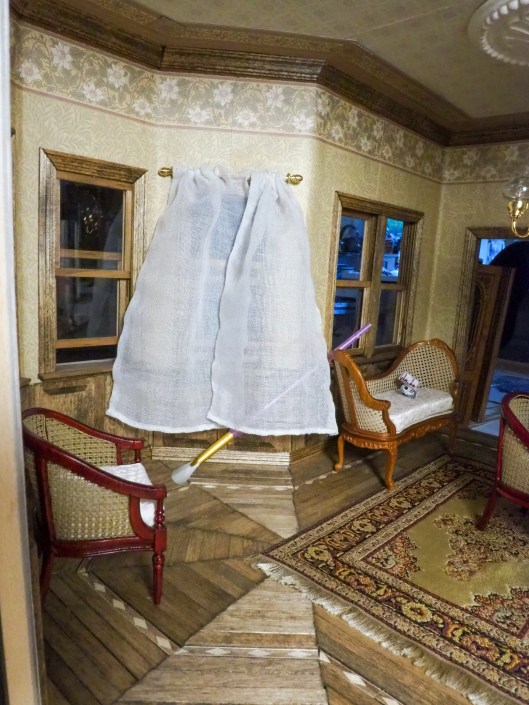
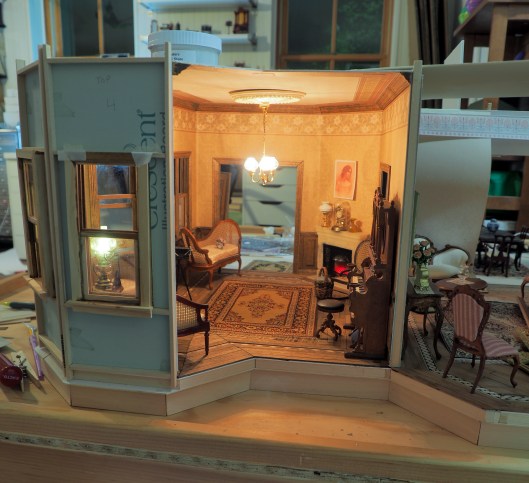
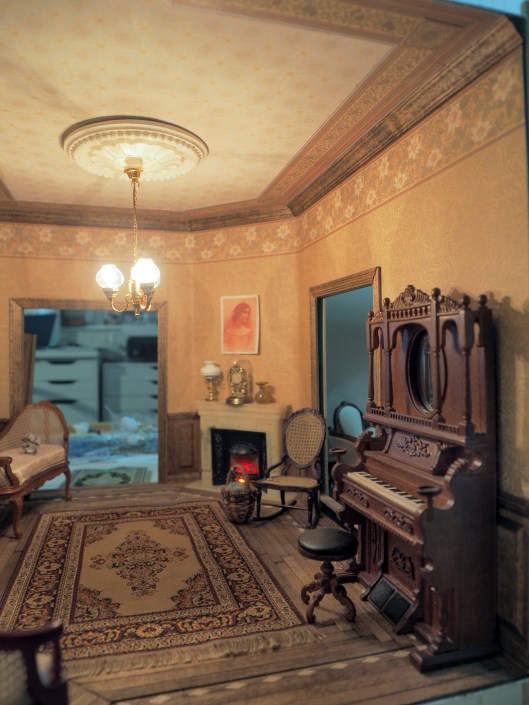
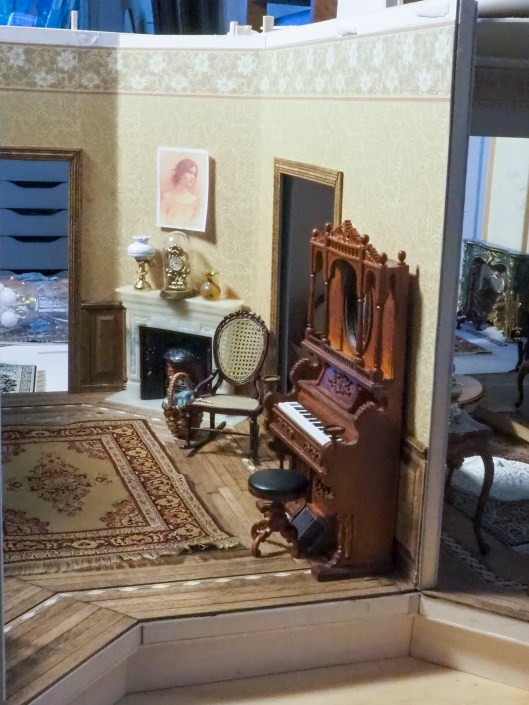
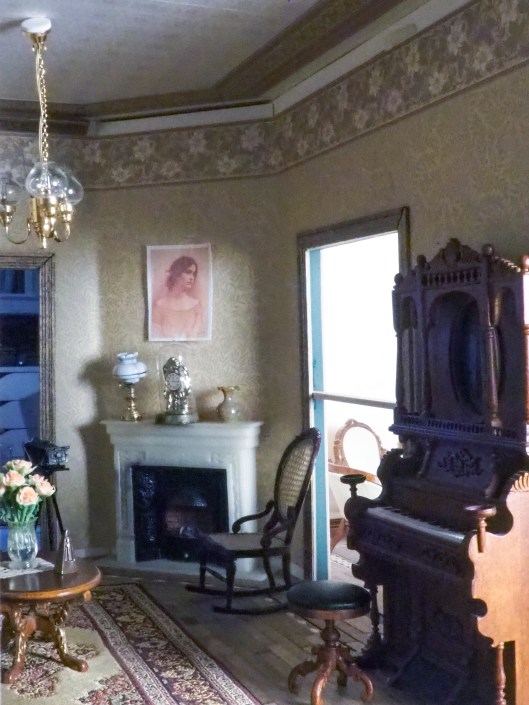
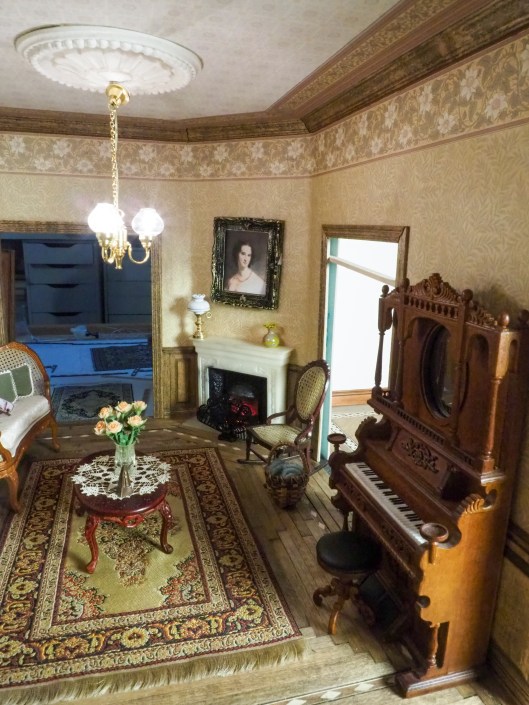
So here is the drawing room so far…

OLYMPUS DIGITAL CAMERA

Good night.


Wallpaper, curtains and pillows, oh my!

Tags

, ,

I’ve been looking for a pretty blue and white china set that wasn’t too expensive for the dining room, and I finally found these plates (and cups and saucers etc.), that arrived in the mail today. So I set the table in the yet-to-be-constructed dining room. They’ll be ready for dinner parties soon enough.

OLYMPUS DIGITAL CAMERA

Worked more on the drawing room wallpaper today, and finally came up with the following pattern.

OLYMPUS DIGITAL CAMERA

The wallpaper size was right but the ceiling trim was too big. So I made the ceiling paper smaller.

OLYMPUS DIGITAL CAMERA

That looked about right to me. So I printed out the wallpaper and wall trim on matte presentation paper, cut it out, and started gluing it on. (The line between the trim and the wallpaper will be covered with trim later.)

OLYMPUS DIGITAL CAMERA

The result is just a bit more yellow than I had wanted…I was looking for a more creamy look. So I might still change it. But for now, this is what I have in the drawing room.

OLYMPUS DIGITAL CAMERA

Then I started making another set of curtains for the sitting room.

OLYMPUS DIGITAL CAMERA

OLYMPUS DIGITAL CAMERA

I also decided to make a couple pillows for the sofa. Sewed up the sides.

OLYMPUS DIGITAL CAMERA

Filled it with seed beads, a trick I learned to make the pillows look more natural, since they are so small and weigh so little if you stuff them with stuffing.

OLYMPUS DIGITAL CAMERA

And sewed them closed.

OLYMPUS DIGITAL CAMERA

So, after hanging the set of curtains behind the sofa, the sitting room is looking even more home-like.

OLYMPUS DIGITAL CAMERA

And after I added a lace trim to the pillows, the sofa looks even more comfortable.

OLYMPUS DIGITAL CAMERA

Good night.


Curtains and decisions

Tags

, ,

Today I finished off the wainscoting under the tower windows, pulling off the bottom of the windowsills as I went to make it fit.

OLYMPUS DIGITAL CAMERA

Still haven’t finished the chair rail between the windows…

OLYMPUS DIGITAL CAMERA

…because the curtain rods came in the mail today, and I got sidetracked with curtain-making.

OLYMPUS DIGITAL CAMERA

I took the leftover pieces of the scarf that I had used for the top of the crib in the nursery. It seemed light and airy enough. Used fabric fusion to hem up the sides of the curtains because it takes up less bulk than actually hemming (the bottom of the curtain had already been machine-hemmed on the scarf).

OLYMPUS DIGITAL CAMERA

Then I folded over the top of the curtain, put a bit of fray guard across the top, and used a tiny slip stich to make a little place where the curtain rod could go through.

OLYMPUS DIGITAL CAMERA

Stitched a second one.

OLYMPUS DIGITAL CAMERA

And had my first set of curtains completed.

OLYMPUS DIGITAL CAMERA

Screwed the eye hooks into the wall by the window…

OLYMPUS DIGITAL CAMERA

…slipped the curtain rods through…

OLYMPUS DIGITAL CAMERA

…then hung the curtains.

OLYMPUS DIGITAL CAMERA

Then I pleated them and tied back the bottom of the curtains so they would fall more naturally. (I probably should have done that before I hung them, but I forgot.)

OLYMPUS DIGITAL CAMERA

That was a lot more work than it looks, so I decided I was done with curtains for the day.

Then I printed out a different possible Bradbury & Bradbury wallpaper for the drawing room and taped it up to see.

OLYMPUS DIGITAL CAMERA

Wasn’t sure I liked it, so I combined it with the wall trim I had previously printed out.

OLYMPUS DIGITAL CAMERA

Not so sure the pink on the wall trim and the peach on the ceiling trim match. Maybe I’ll do some combination of the two papers…we’ll see.

OLYMPUS DIGITAL CAMERA

For now, I leave you with a photo of the sitting room with one curtain completed…

OLYMPUS DIGITAL CAMERA

Be well.

.


Crown moulding

Tags

, ,

Today I cut out the crown moulding for the sitting room.

OLYMPUS DIGITAL CAMERA

Stained it all and glued it onto the ceiling.

OLYMPUS DIGITAL CAMERA

Laid the decorative squares in the corners and decided it looked more Victorian that way…so I glued them on.

OLYMPUS DIGITAL CAMERA

Then I placed the ceiling onto the room…it fit very tightly, but it fit. Unfortunately, there was a tiny white line between the top of the wallpaper trim and the crown moulding.

OLYMPUS DIGITAL CAMERA

I would have added a paper trim to that edge to solve the problem, but the thickness of the paper would have made the ceiling no longer fit. So I painted in the area with matching brown paint.

OLYMPUS DIGITAL CAMERA

And placed the ceiling back on.

OLYMPUS DIGITAL CAMERA

Then I changed the burnt-out bulb in the light and drilled a hole in the ceiling rosette, so I could string them together and through the hole in the center of the ceiling. They’re not glued on yet, but the effect is there.

OLYMPUS DIGITAL CAMERA

I finished a bit more of the wainscoting on the octagonal tower part (still a bit more to do).

OLYMPUS DIGITAL CAMERA

And here’s what I have so far.

OLYMPUS DIGITAL CAMERA

I’ve changed my mind (yet again) about the outside of the house. I want to cover it with bricks, so that will be added at a later time. And the room needs a round table in the middle of the carpet. But right now, the sitting room looks like a rather cozy, peaceful place to have a cup of tea and knit by the fire.

OLYMPUS DIGITAL CAMERA


Good night.

Sitting room wainscoting

Tags

, ,

Got some wainscoting pieces in the mail today, so I started in on the wainscoting for the sitting room. Cut out all the pieces I would need.

OLYMPUS DIGITAL CAMERA

Stained them.

OLYMPUS DIGITAL CAMERA

And glued them onto the wall behind the organ.

OLYMPUS DIGITAL CAMERA

Kept going with the little fiddly bits around the fireplace.

OLYMPUS DIGITAL CAMERA

And placed the organ back in.

OLYMPUS DIGITAL CAMERA

Then I started on the opposite wall.

OLYMPUS DIGITAL CAMERA

Forgot that I would have to cut around the window sill trim…and then realized that if I just removed the trim, it would look a lot better. (The smudge of stain under the window sill trim here is because I stain the wall behind the edges of the wainscoting so if there’s a tiny crack, it won’t be as noticeable.)

OLYMPUS DIGITAL CAMERA

So I took a razor blade to the trim under the window sill (didn’t I just put that on a couple days ago?)…and added the wainscoting under the double window.

OLYMPUS DIGITAL CAMERA

Didn’t get to the tower portion yet, but the rest of the room works pretty well.

OLYMPUS DIGITAL CAMERA

OLYMPUS DIGITAL CAMERA

OLYMPUS DIGITAL CAMERA

Even simulated some morning sunshine peeping in through the windows with the spotlight…

OLYMPUS DIGITAL CAMERA

That’s all for today. Good night.


Ceiling paper

Tags

, ,

Finished off the ceiling trim tonight.

OLYMPUS DIGITAL CAMERA

Placed a few of these decorative squares in the corners…still not sure if I’ll use them or not.

OLYMPUS DIGITAL CAMERA

Then I placed it on the sitting room to get the effect.

OLYMPUS DIGITAL CAMERA

There will be crown moulding between the ceiling and the walls (I just taped a bit on in these photos to see).

OLYMPUS DIGITAL CAMERA

OLYMPUS DIGITAL CAMERA

OLYMPUS DIGITAL CAMERA

Then I started cutting out the crown moulding, but the corners are complicated and I’m tired and I did them all wrong…

OLYMPUS DIGITAL CAMERA

So it’s bedtime for me instead.

By the way, if you’re wondering where my little helper has been these past few days…he got inspired by my house and decided to make a miniature house of his own from a cardboard box.

20200813_150753

It’s a summer home for Elsa and Anna and their friends (from Frozen), in the Enchanted Forest.

20200813_150843

He even made the table and chairs (the rest of the furniture is old furniture I had no need for). So he’s working happily away on his house, in the same room as I work on mine.

Be well…and good night.


Ceiling trim and paper

Tags

, ,

Started out today by putting together a knitting basket for whoever sits in the rocking chair in the sitting room…the thickness of the ‘wool’ may be a bit much, so I may do it again with thinner yarn later.

OLYMPUS DIGITAL CAMERA

Then I made some trim for the ceiling edges. The first version was too small.

OLYMPUS DIGITAL CAMERA


So I fiddled around and got to this size, which I think may be right.

OLYMPUS DIGITAL CAMERA


I was of two minds about using the ceiling paper that went with the wallpaper, but after trying it in, I realized I really liked it.

OLYMPUS DIGITAL CAMERA

OLYMPUS DIGITAL CAMERA

So I printed and cut out the ceiling paper.

OLYMPUS DIGITAL CAMERA

And printed out a sheet of ceiling border…

OLYMPUS DIGITAL CAMERA

…and started putting it all together on the ceiling.

OLYMPUS DIGITAL CAMERA

Not finished with the border yet. and I haven’t decided where to place the decorative squares (like the ones in the corners of the border), but this is enough for now.

Goodnight.