• About
  • House plans
  • Scullery
  • Kitchen
  • Butler’s Pantry
  • Linen Closet
  • Bathroom
  • Upstairs hallway
  • Nursery
  • Back Stairs / Pantry
  • Drawing Room (almost finished)
  • Sitting Room (almost finished)
  • Music Room (unfinished)
  • Bedroom I (unfinished)
  • Entrance hall (unfinished)
  • Library (unfinished)
  • Dining room (unfinished)

Victorian Mini

~ Adventures in Modeling

Victorian Mini

Tag Archives: dollhouse

More back staircase

17 Thursday Oct 2013

Posted by cider12 in Uncategorized

≈ 6 Comments

Tags

dollhouse, miniatures, Victorian house

Since I had made the stairs the wrong size a little while back, I had to start fresh.

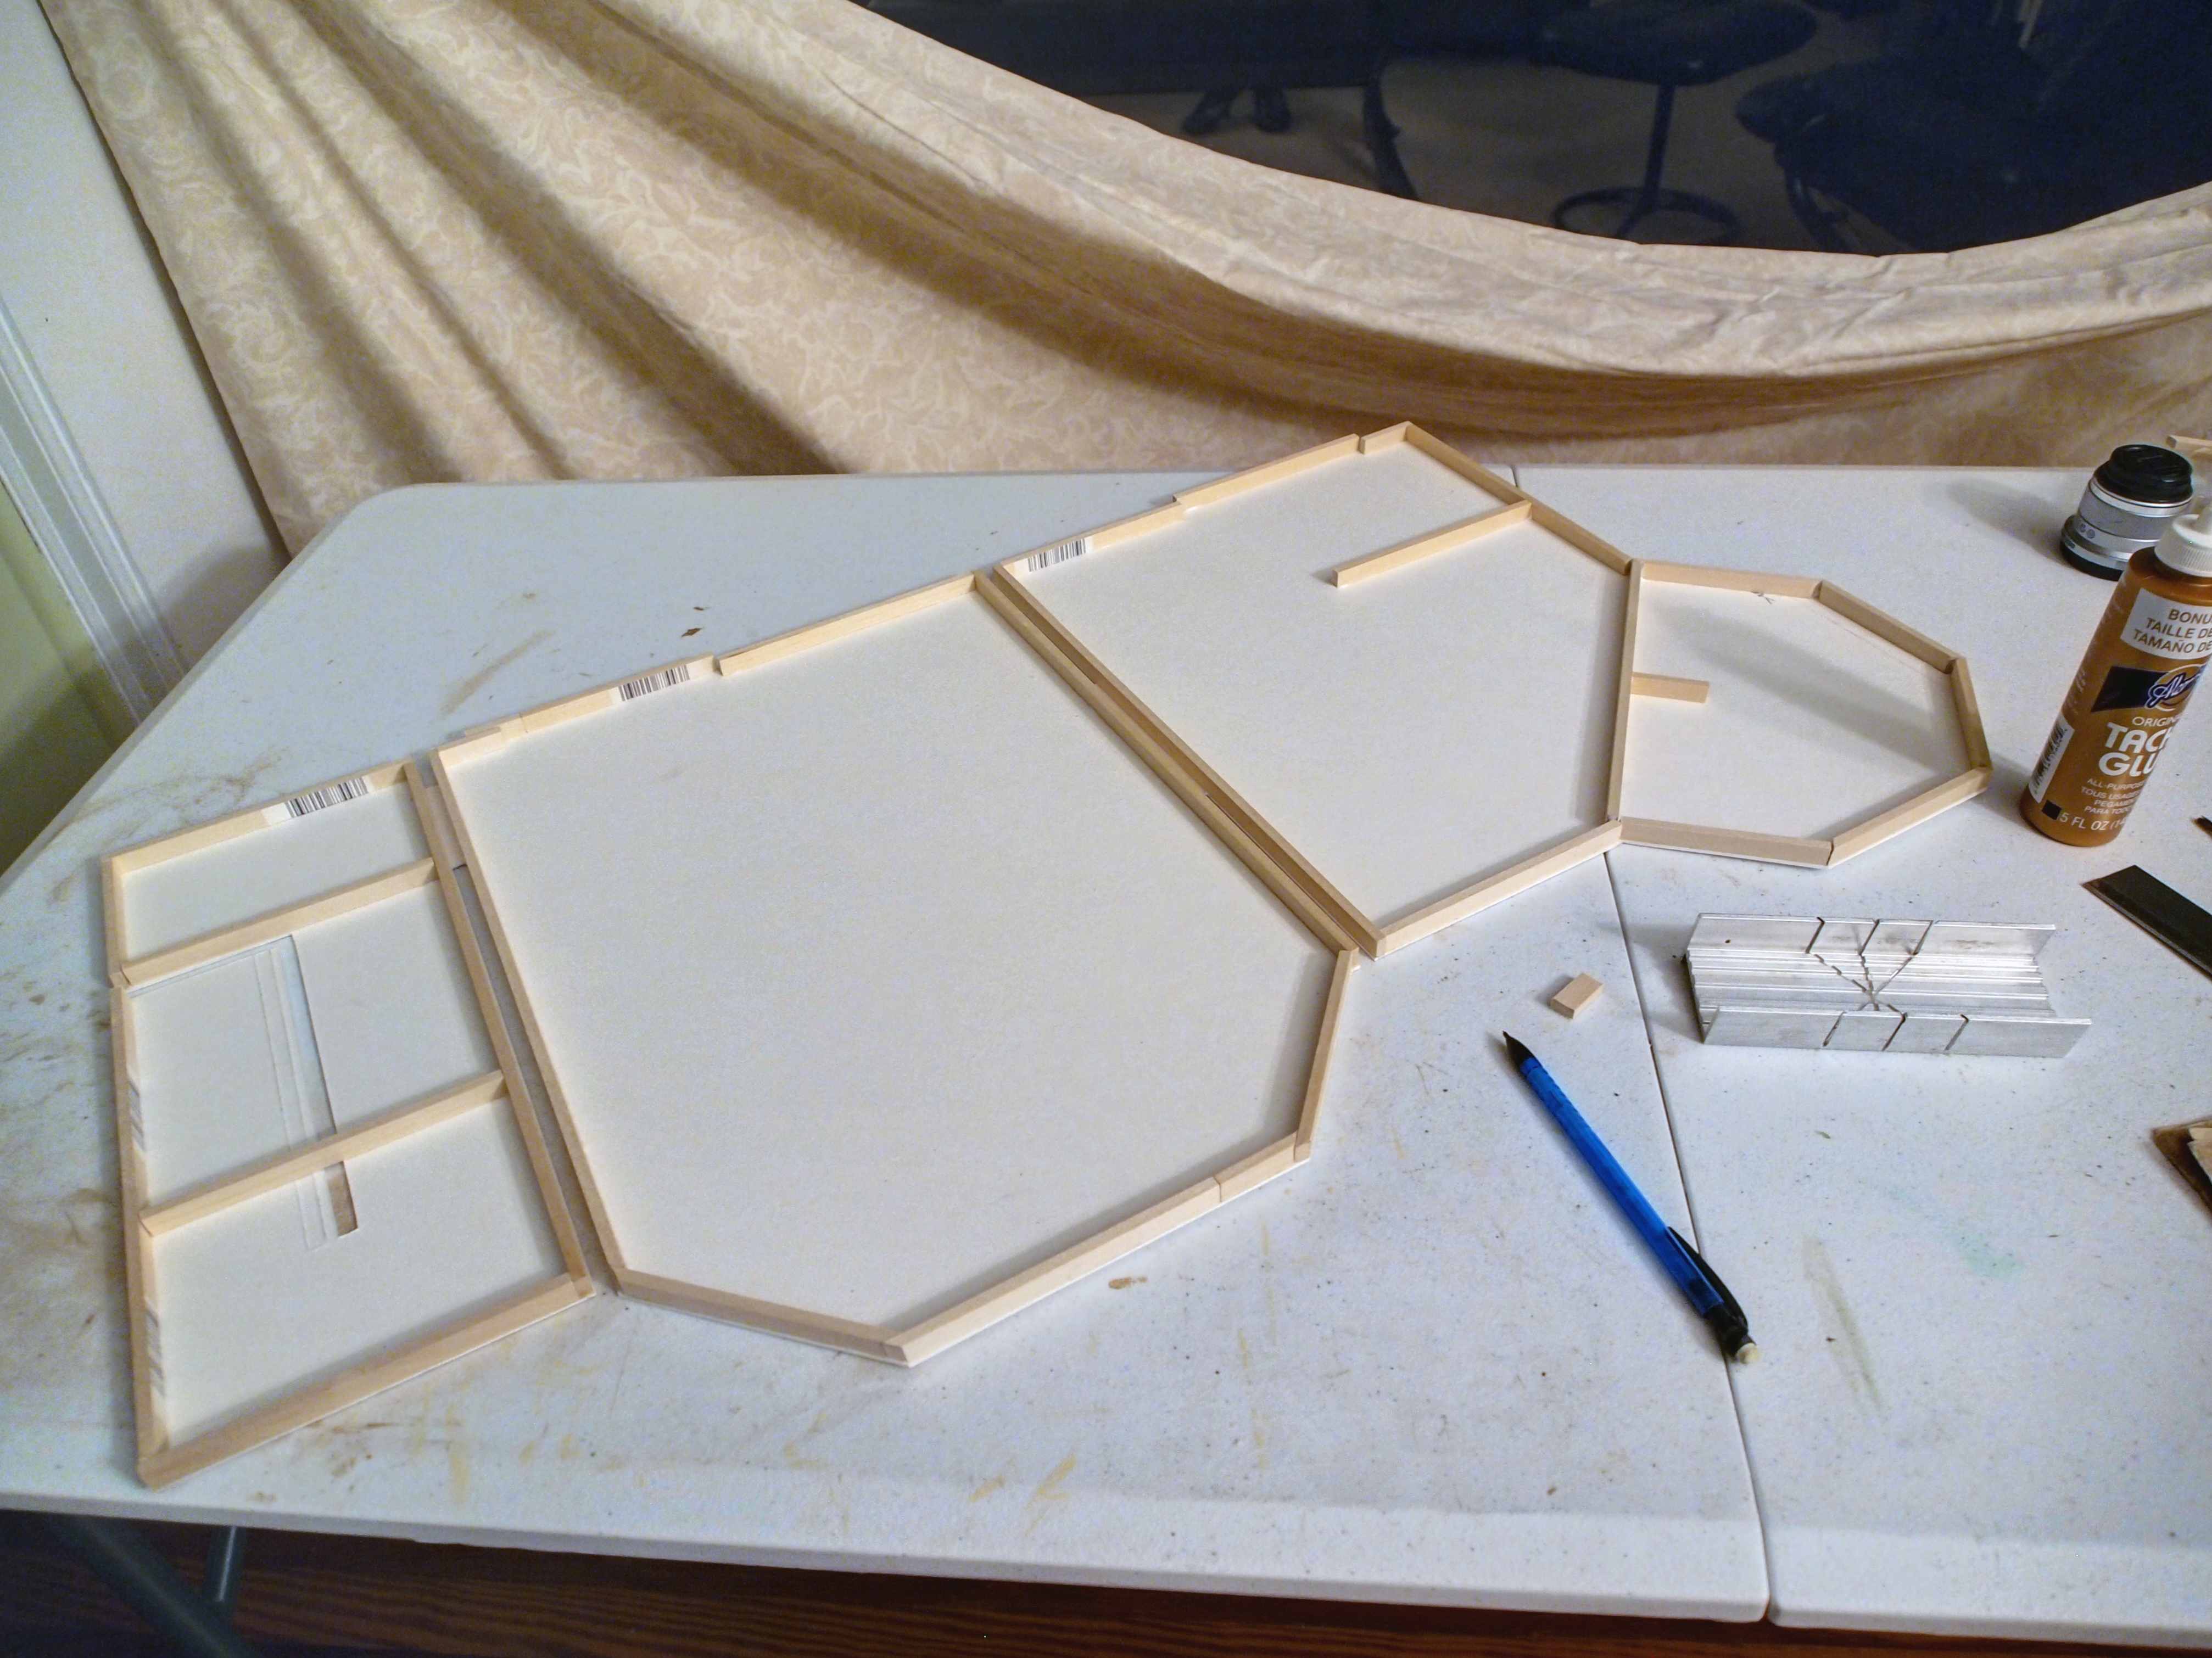
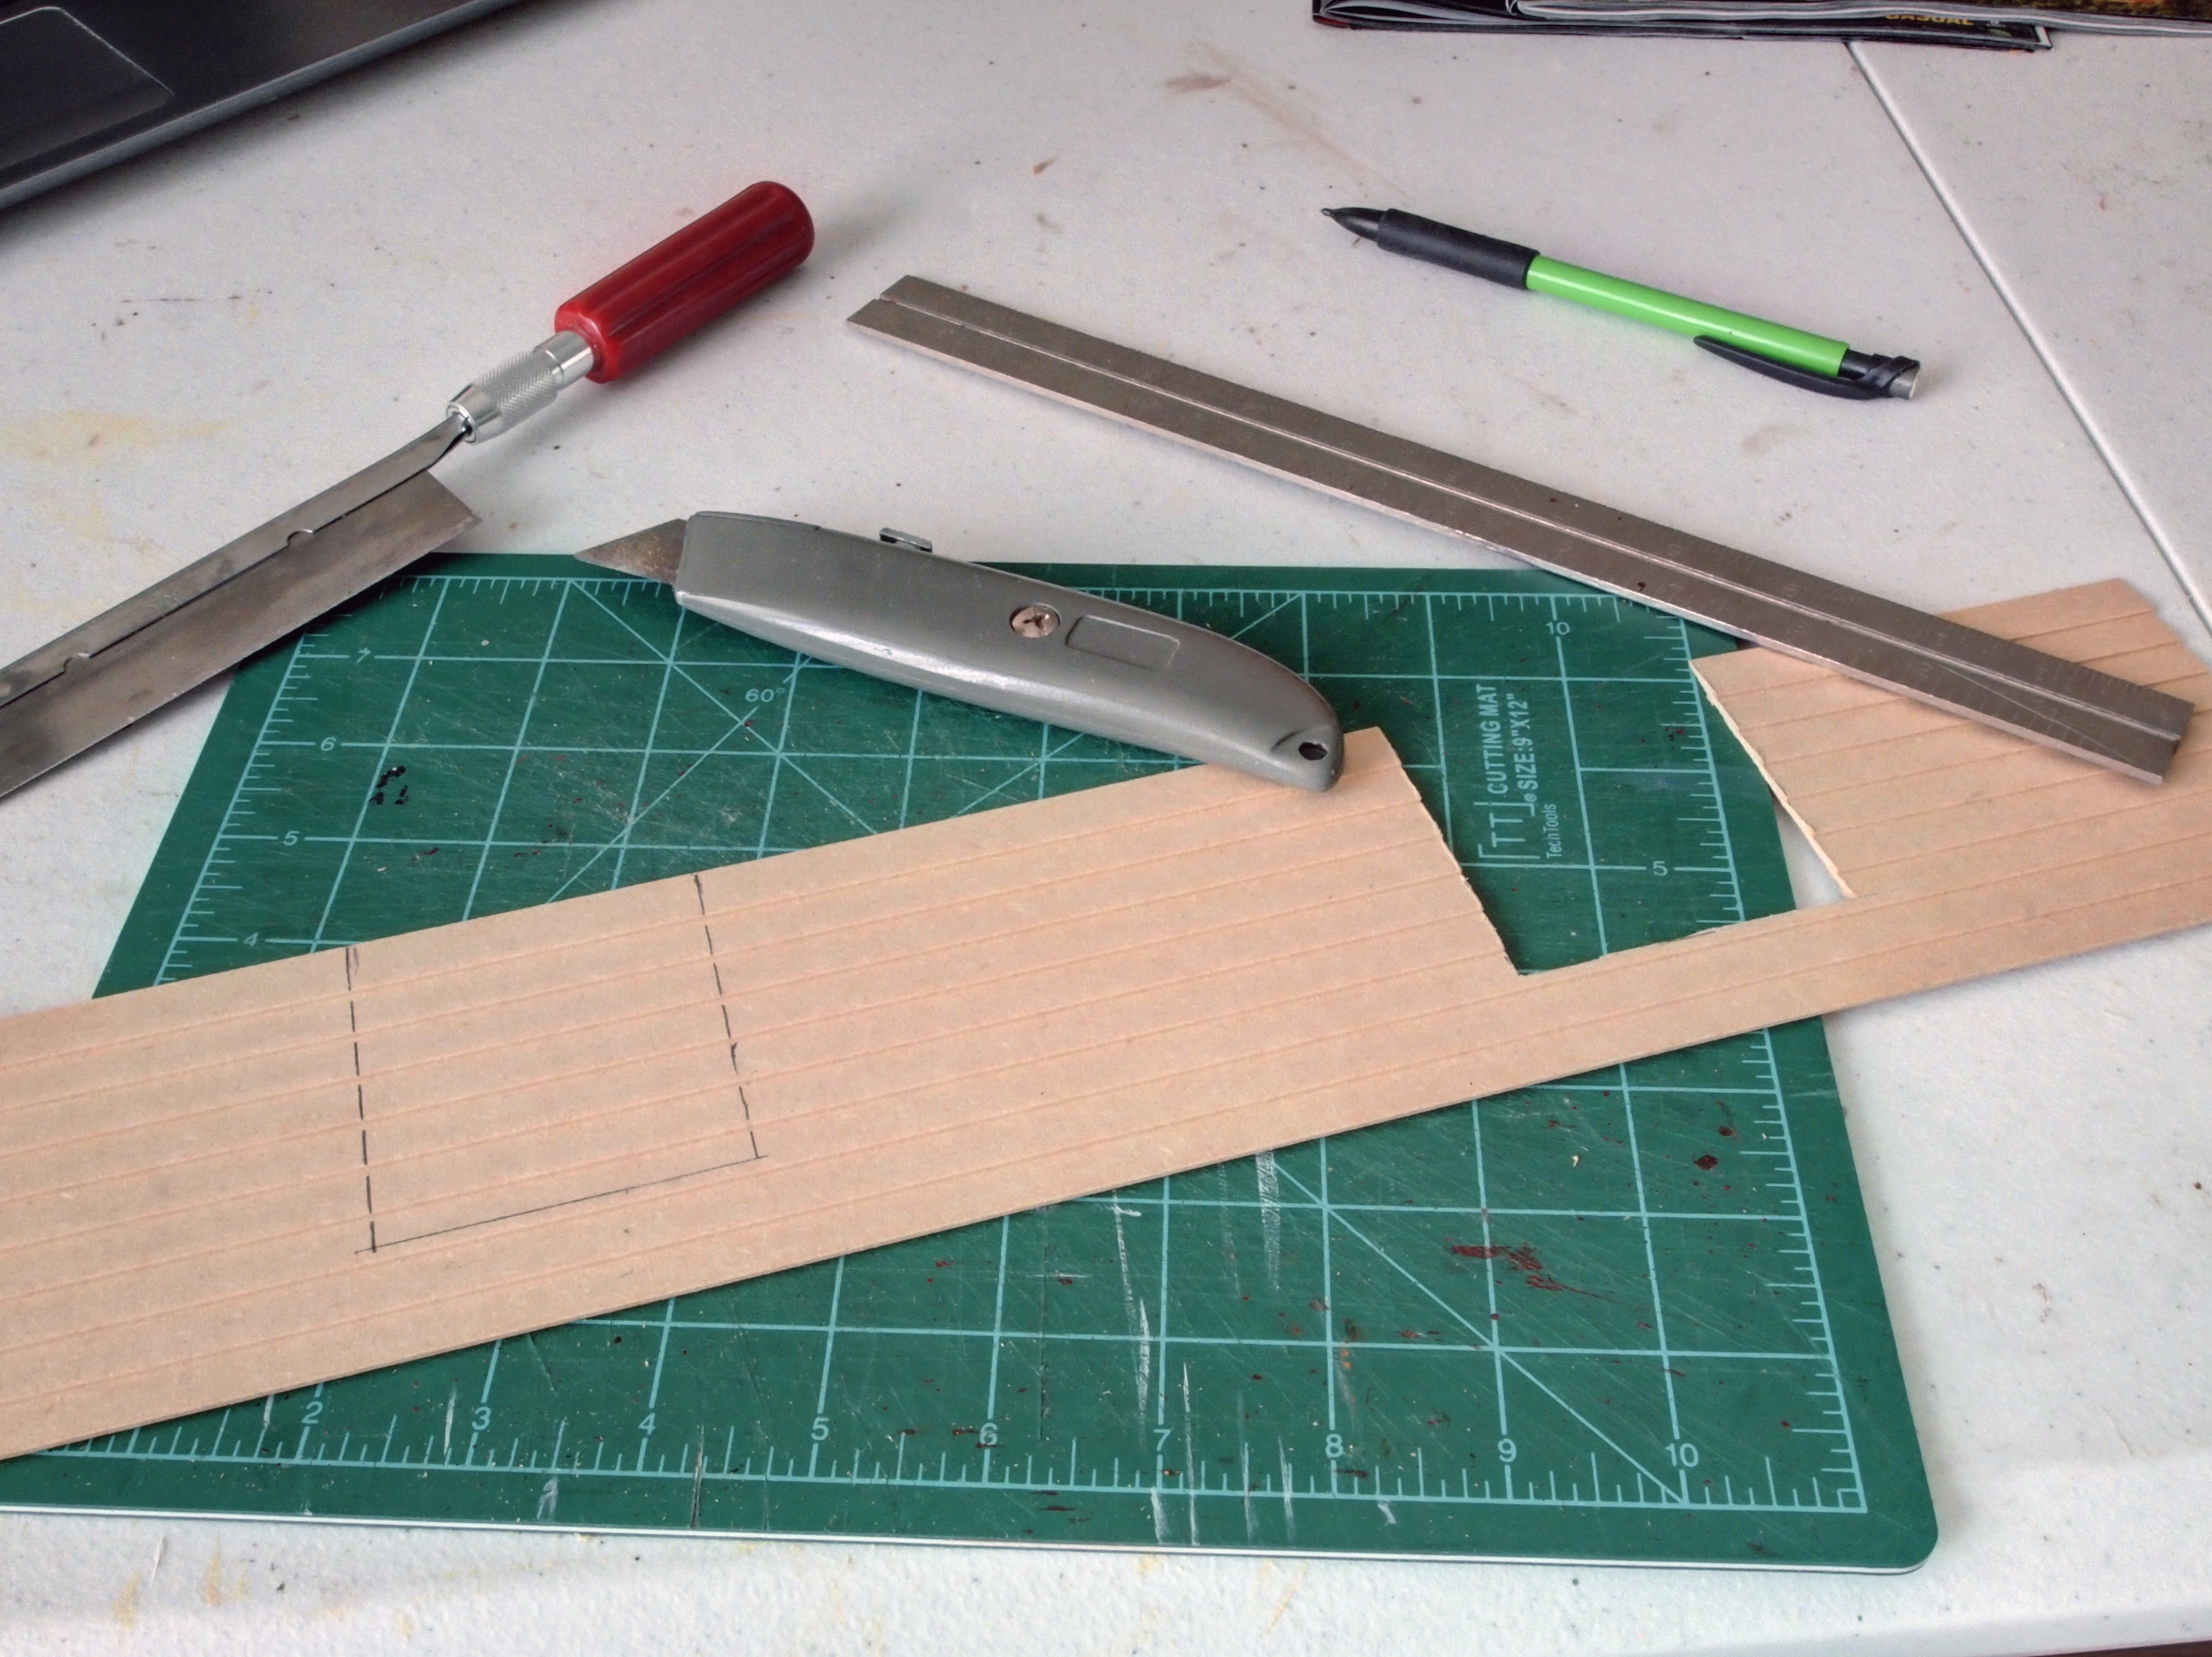
First I cut out the inner stair walls which would reach up to the very top of the house. Added the wooden studs to support them.

OLYMPUS DIGITAL CAMERA

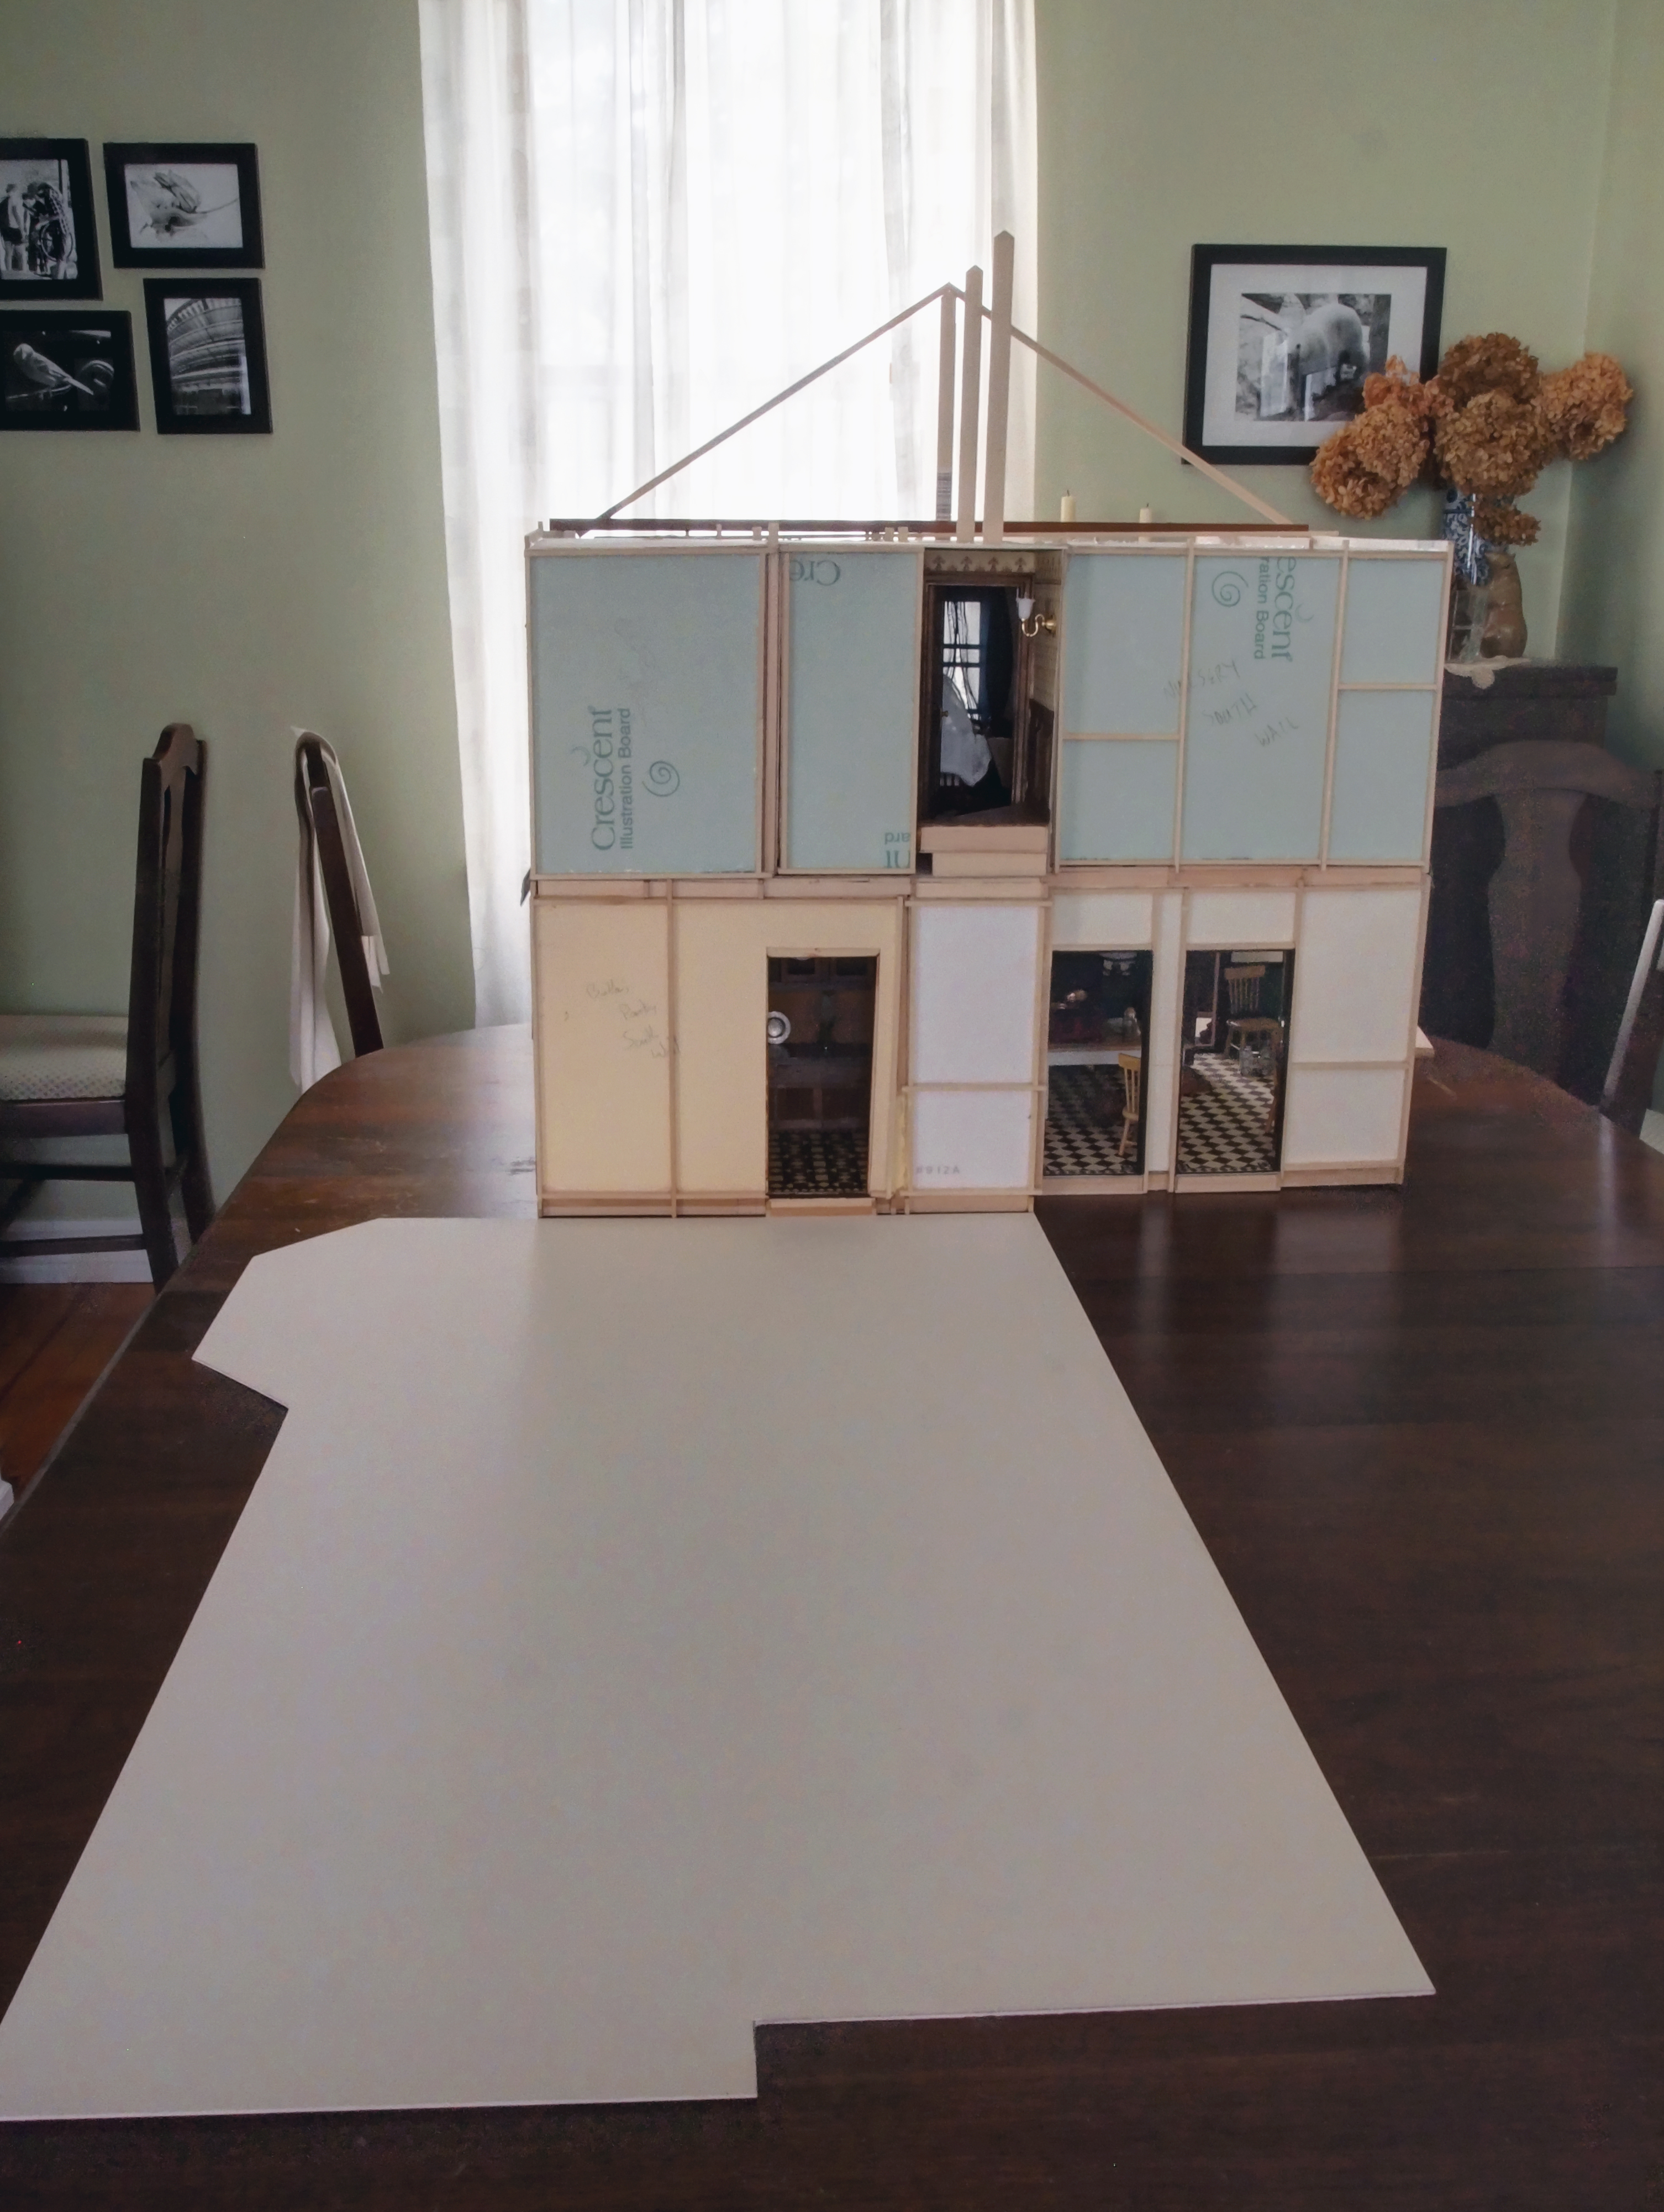
Glued the other side of the wall on and weighed it down.

OLYMPUS DIGITAL CAMERA

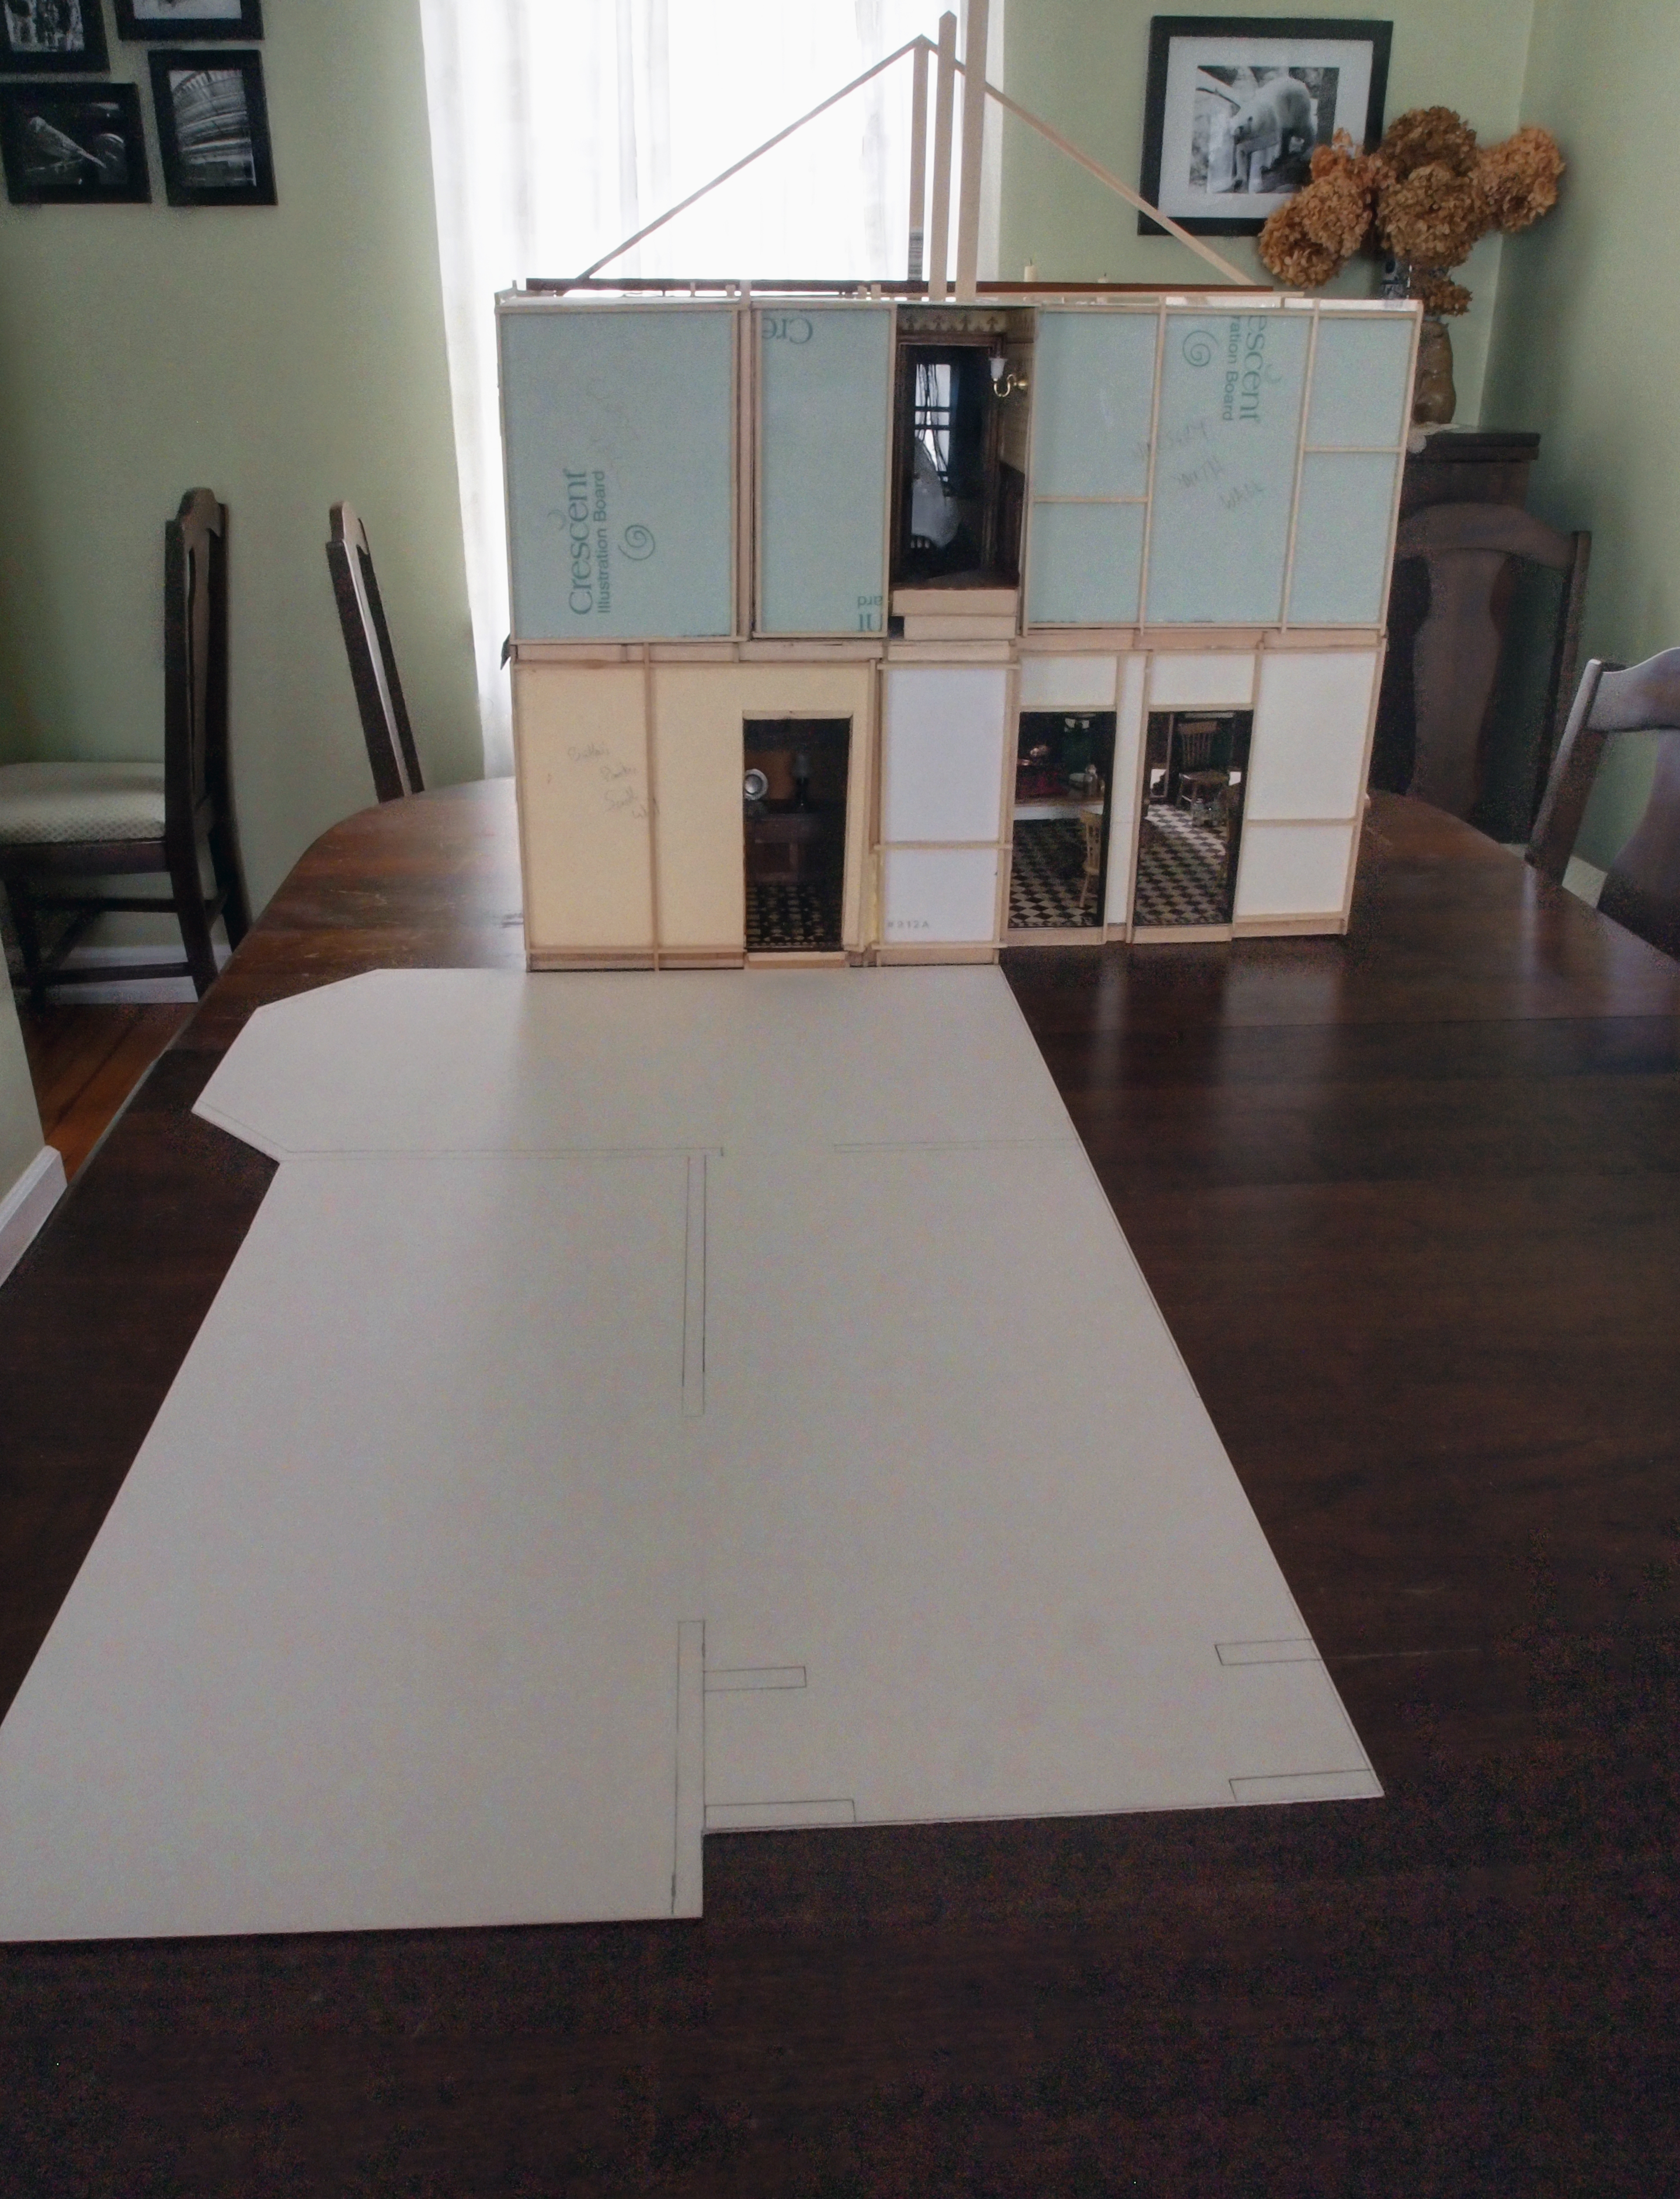
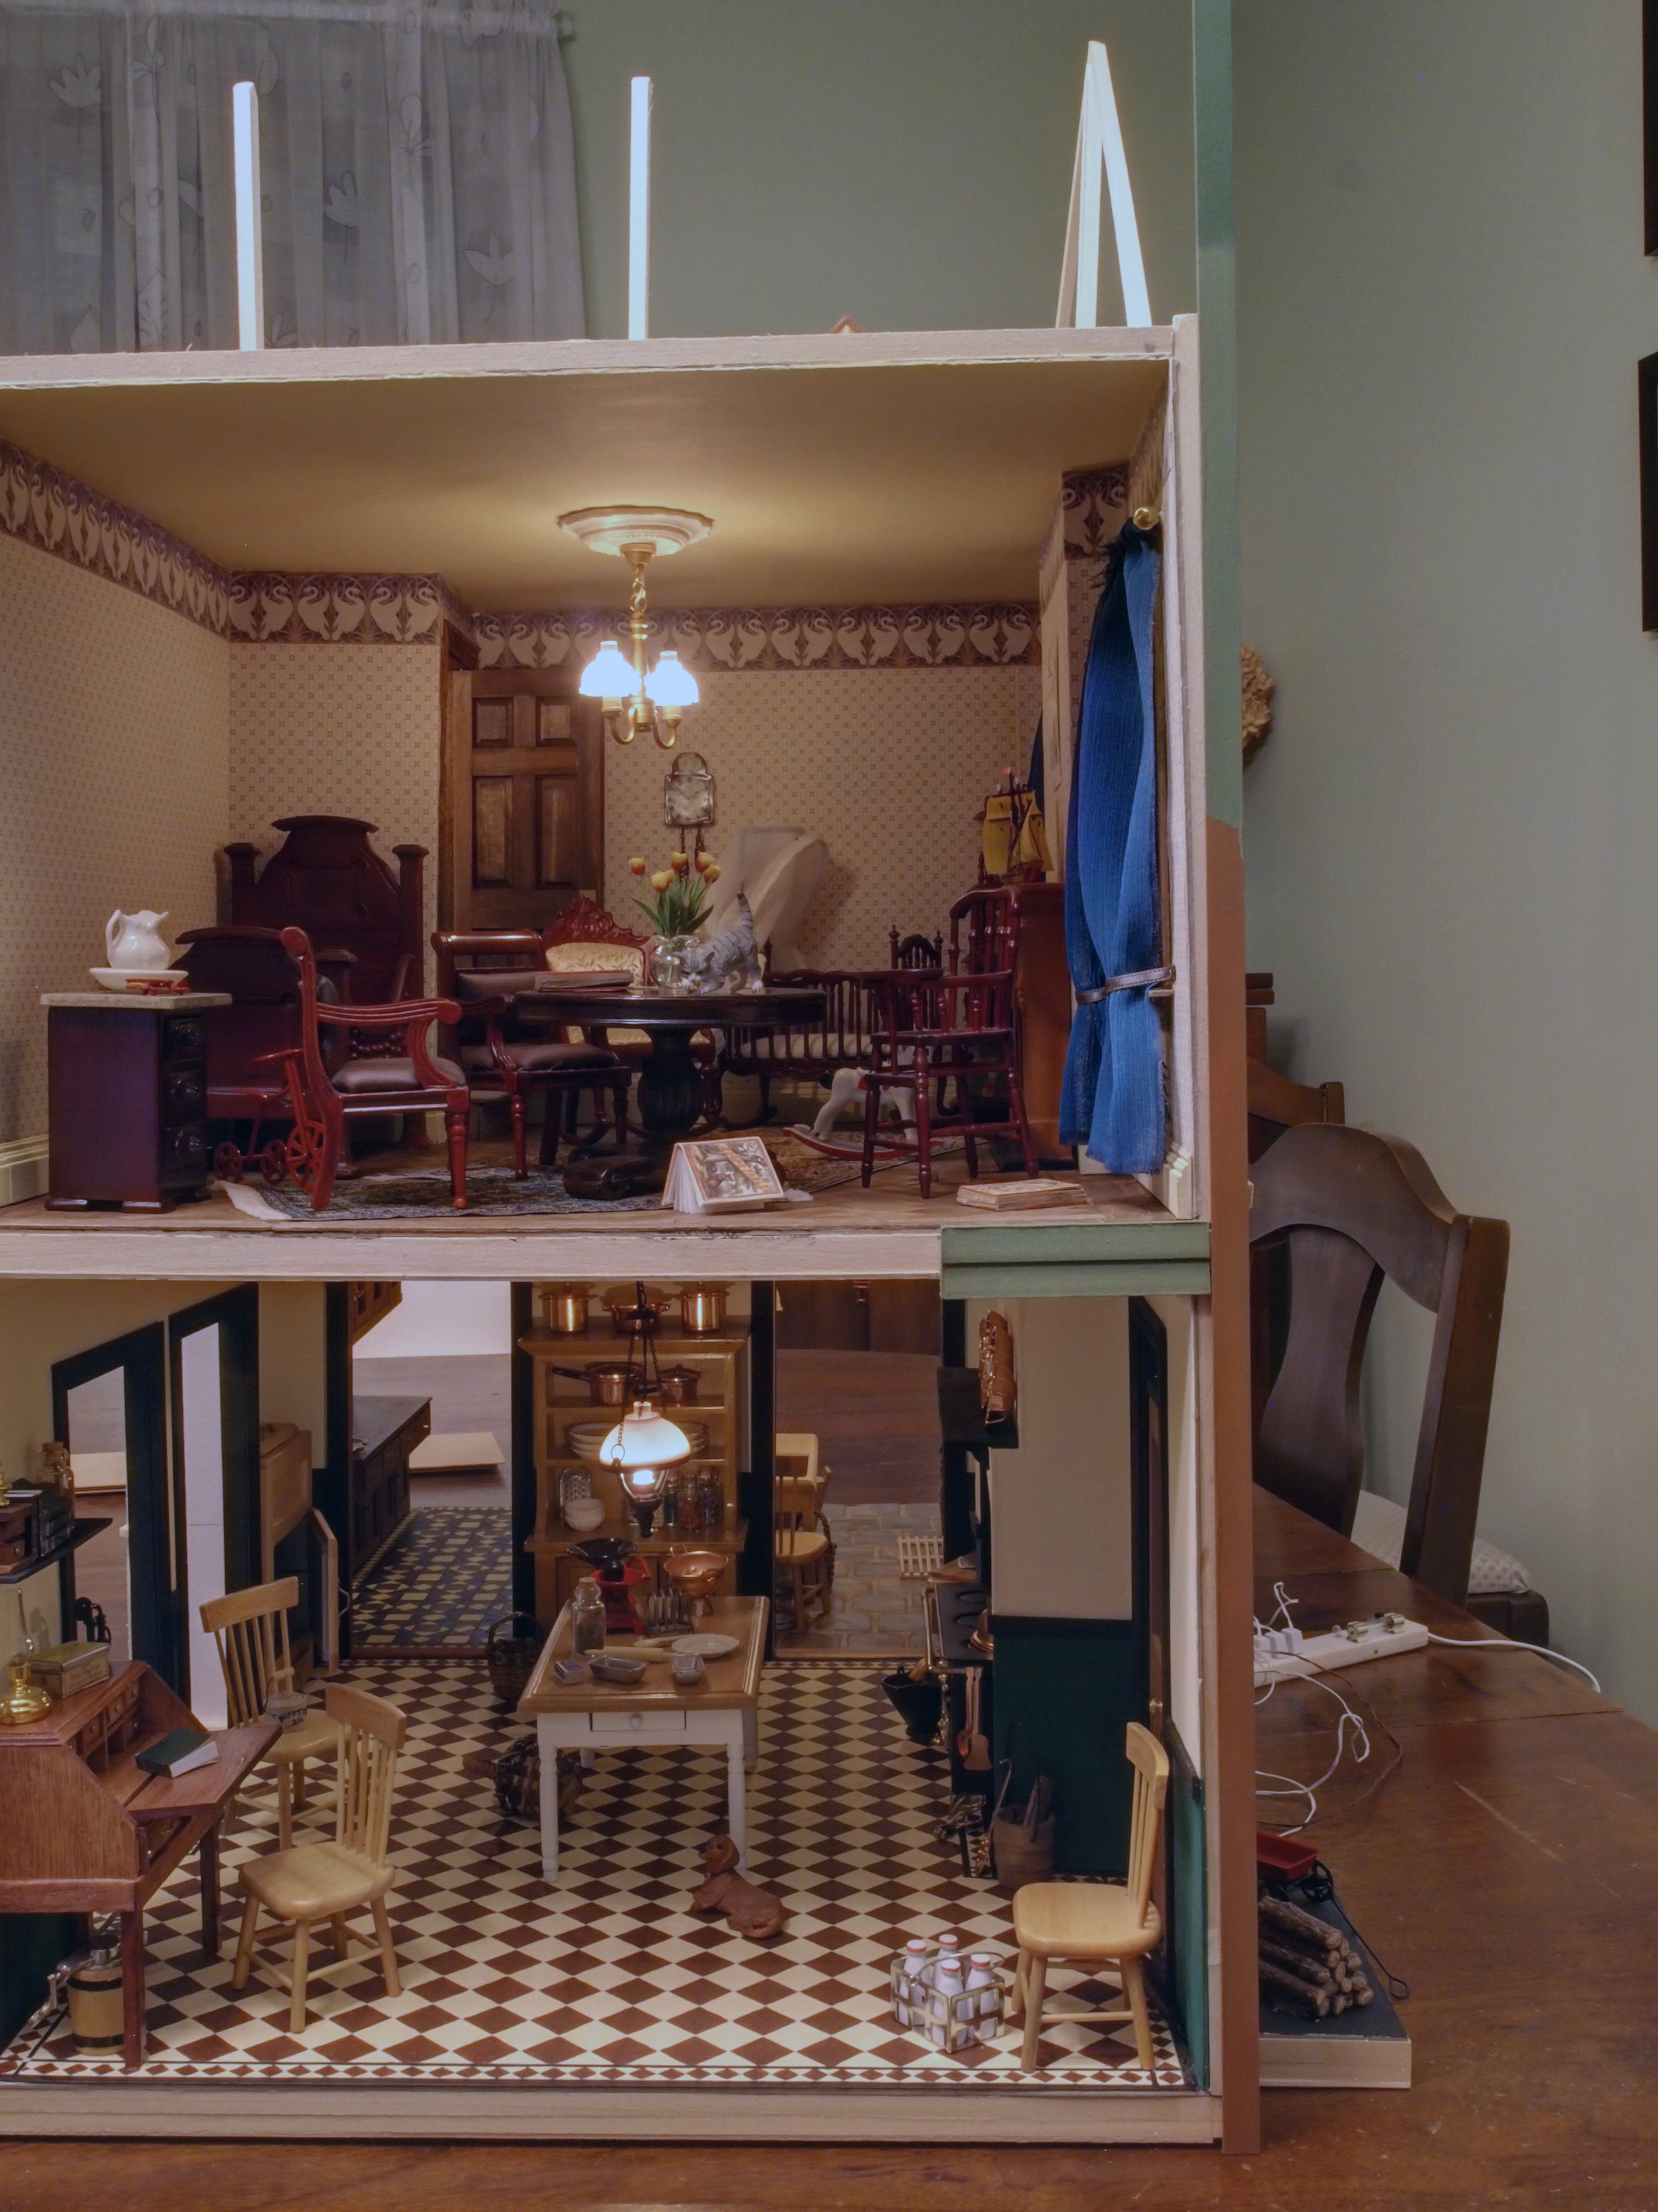
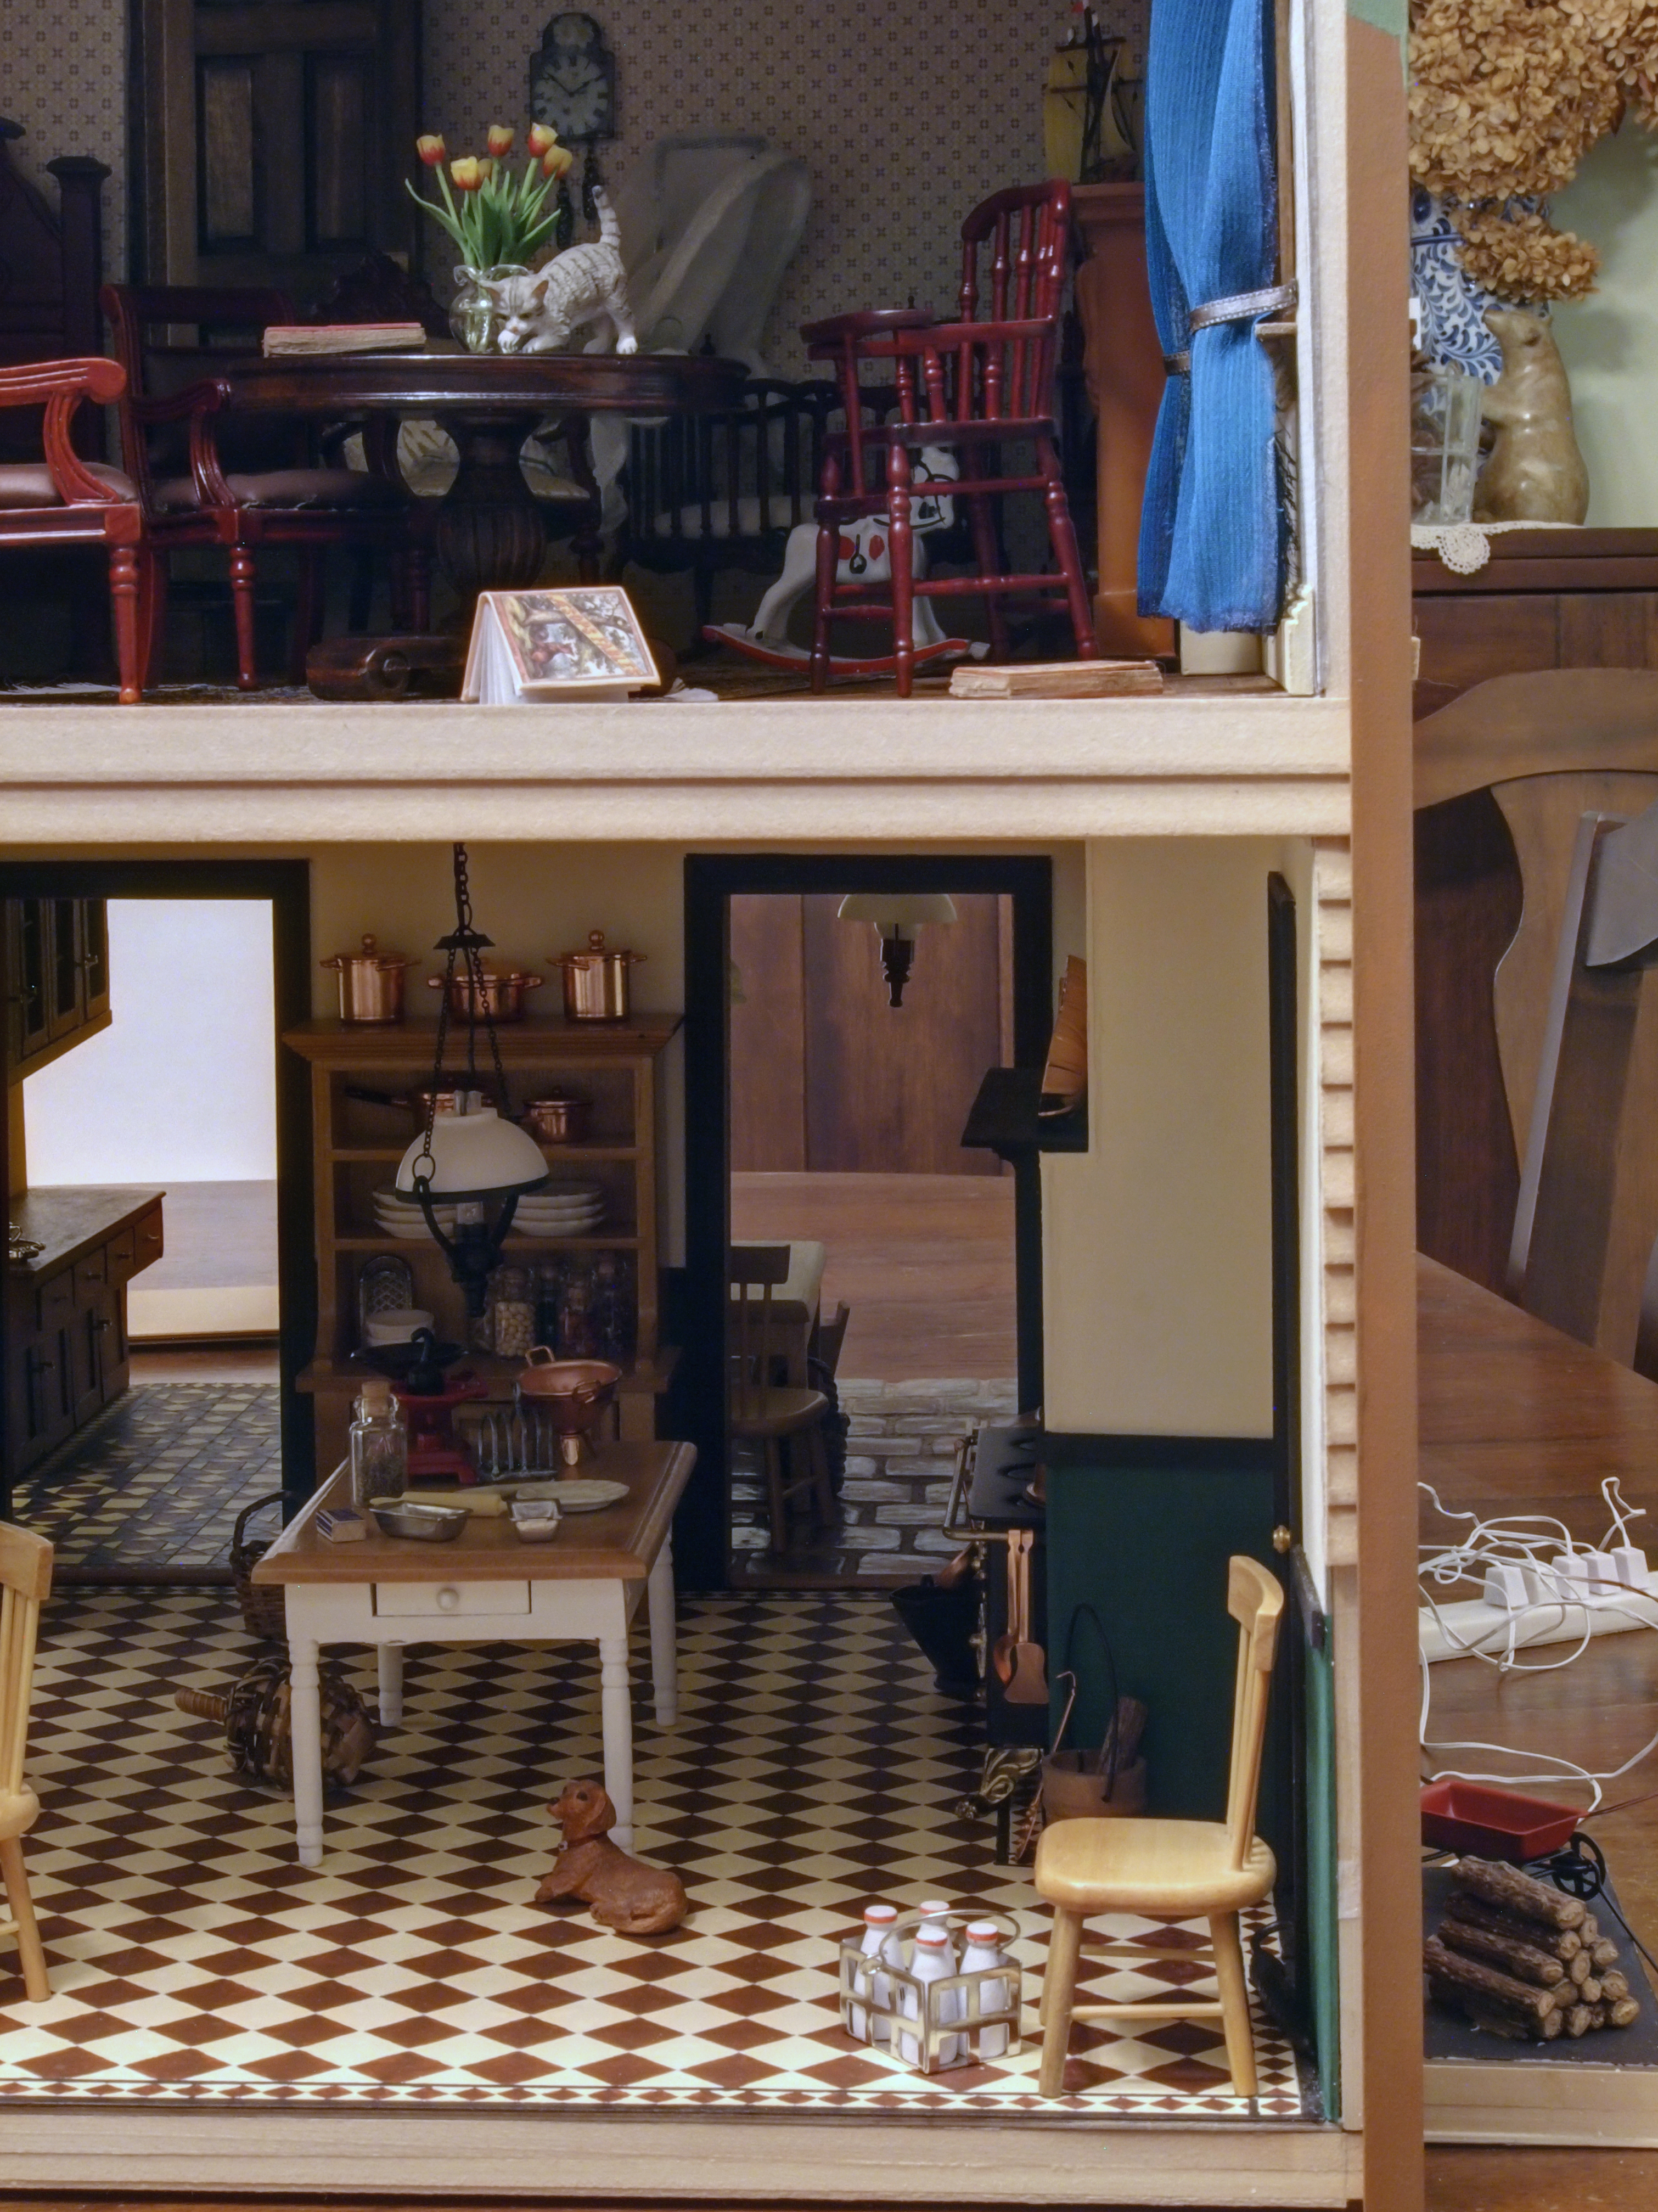
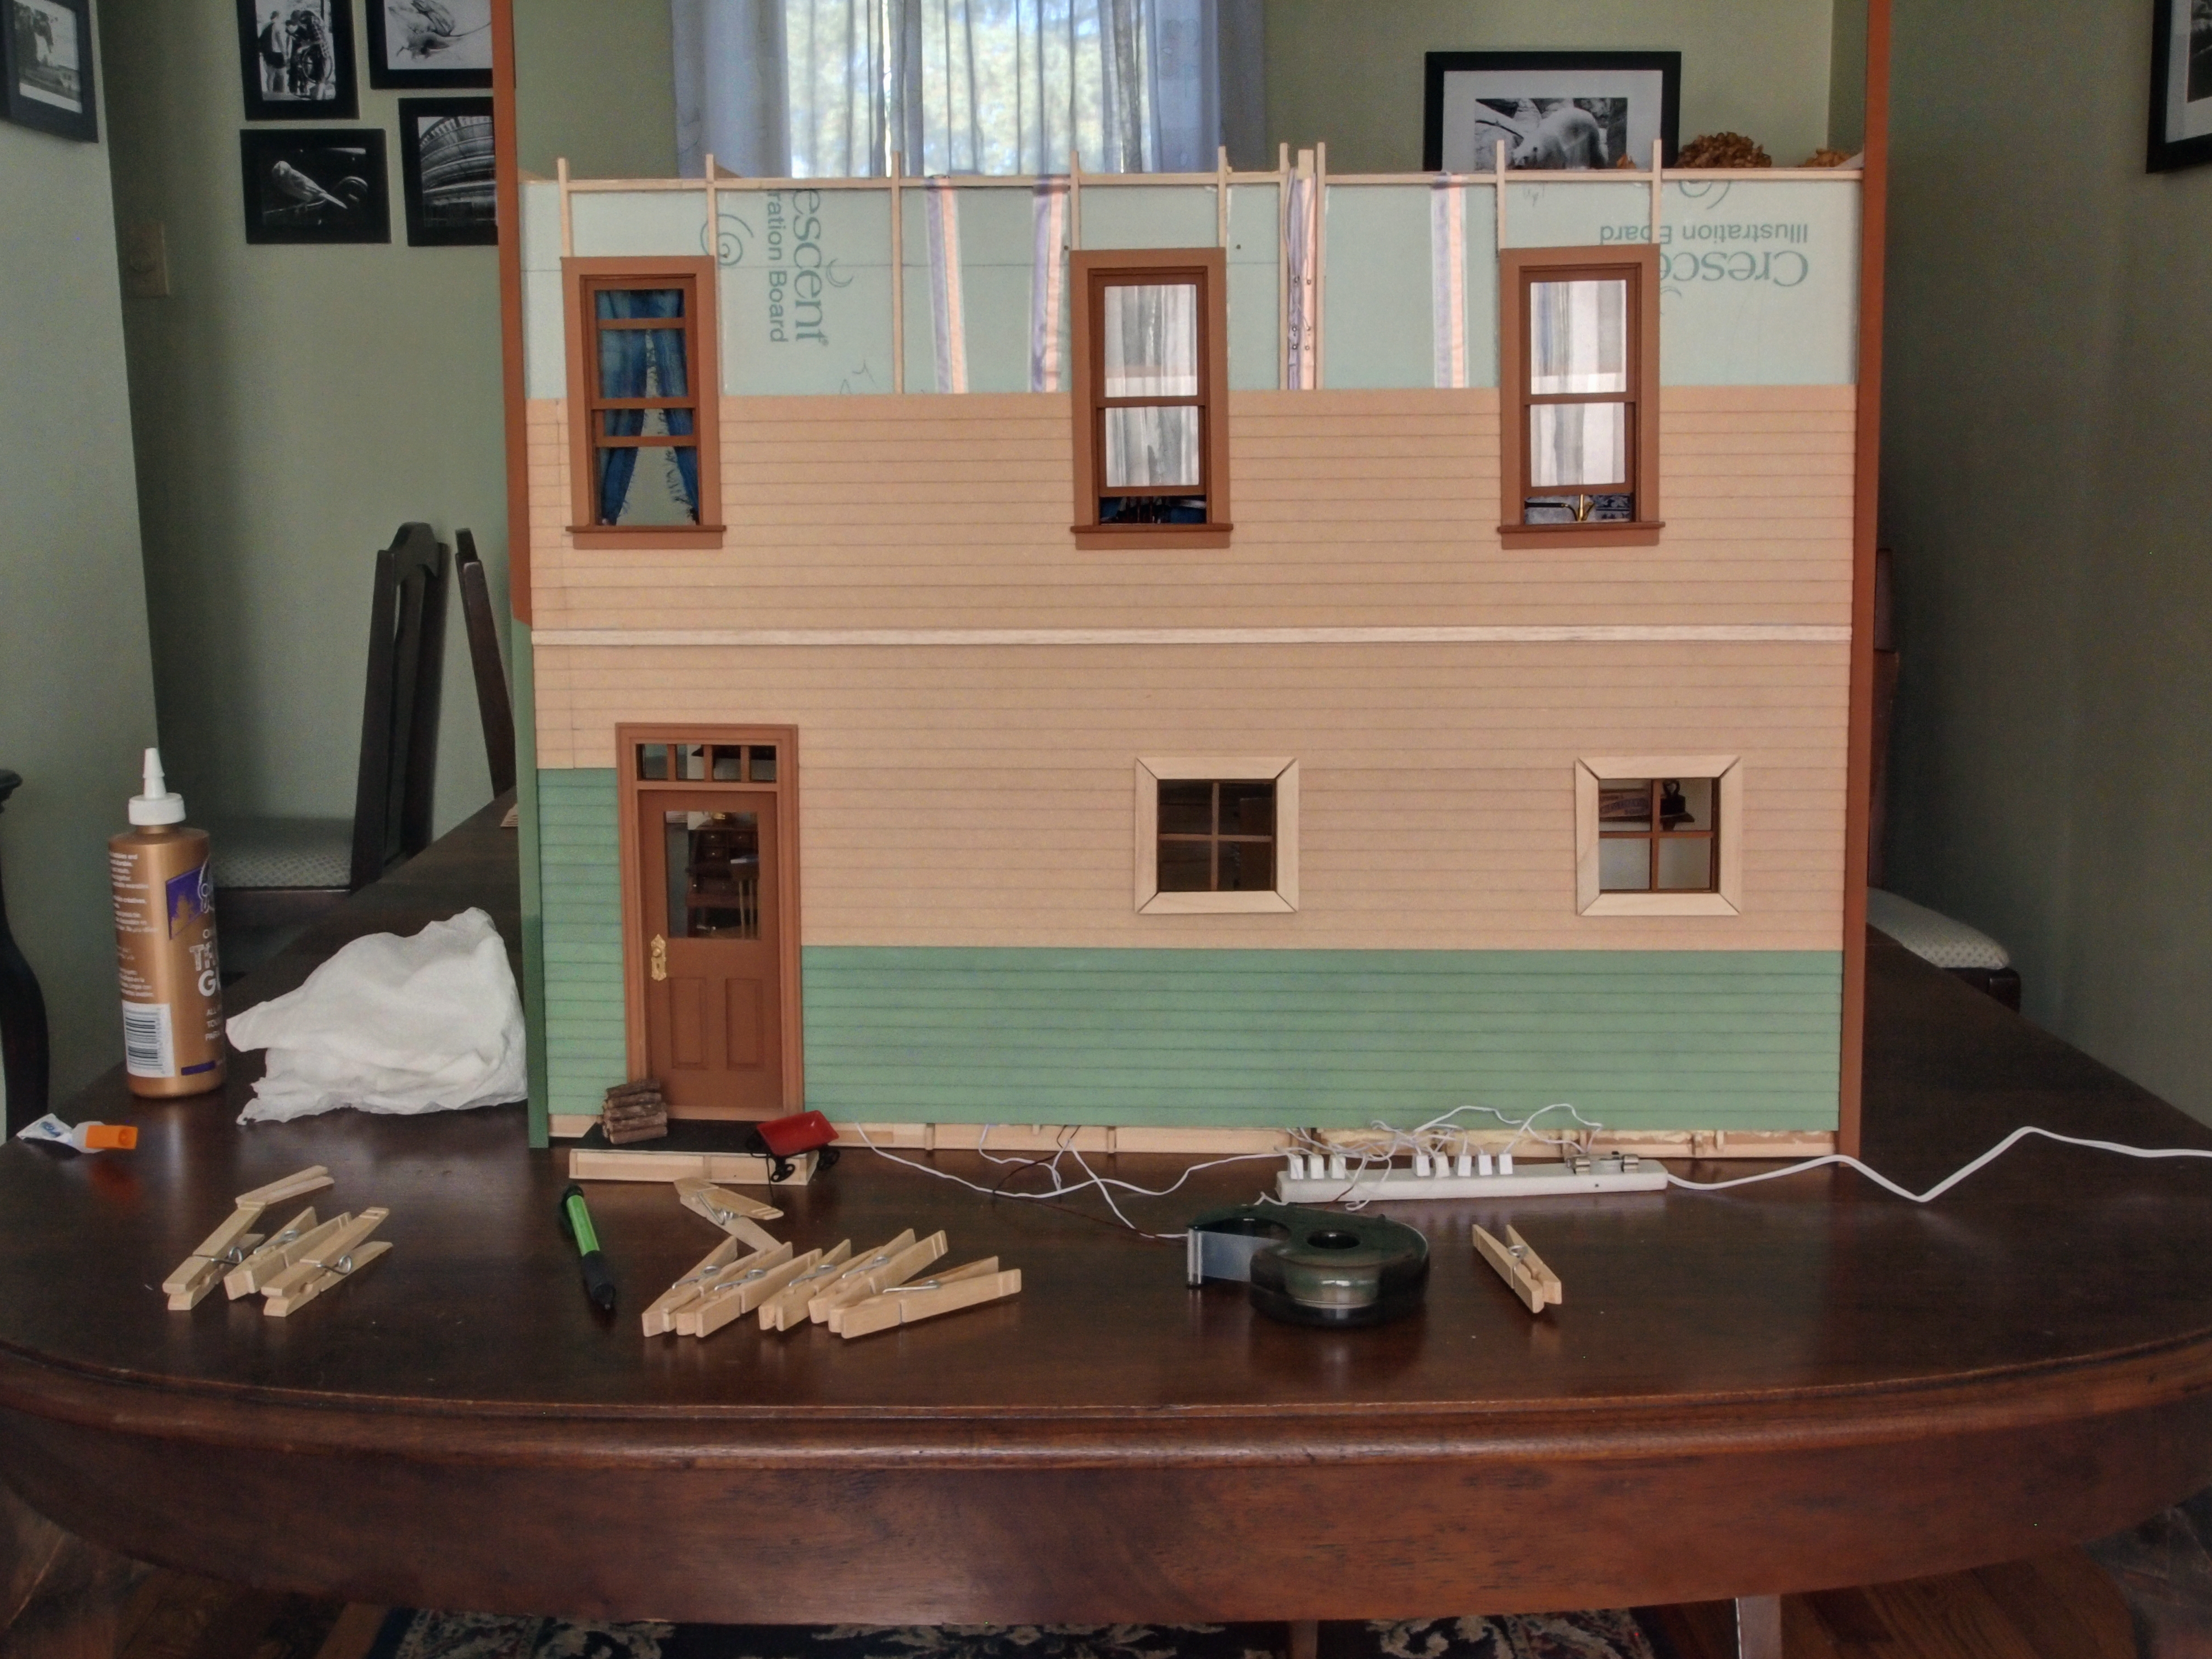
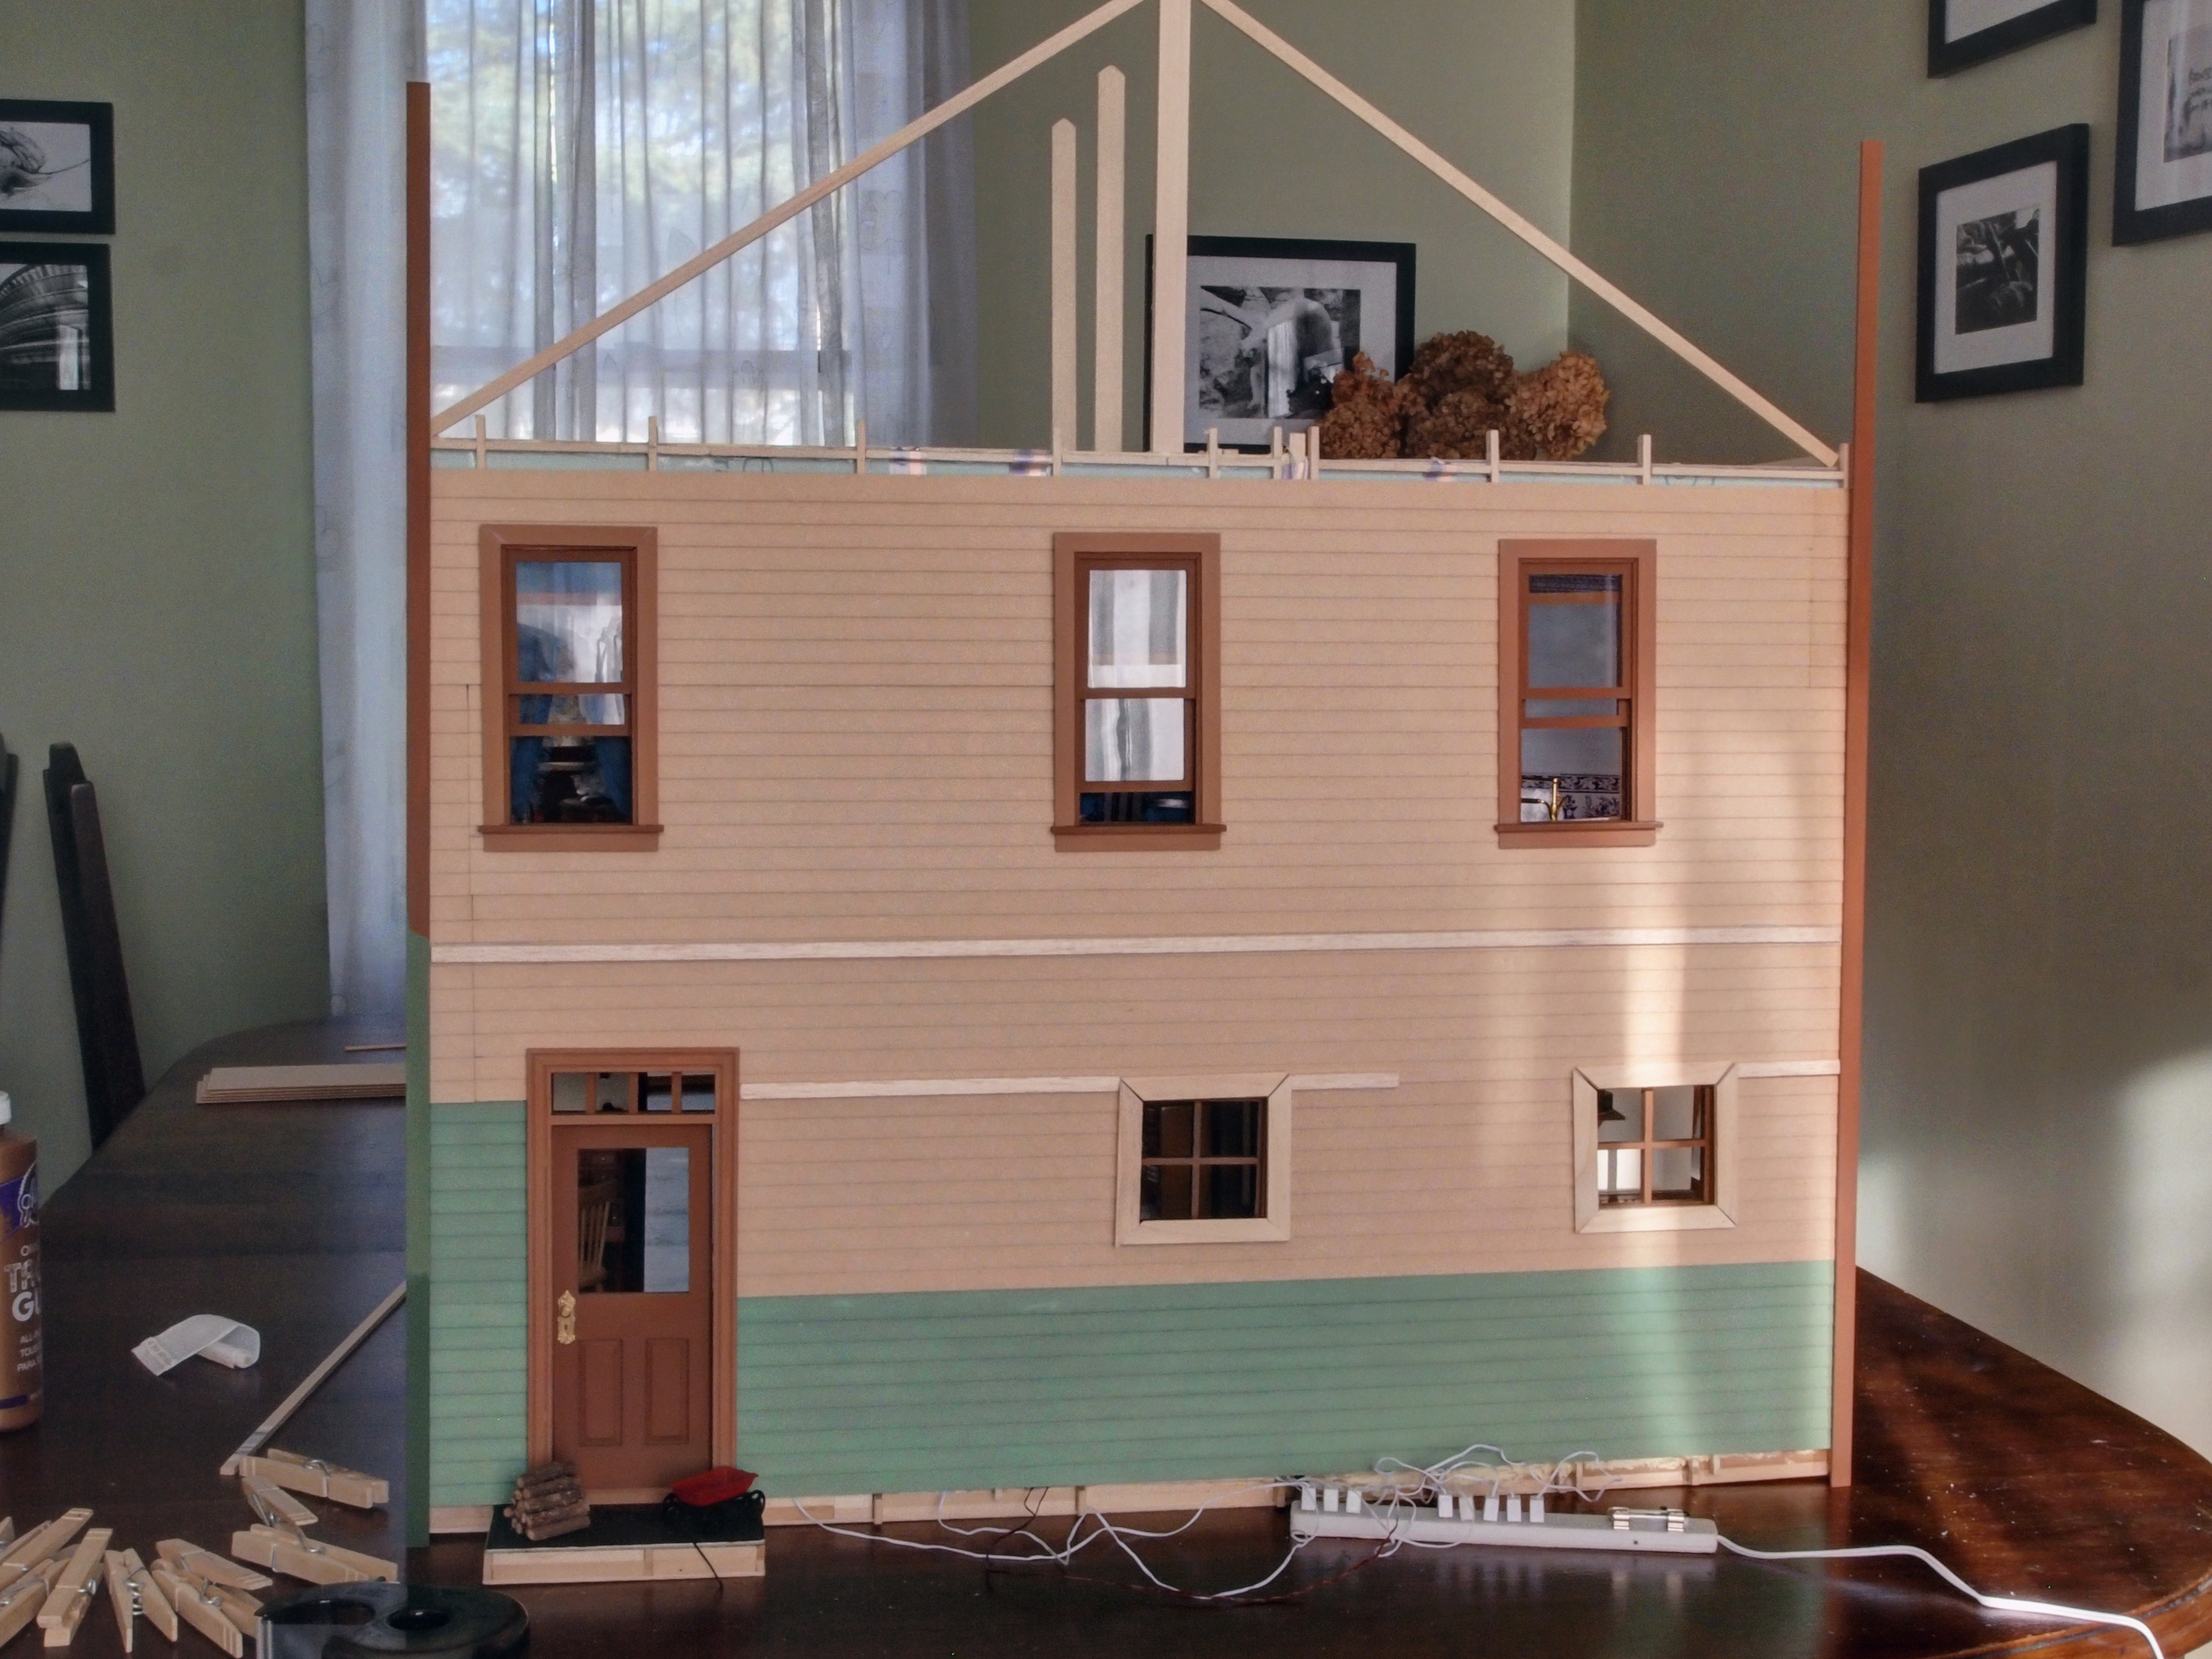
Placed it in the house…

OLYMPUS DIGITAL CAMERA

…and turned the lights on for a bit of fun.

OLYMPUS DIGITAL CAMERA

Then I made a new design for the stairs, using the correct width, and fixing a few conceptual mistakes I had made the first time.

OLYMPUS DIGITAL CAMERA

Cut out the various pieces.
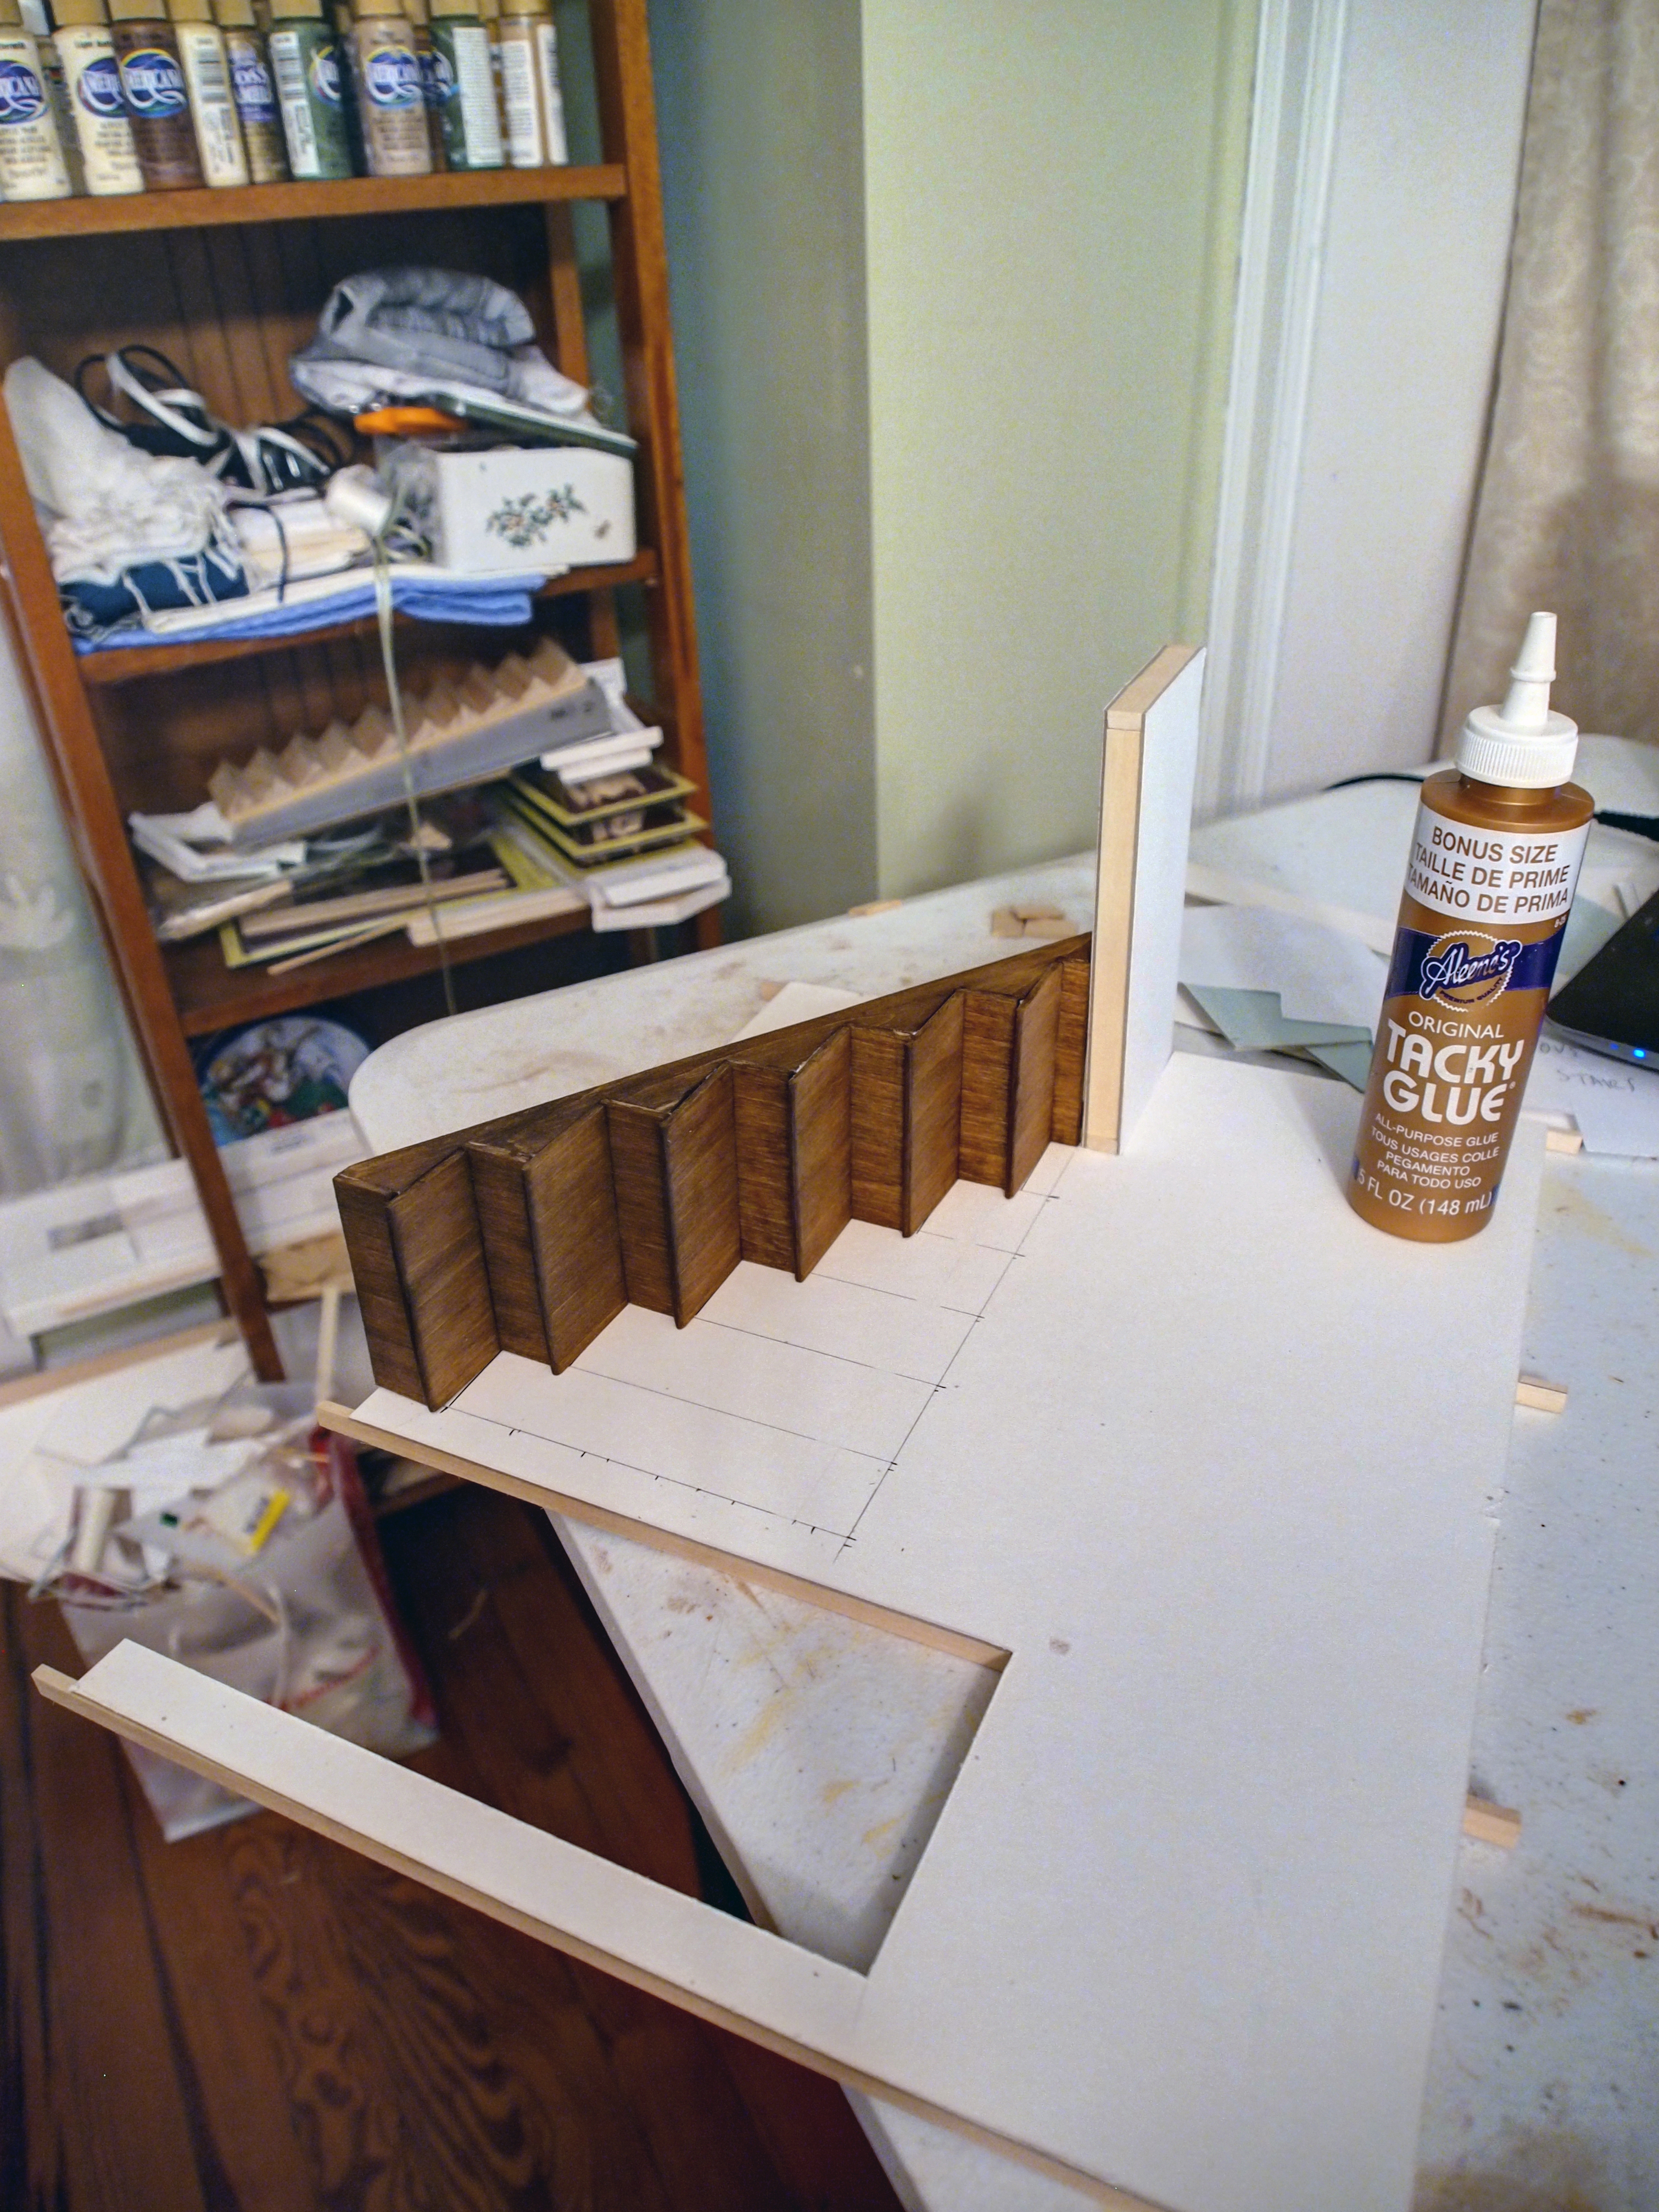
OLYMPUS DIGITAL CAMERA

Stained them.

OLYMPUS DIGITAL CAMERA

Then glued them together, except the last two treads. (It takes a while to hold them as the glue dries and it’s way past my bedtime…so the rest will be done tomorrow.)

OLYMPUS DIGITAL CAMERA

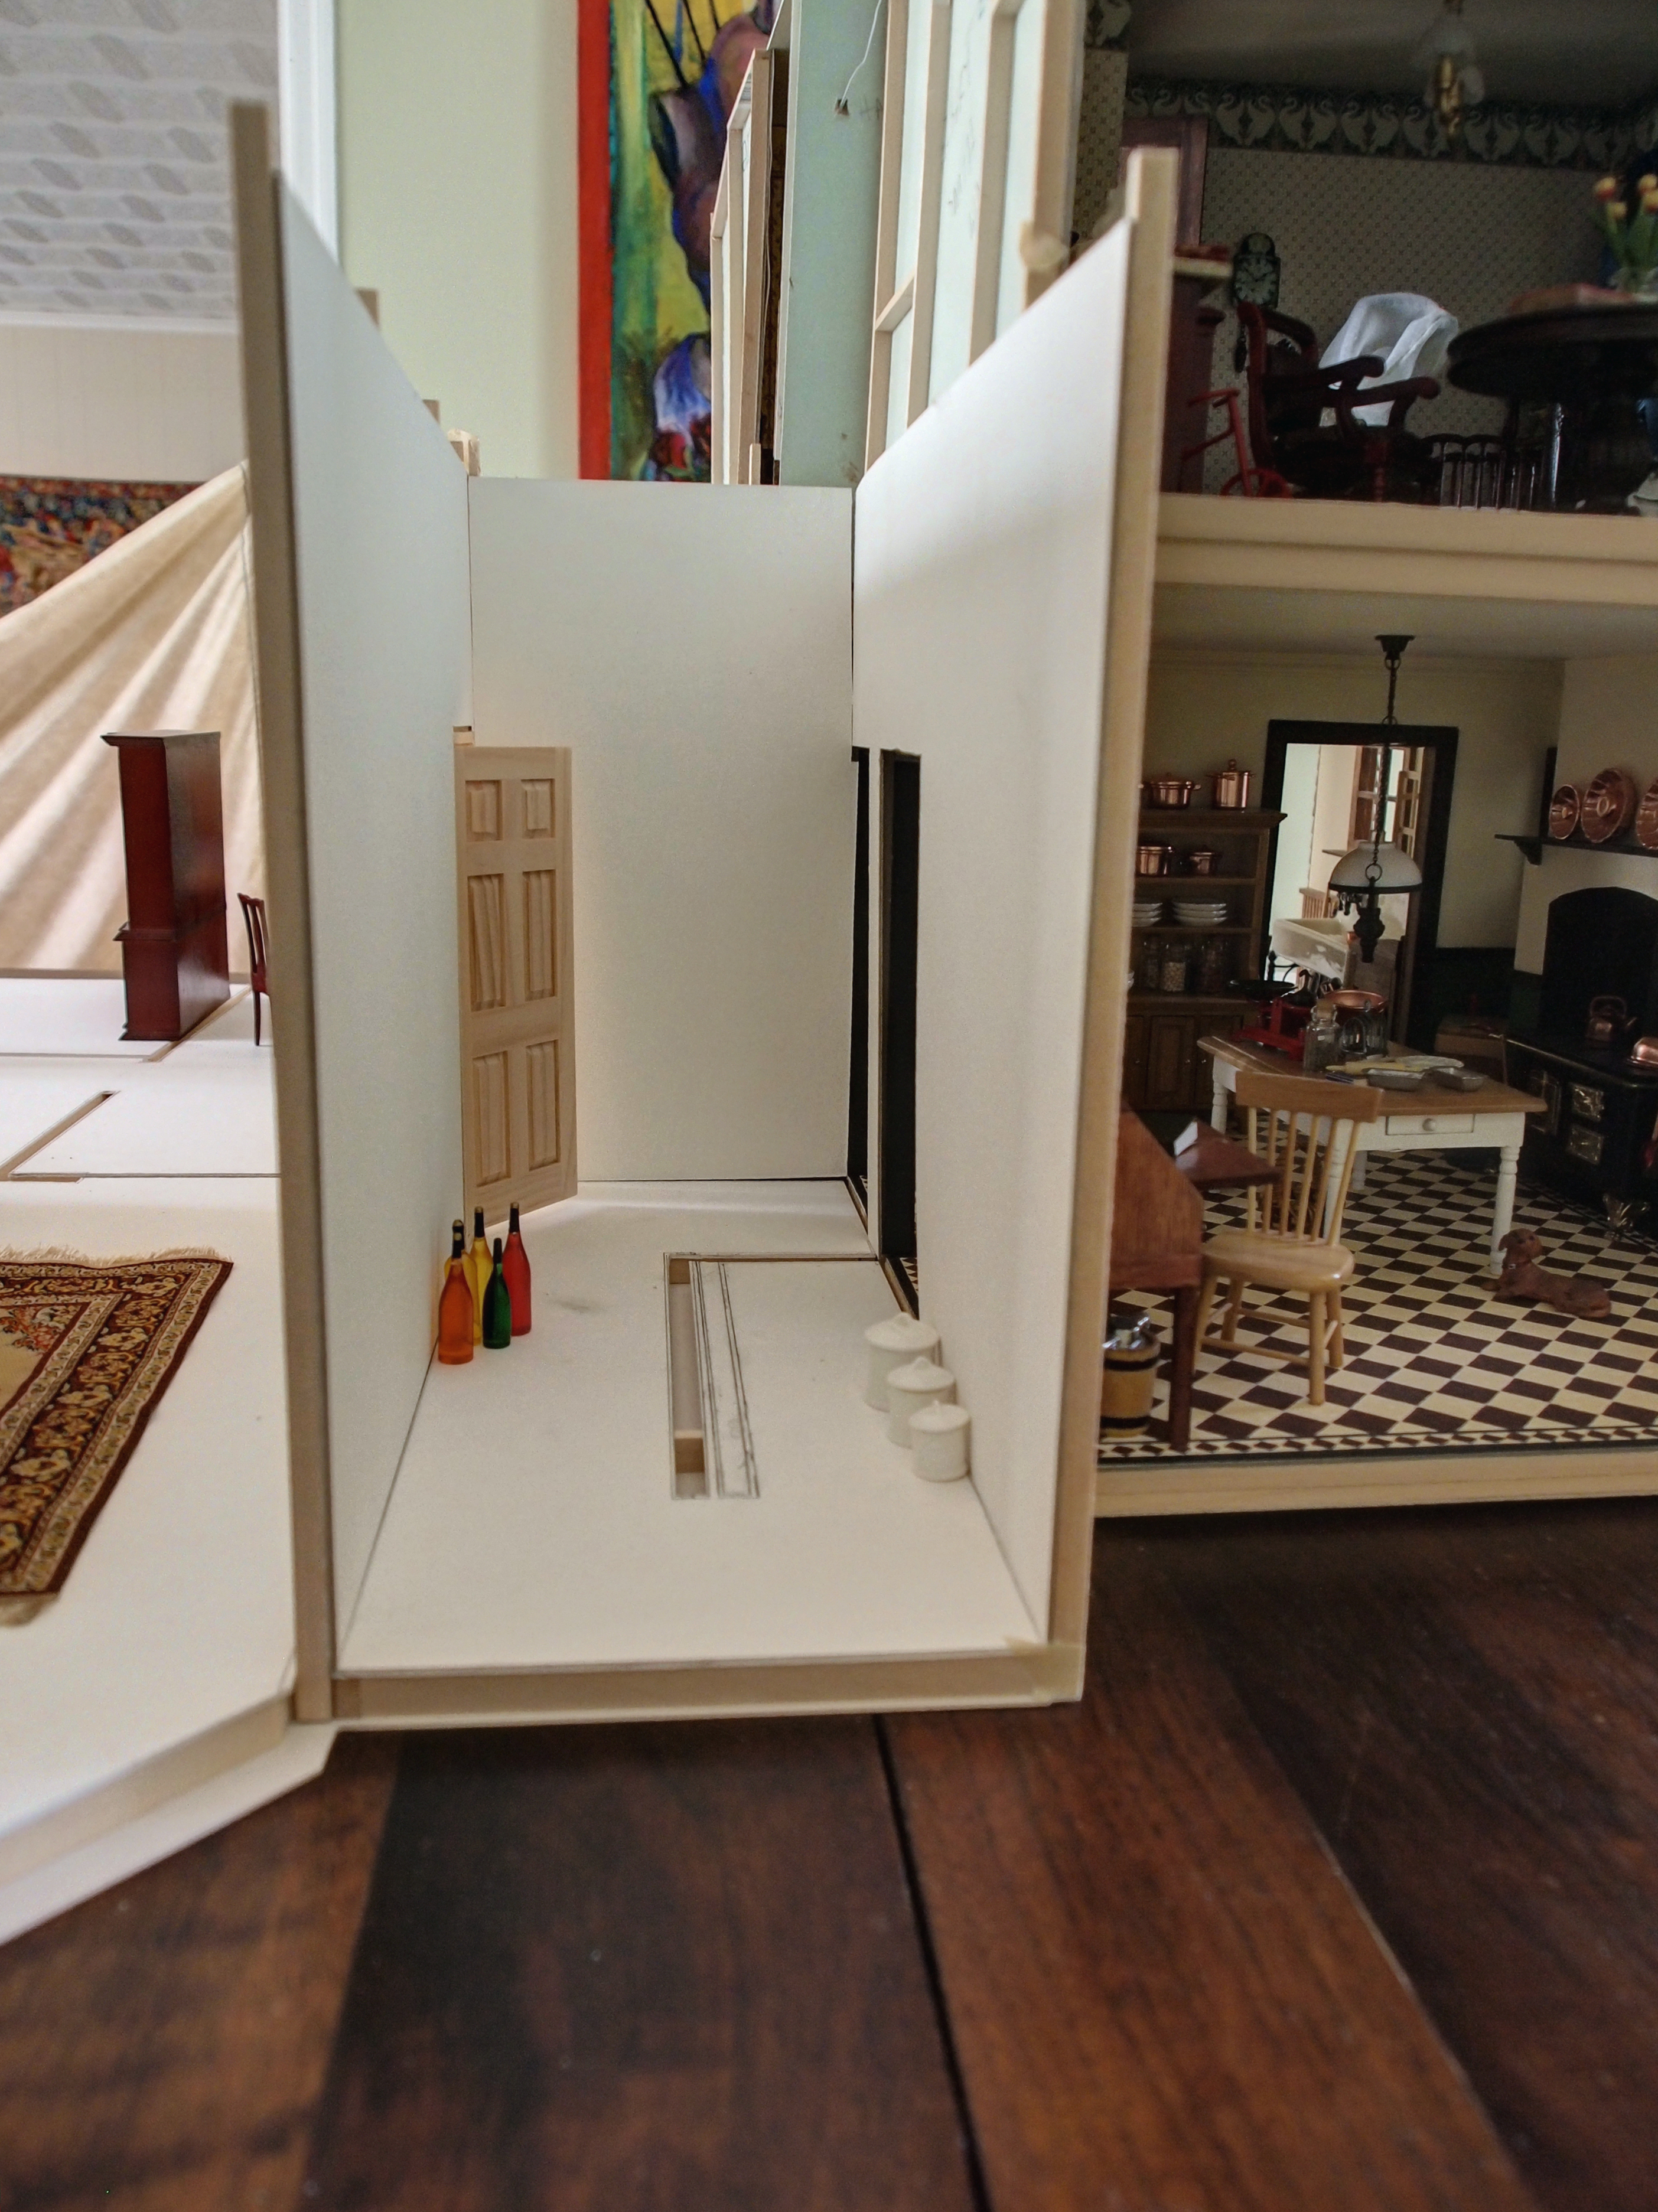
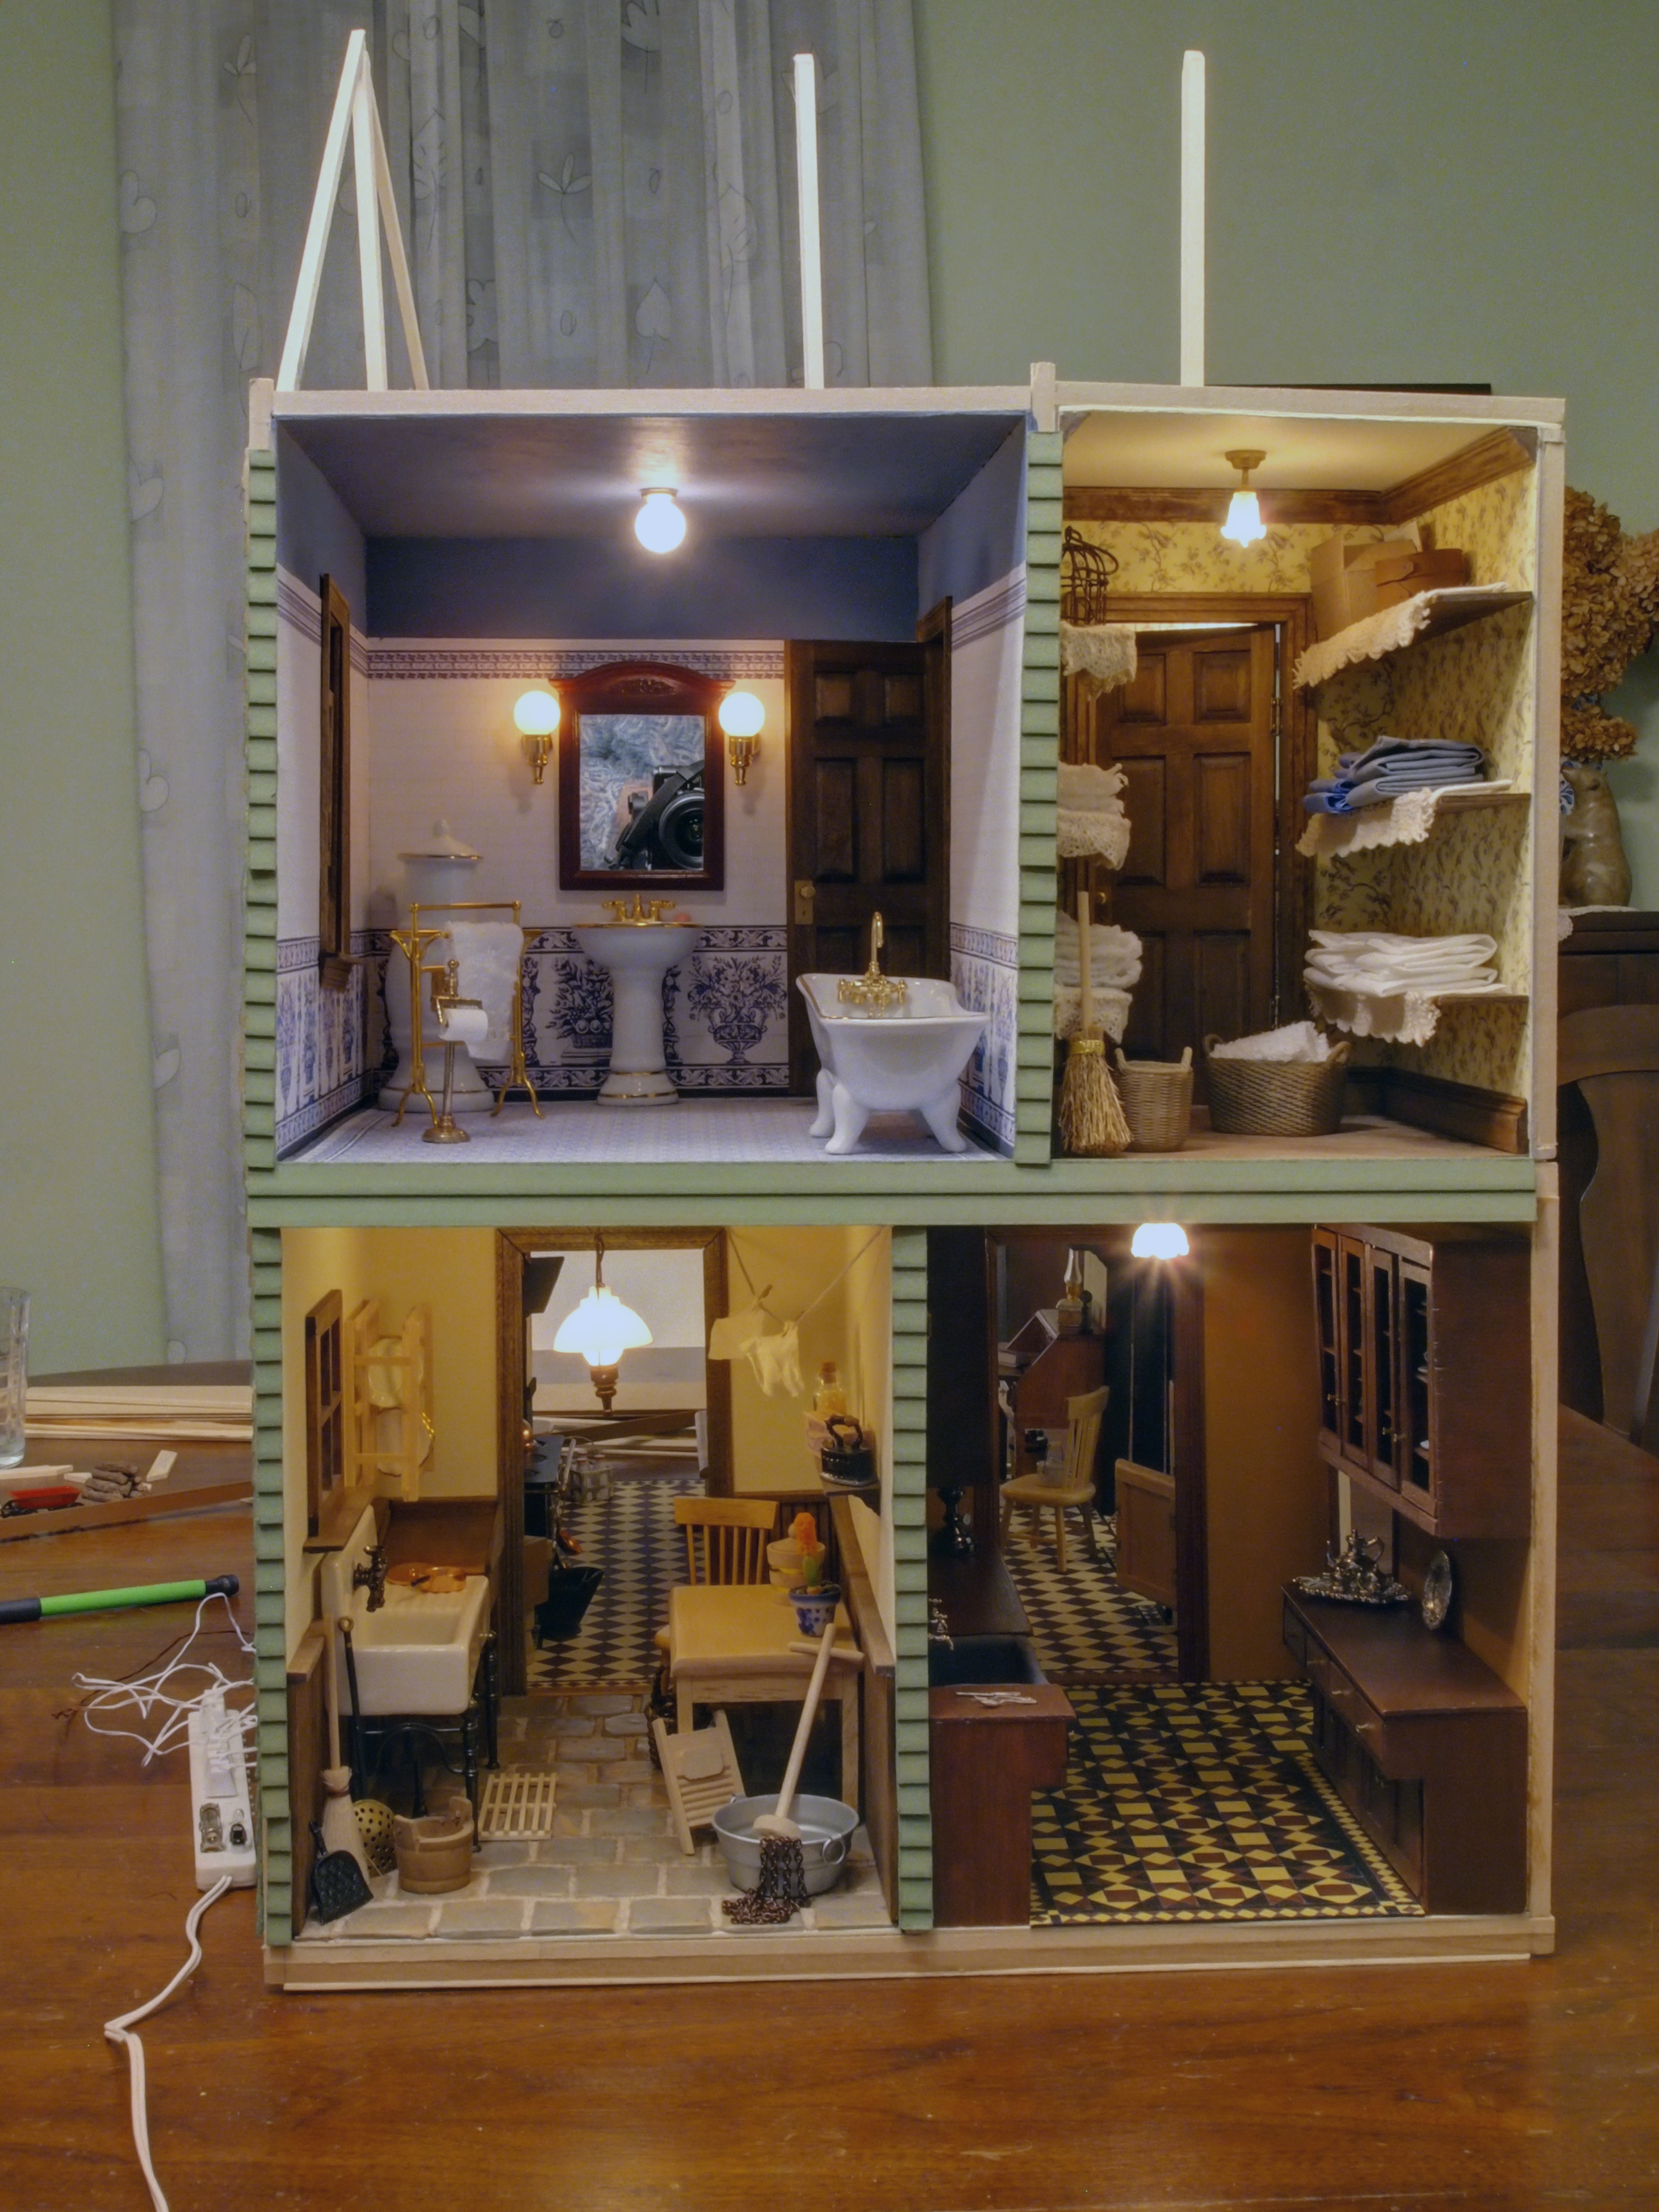
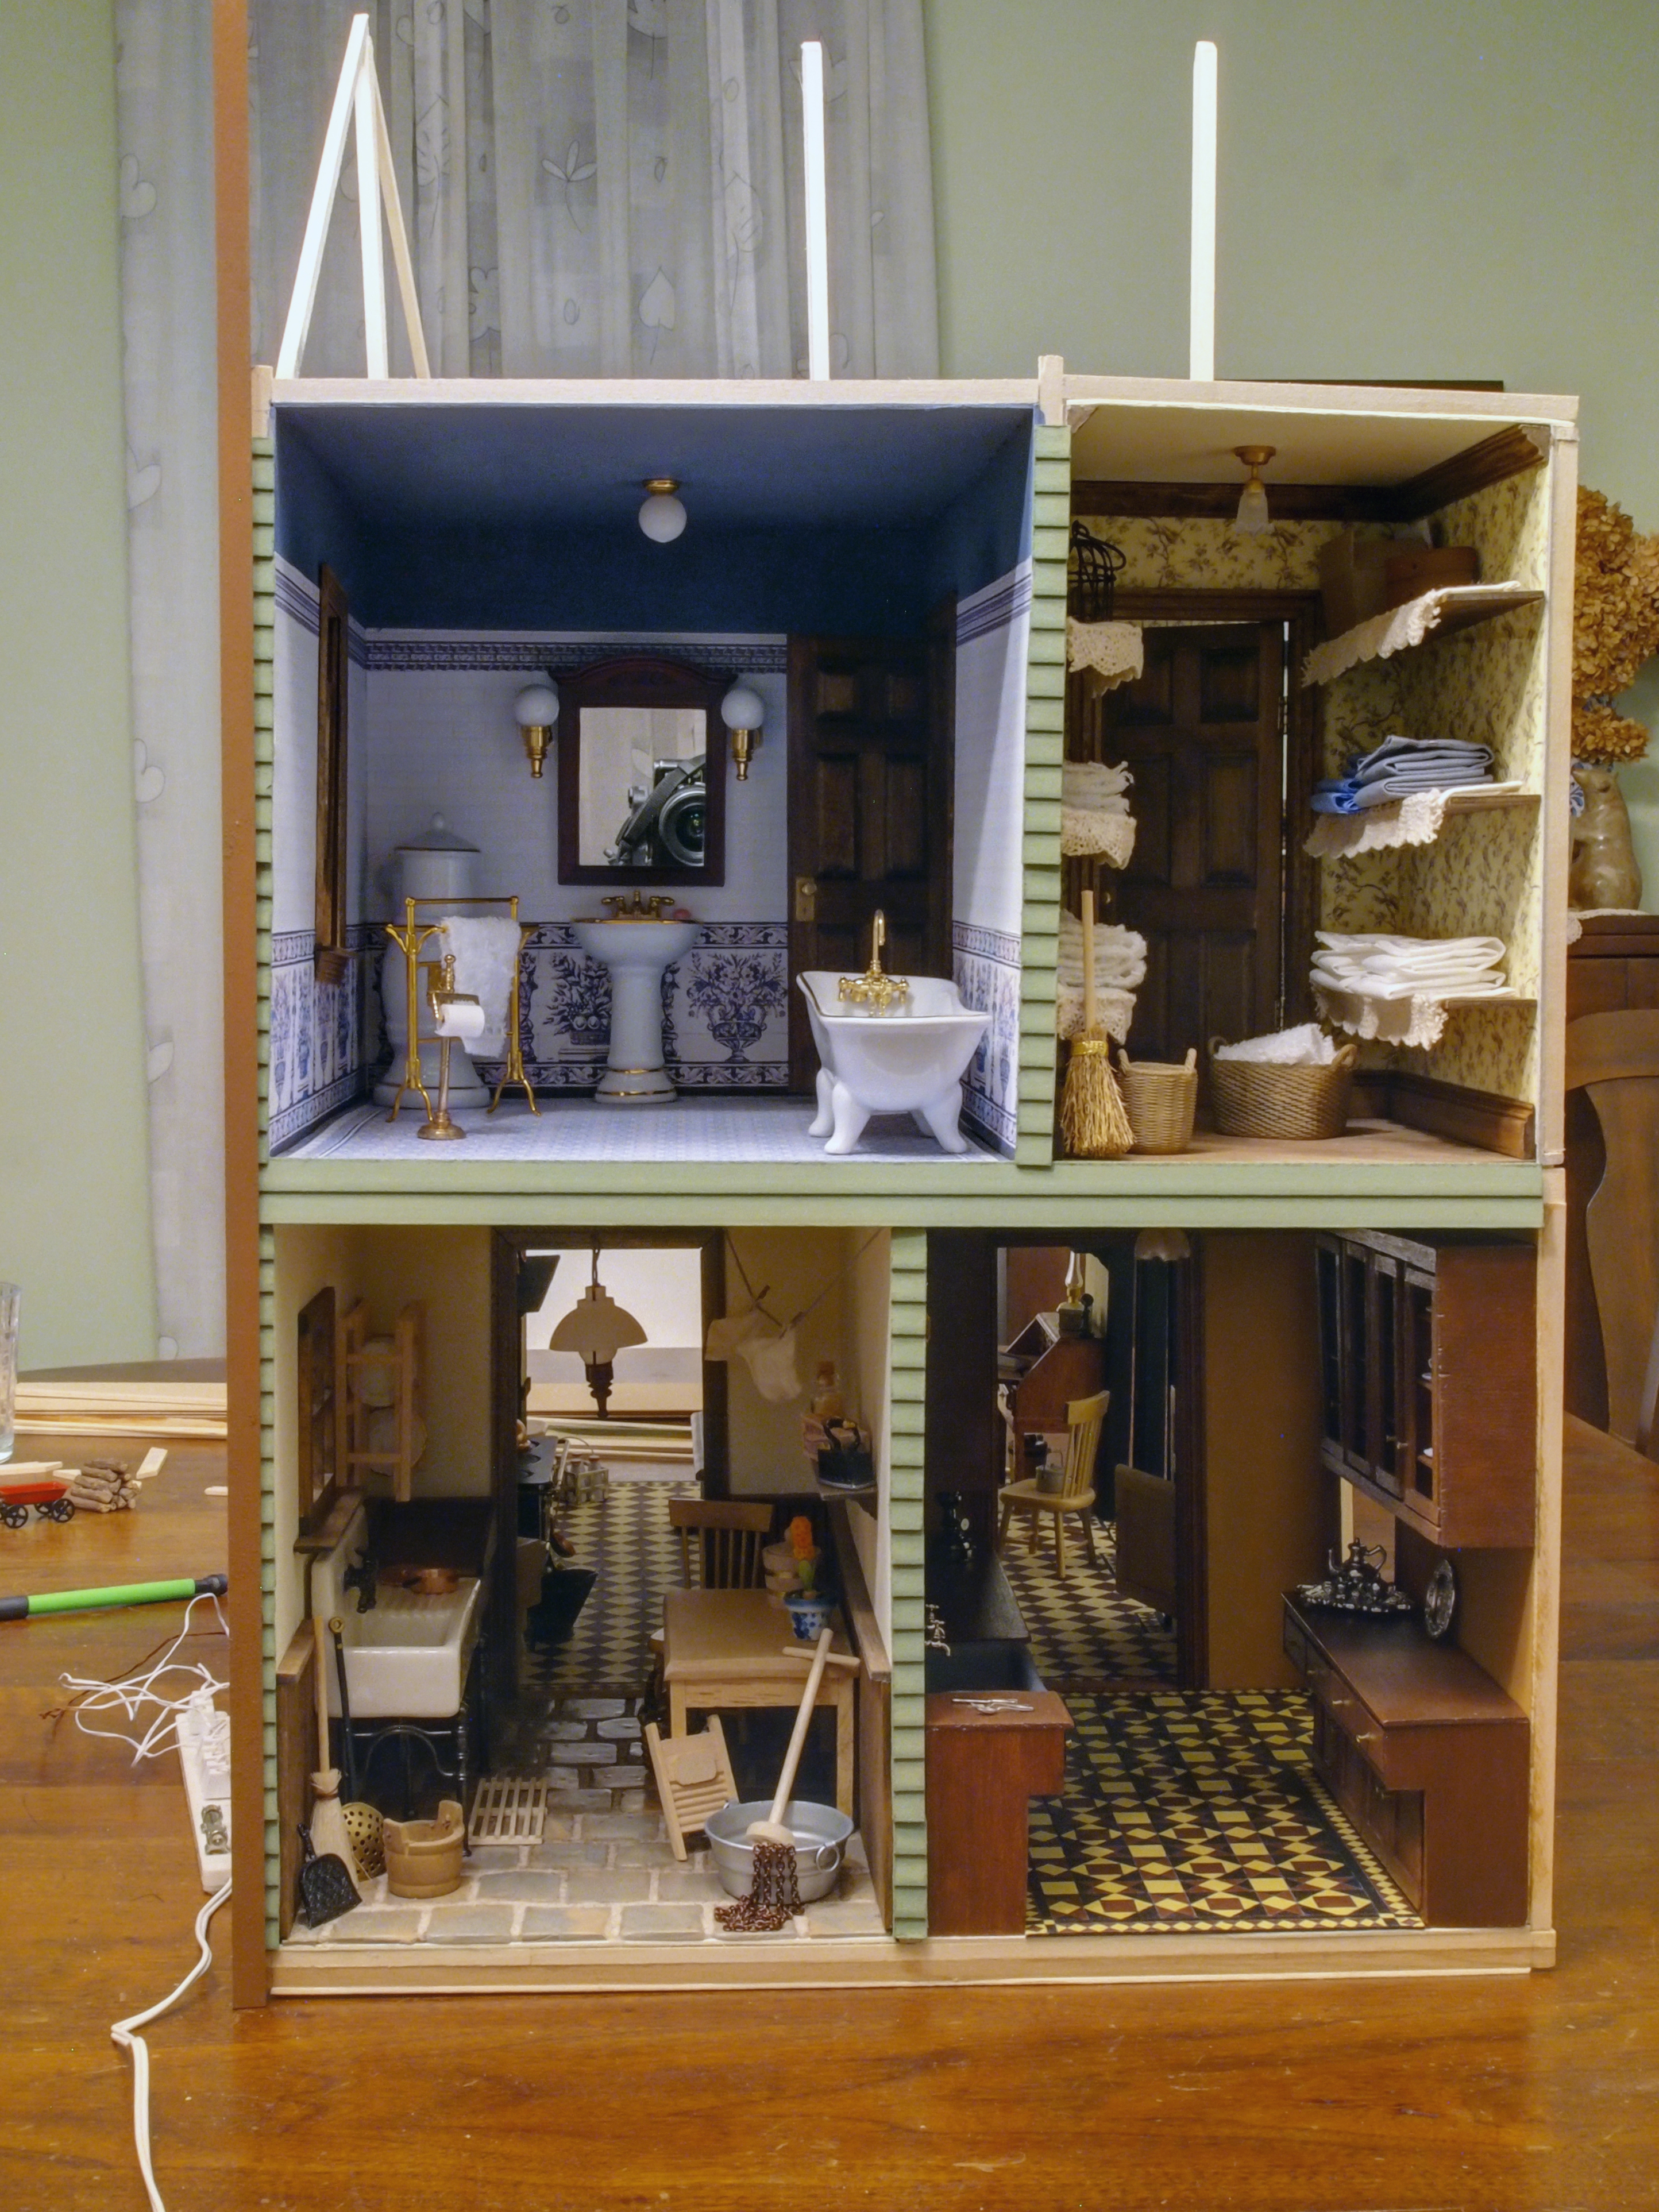
Placed them in the house (you can see the cracks where the two top treads are just laid on).

OLYMPUS DIGITAL CAMERA

Fits much better than the first set of stairs, and I’ve done a much neater job of it all around.

OLYMPUS DIGITAL CAMERA

OLYMPUS DIGITAL CAMERA

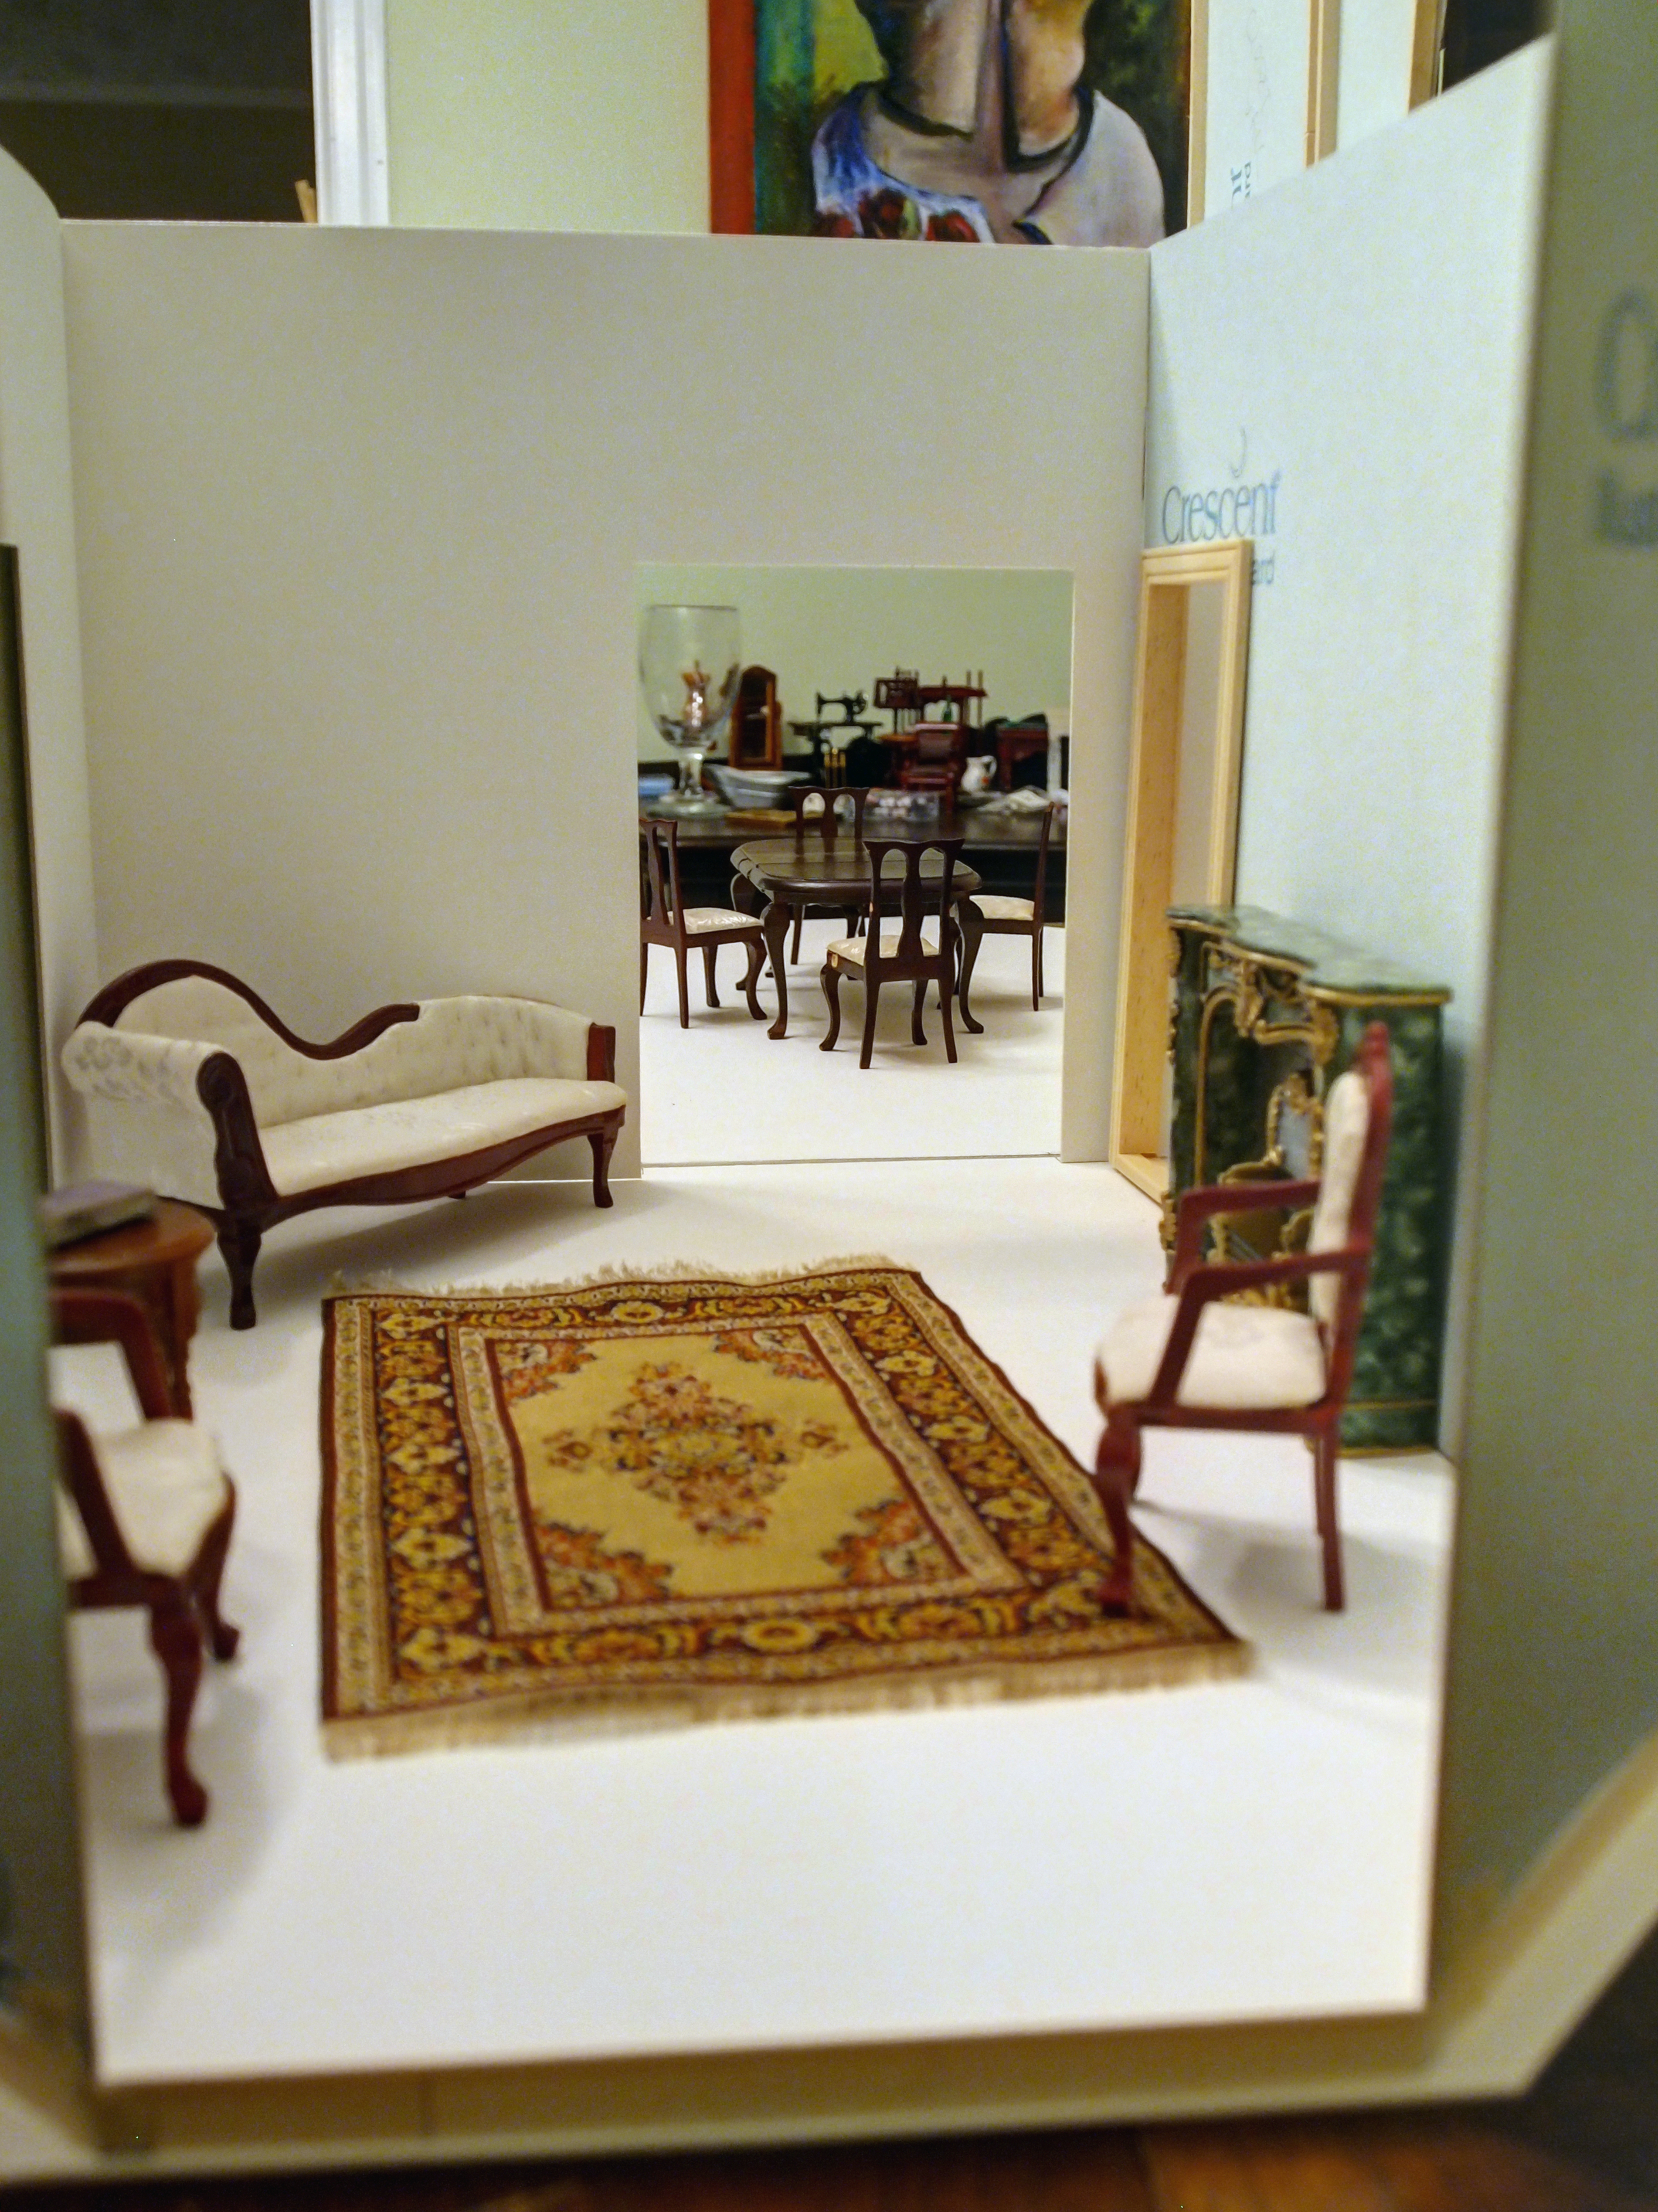
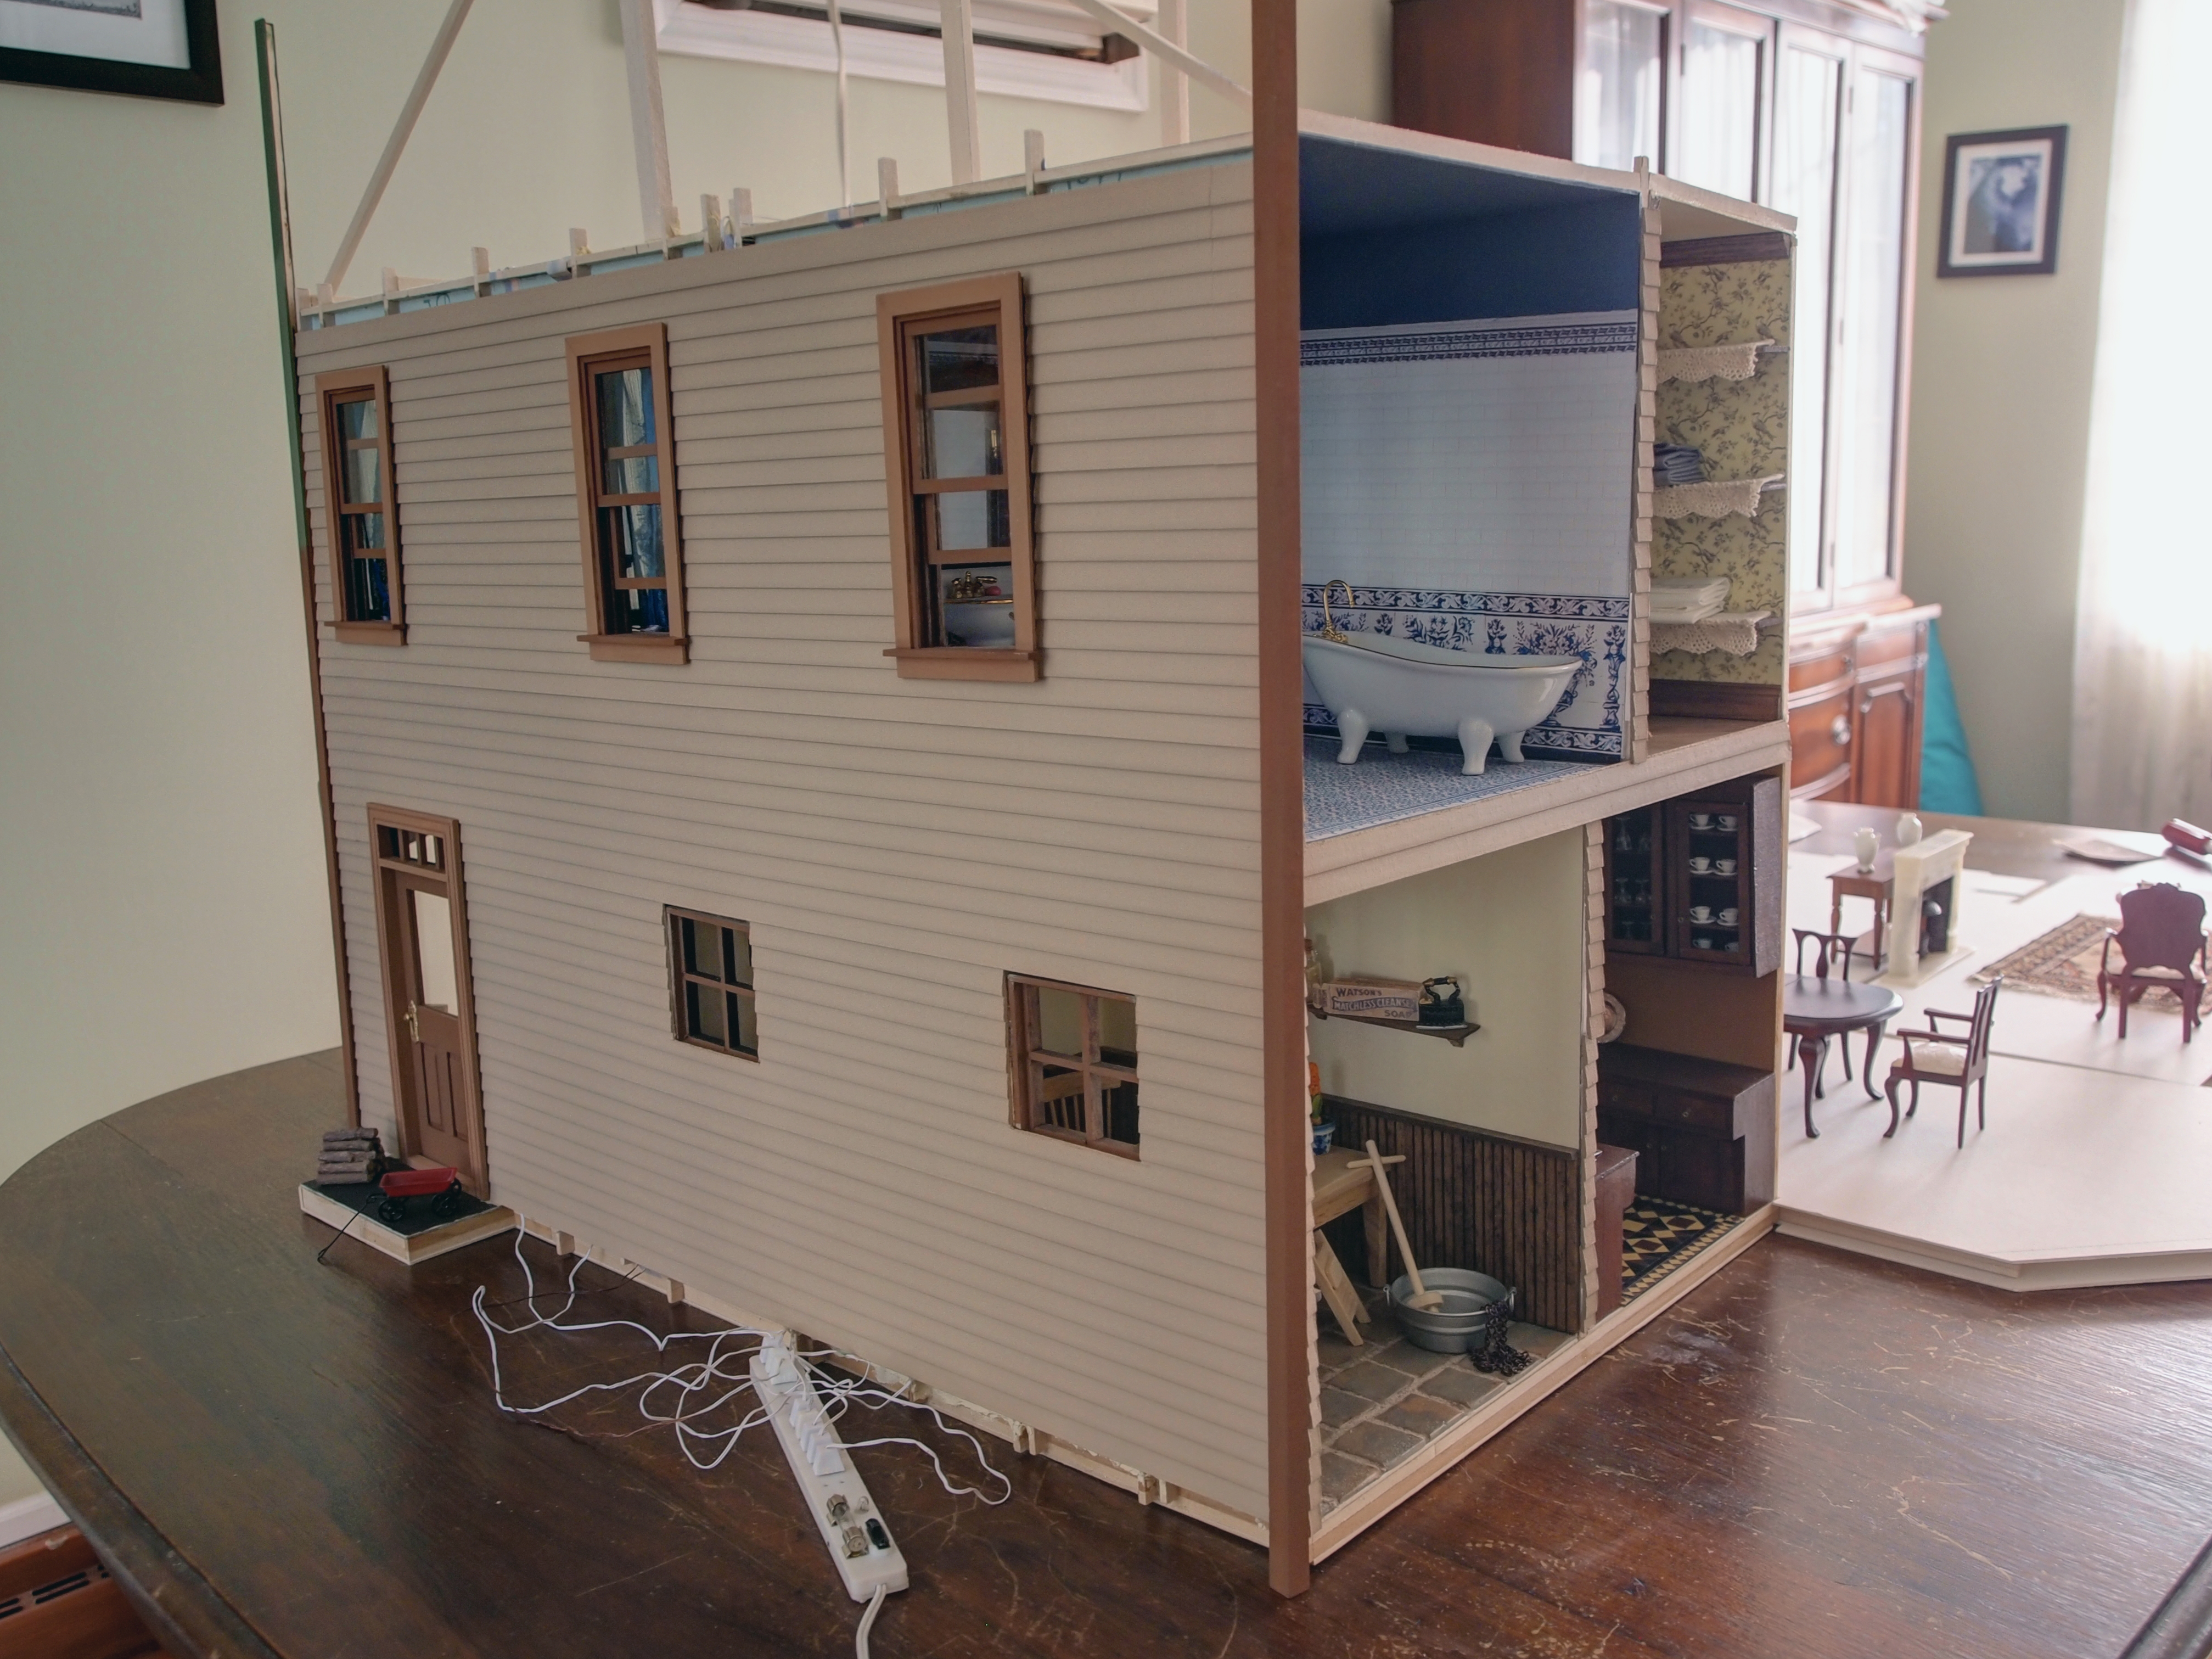
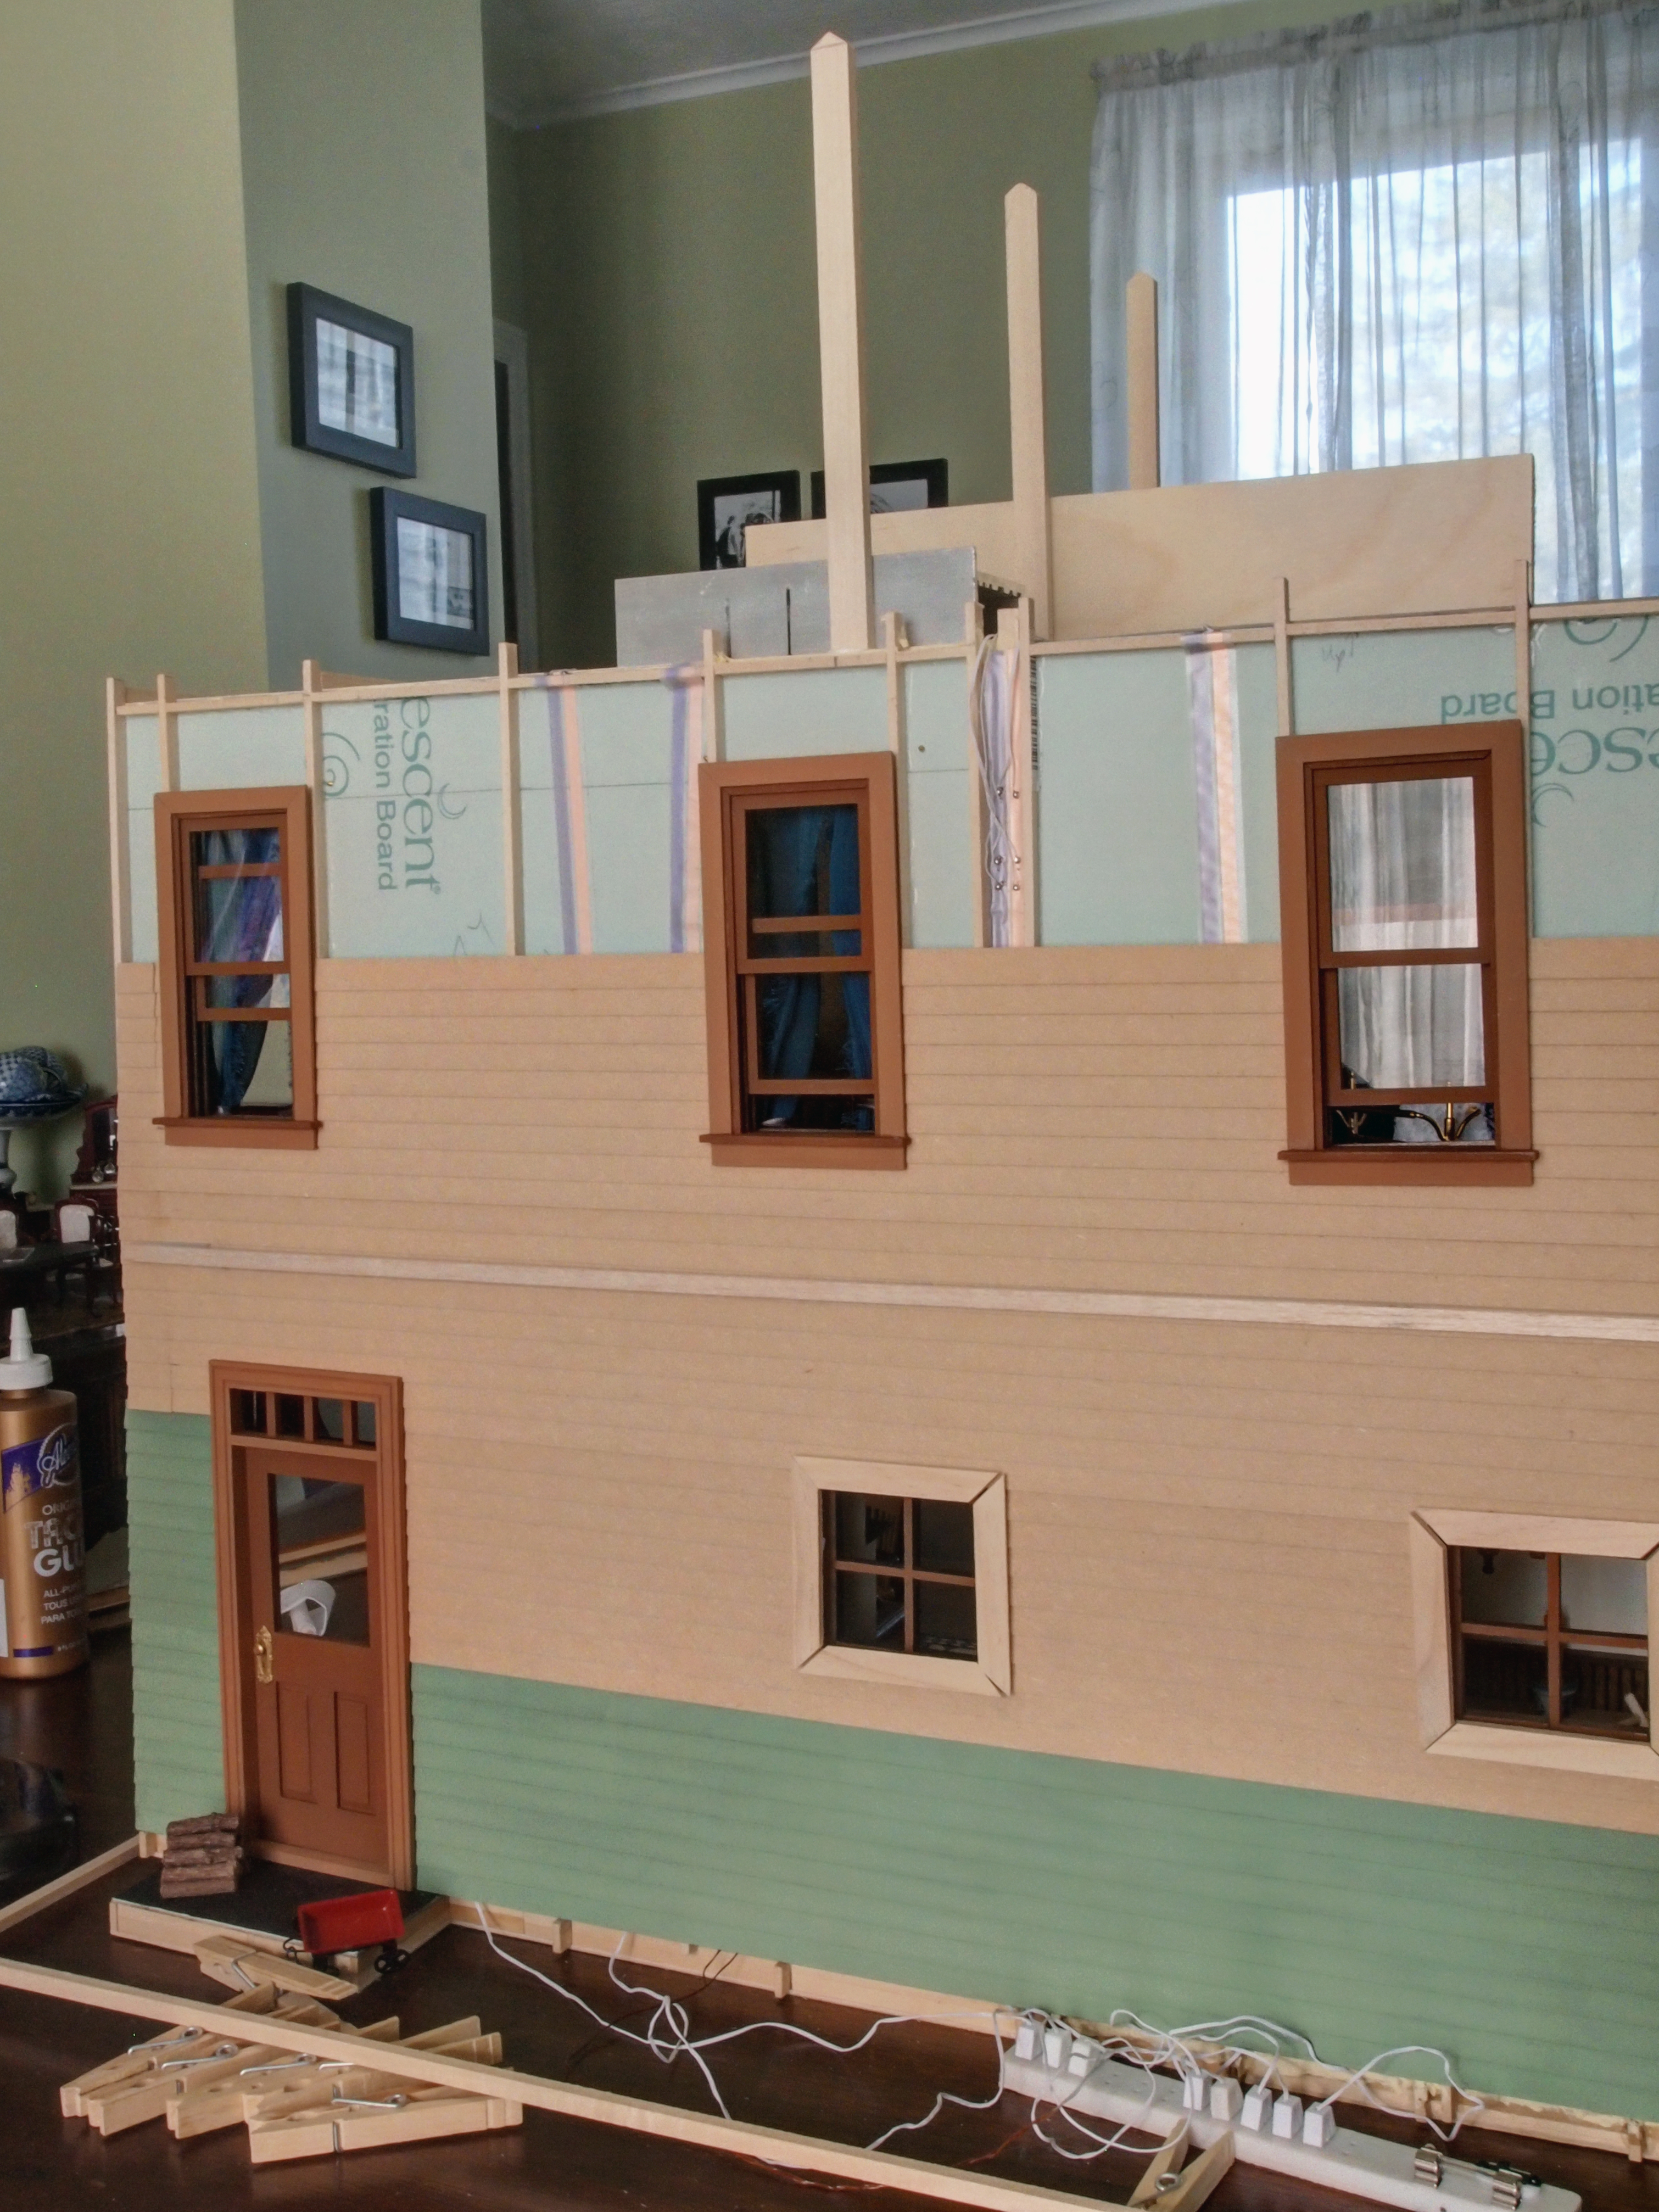
Plenty more to go, but here’s a view looking down the inner wall for now.

OLYMPUS DIGITAL CAMERA

Good night.

Feeling protected

15 Tuesday Oct 2013

Posted by cider12 in Uncategorized

≈ 3 Comments

Tags

dollhouse, miniatures, plexiglass box, Victorian house

Well, here’s half of the plexiglass box up and going. It looks too tall in the photo, but the front part of that house will have three stories plus the tower roof. So it’ll be snug when it’s done.

OLYMPUS DIGITAL CAMERA

The other half is bigger and wouldn’t fit through the house doors. But since I don’t need it for now, I stored it in the garage until I move in May.

I’ll take it apart then for the move.

OLYMPUS DIGITAL CAMERA

Now we (my 85-year-old neighbor and I) are going to build a low table to put this on–so it doesn’t stand quite so tall in the room, and so I can get my dining room table back.

OLYMPUS DIGITAL CAMERA

Cheers!

Boxing it in

13 Sunday Oct 2013

Posted by cider12 in Uncategorized

≈ 2 Comments

Tags

dollhouse, miniatures, plexiglass box, Victorian house

Didn’t work on the actual house today, but I did finally get the time to put together most of the box in which it’s going to reside (to protect it from sunlight, dust, unidentified flung objects, and dog tails & teeth).

OLYMPUS DIGITAL CAMERA

This was created with the help of my 85-year-old neighbor who was a carpenter all his life and has all the tools you could ever want in his workshop!

Still have one of the tops to attach on.

OLYMPUS DIGITAL CAMERA

Now that I see it in the context of my garage…it’s awfully big, huh?  But then…the house has two more stories and a tower and a porch that need to be added on to what’s already there.

OLYMPUS DIGITAL CAMERA

Cider got to pose with the box in the photos because he was a good boy and sat waiting in the yard while I was in the garage most of the afternoon.

That and because he really, REALLY wanted to go for a walk and he thought maybe if he sat still for the photos we’d finally leave for that walk.

Good night.

Back stair beginnings

10 Thursday Oct 2013

Posted by cider12 in Uncategorized

≈ 2 Comments

Tags

dollhouse, miniatures, Victorian house

Began to build the back stairs this evening. Started by computing and drawing out the stairs on the side of the wall.

OLYMPUS DIGITAL CAMERA

Created the framework for the stairs.

OLYMPUS DIGITAL CAMERA

Added the risers.

OLYMPUS DIGITAL CAMERA

Cut out the treads and rounded off the front of each one.

OLYMPUS DIGITAL CAMERA

Stained the lot of them.OLYMPUS DIGITAL CAMERA

And glued the staircase together.

OLYMPUS DIGITAL CAMERA

Then I placed it into the stairwell to see how it would work.

OLYMPUS DIGITAL CAMERA

OLYMPUS DIGITAL CAMERA

Placed it on the upper half to see how that would look.

OLYMPUS DIGITAL CAMERA

But I noticed there was a bit of a fit problem.  So I added a temporary wall and studs where the center wall would be…

OLYMPUS DIGITAL CAMERA

…and realized I had made the stairs too small. Turns out I measured off the length of a beam with floor and ceiling as opposed to the length of two walls and a stud; I’m an eighth of an inch off.  Sigh.

So I’ll be trying this over again…hopefully I’ll do a better job then.

For now…good night.

Back stairwell walls

03 Thursday Oct 2013

Posted by cider12 in Uncategorized

≈ 2 Comments

Tags

dollhouse, miniatures, Victorian house

Started working on the back stairwell today.

Added the studs to support the walls…took a while to line them up correctly with the back part of the house.

OLYMPUS DIGITAL CAMERA

Finished the last wall.

OLYMPUS DIGITAL CAMERA

So here’s the stairwell.

OLYMPUS DIGITAL CAMERA

Added the ceiling and floor of the landing (can’t add the beams between the two since I’m out of supplies).

OLYMPUS DIGITAL CAMERA

OLYMPUS DIGITAL CAMERA

Placed a few pieces of cardboard to see what the stairs and walls would look like before starting on the stairs.

OLYMPUS DIGITAL CAMERA

I think I like the result, so next time I’ll work out how to make the stairs.

OLYMPUS DIGITAL CAMERA

Be well.

Walls east side

02 Wednesday Oct 2013

Posted by cider12 in Uncategorized

≈ 2 Comments

Tags

dollhouse, miniatures, Victorian house

Started cutting out walls for the rooms on the east side of the house tonight.

Walls for the back stairwell:

OLYMPUS DIGITAL CAMERA

Walls for the formal drawing room:

OLYMPUS DIGITAL CAMERA

And walls for the front sitting room:

OLYMPUS DIGITAL CAMERA

From the side, then, the view will be the back stairs (the stairs will come up from the door on the left, with a landing halfway up, and end in the back on the right above the doorway…under the stairs, there will be the kitchen pantry and the wine cellar)…

OLYMPUS DIGITAL CAMERA

…the drawing room (with a view of the dining room behind…the two small diagonal walls on both sides in front will have windows as part of a bay window area)…

OLYMPUS DIGITAL CAMERA

…and the sitting room (the octagonal tower section will be full of windows, as will the left wall and the drawing room wall on the right, so the walls won’t look quite so solid and imposing).

OLYMPUS DIGITAL CAMERA

Which will end up a bit like this:

OLYMPUS DIGITAL CAMERA

And like this from the other side of the house:

OLYMPUS DIGITAL CAMERA

These front rooms, as they are more formal and built to impress, are a good two inches taller than the back rooms, which explains why I needed to add a few steps in the upstairs hallway so I could connect the front and back hallways correctly.

OLYMPUS DIGITAL CAMERA

A couple views from above…

OLYMPUS DIGITAL CAMERA

OLYMPUS DIGITAL CAMERA

And one of the front of the house, which will be full of windows (and, of course, a front door) when it’s finished.

OLYMPUS DIGITAL CAMERA

Good night.

Floors, beams, and sub-floors

01 Tuesday Oct 2013

Posted by cider12 in Uncategorized

≈ 2 Comments

Tags

dollhouse, miniatures, Victorian house

Started out today by cutting out the floors for the right side of the house.

OLYMPUS DIGITAL CAMERA

So I got to place some furniture around the rooms and get an idea of what it would look like.

OLYMPUS DIGITAL CAMERA

Cut out the rest of the beams and glued them onto the sub-floor for the left side.

OLYMPUS DIGITAL CAMERA

Glued it onto the bottom floor and weighted it down.

OLYMPUS DIGITAL CAMERA

Next I cut out and glued on beams for the right side, but I ran out of supplies (again!), so I couldn’t quite finish up the middle of the rooms.

OLYMPUS DIGITAL CAMERA

But I’ve got enough for it to stand up straight and to give an idea of what the floor plan will look like.

OLYMPUS DIGITAL CAMERA

Even added labels (with Photoshop) to show what everything will be.

OLYMPUS DIGITAL CAMERA

Next time, while I’m waiting for more supplies, I think I’ll start cutting out the walls…

Good night.

New floor boards

29 Sunday Sep 2013

Posted by cider12 in Uncategorized

≈ 1 Comment

Tags

dollhouse, miniatures, Victorian houses

I decided to start building the floor boards for the two front sections of the house today (two sections instead of one so they can easily fit through doorways…)

Began with the paper plans I had made earlier…

OLYMPUS DIGITAL CAMERA

Cut out one of the floors…

OLYMPUS DIGITAL CAMERA

Transferred the position of the walls and doorways…

OLYMPUS DIGITAL CAMERA

OLYMPUS DIGITAL CAMERA

Cut out the walls so I could pass studs through them later, created a base for underneath, and started gluing the beams between the two layers (oh, and Cider showed up in this photo because he wanted to go for a walk…)

OLYMPUS DIGITAL CAMERA

Ran out of wood for the beams so I couldn’t finish, but here’s what I have so far…

OLYMPUS DIGITAL CAMERA

Haven’t started the right-hand floor yet because I’m a bit stymied when it comes to drawing the octagonal tower. But I’ll figure that out later.

Next, I decided I didn’t like the green on the siding…clashed too much with the colors inside the rooms.  So I repainted it all with two coats of tan paint.

OLYMPUS DIGITAL CAMERA

A bit duller, but I already like it better…

OLYMPUS DIGITAL CAMERA

And it doesn’t make a mess with the rest of the house anymore…

OLYMPUS DIGITAL CAMERA

Still not sure if I’d rather not just replace the siding between the rooms with polished wood, but that can wait for now..

OLYMPUS DIGITAL CAMERA

Be well.

Side siding

28 Saturday Sep 2013

Posted by cider12 in Uncategorized

≈ 2 Comments

Tags

dollhouse, miniatures, Victorian house

Thought I’d try out my idea of using siding between the rooms…

OLYMPUS DIGITAL CAMERA

…so I painted a little sample piece and taped it on to see what it would look like.

OLYMPUS DIGITAL CAMERA

Thought it’d look good, so I started cutting out strips of siding…

OLYMPUS DIGITAL CAMERA

…all the way up…

OLYMPUS DIGITAL CAMERA

…and did the same for the other side.

OLYMPUS DIGITAL CAMERA

Then I mixed up some paint (for future reference when I need to do more outside paint, it was equal parts light avocado and buttermilk, then bits of avocado until it got dark enough), and painted the back of the house.

OLYMPUS DIGITAL CAMERA

Finished the back and painted the pieces for the sides.

OLYMPUS DIGITAL CAMERA

Then I taped the side strips back on (not glued in yet because I’m still not sure if I like the effect).

OLYMPUS DIGITAL CAMERA

I was trying to make it look like the walls had been cut into to show inside the rooms (that corner trim will eventually be dark green instead of brown)…

OLYMPUS DIGITAL CAMERA

…but I’m not sure if this just doesn’t look a bit sloppy and if it wouldn’t look slightly classier with just polished wood between the rooms.

OLYMPUS DIGITAL CAMERA

Or maybe it’s the green that’s interfering with the room colors and it would work better if I painted the siding a light tan.

Too tired to figure it out now…I’ll think about it again tomorrow.

For now…good night.

More siding

26 Thursday Sep 2013

Posted by cider12 in Uncategorized

≈ 1 Comment

Tags

dollhouse, miniatures, Victorian house

Got back to work on the siding for the back of the house today.

Measured a new piece…

OLYMPUS DIGITAL CAMERA

…cut out the holes for the windows…

OLYMPUS DIGITAL CAMERA

OLYMPUS DIGITAL CAMERA

…then decided to glue all the siding pieces on from the bottom up.

OLYMPUS DIGITAL CAMERA

Placed the side trim and the floor line trim back on (not glued yet)…

OLYMPUS DIGITAL CAMERA

Next I added three columns to support the peak of the roof.

OLYMPUS DIGITAL CAMERA

Added a frame for the roof line.

OLYMPUS DIGITAL CAMERA

Measured and cut out one more layer of siding…

OLYMPUS DIGITAL CAMERA

…and glued it on.

OLYMPUS DIGITAL CAMERA

I’m planning to create a more complicated design for the siding of the gable roof pediment, in keeping with a Queen Anne style Victorian, so I’ve stopped here for today.

Be well.


← Older posts
Newer posts →
  • RSS - Posts

Room Photos

  • About
  • House plans
  • Scullery
  • Kitchen
  • Butler’s Pantry
  • Linen Closet
  • Bathroom
  • Upstairs hallway
  • Nursery
  • Back Stairs / Pantry
  • Drawing Room (almost finished)
  • Sitting Room (almost finished)
  • Music Room (unfinished)
  • Bedroom I (unfinished)
  • Entrance hall (unfinished)
  • Library (unfinished)
  • Dining room (unfinished)

Previous posts

  • November 2020 (1)
  • September 2020 (5)
  • August 2020 (23)
  • July 2020 (1)
  • December 2016 (1)
  • November 2016 (6)
  • October 2015 (1)
  • September 2015 (6)
  • October 2014 (1)
  • March 2014 (1)
  • January 2014 (12)
  • November 2013 (3)
  • October 2013 (11)
  • September 2013 (11)
  • August 2013 (7)
  • July 2013 (1)
  • June 2013 (1)
  • May 2013 (2)
  • April 2013 (12)
  • March 2013 (13)
  • February 2013 (14)
  • January 2013 (21)
  • December 2012 (5)

RSS feed

  • RSS - Posts

Create a free website or blog at WordPress.com.

Privacy & Cookies: This site uses cookies. By continuing to use this website, you agree to their use.
To find out more, including how to control cookies, see here: Cookie Policy
  • Subscribe Subscribed
    • Victorian Mini
    • Join 79 other subscribers
    • Already have a WordPress.com account? Log in now.
    • Victorian Mini
    • Subscribe Subscribed
    • Sign up
    • Log in
    • Report this content
    • View site in Reader
    • Manage subscriptions
    • Collapse this bar
 

Loading Comments...