Butler’s Pantry Finished…

Tags

, ,

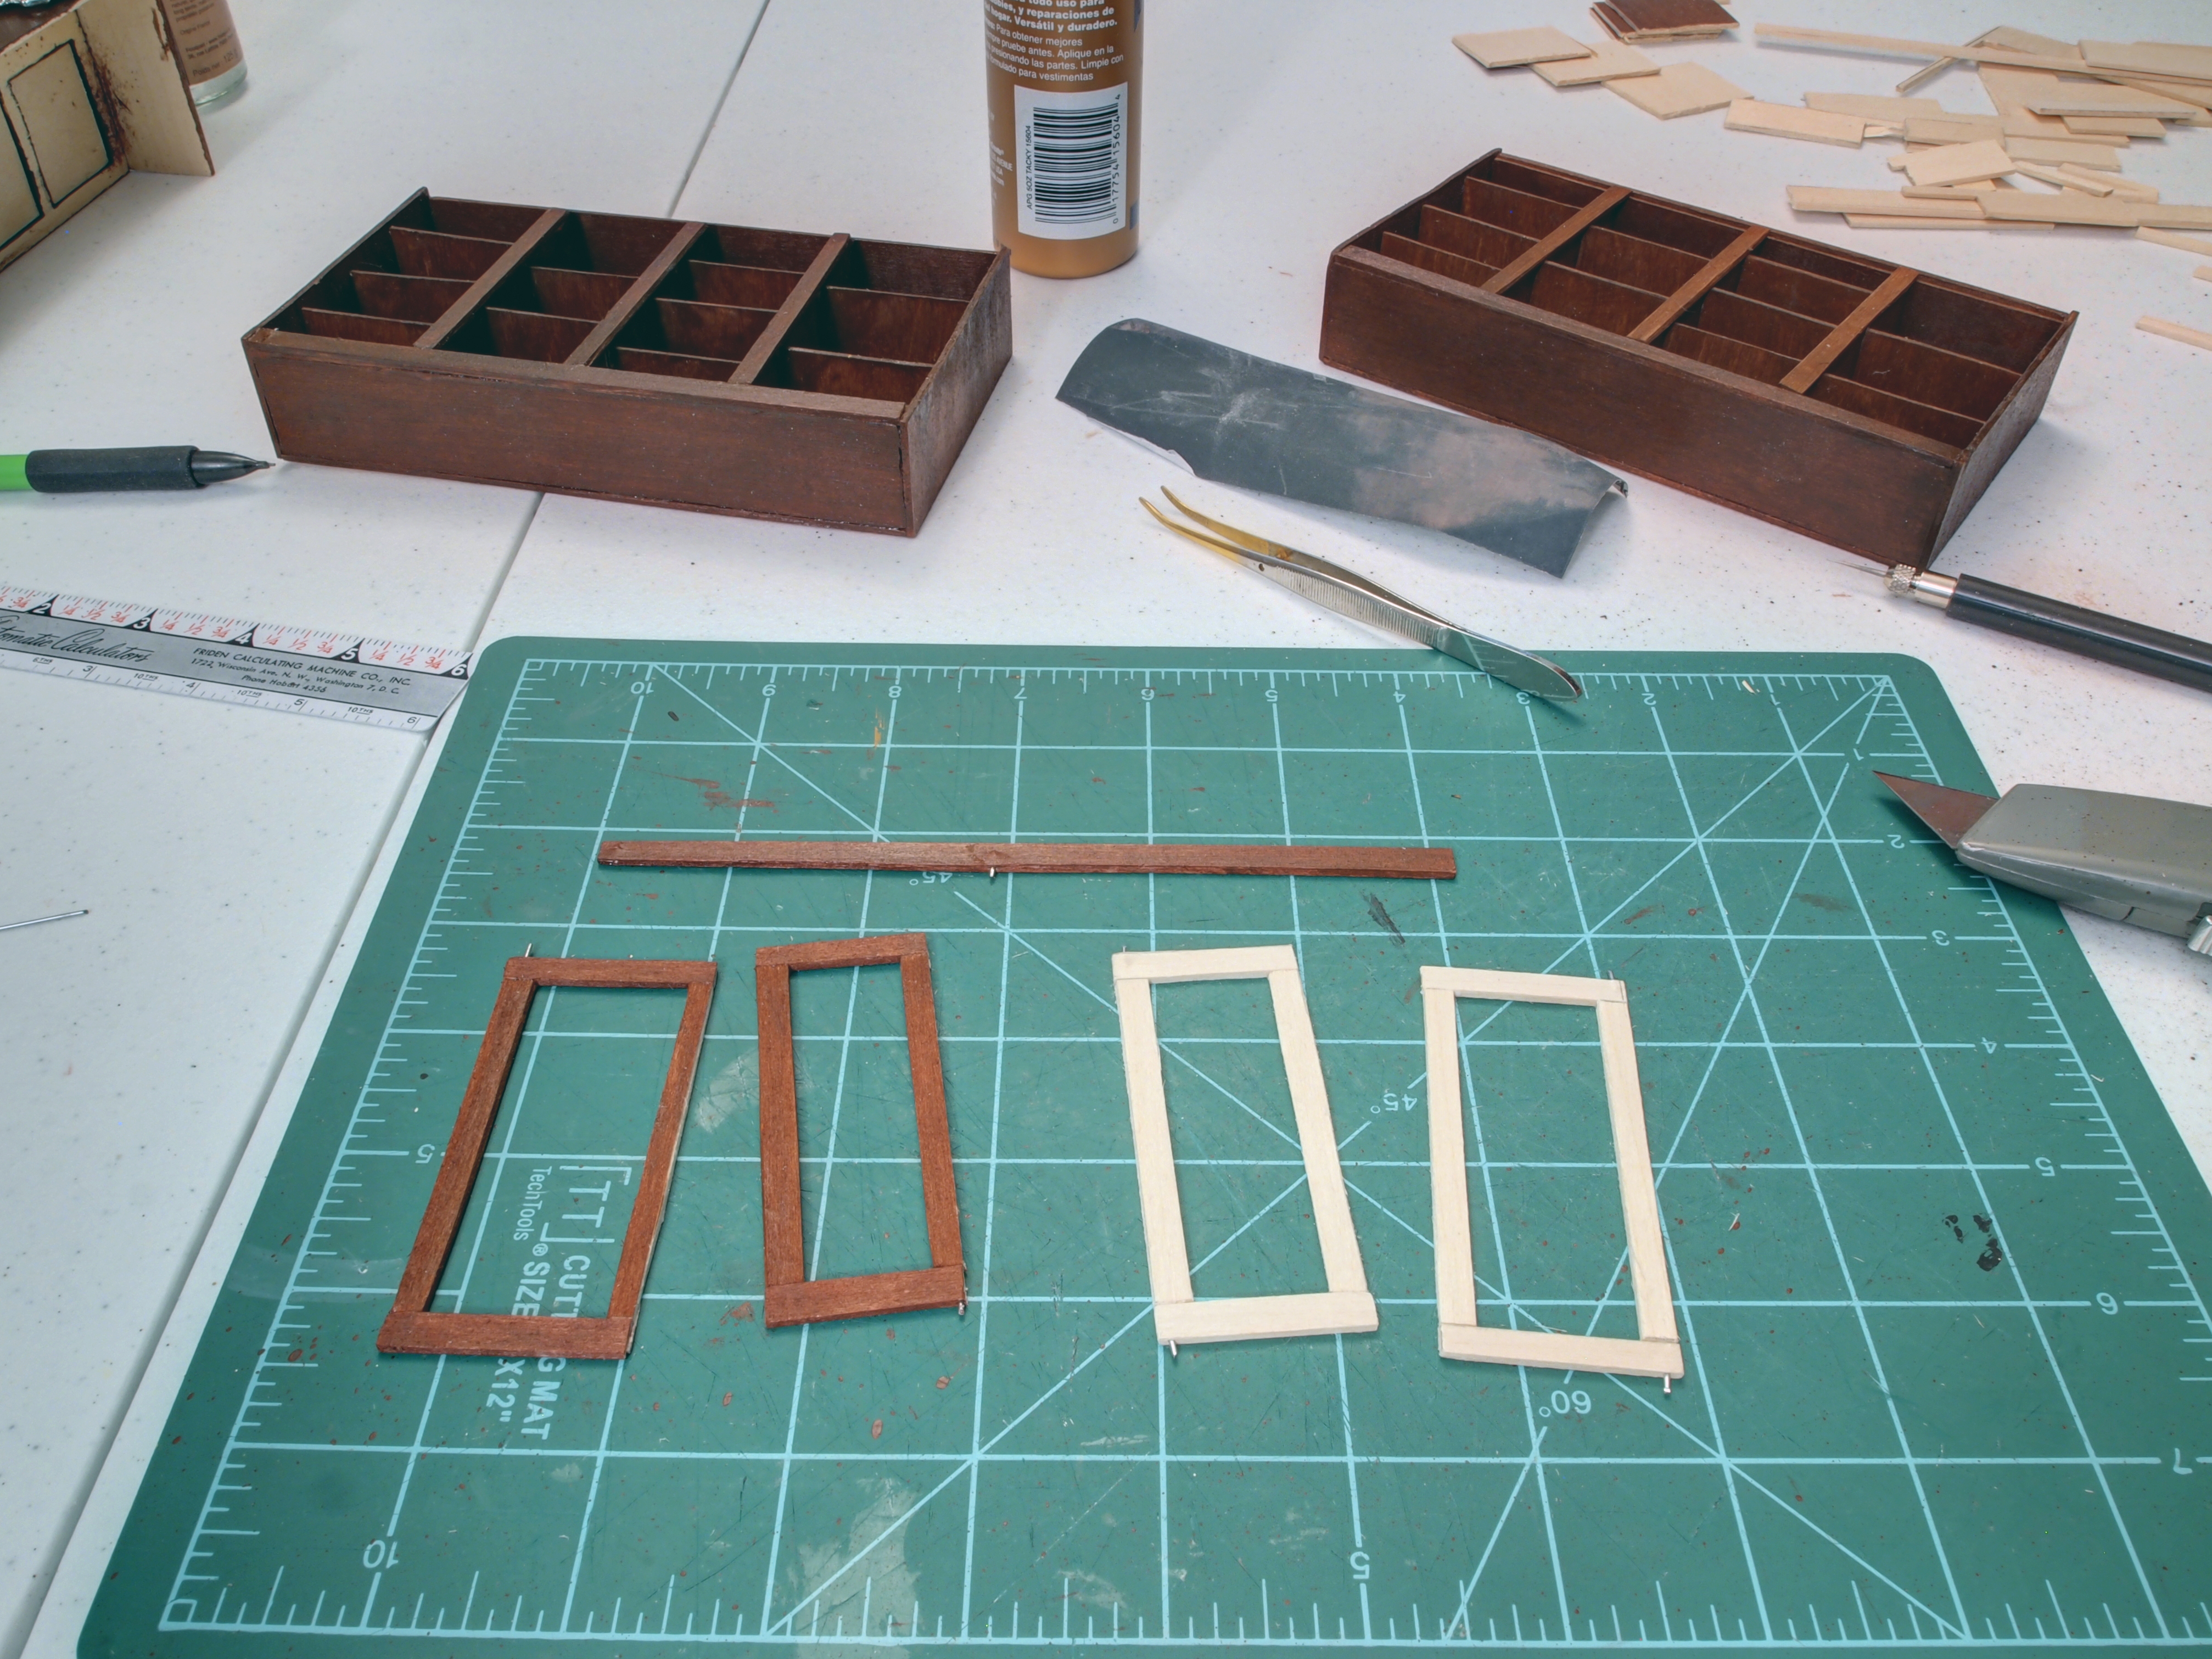
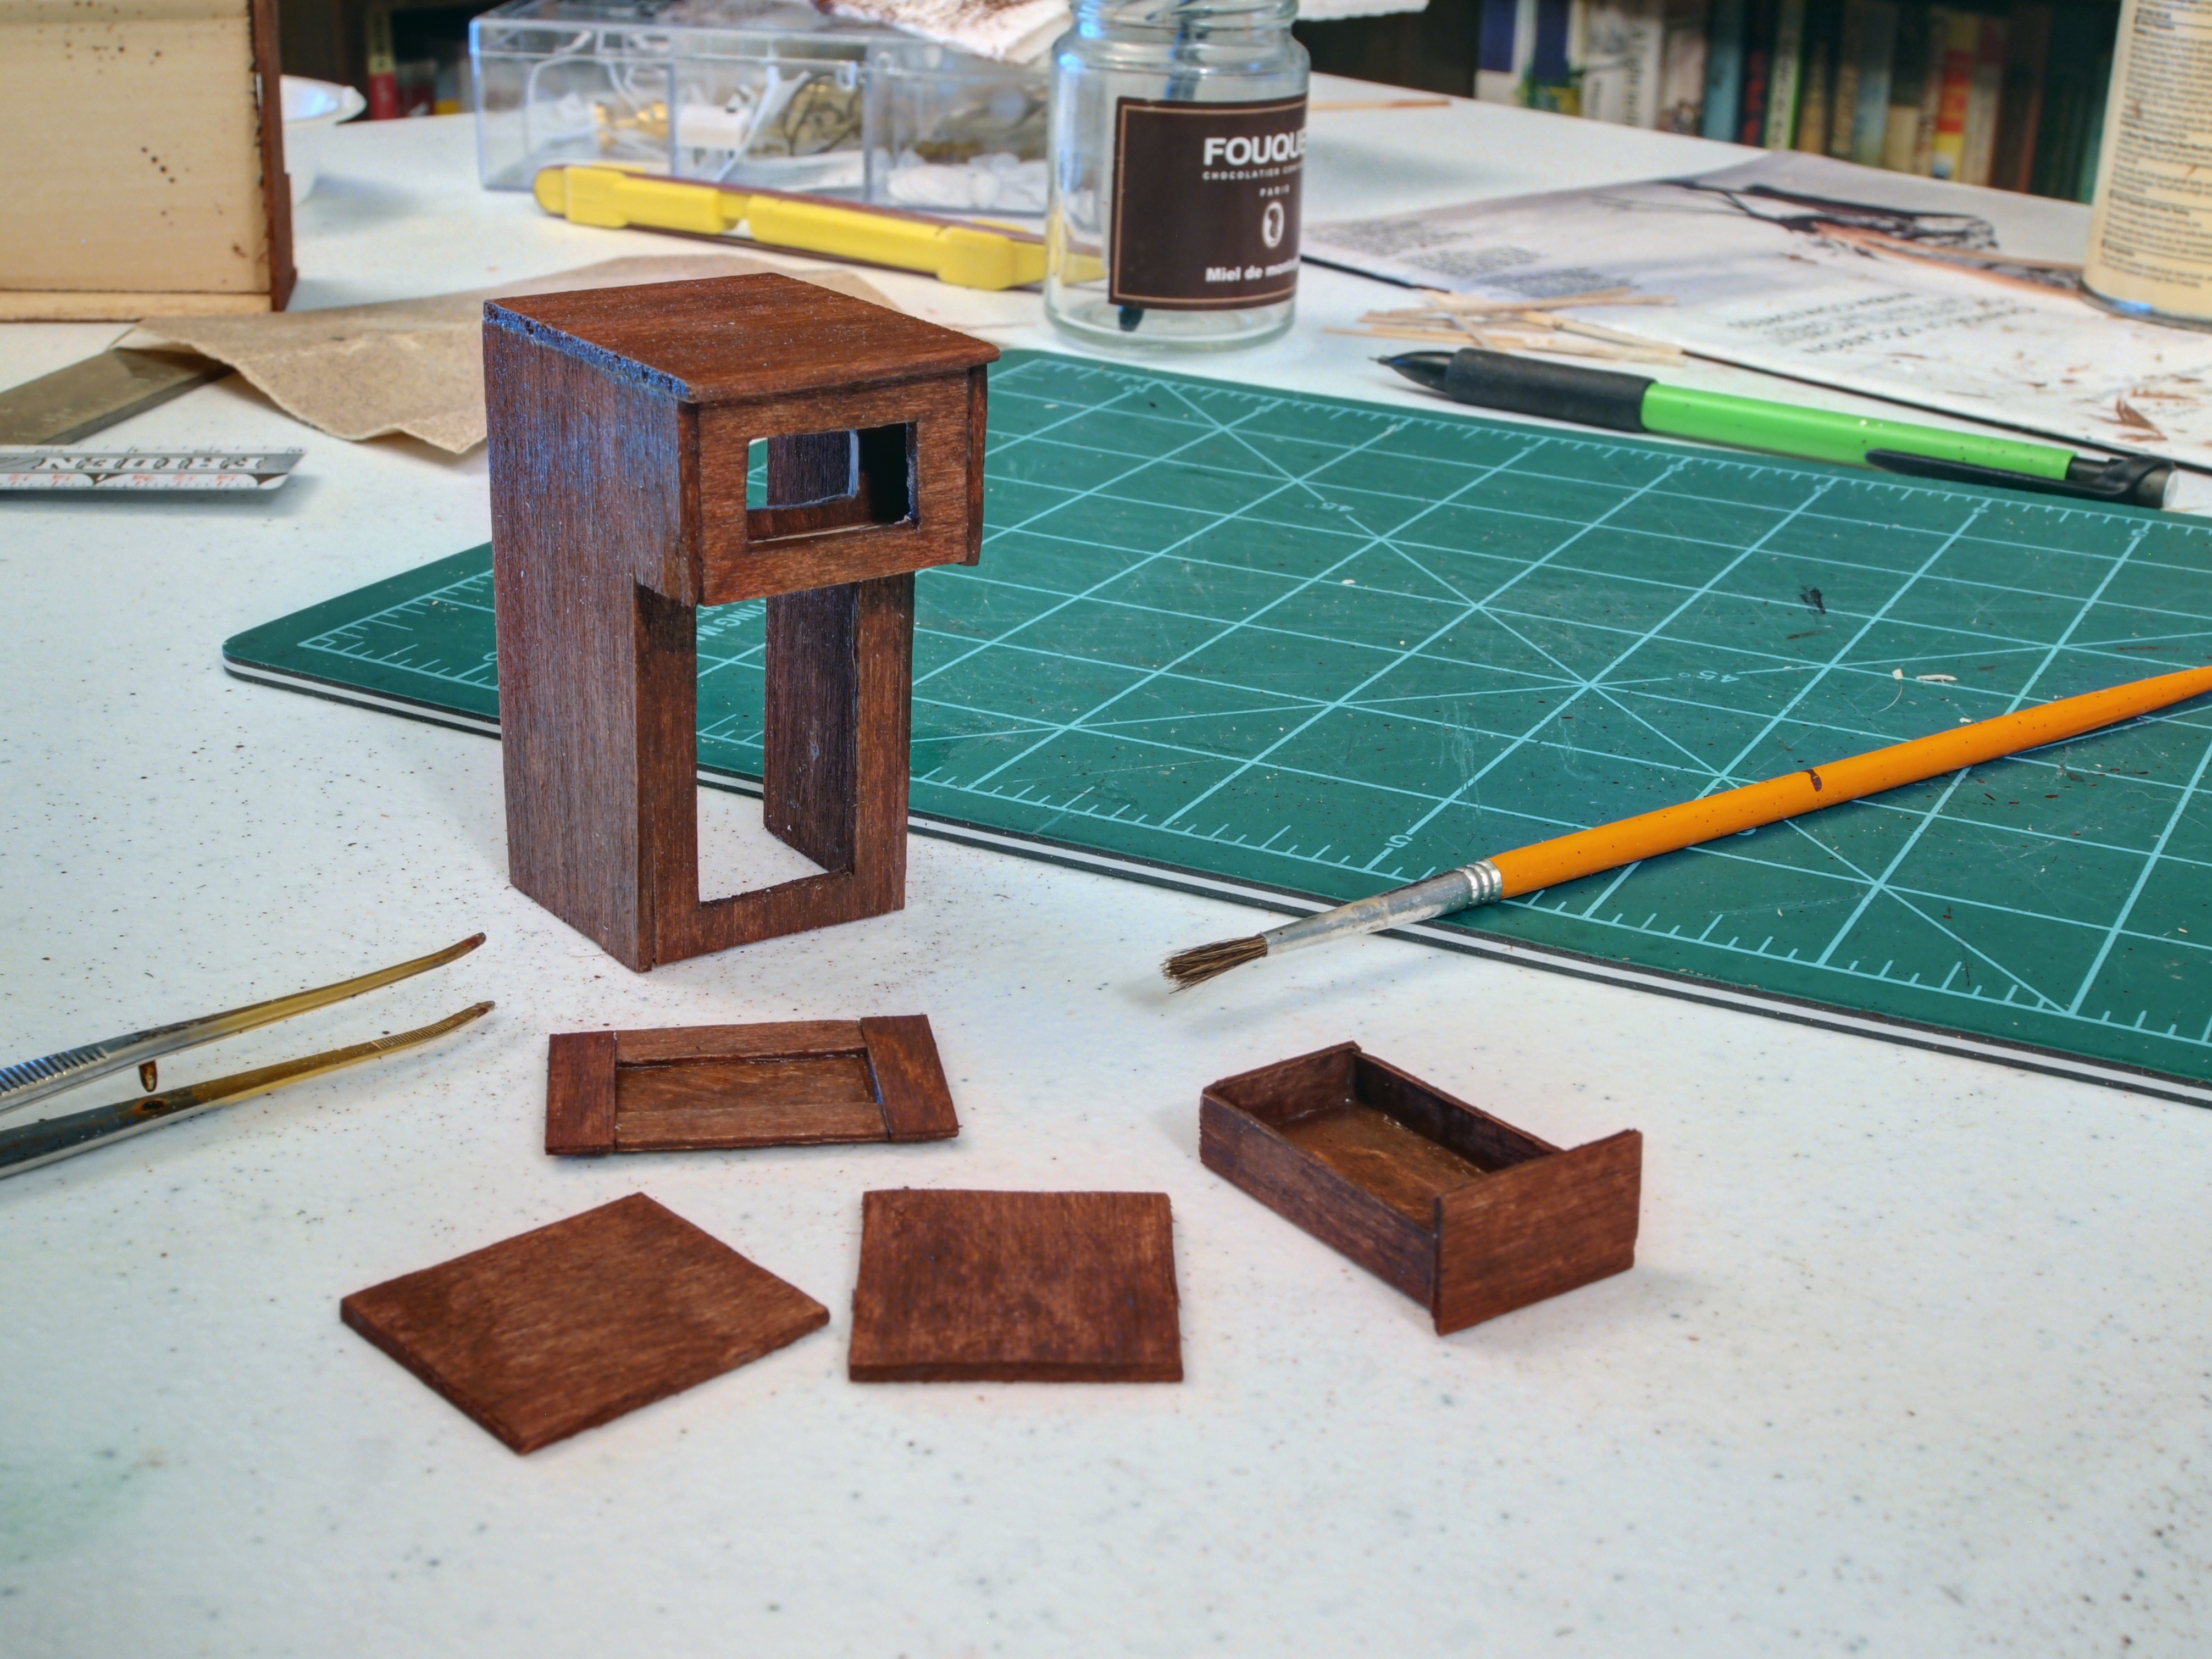
So I got back to work this evening on the cabinets. Cut out, stained, and varnished the rest of the doors…

OLYMPUS DIGITAL CAMERA

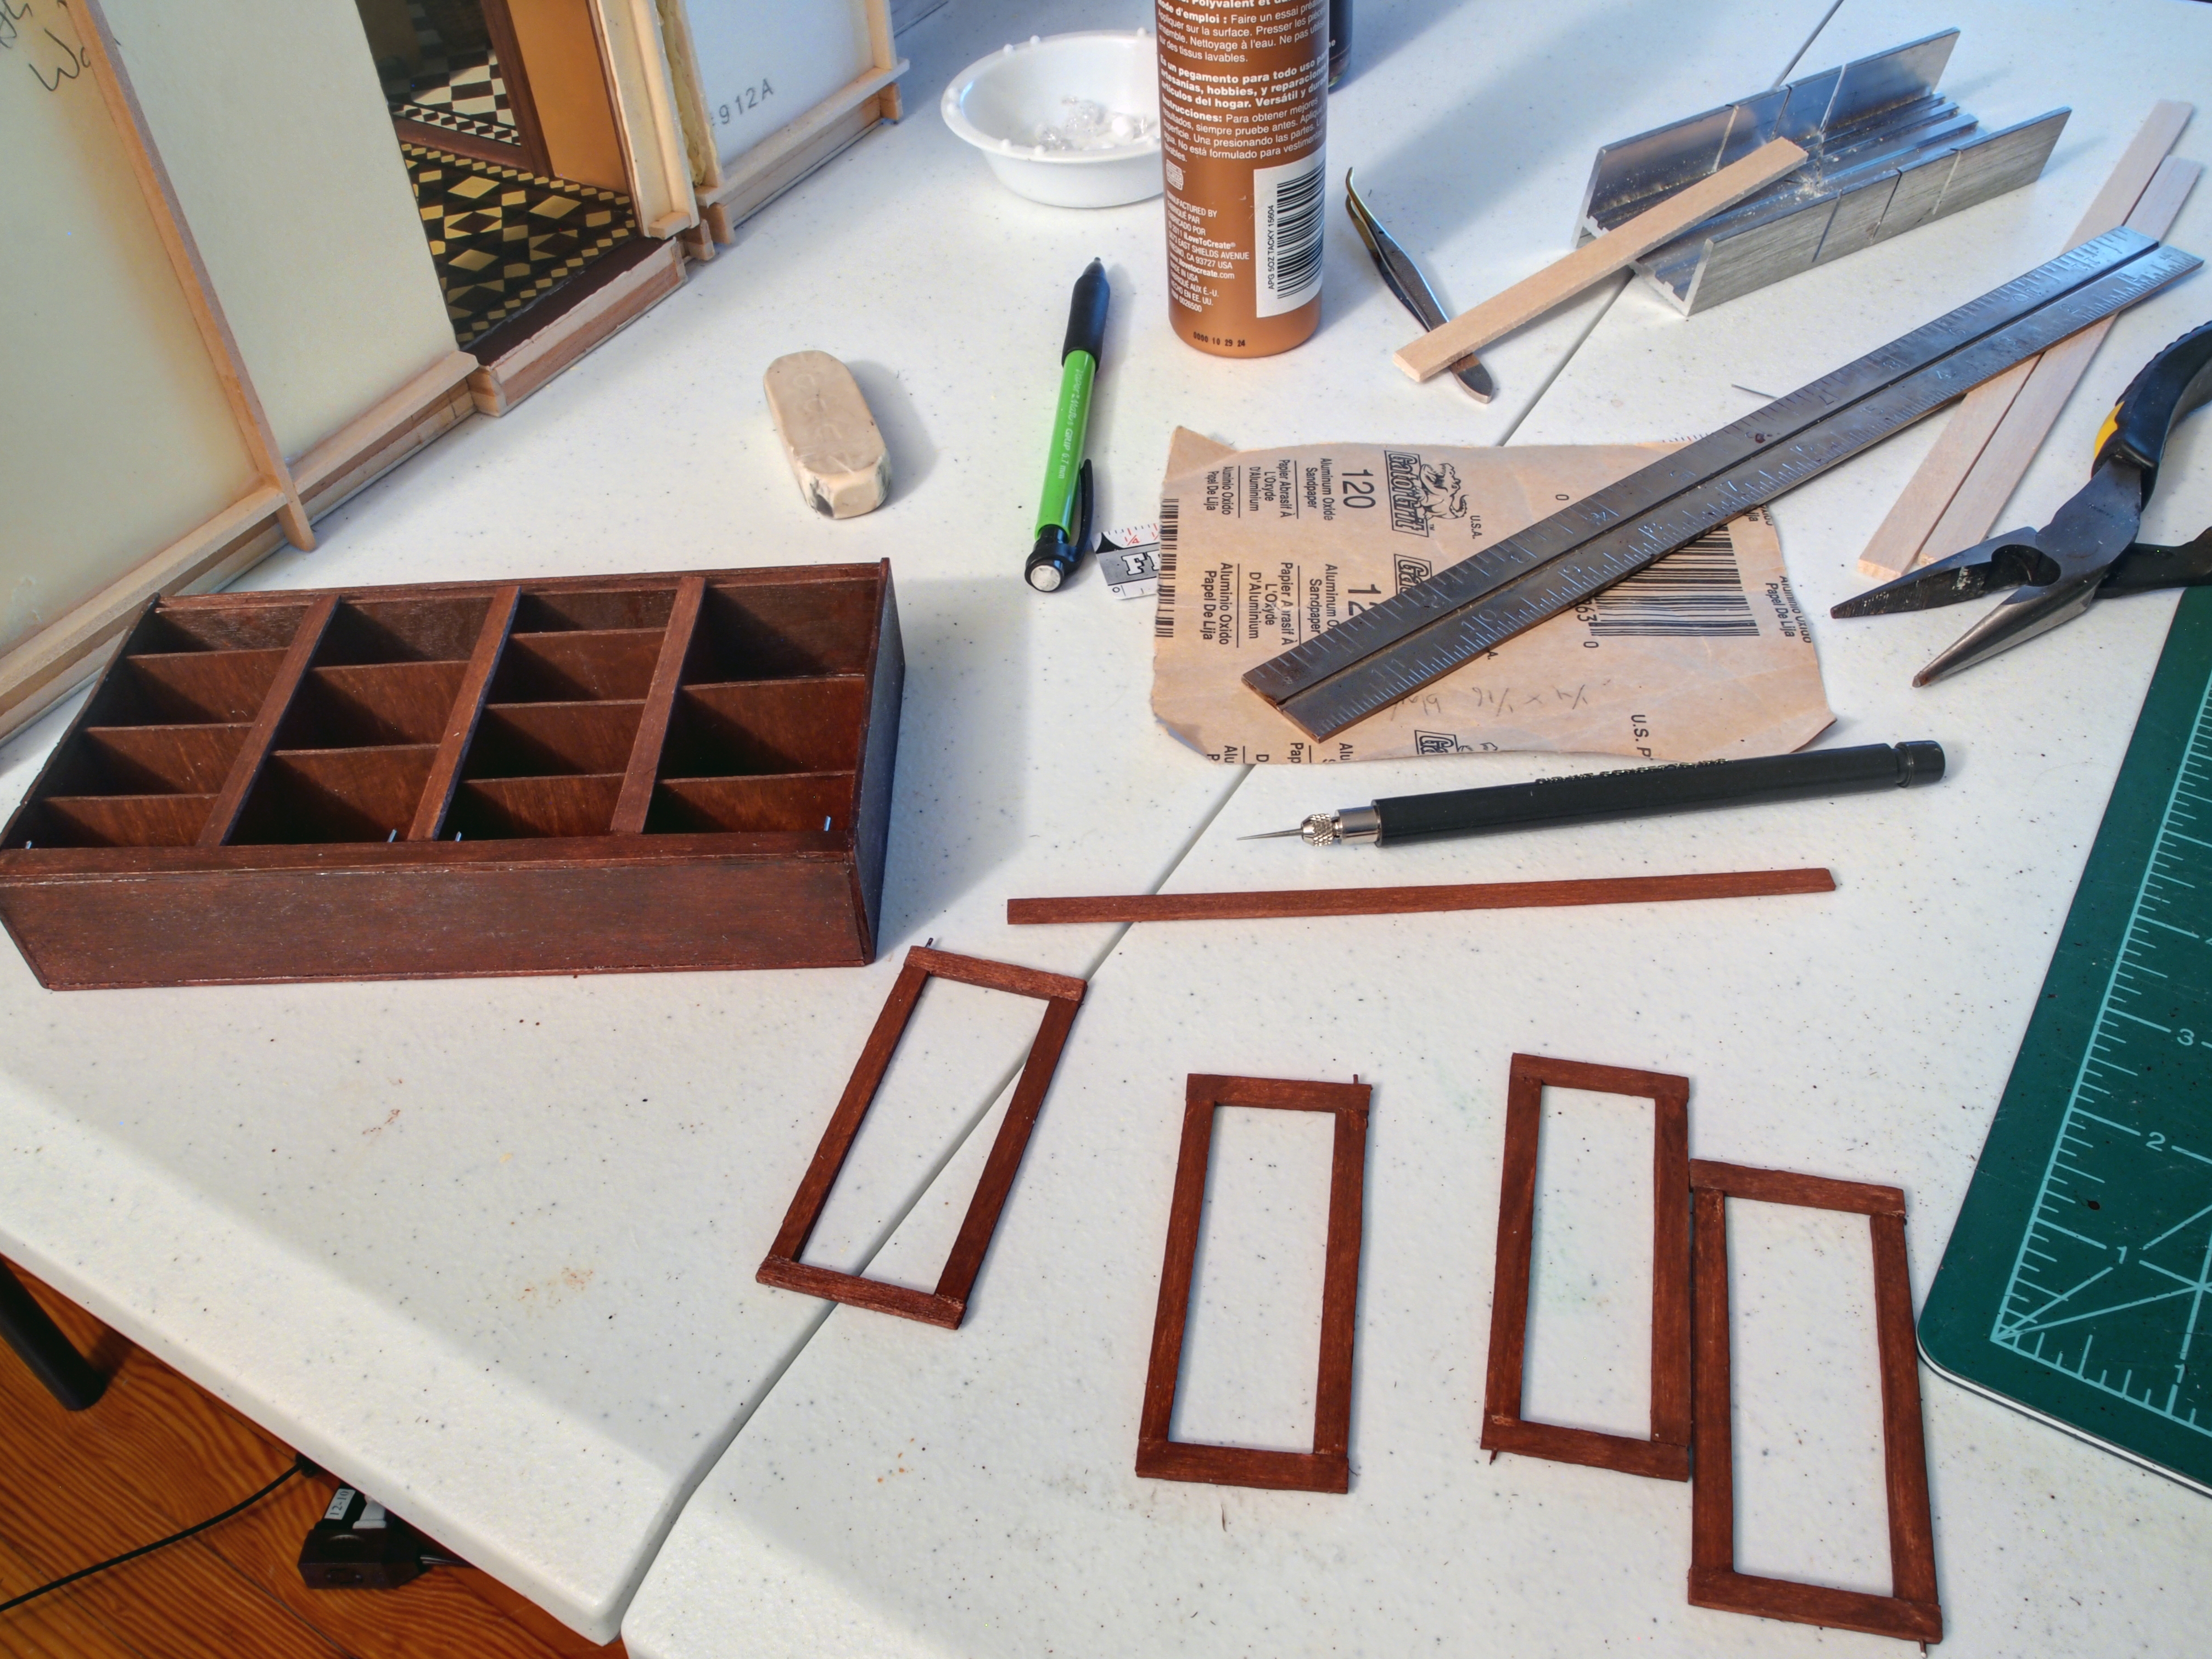
…attached them by their hinges and added knobs…

OLYMPUS DIGITAL CAMERA

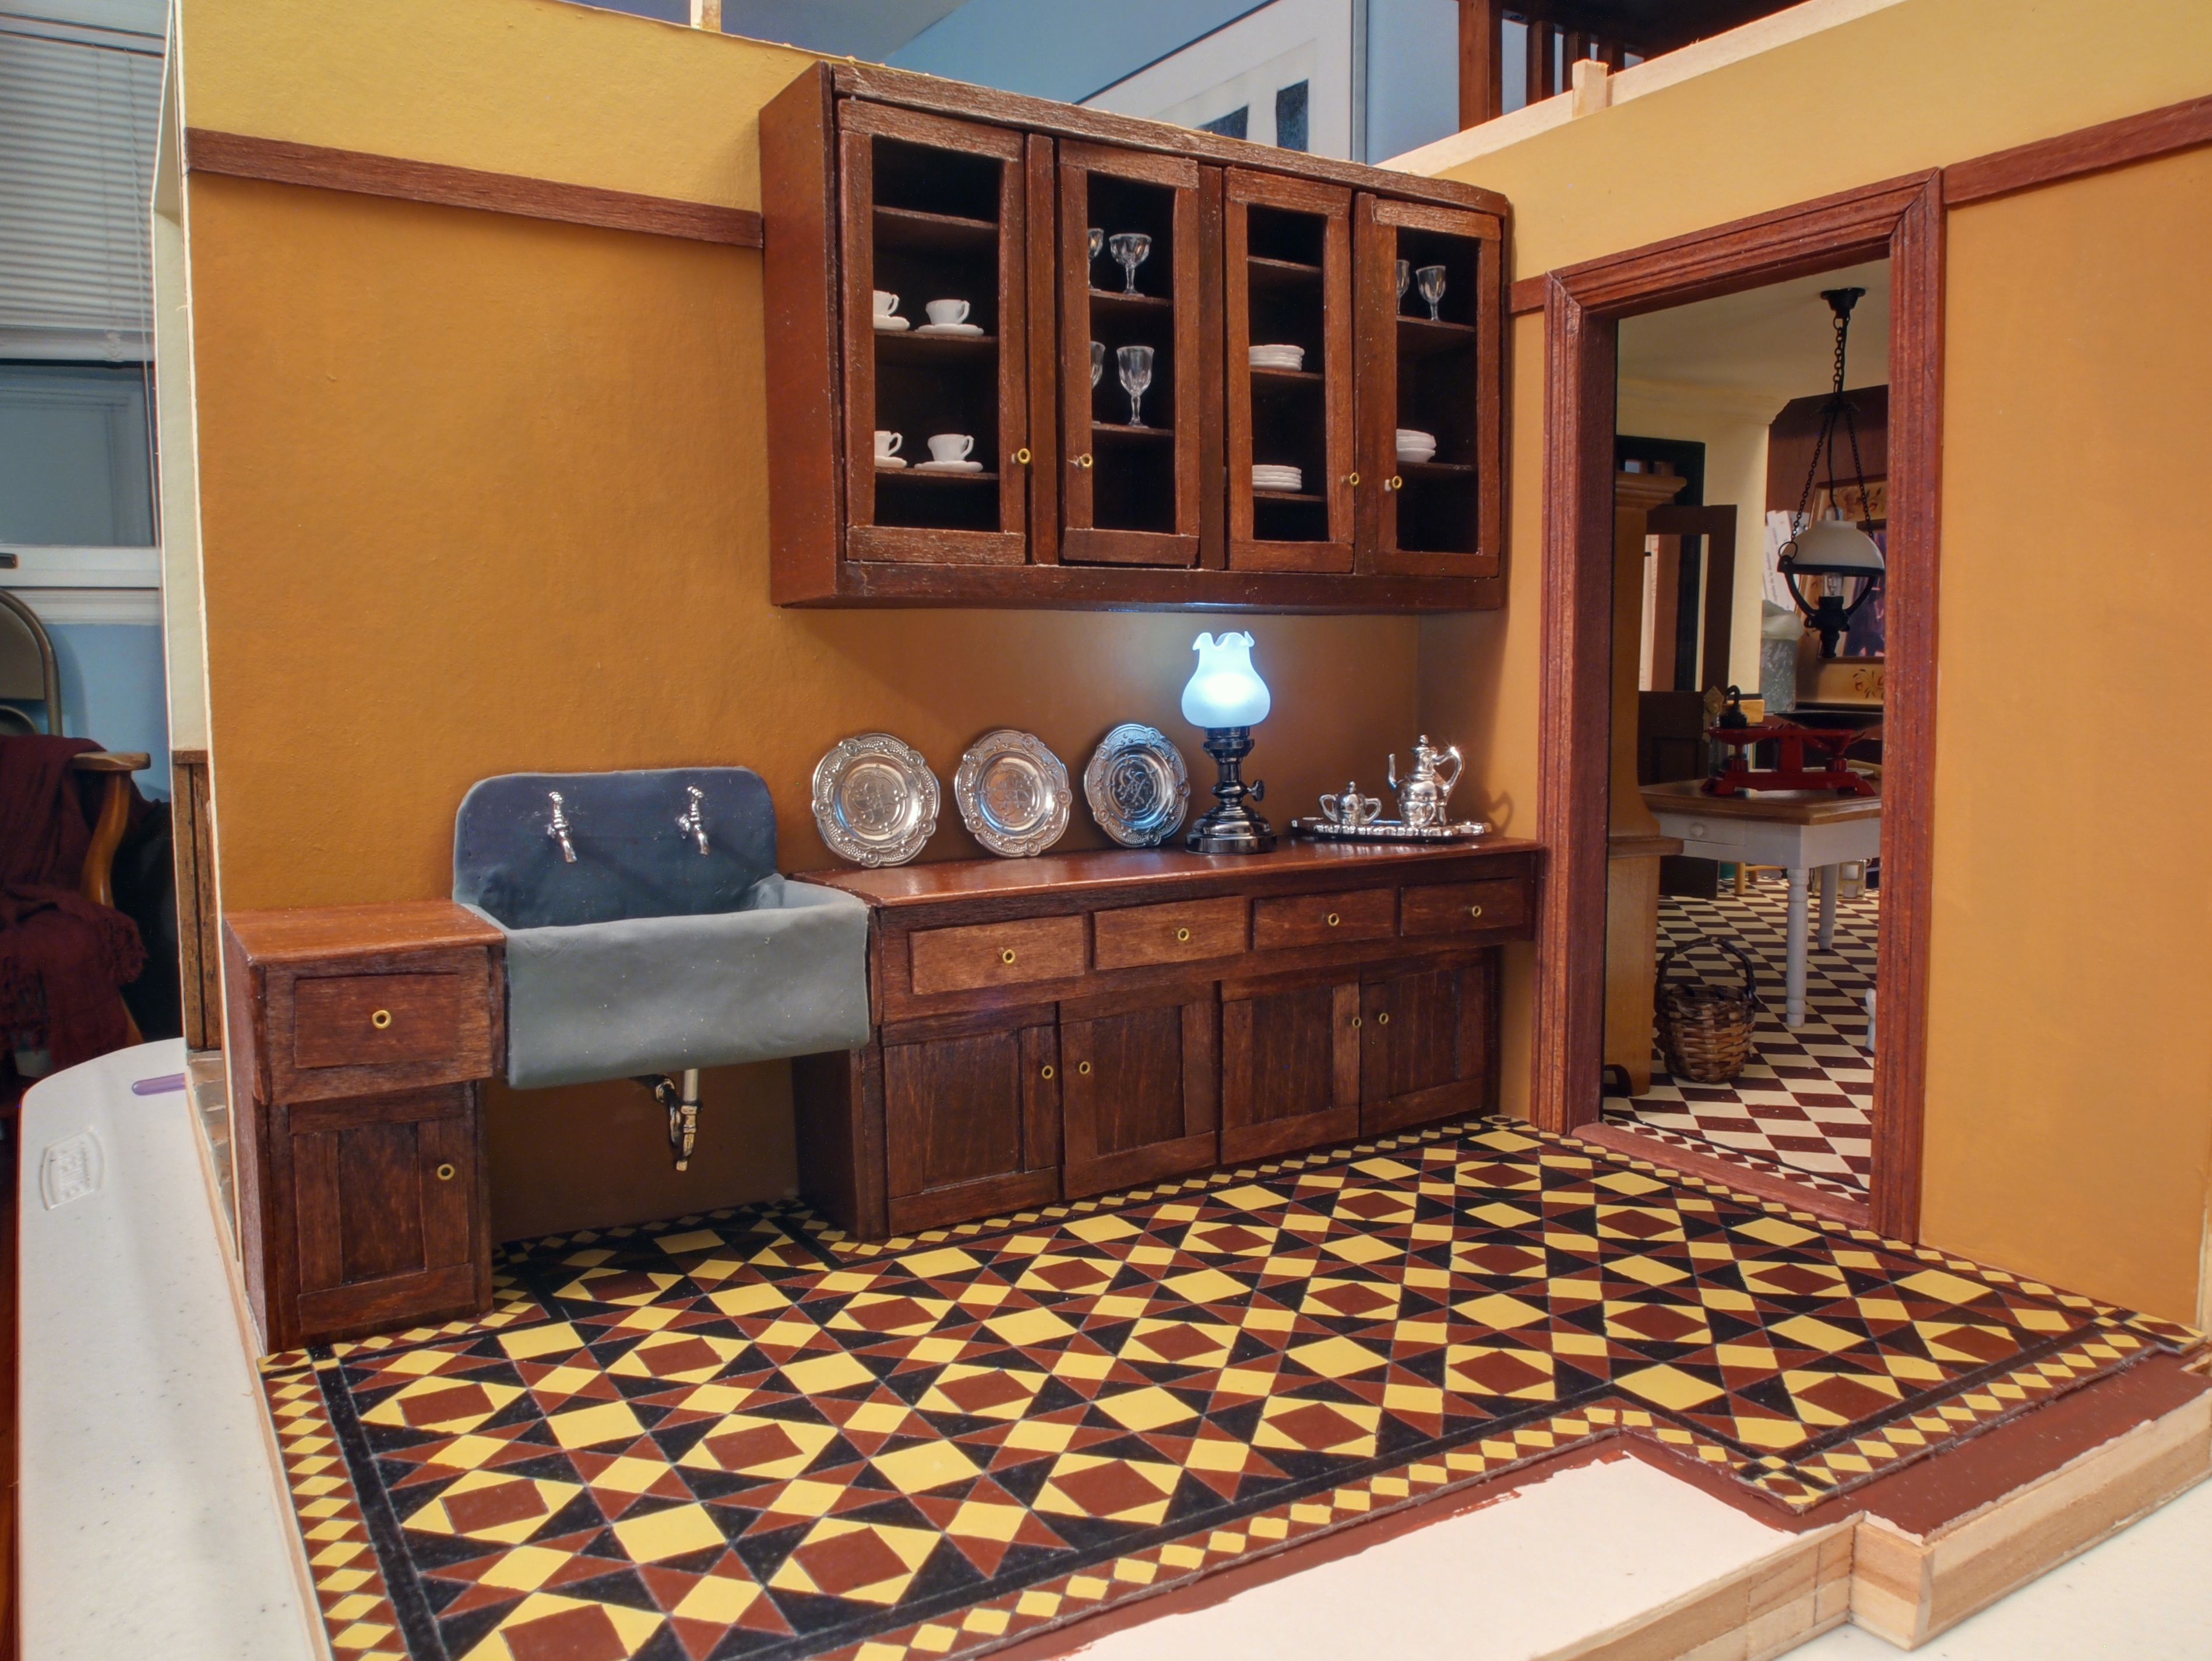
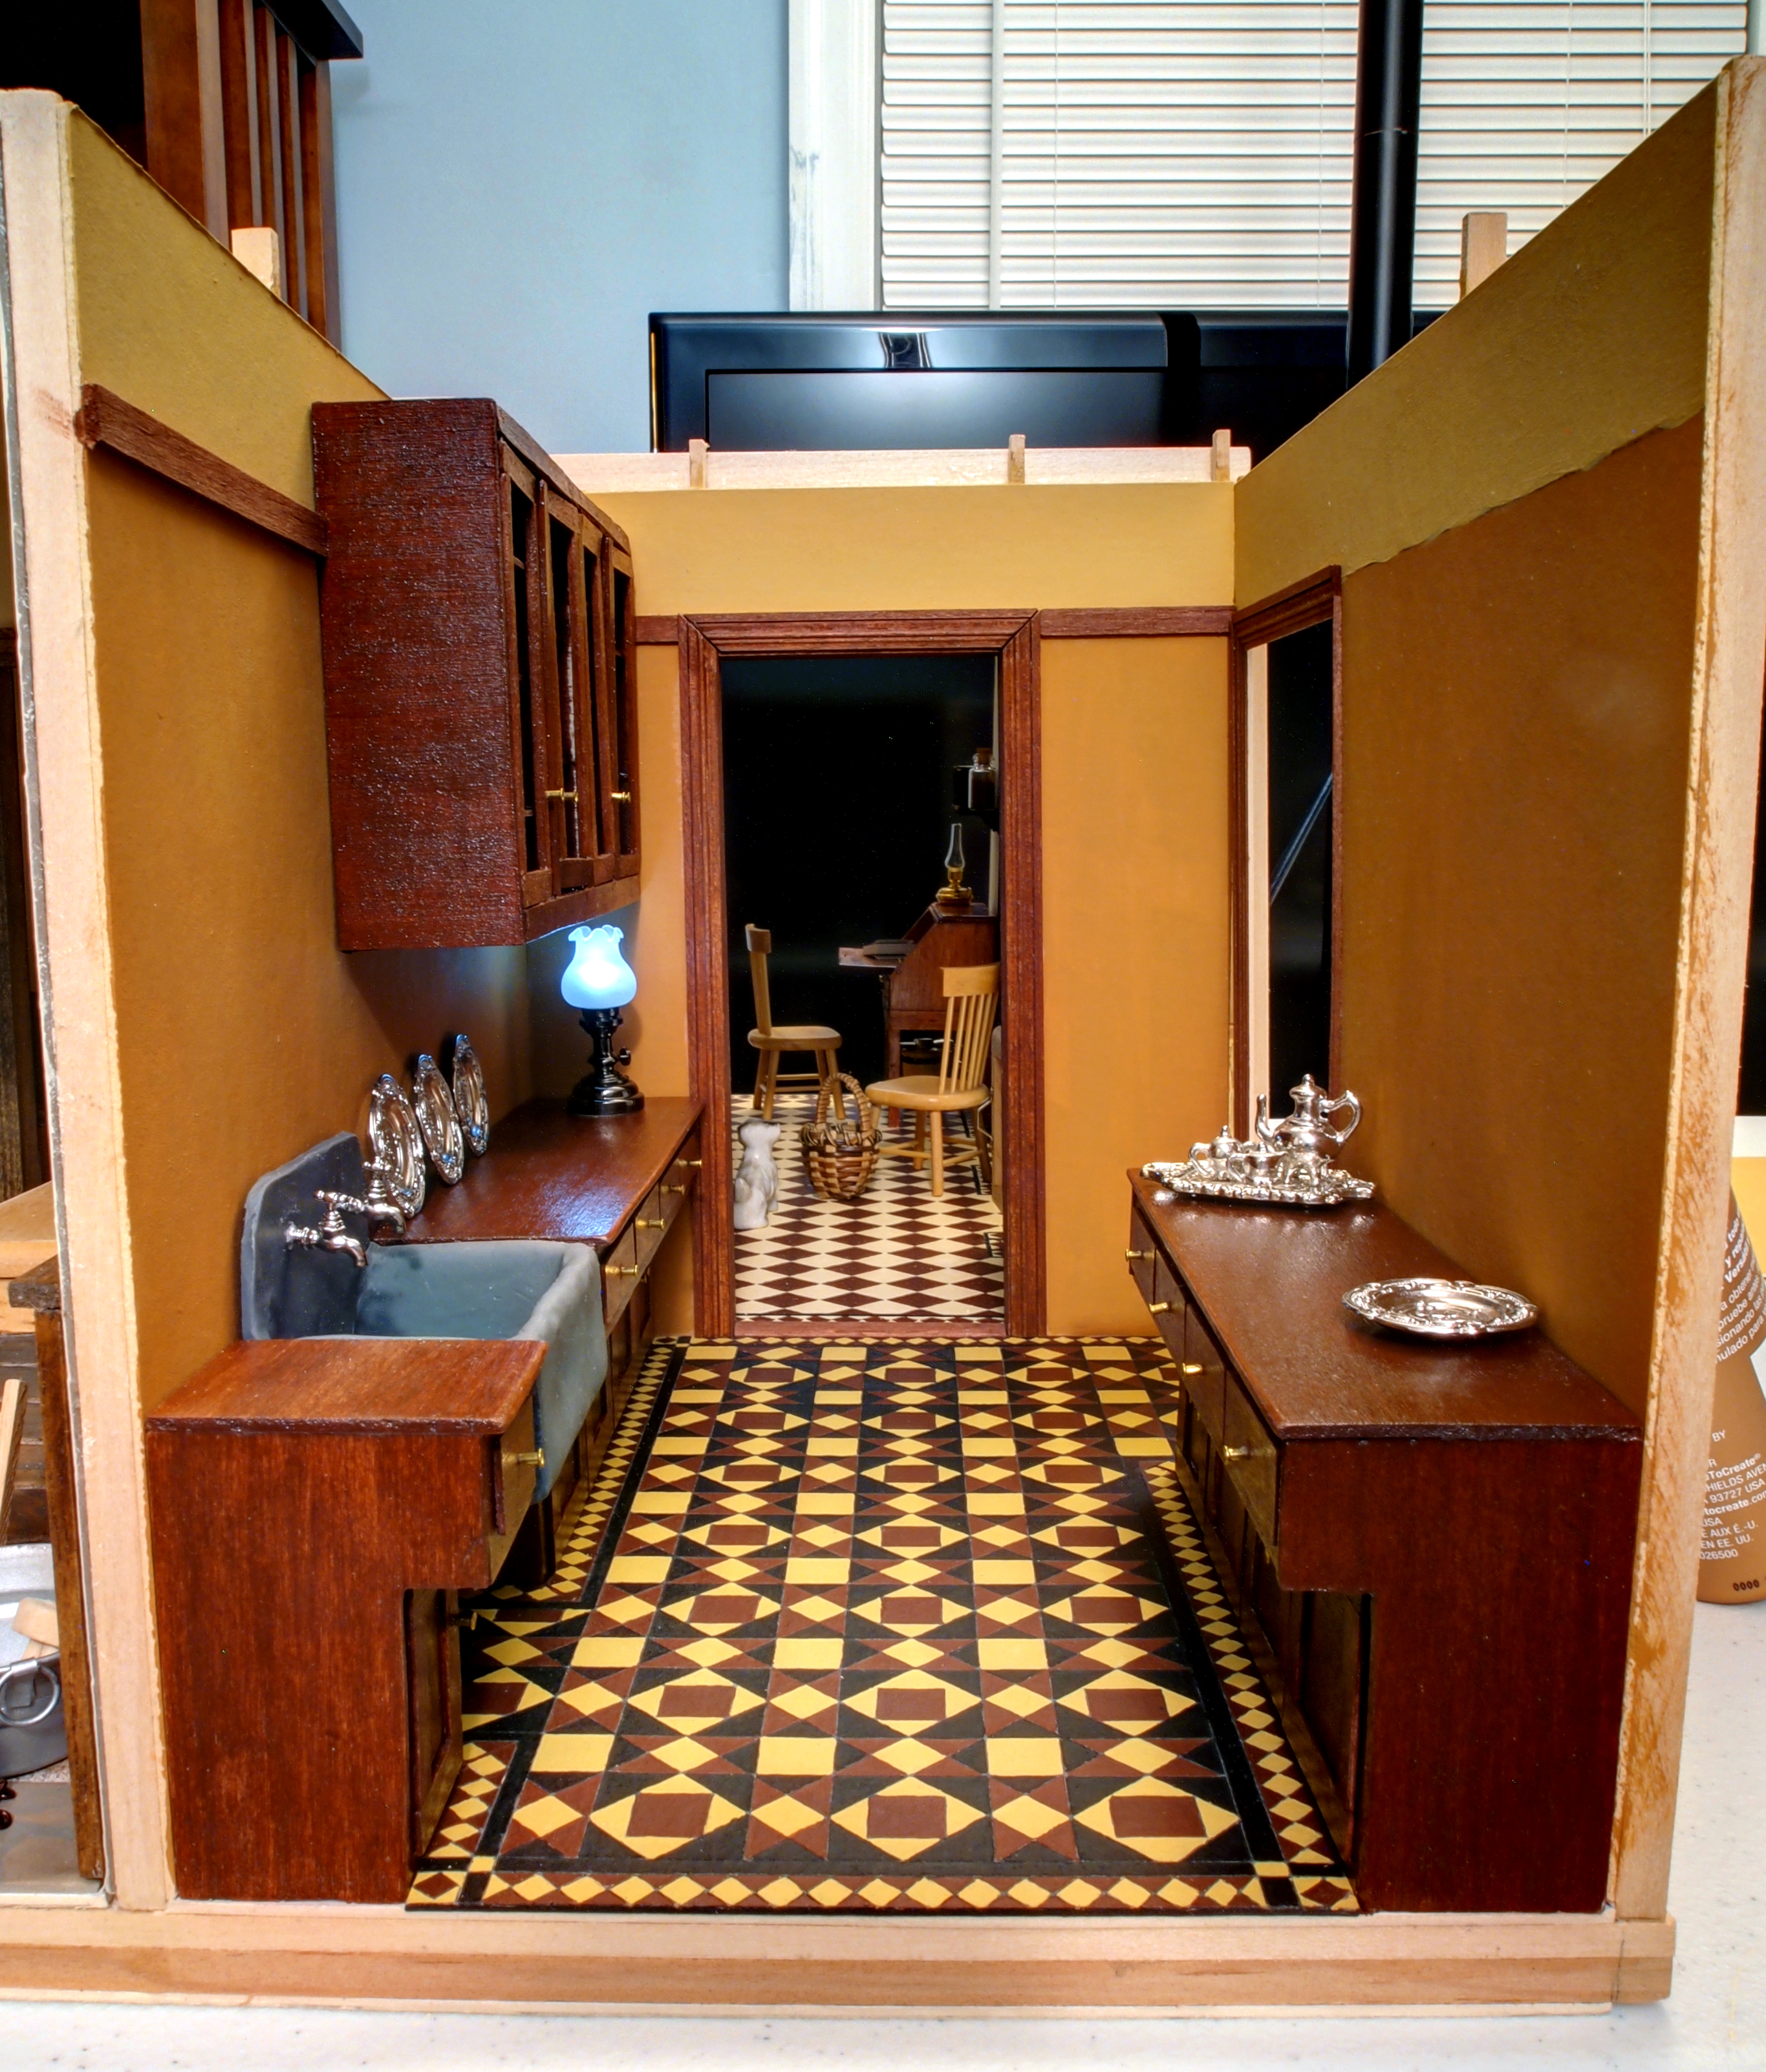
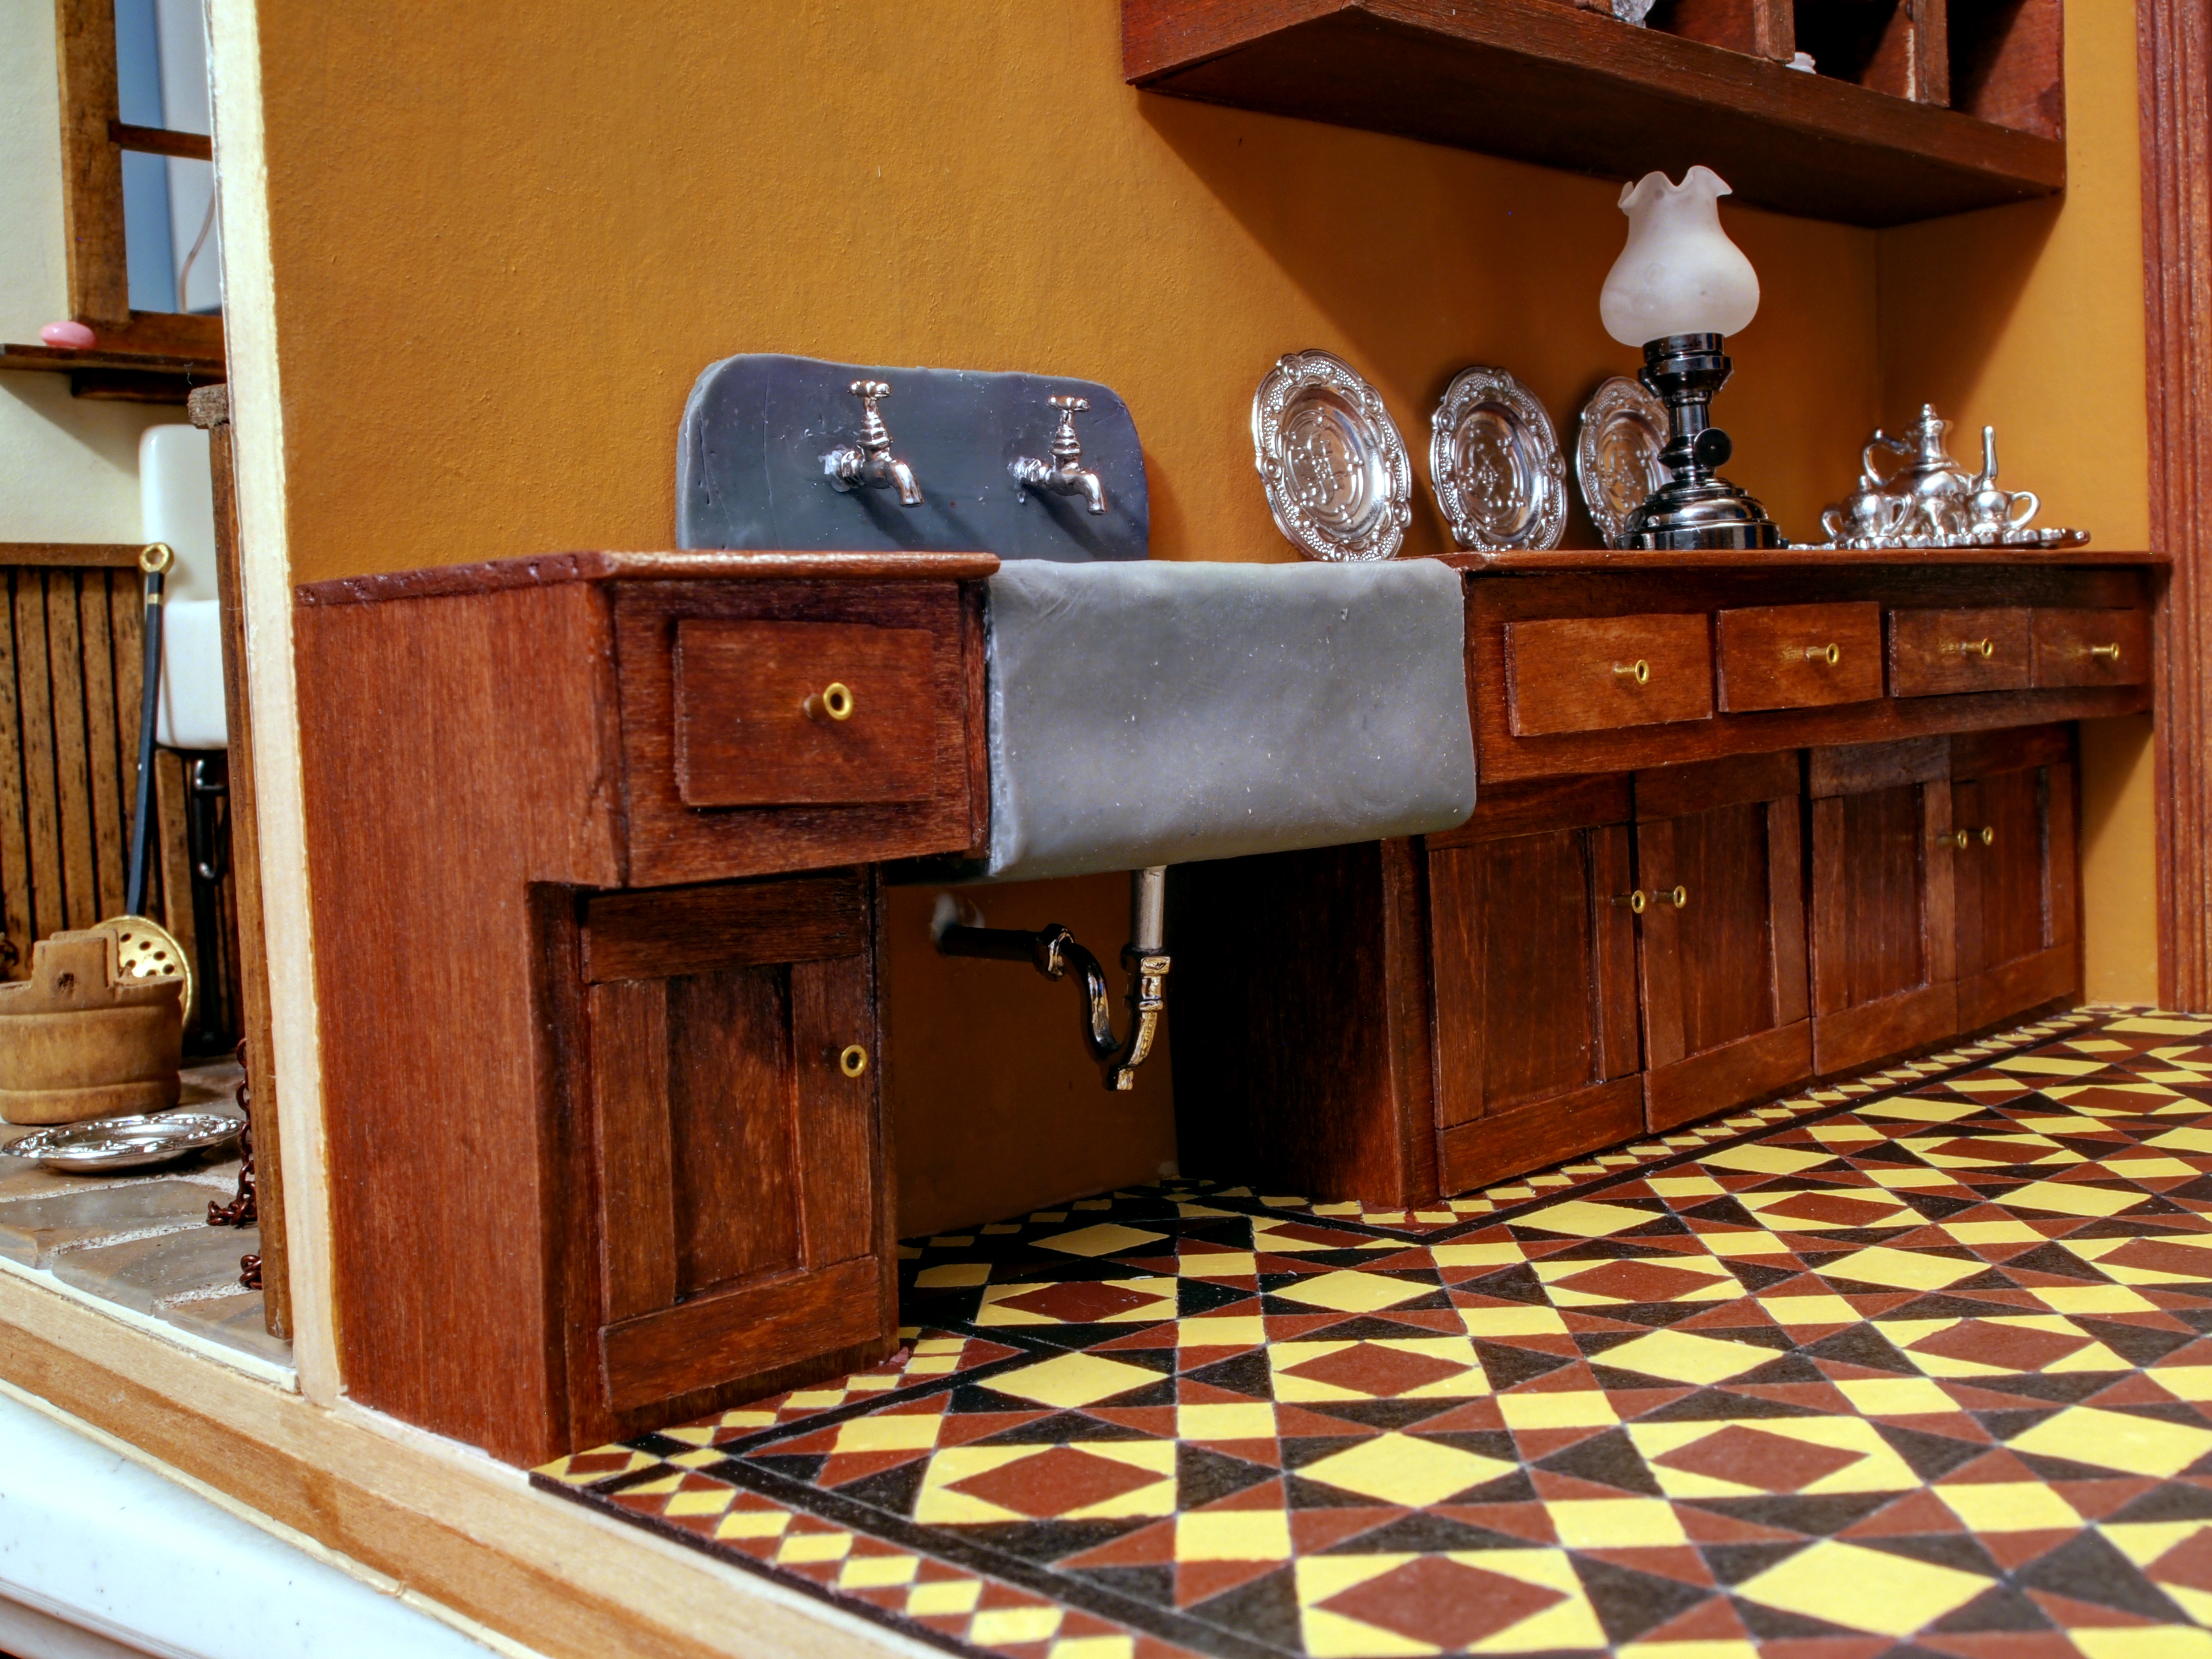
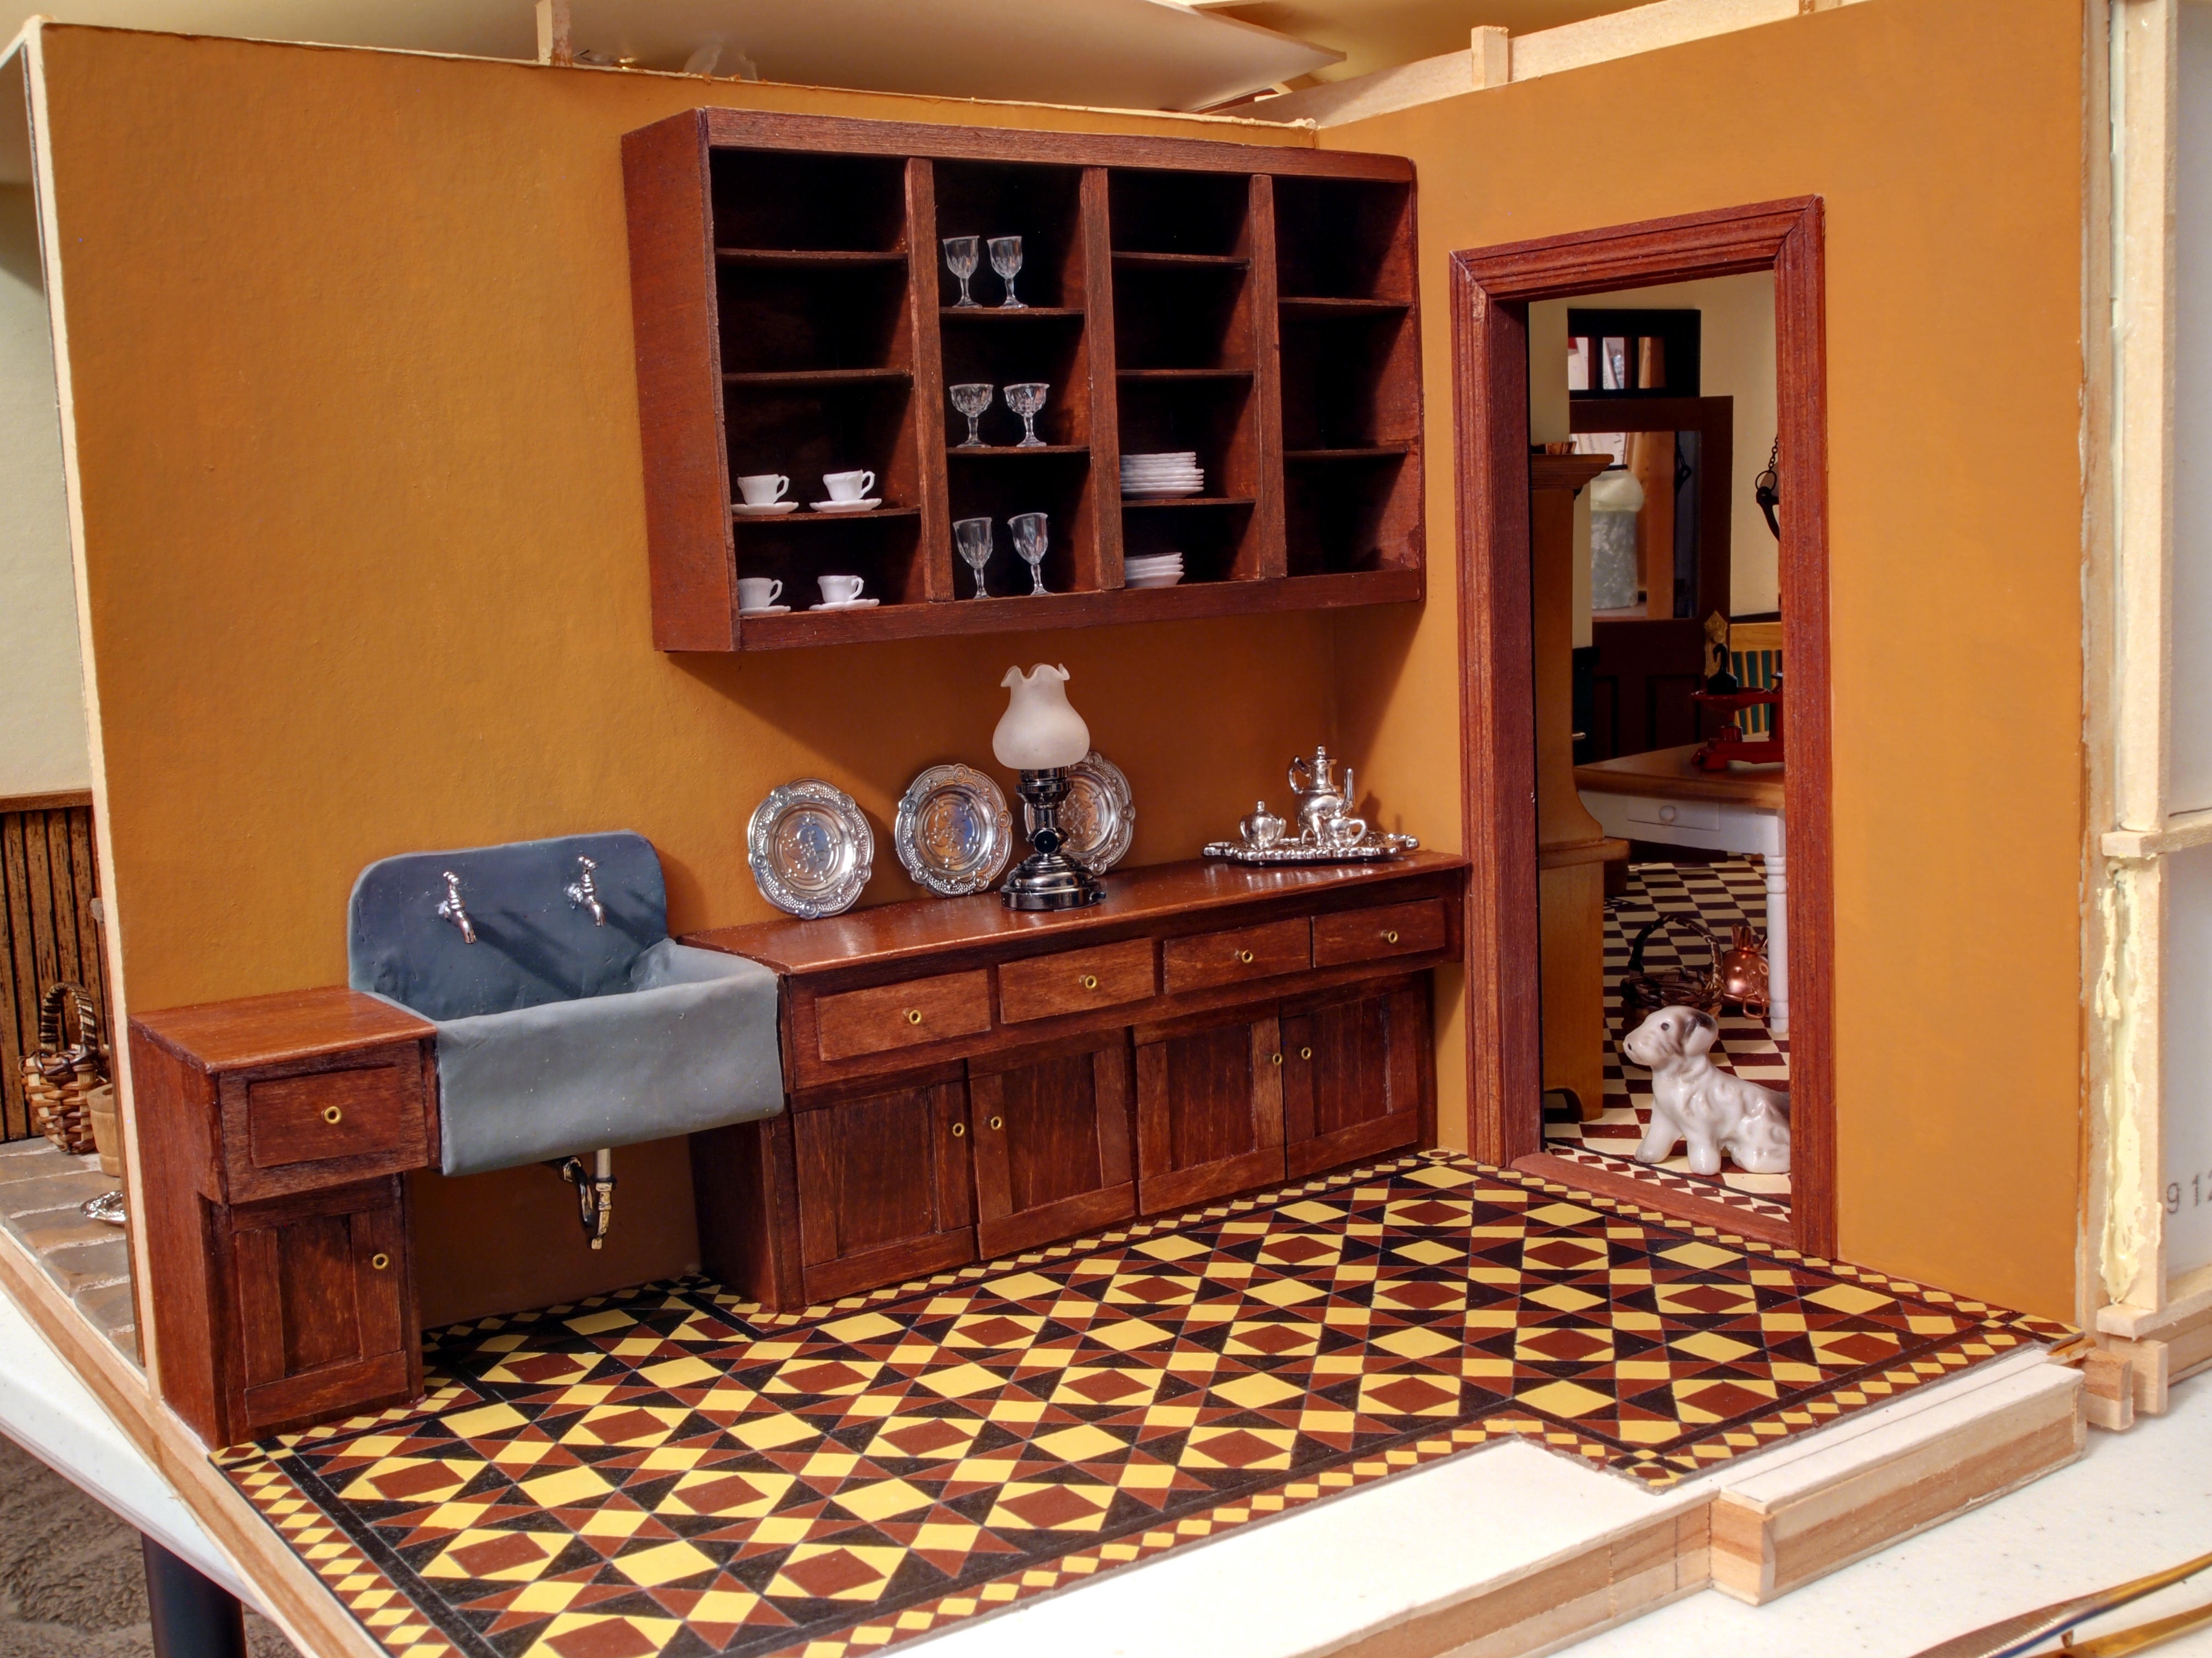
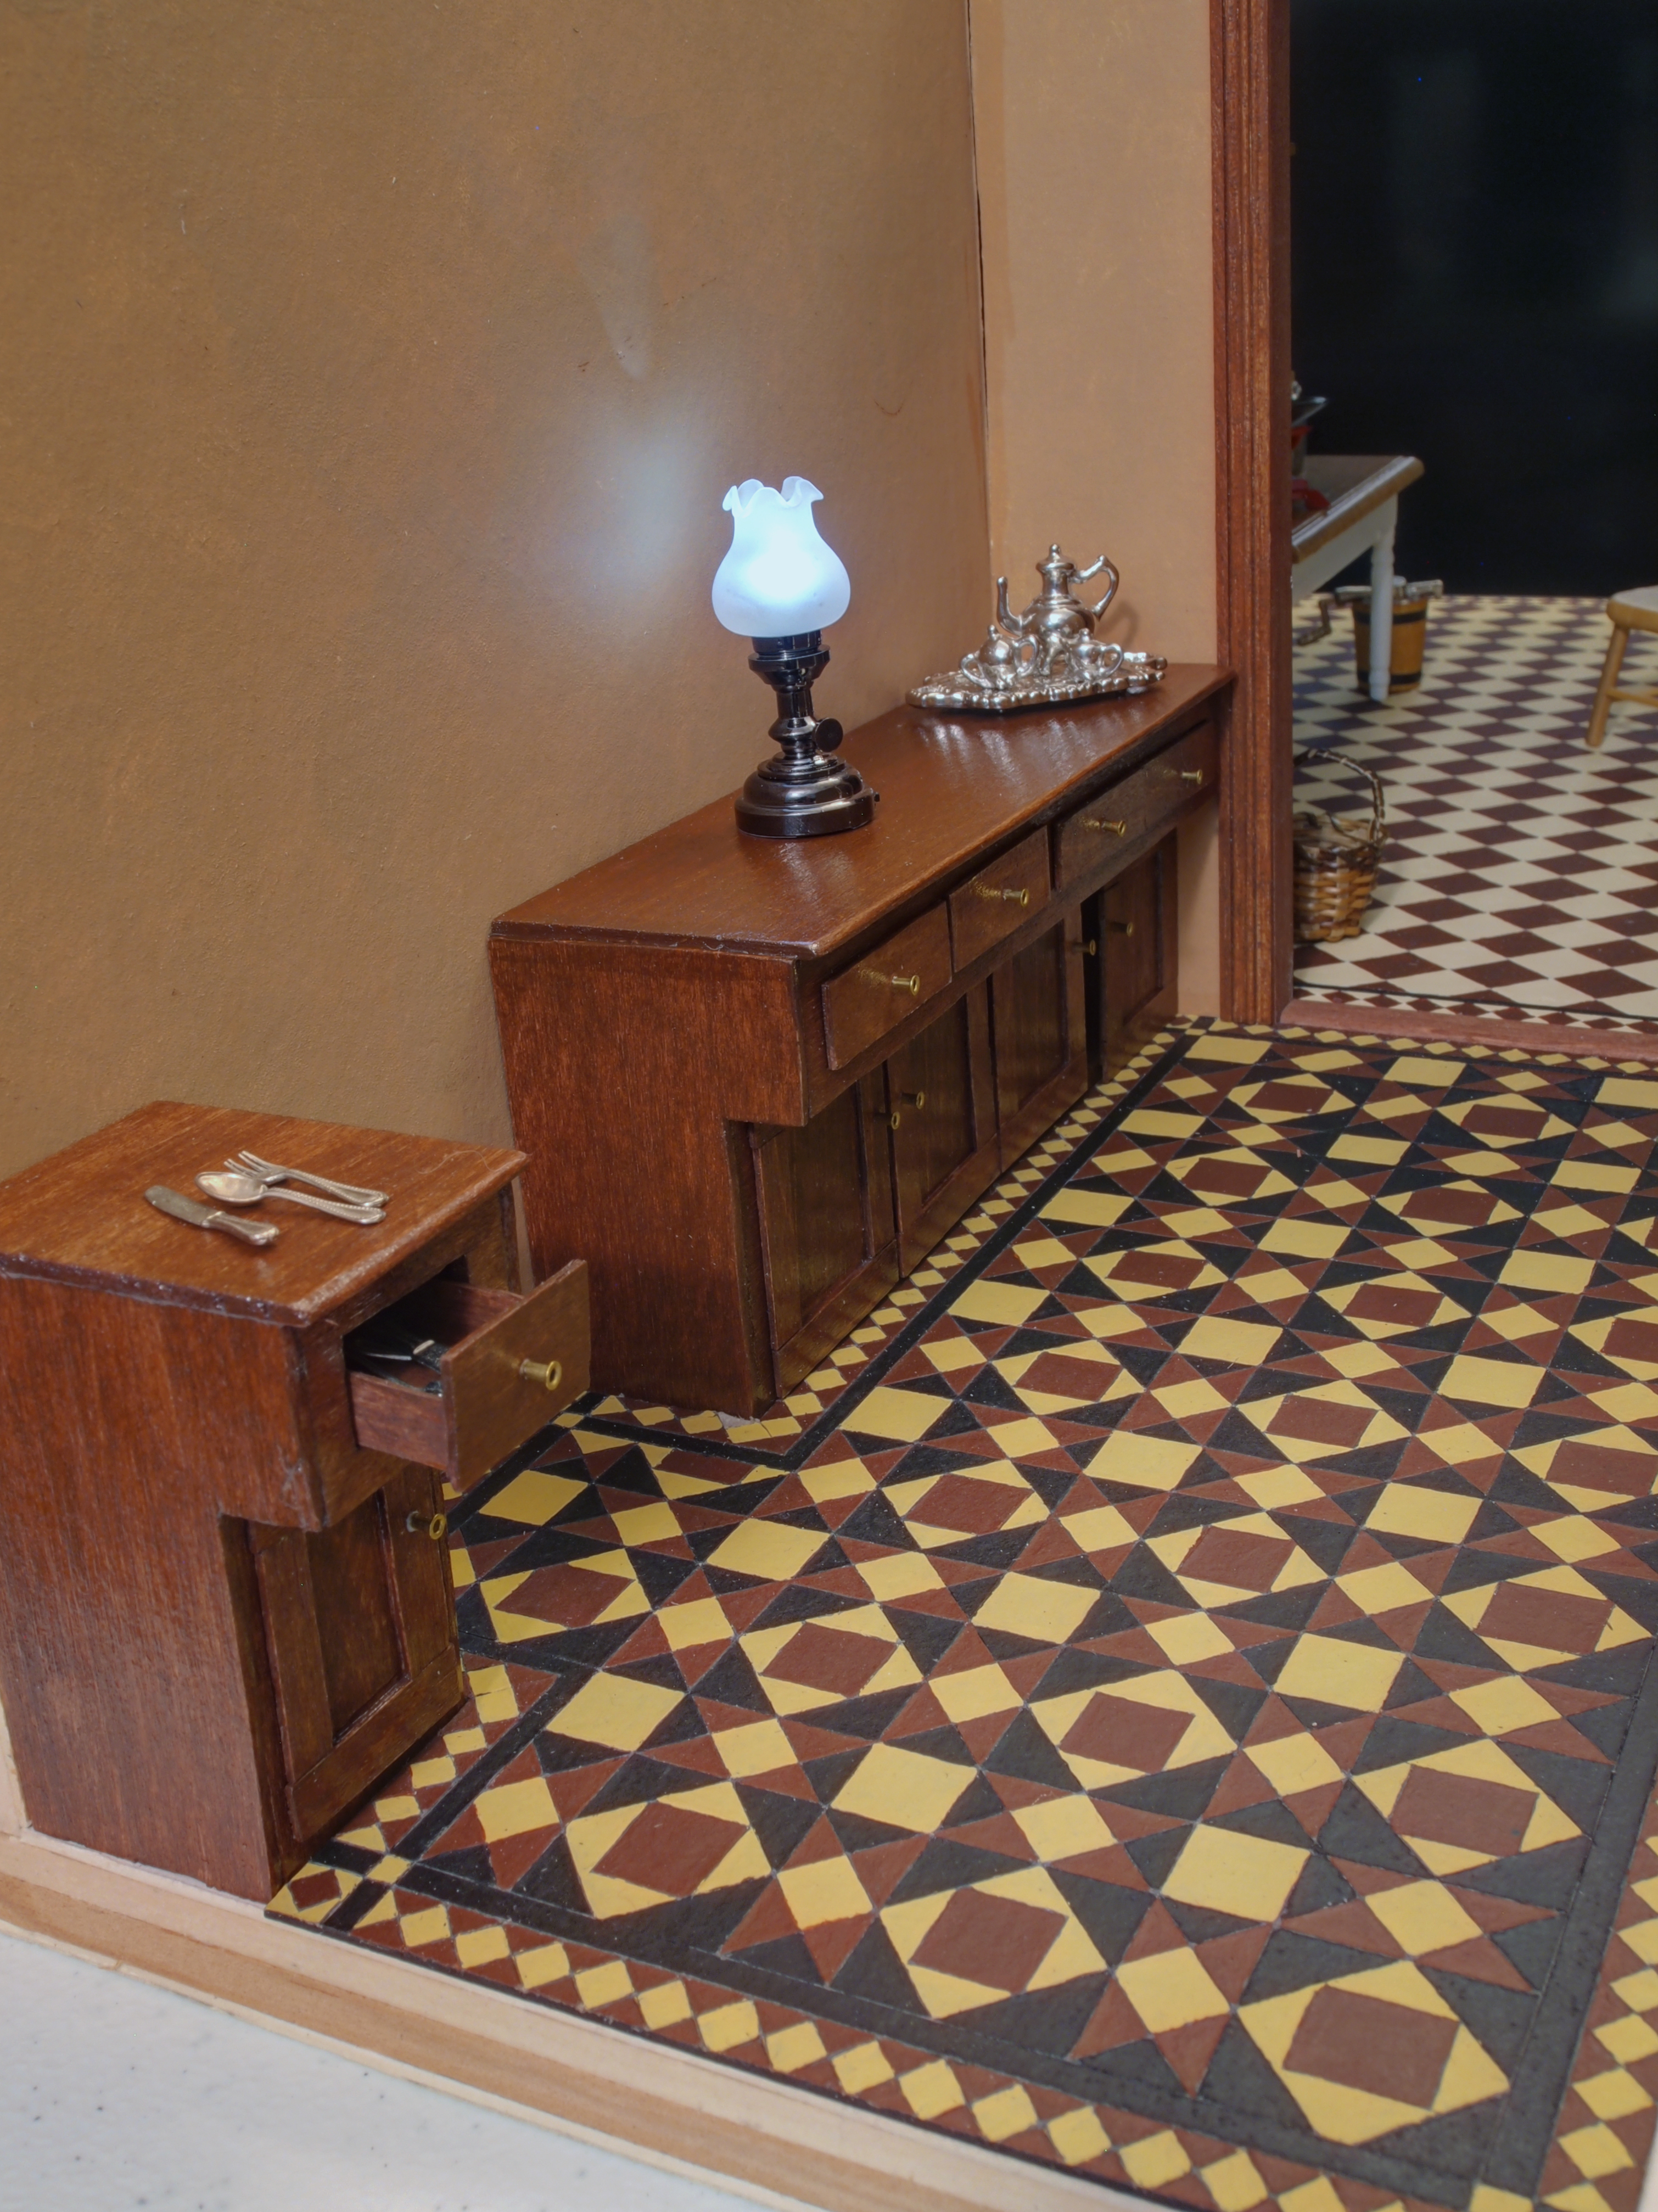
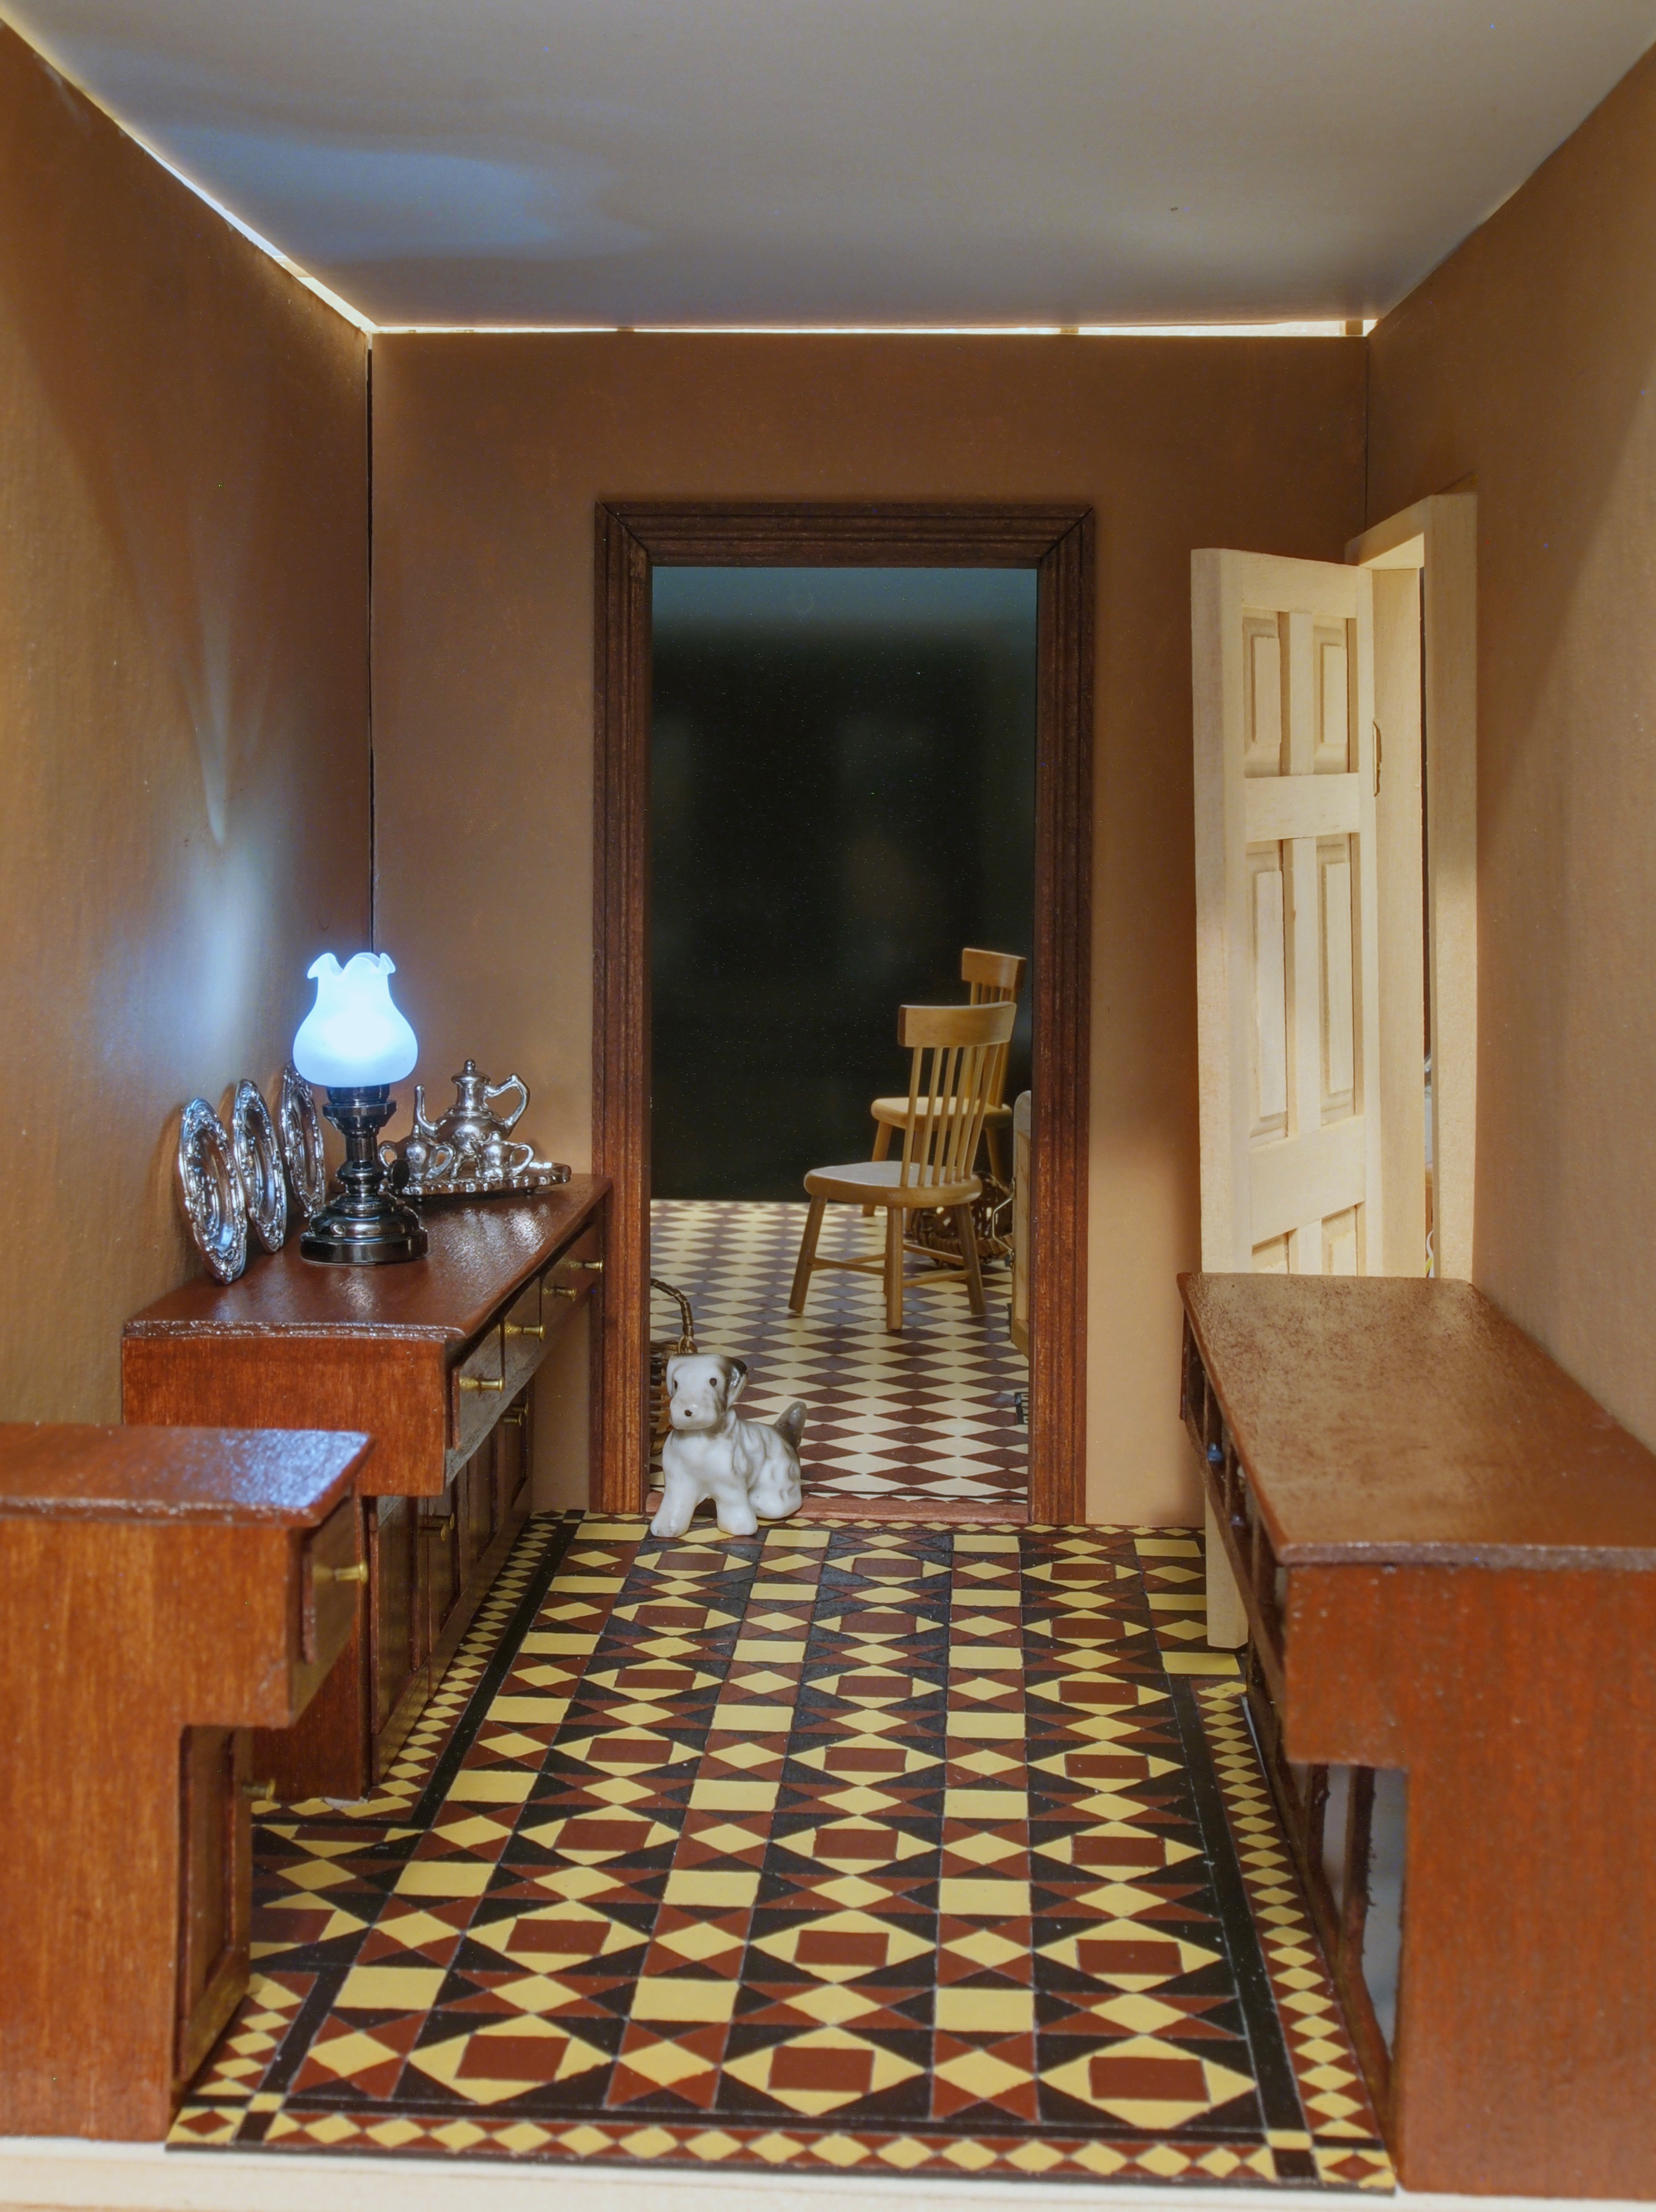
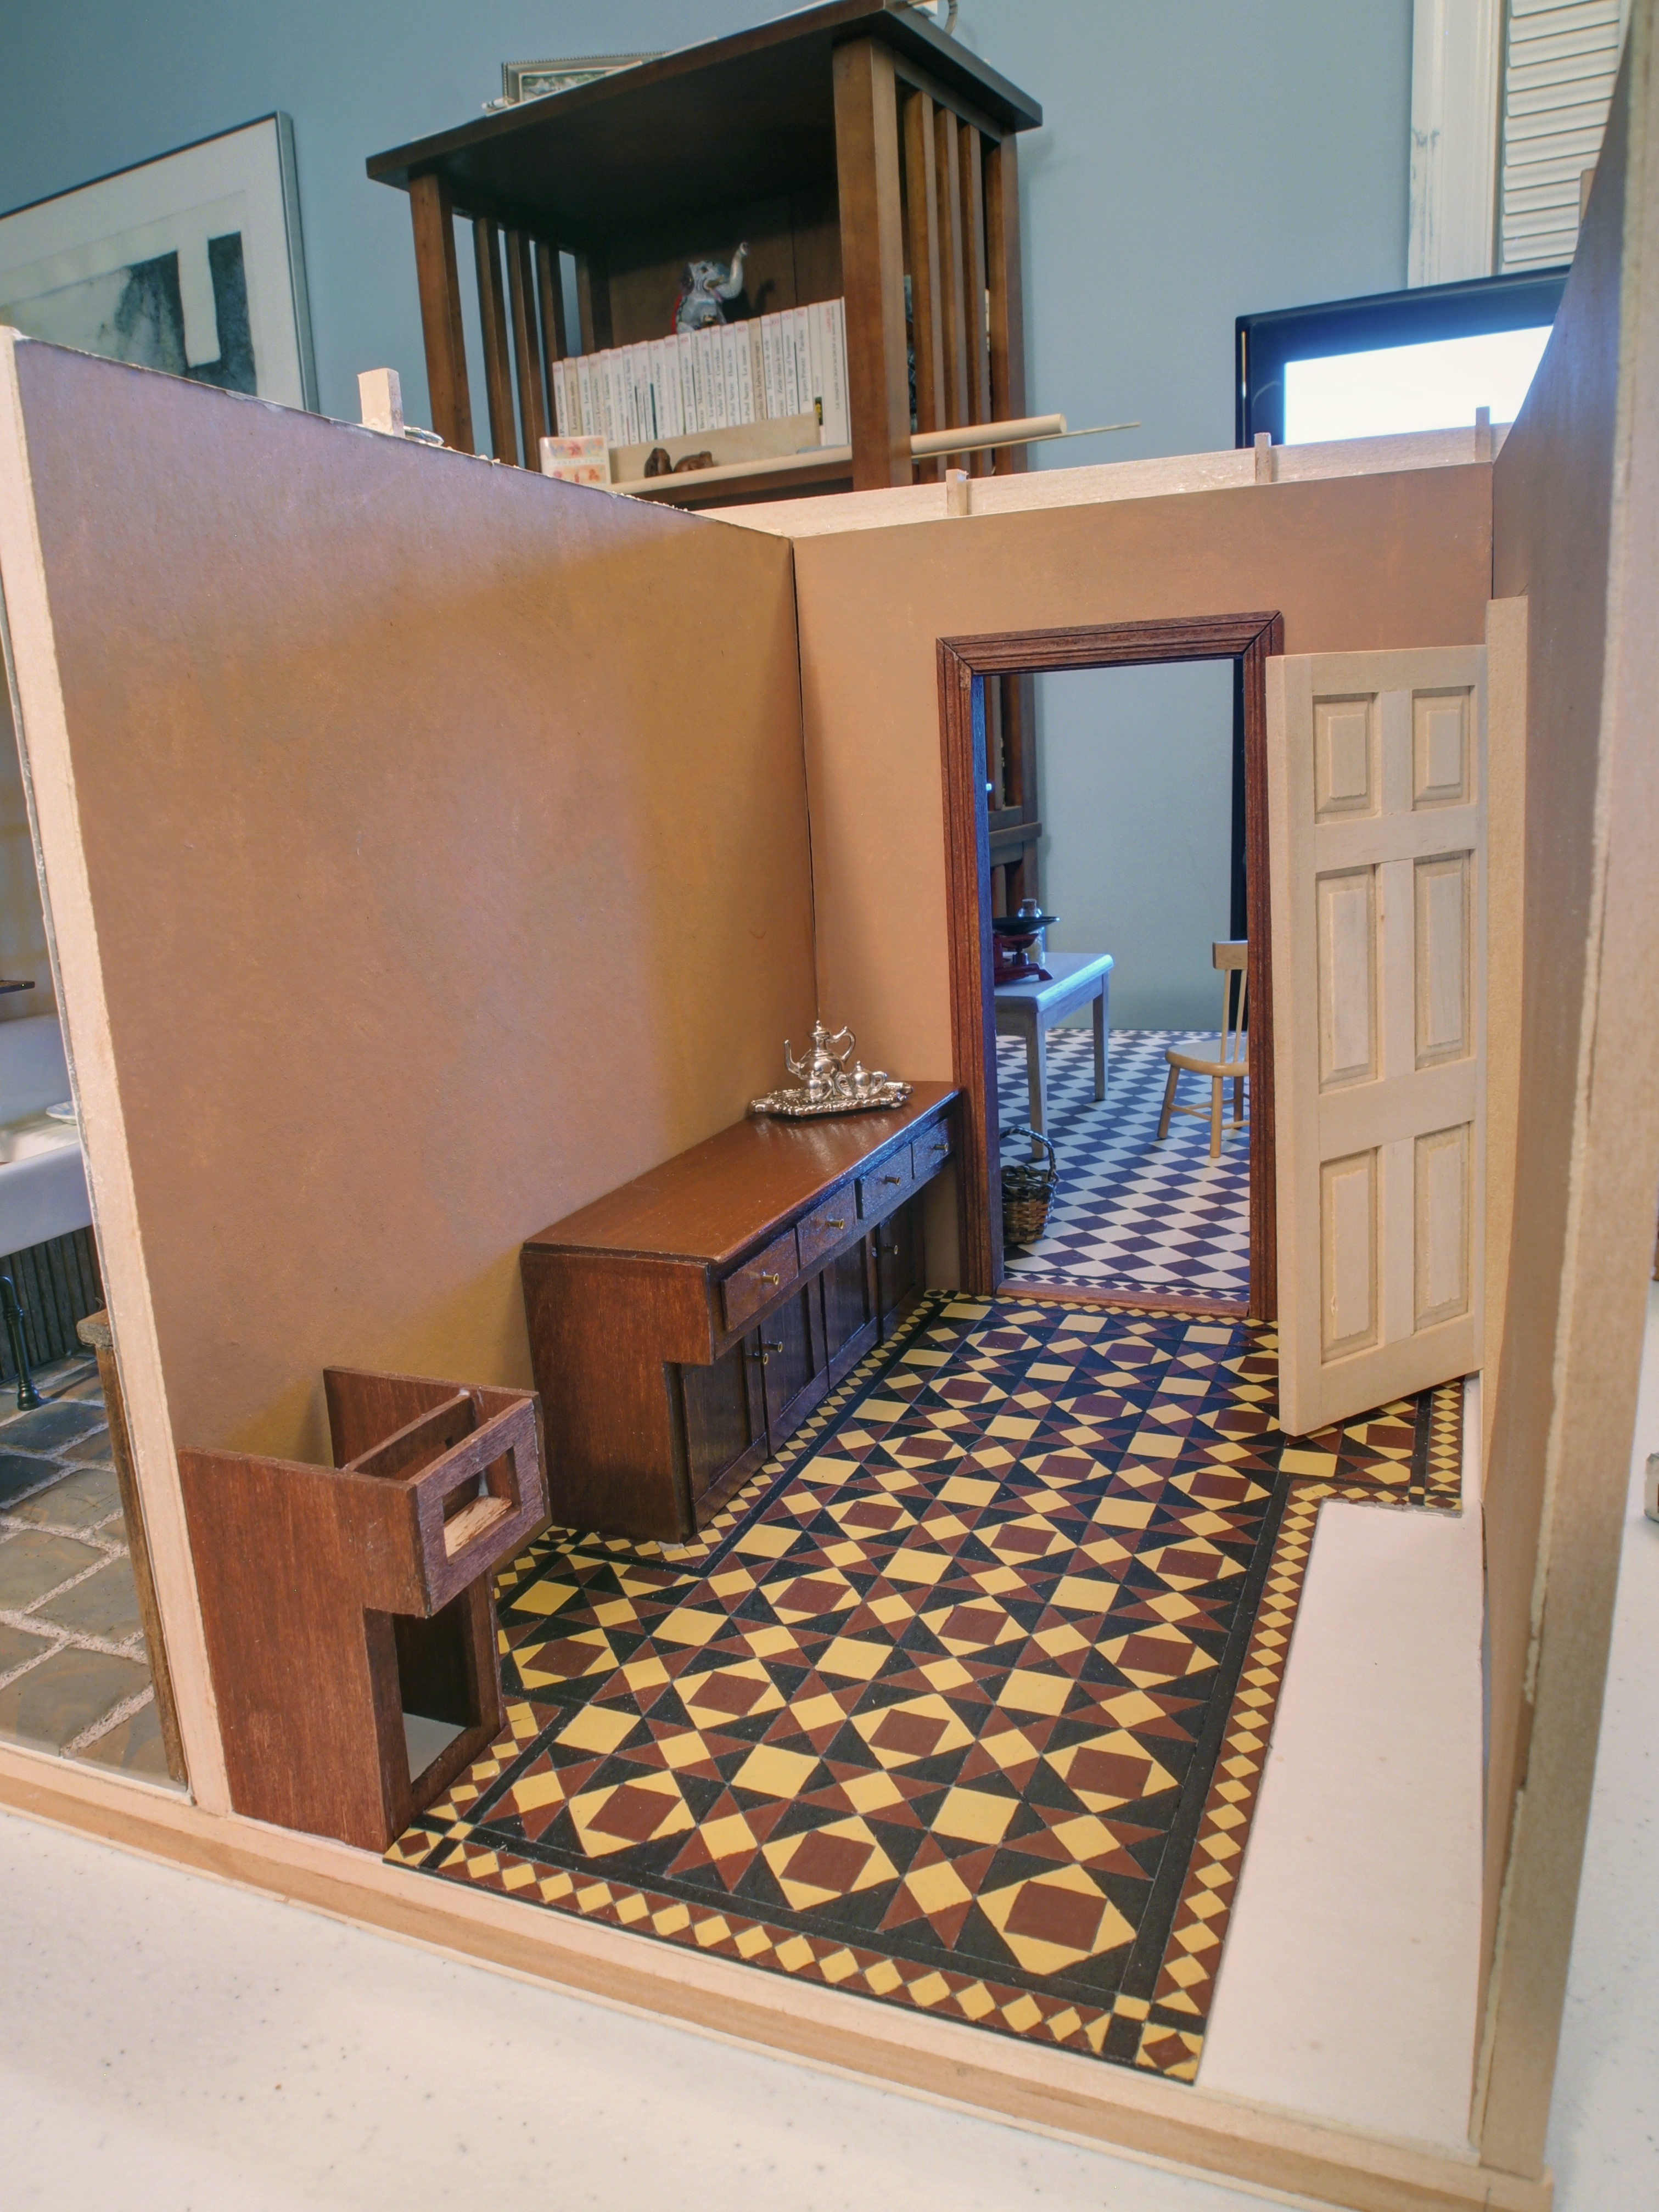
…glued the cabinets in place and loaded them with glasses and teacups…

OLYMPUS DIGITAL CAMERA

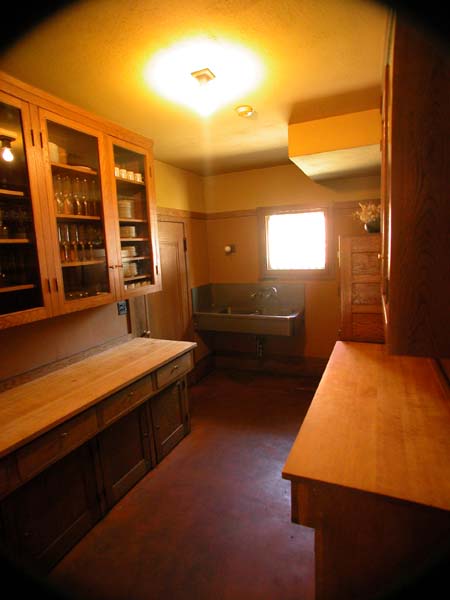
..and there you go. I will need to collect plenty more things to put on the shelves and counters, but for now…the butler’s pantry is finished.  (Three rooms down, nineteen to go…)

———————————–

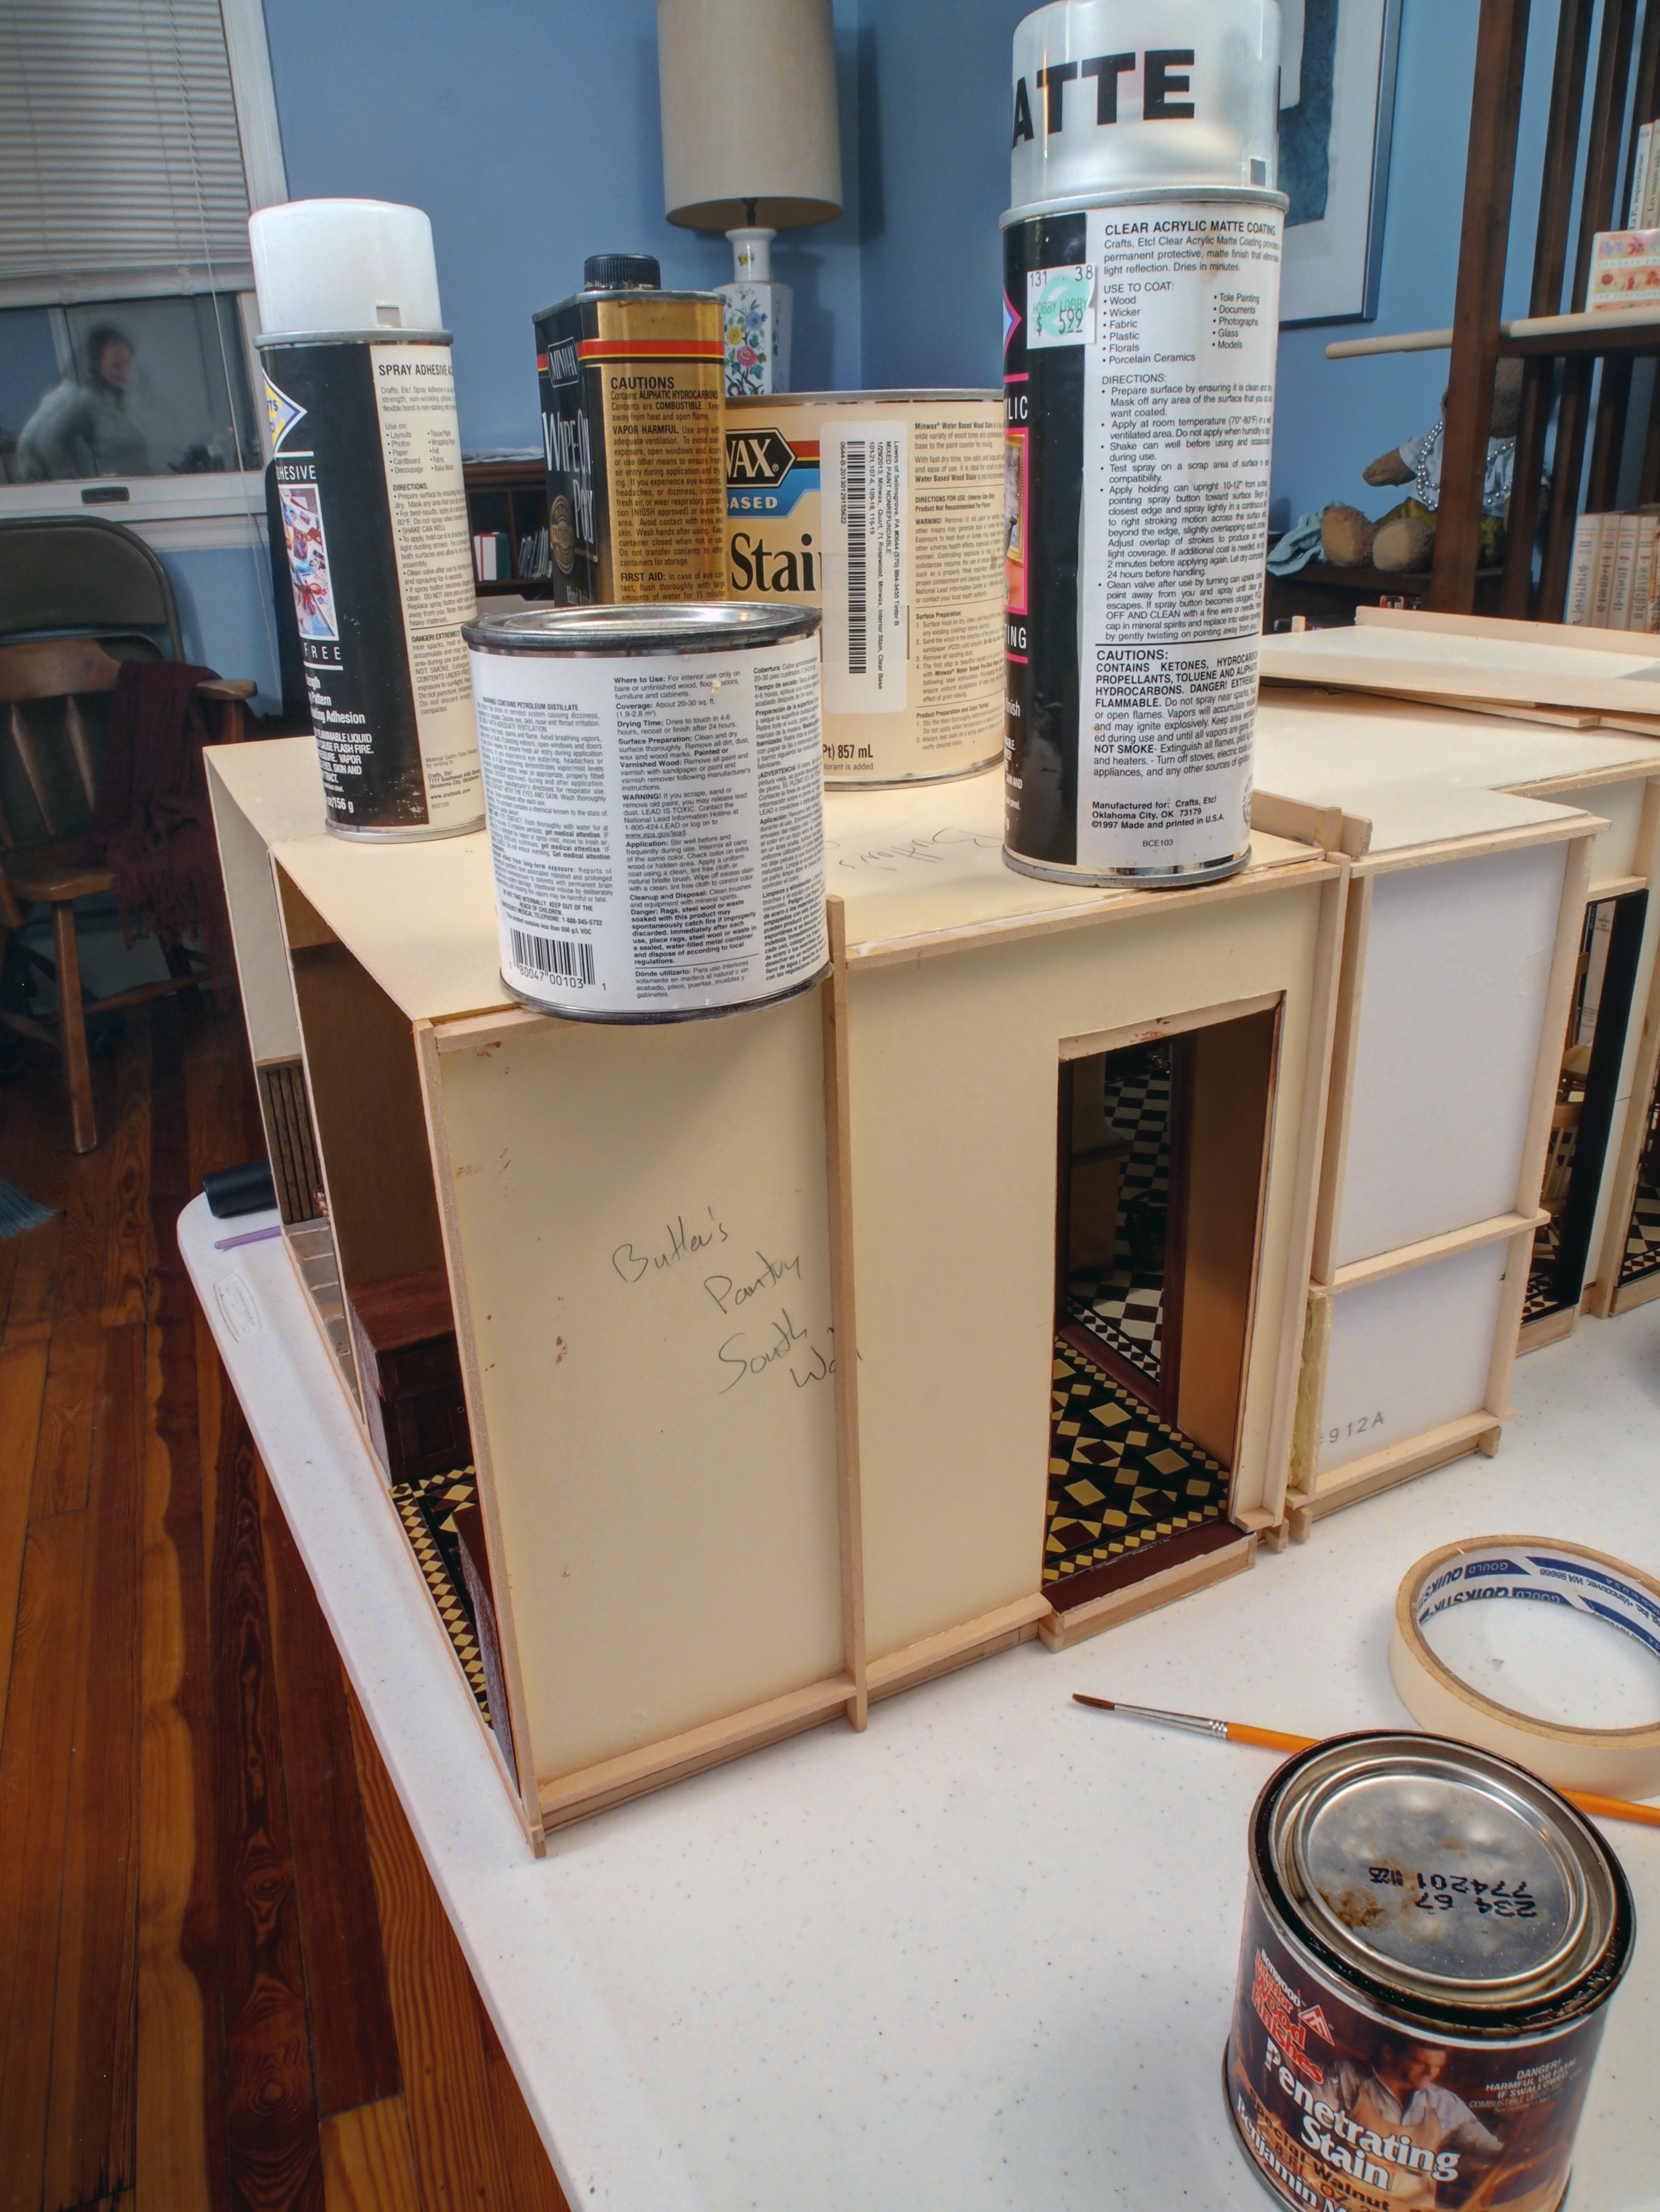
Then I turned my attention to the second floor.  Four years ago I had used some sort of design program to make a detailed plan of the house, with all the measurements worked out. Since the only version I had left was a printed one and the ink from that was sadly fading, I thought it would be safer to create an electronic copy again.

So I downloaded Sketchup and was about to enter in the dimensions I already had, when I noticed…well, I noticed that I’m not quite sure what I was thinking four years ago, but the dimensions of the three rooms I had just finished had very little to do with those on the plans…

Since I wasn’t about to chuck the rooms I had made and re-make them with the ‘correct’ dimensions, I figured my best bet would be to start from scratch again for the measurements, using what I had made as a basis and the previously-drawn plans as vague guidelines.

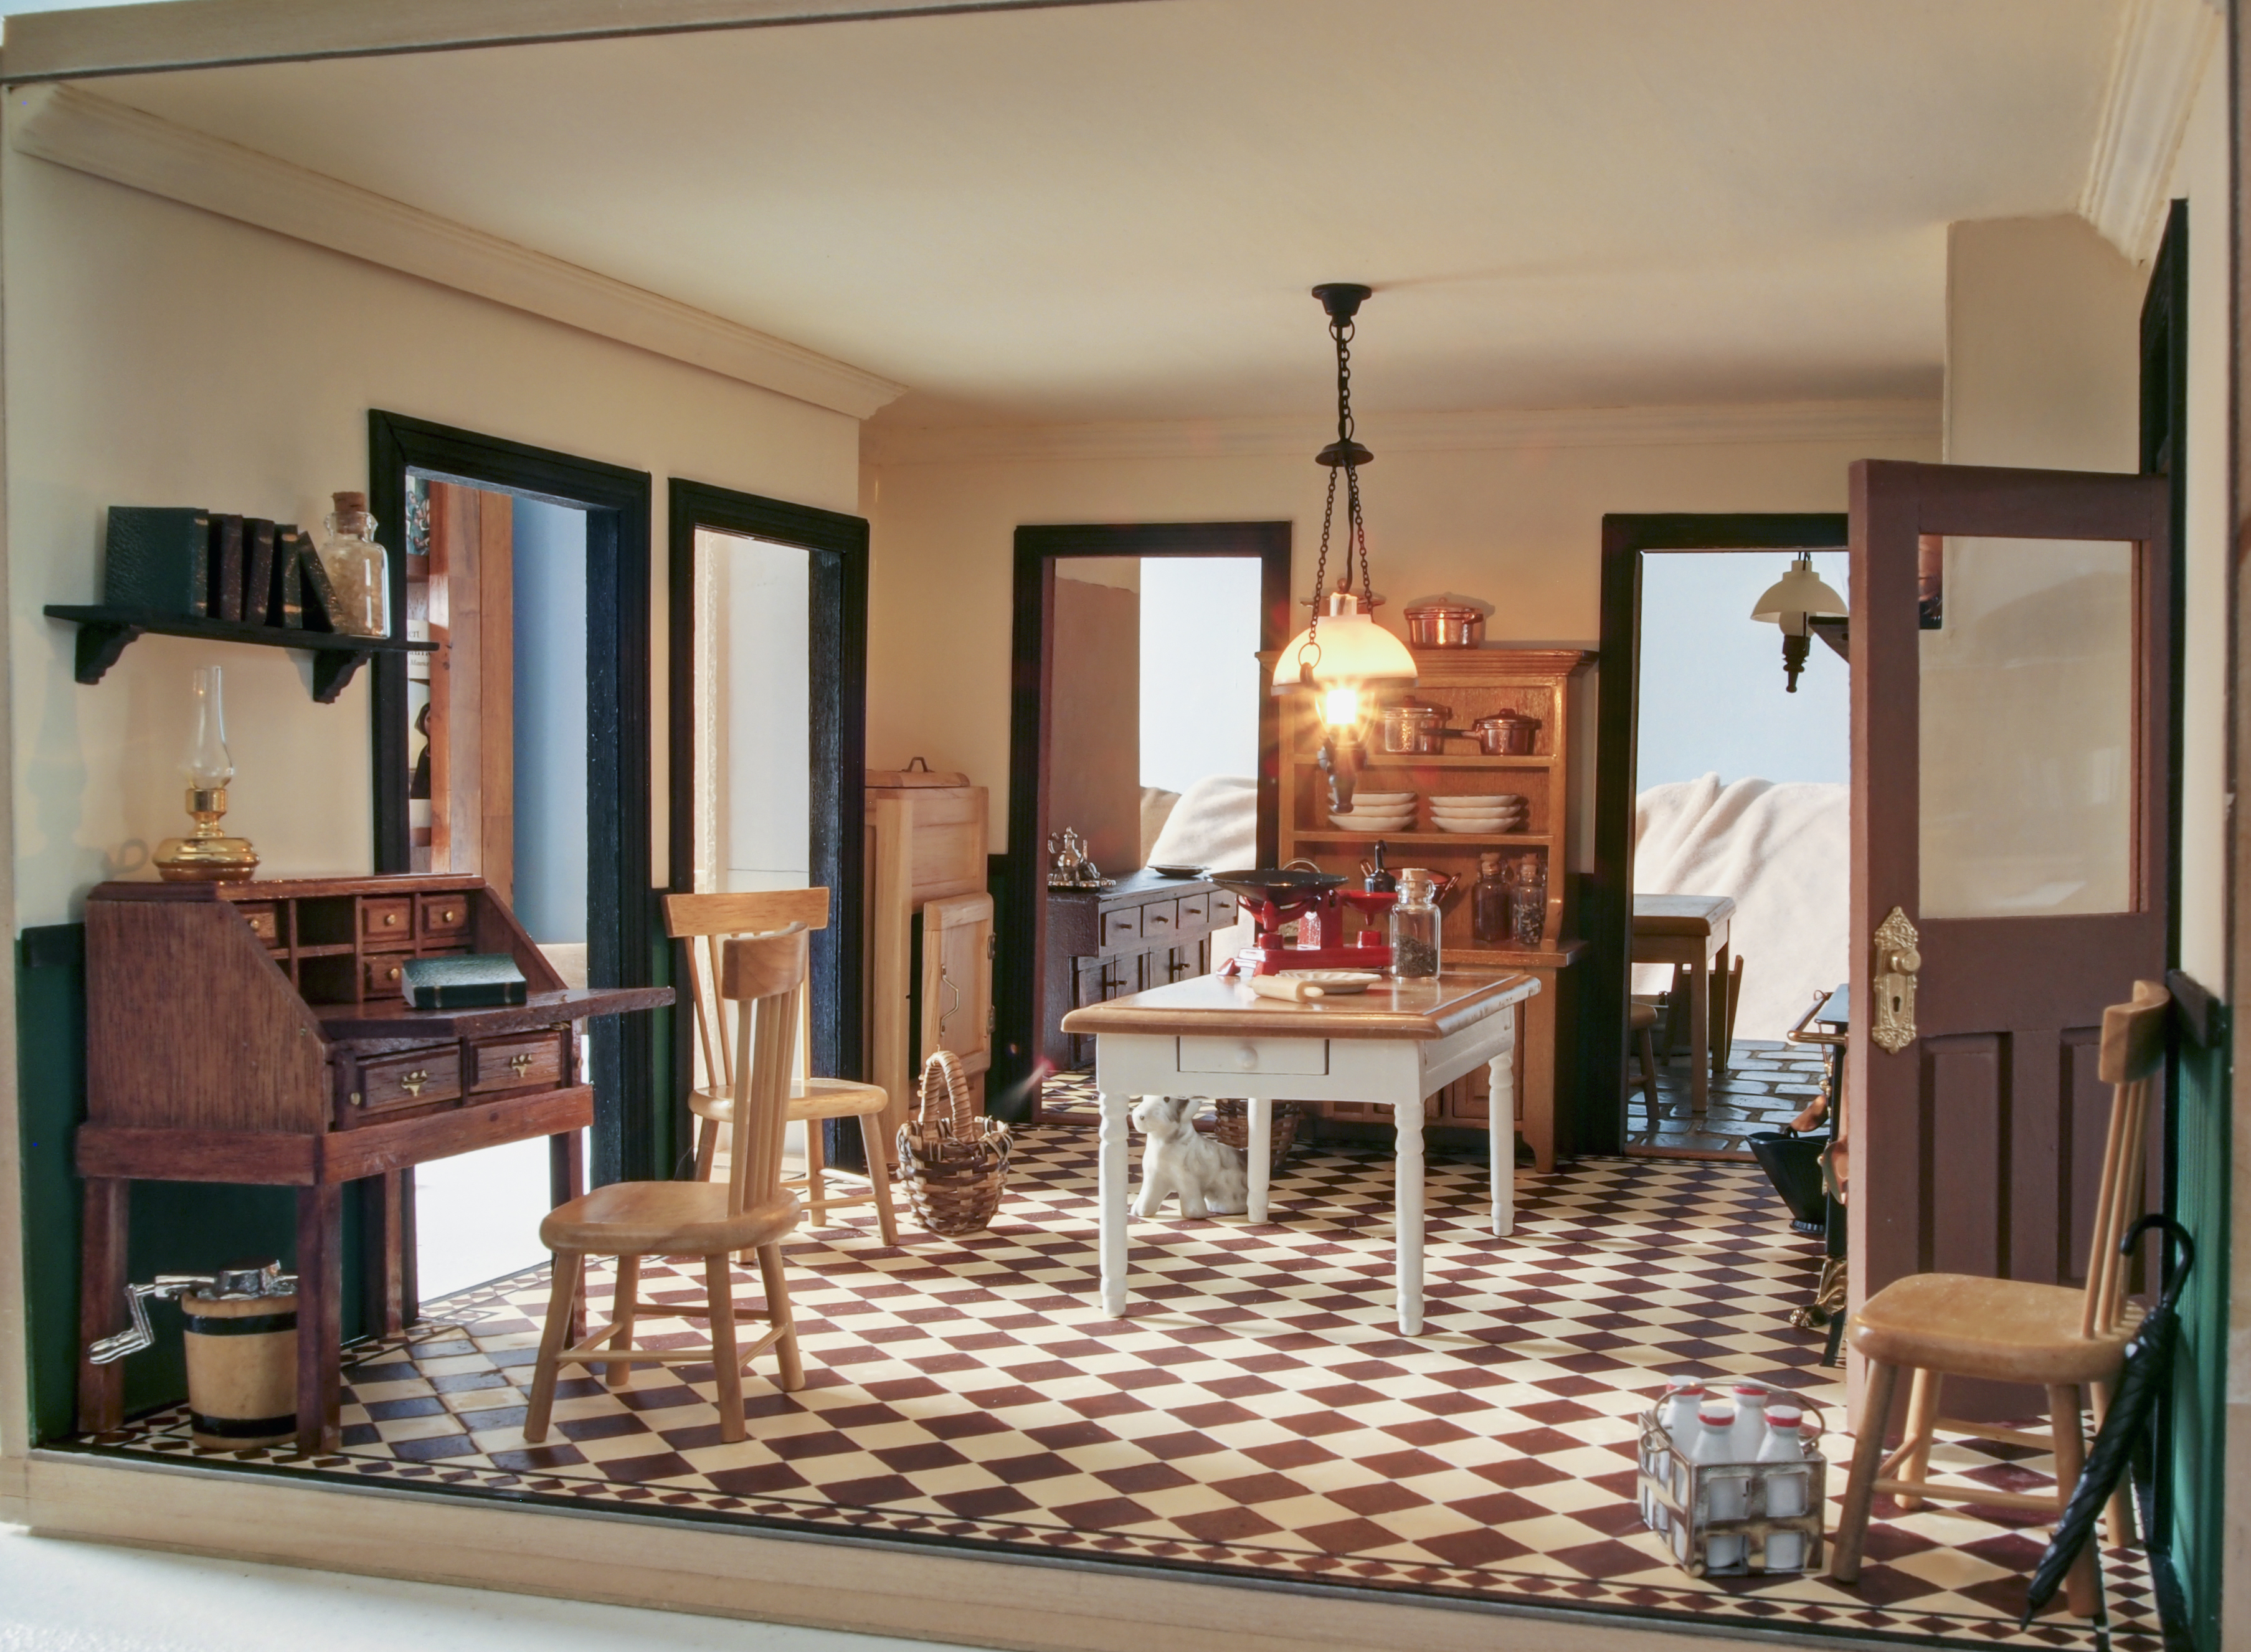
So far I have only sketched out the back section of the house on which I am working.  The completed first floor:

First floor, north side

And the corresponding second floor which I am about to build:

Second floor, north side

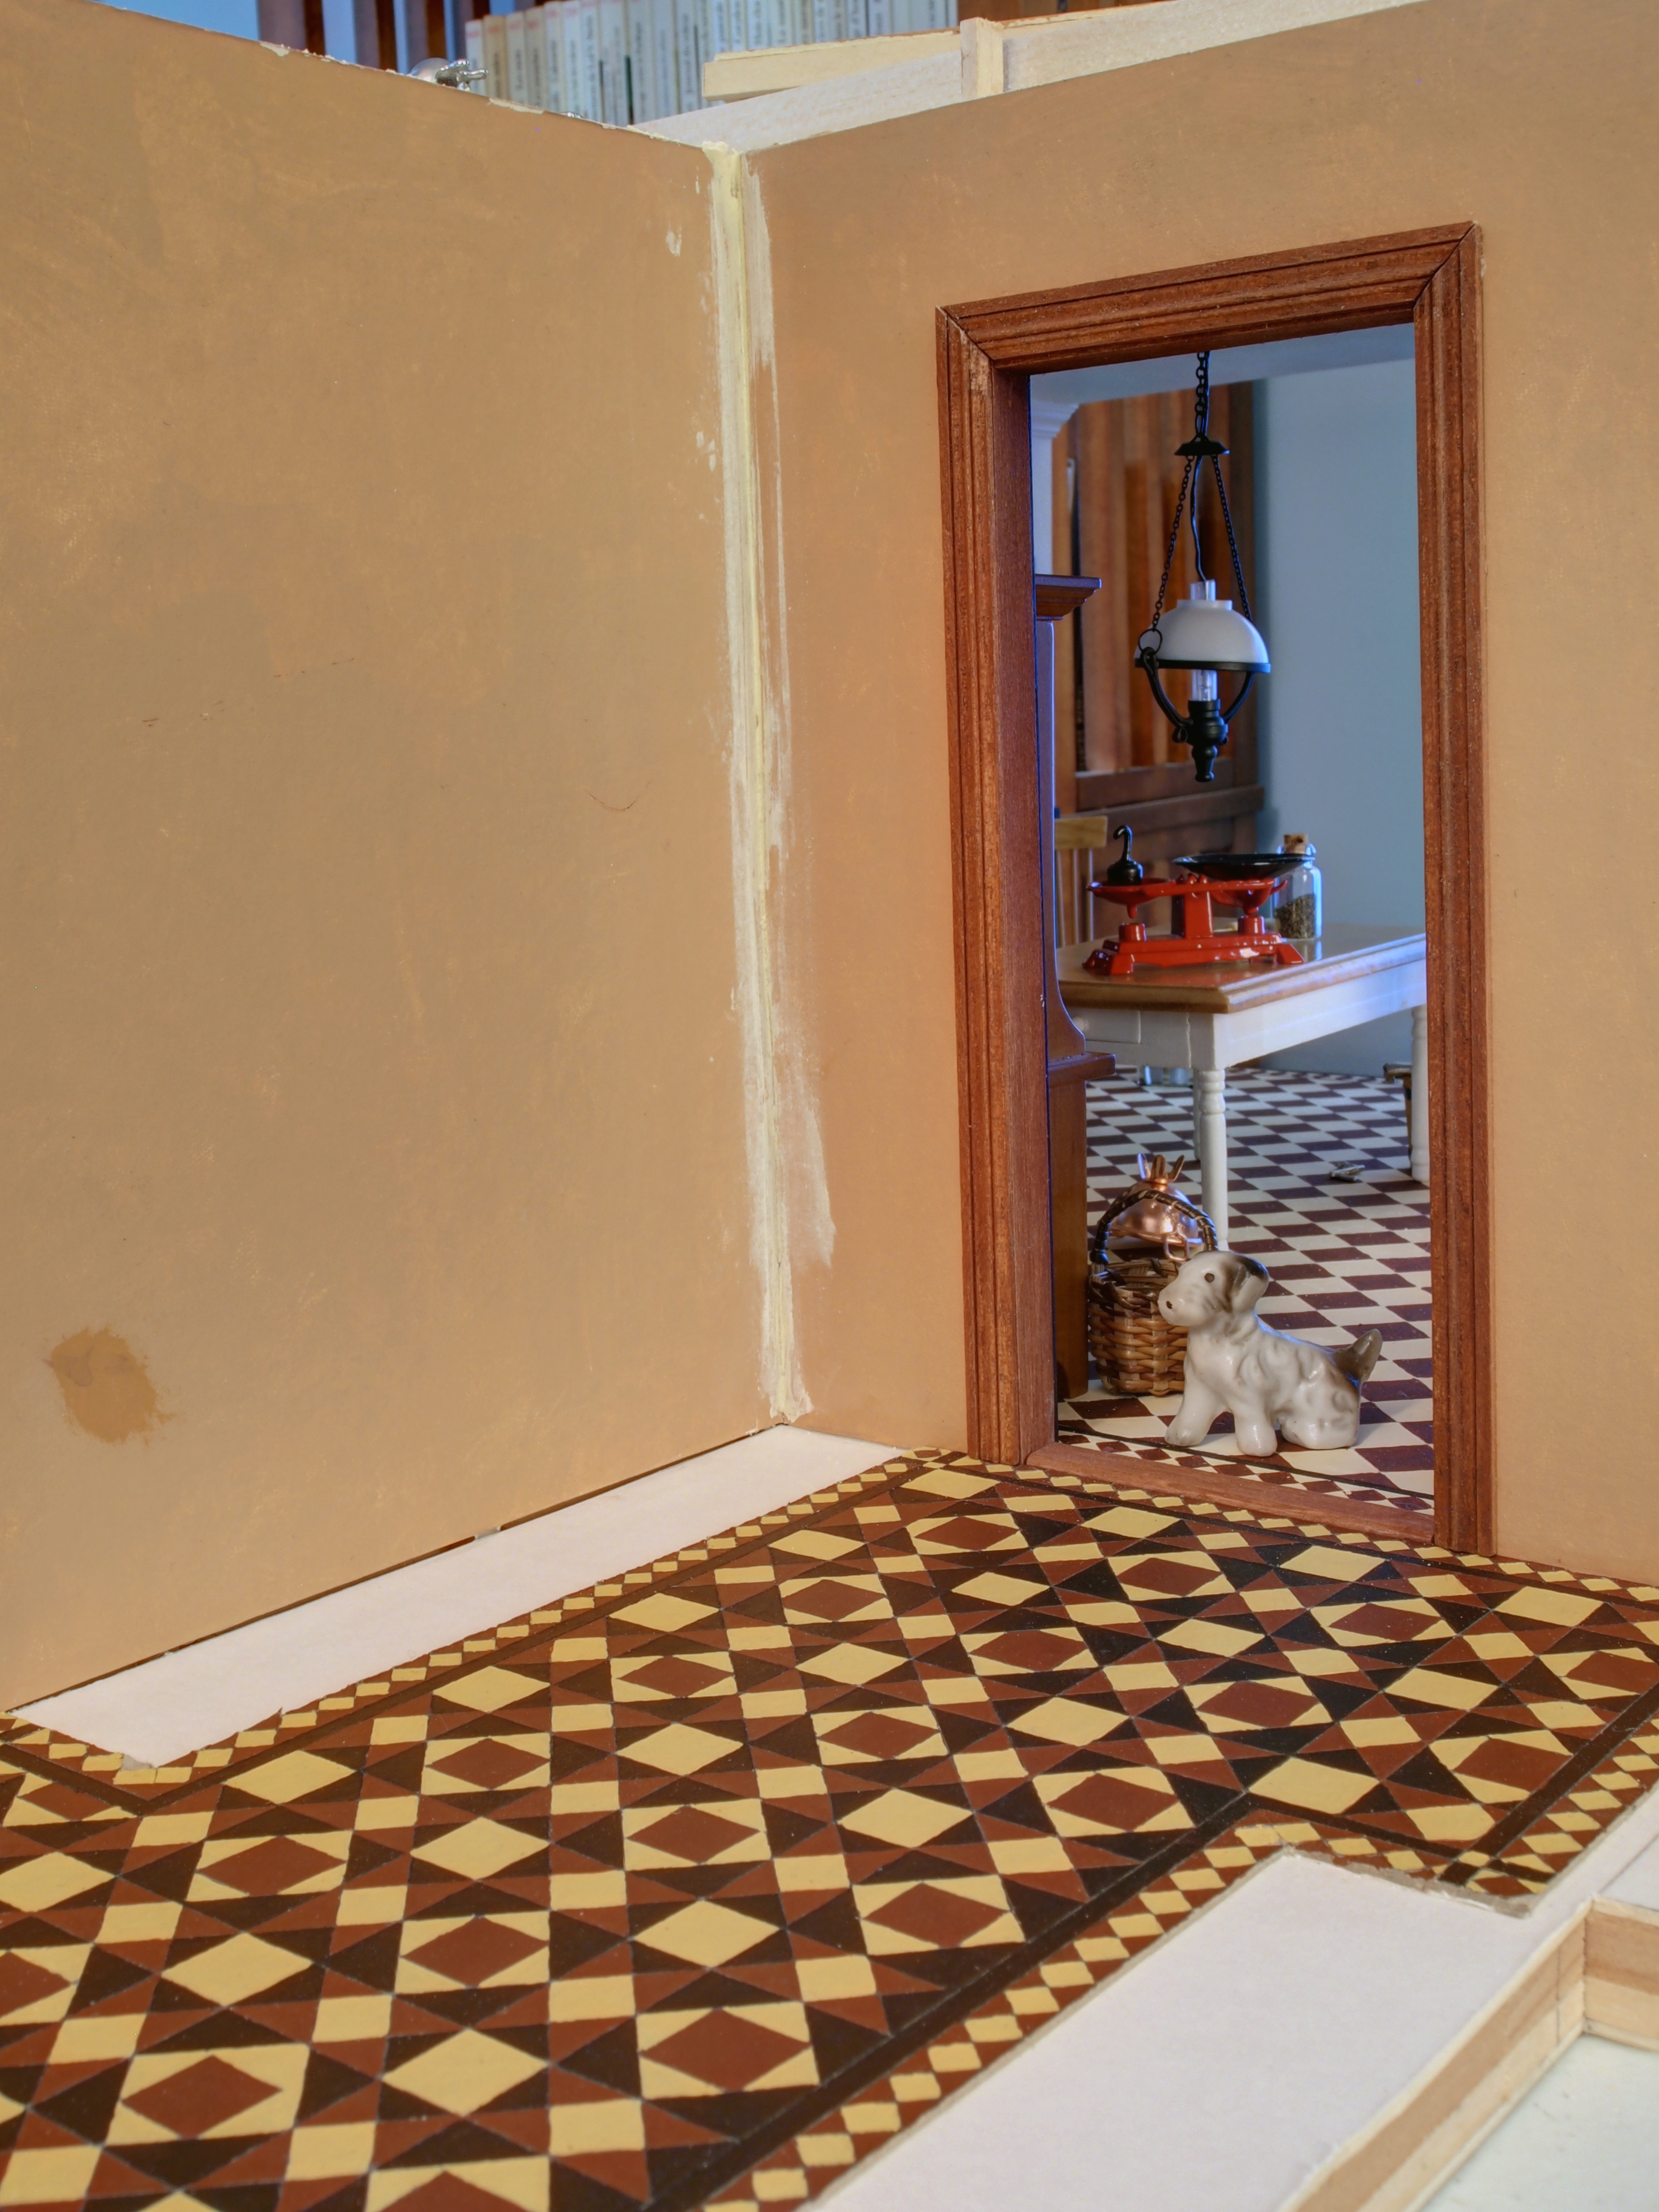
The hallway will link these three rooms to the front of the house and the stairs.

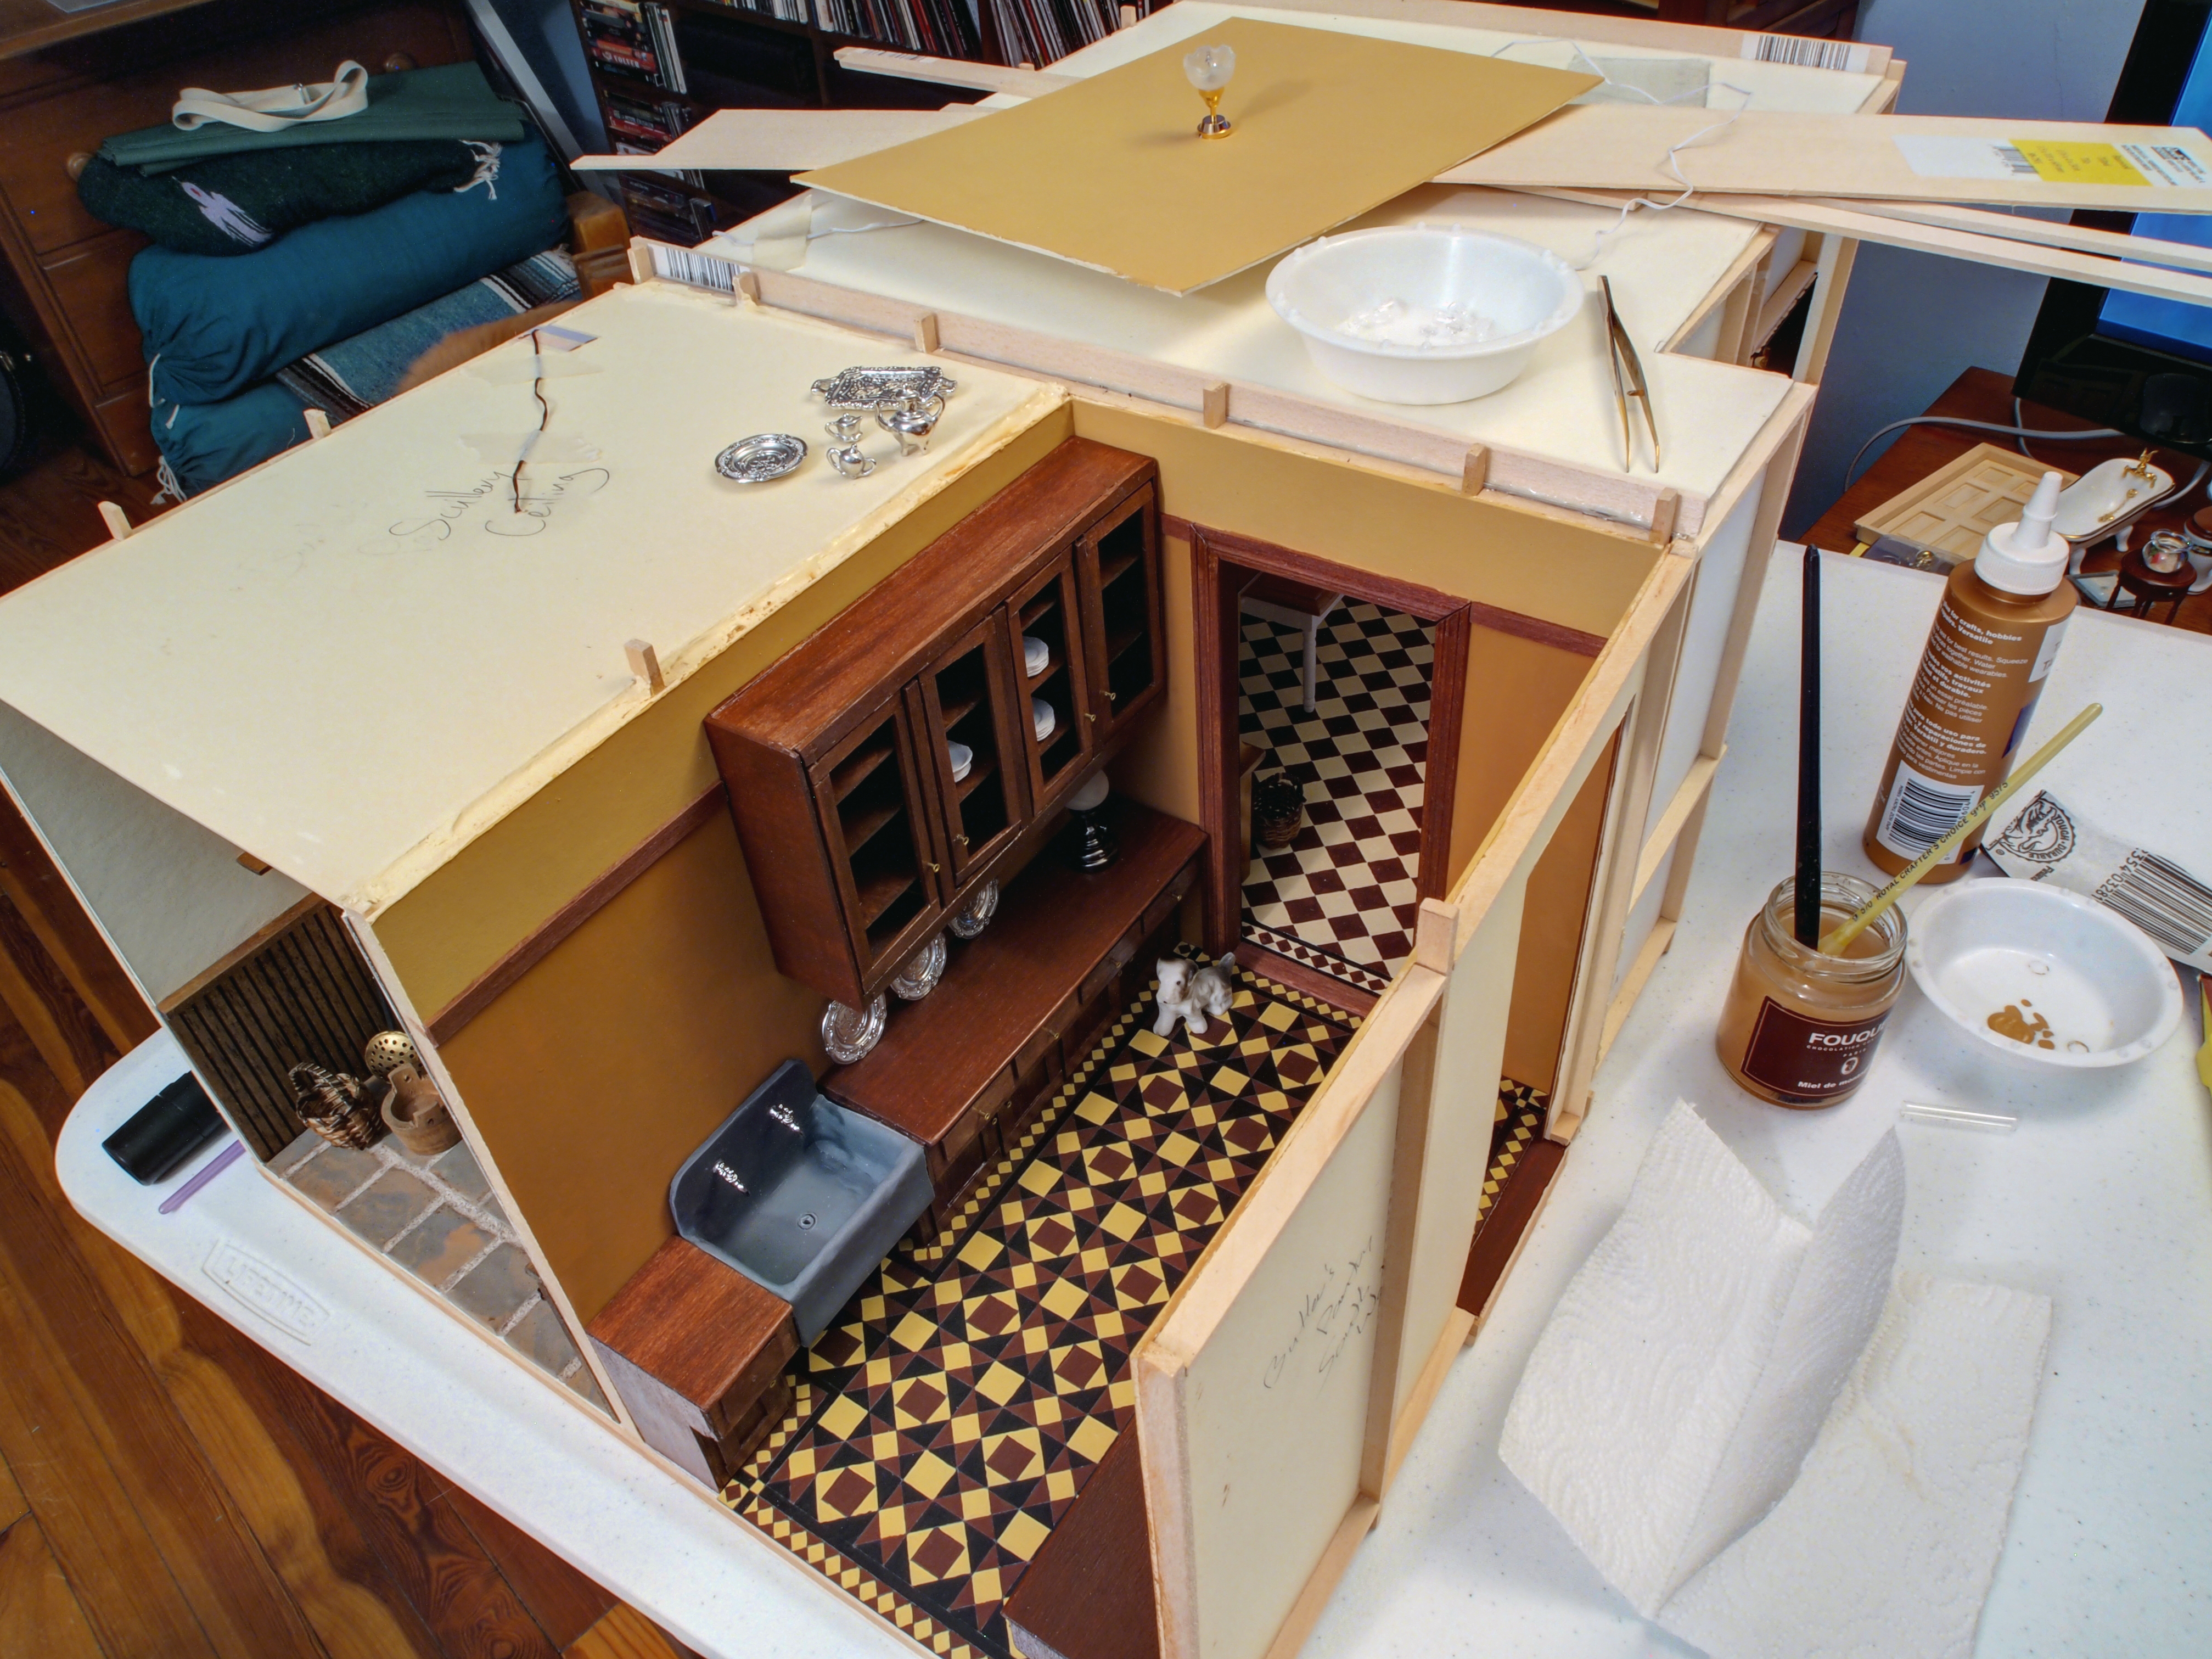
I started gluing in the beams and joists that will go between the ceilings and the floor above.

OLYMPUS DIGITAL CAMERA

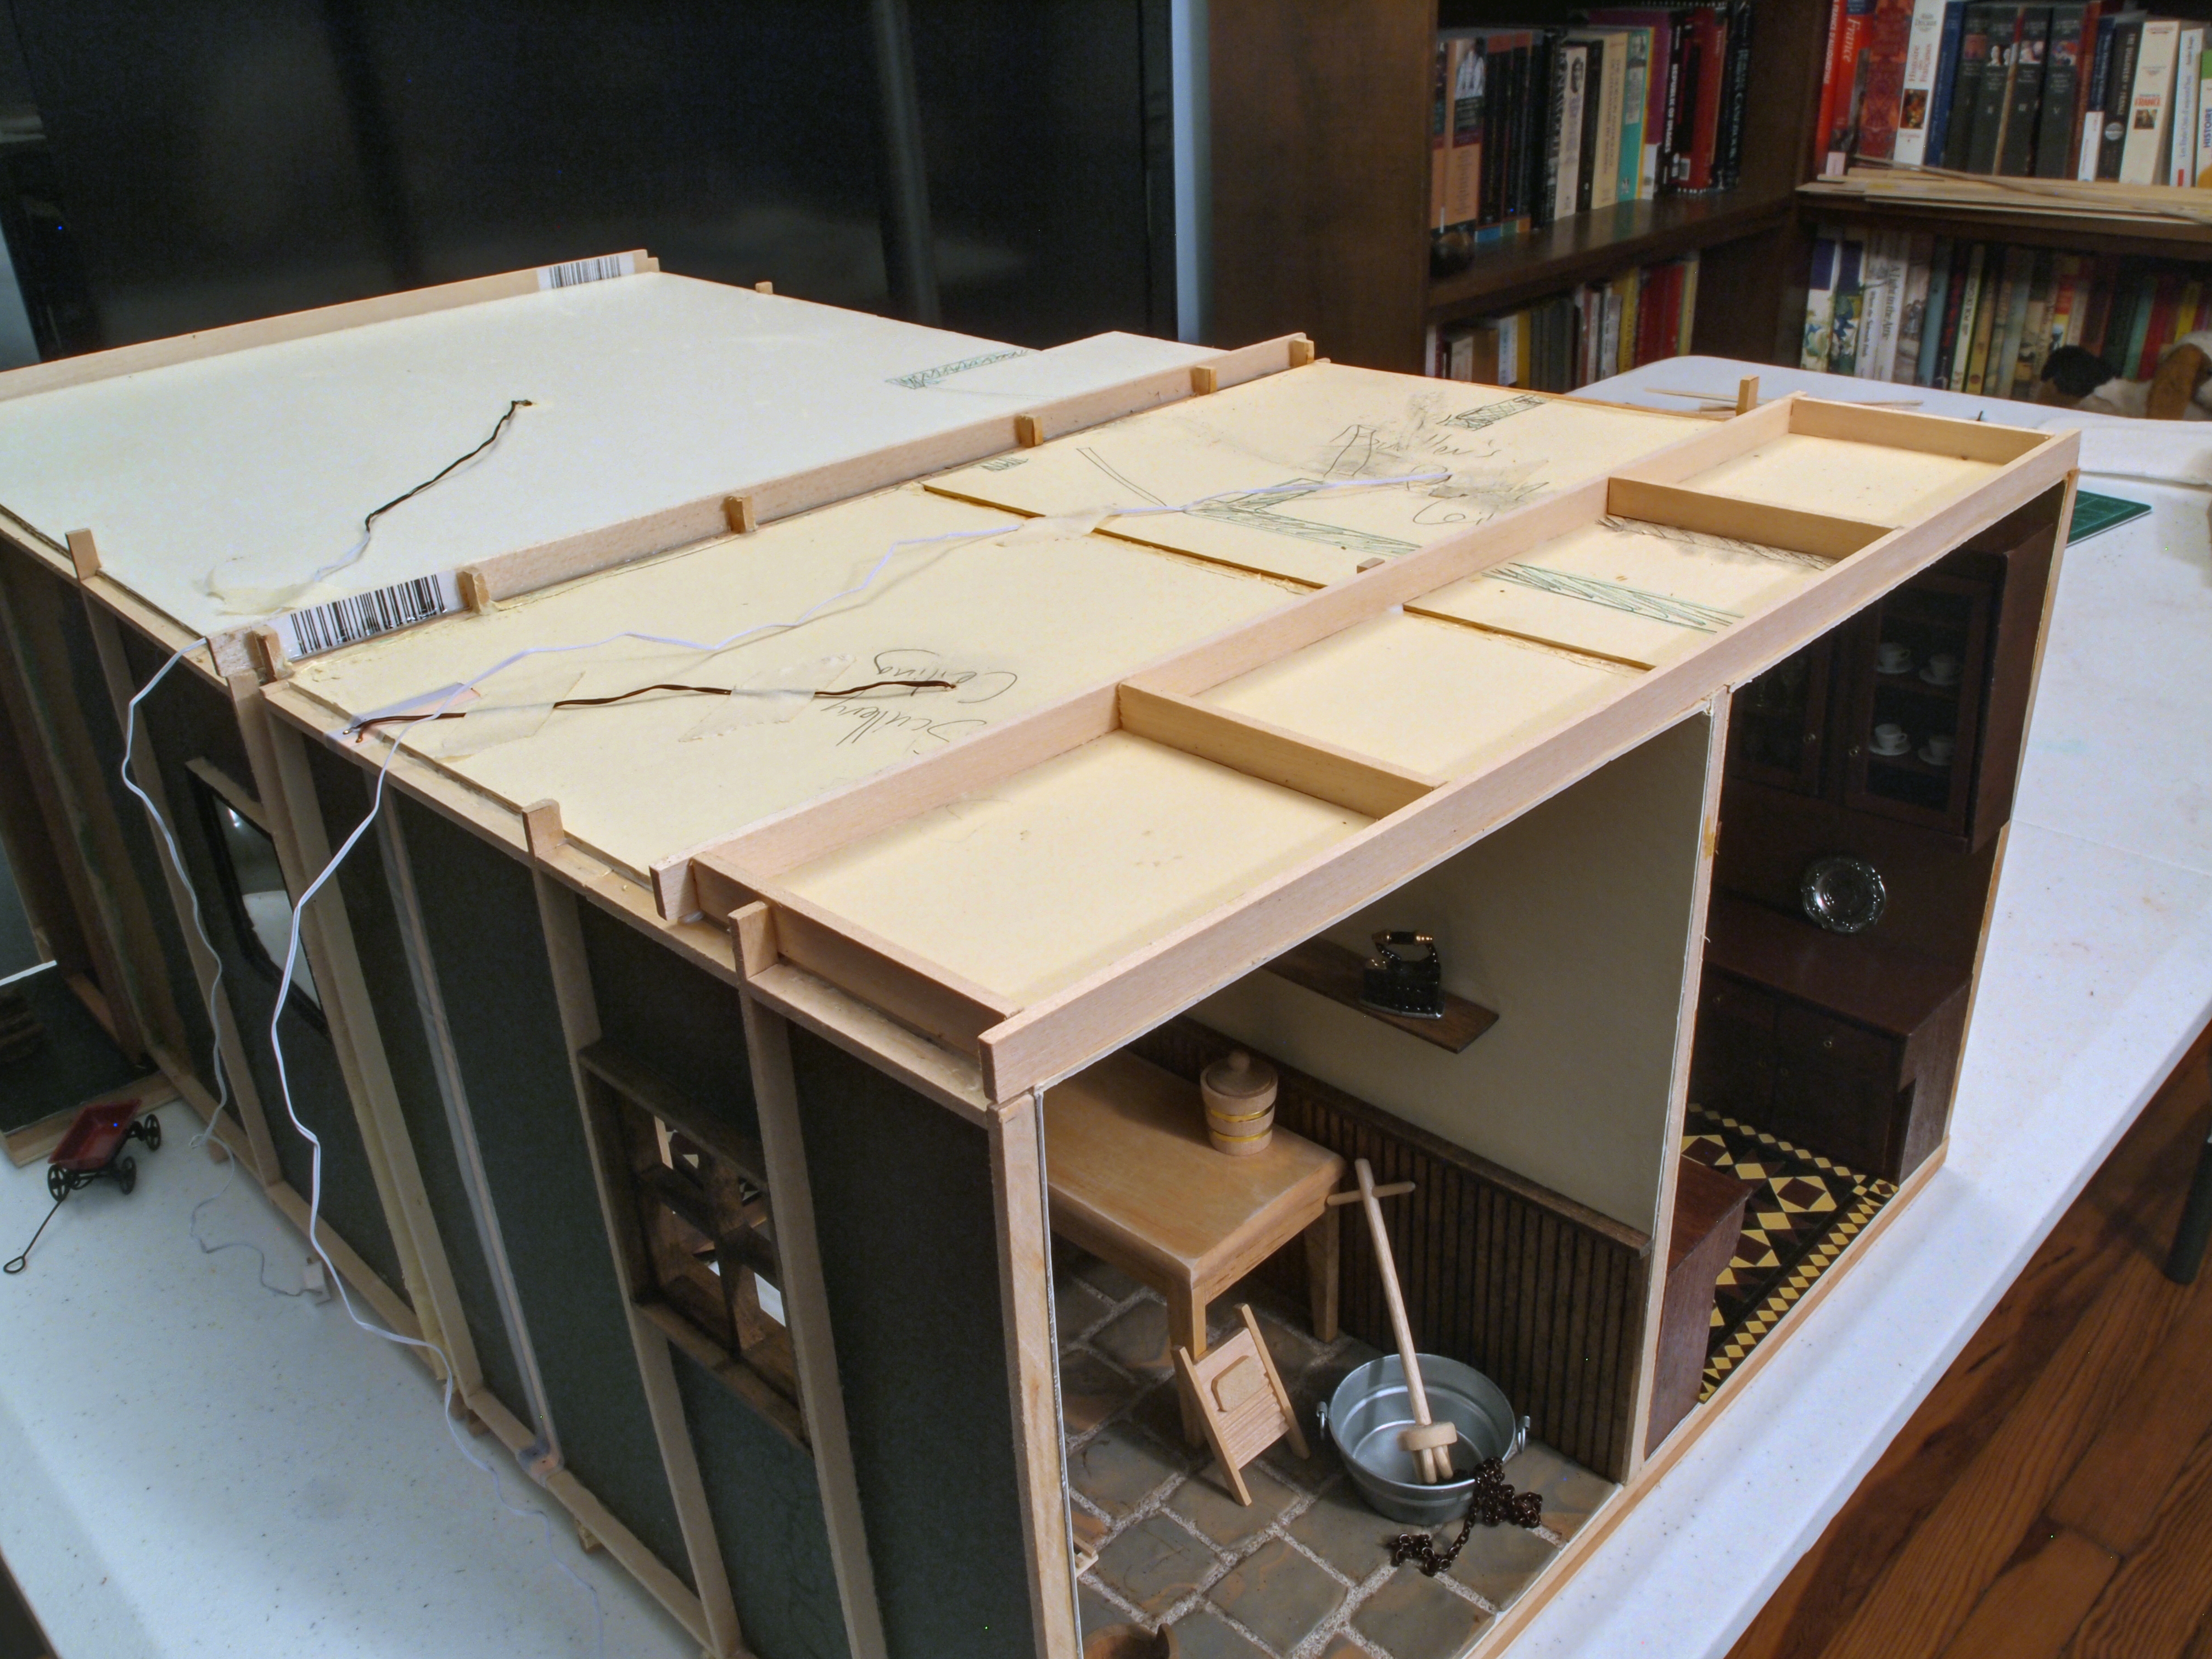
I also drew the approximate dimensions of the three rooms onto the ceiling and added objects to see if the sizes worked before I cut out the floors.

OLYMPUS DIGITAL CAMERA

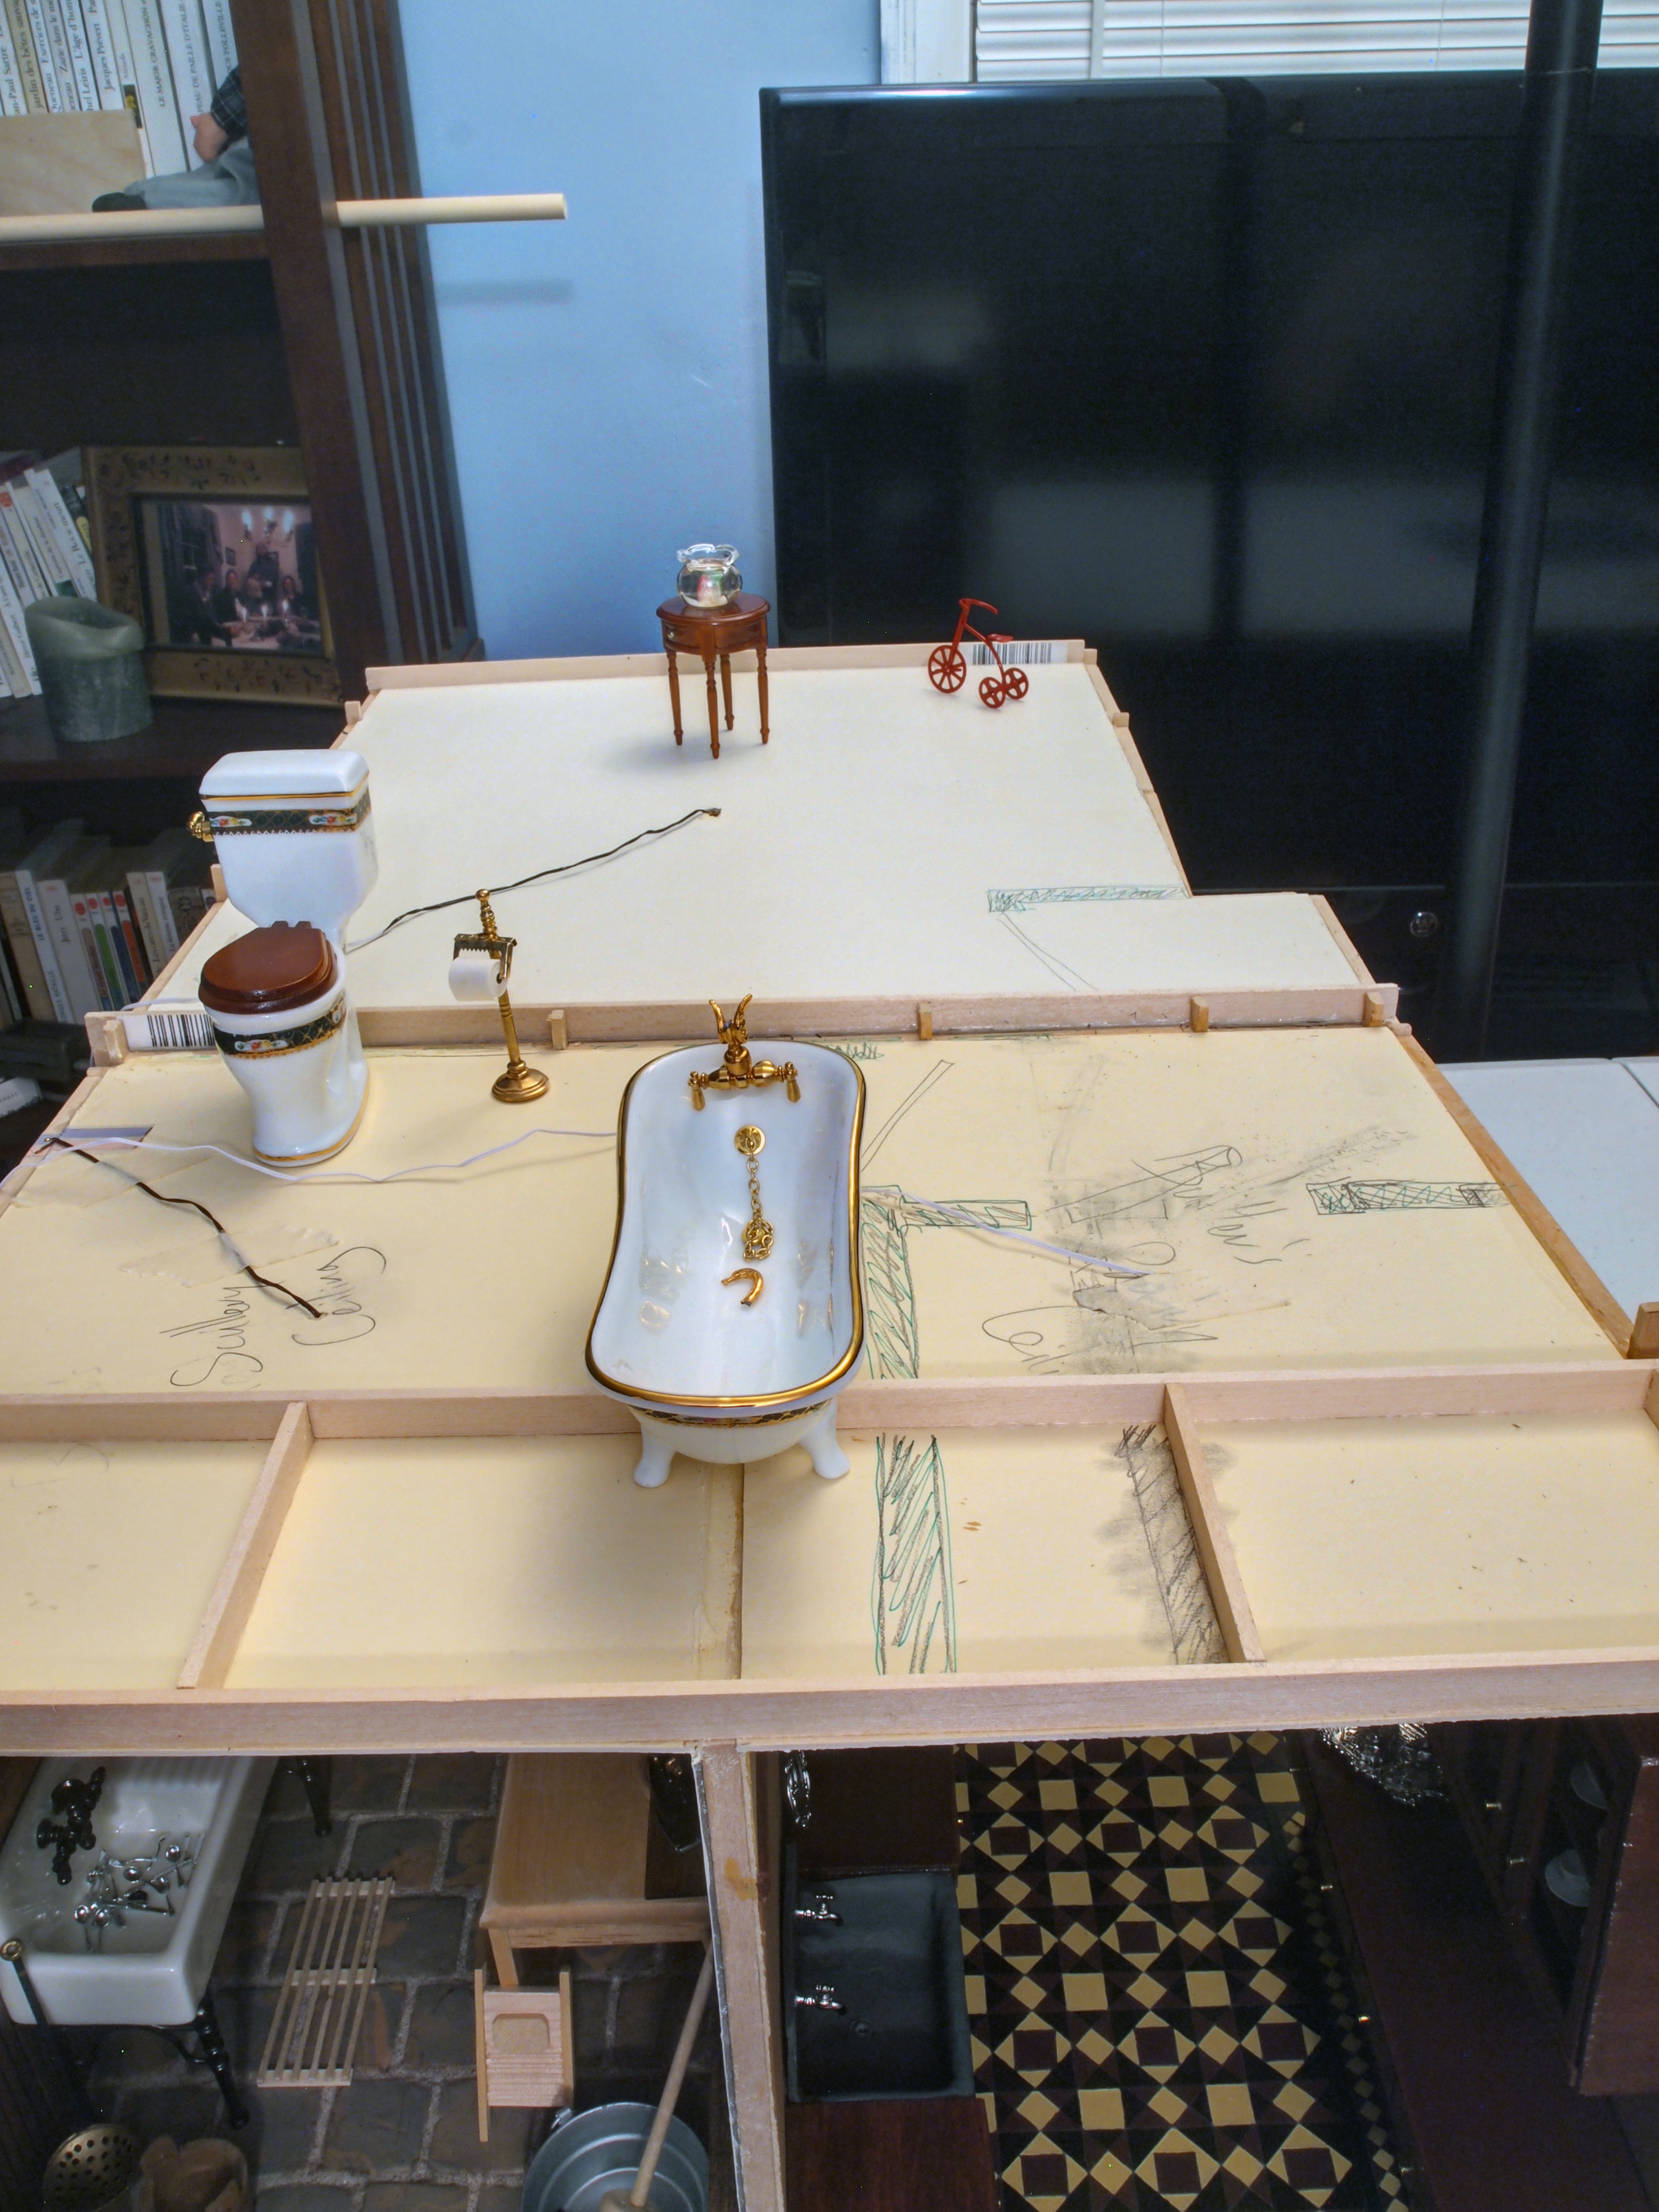
The walls are drawn in green…I think the sizes should work fine. So next time I will finish the beams and joists and create the floors. (I bet the workmen who are building this house will be pleased when that toilet gets hooked up properly…no one likes a porta-potty.)

OLYMPUS DIGITAL CAMERA

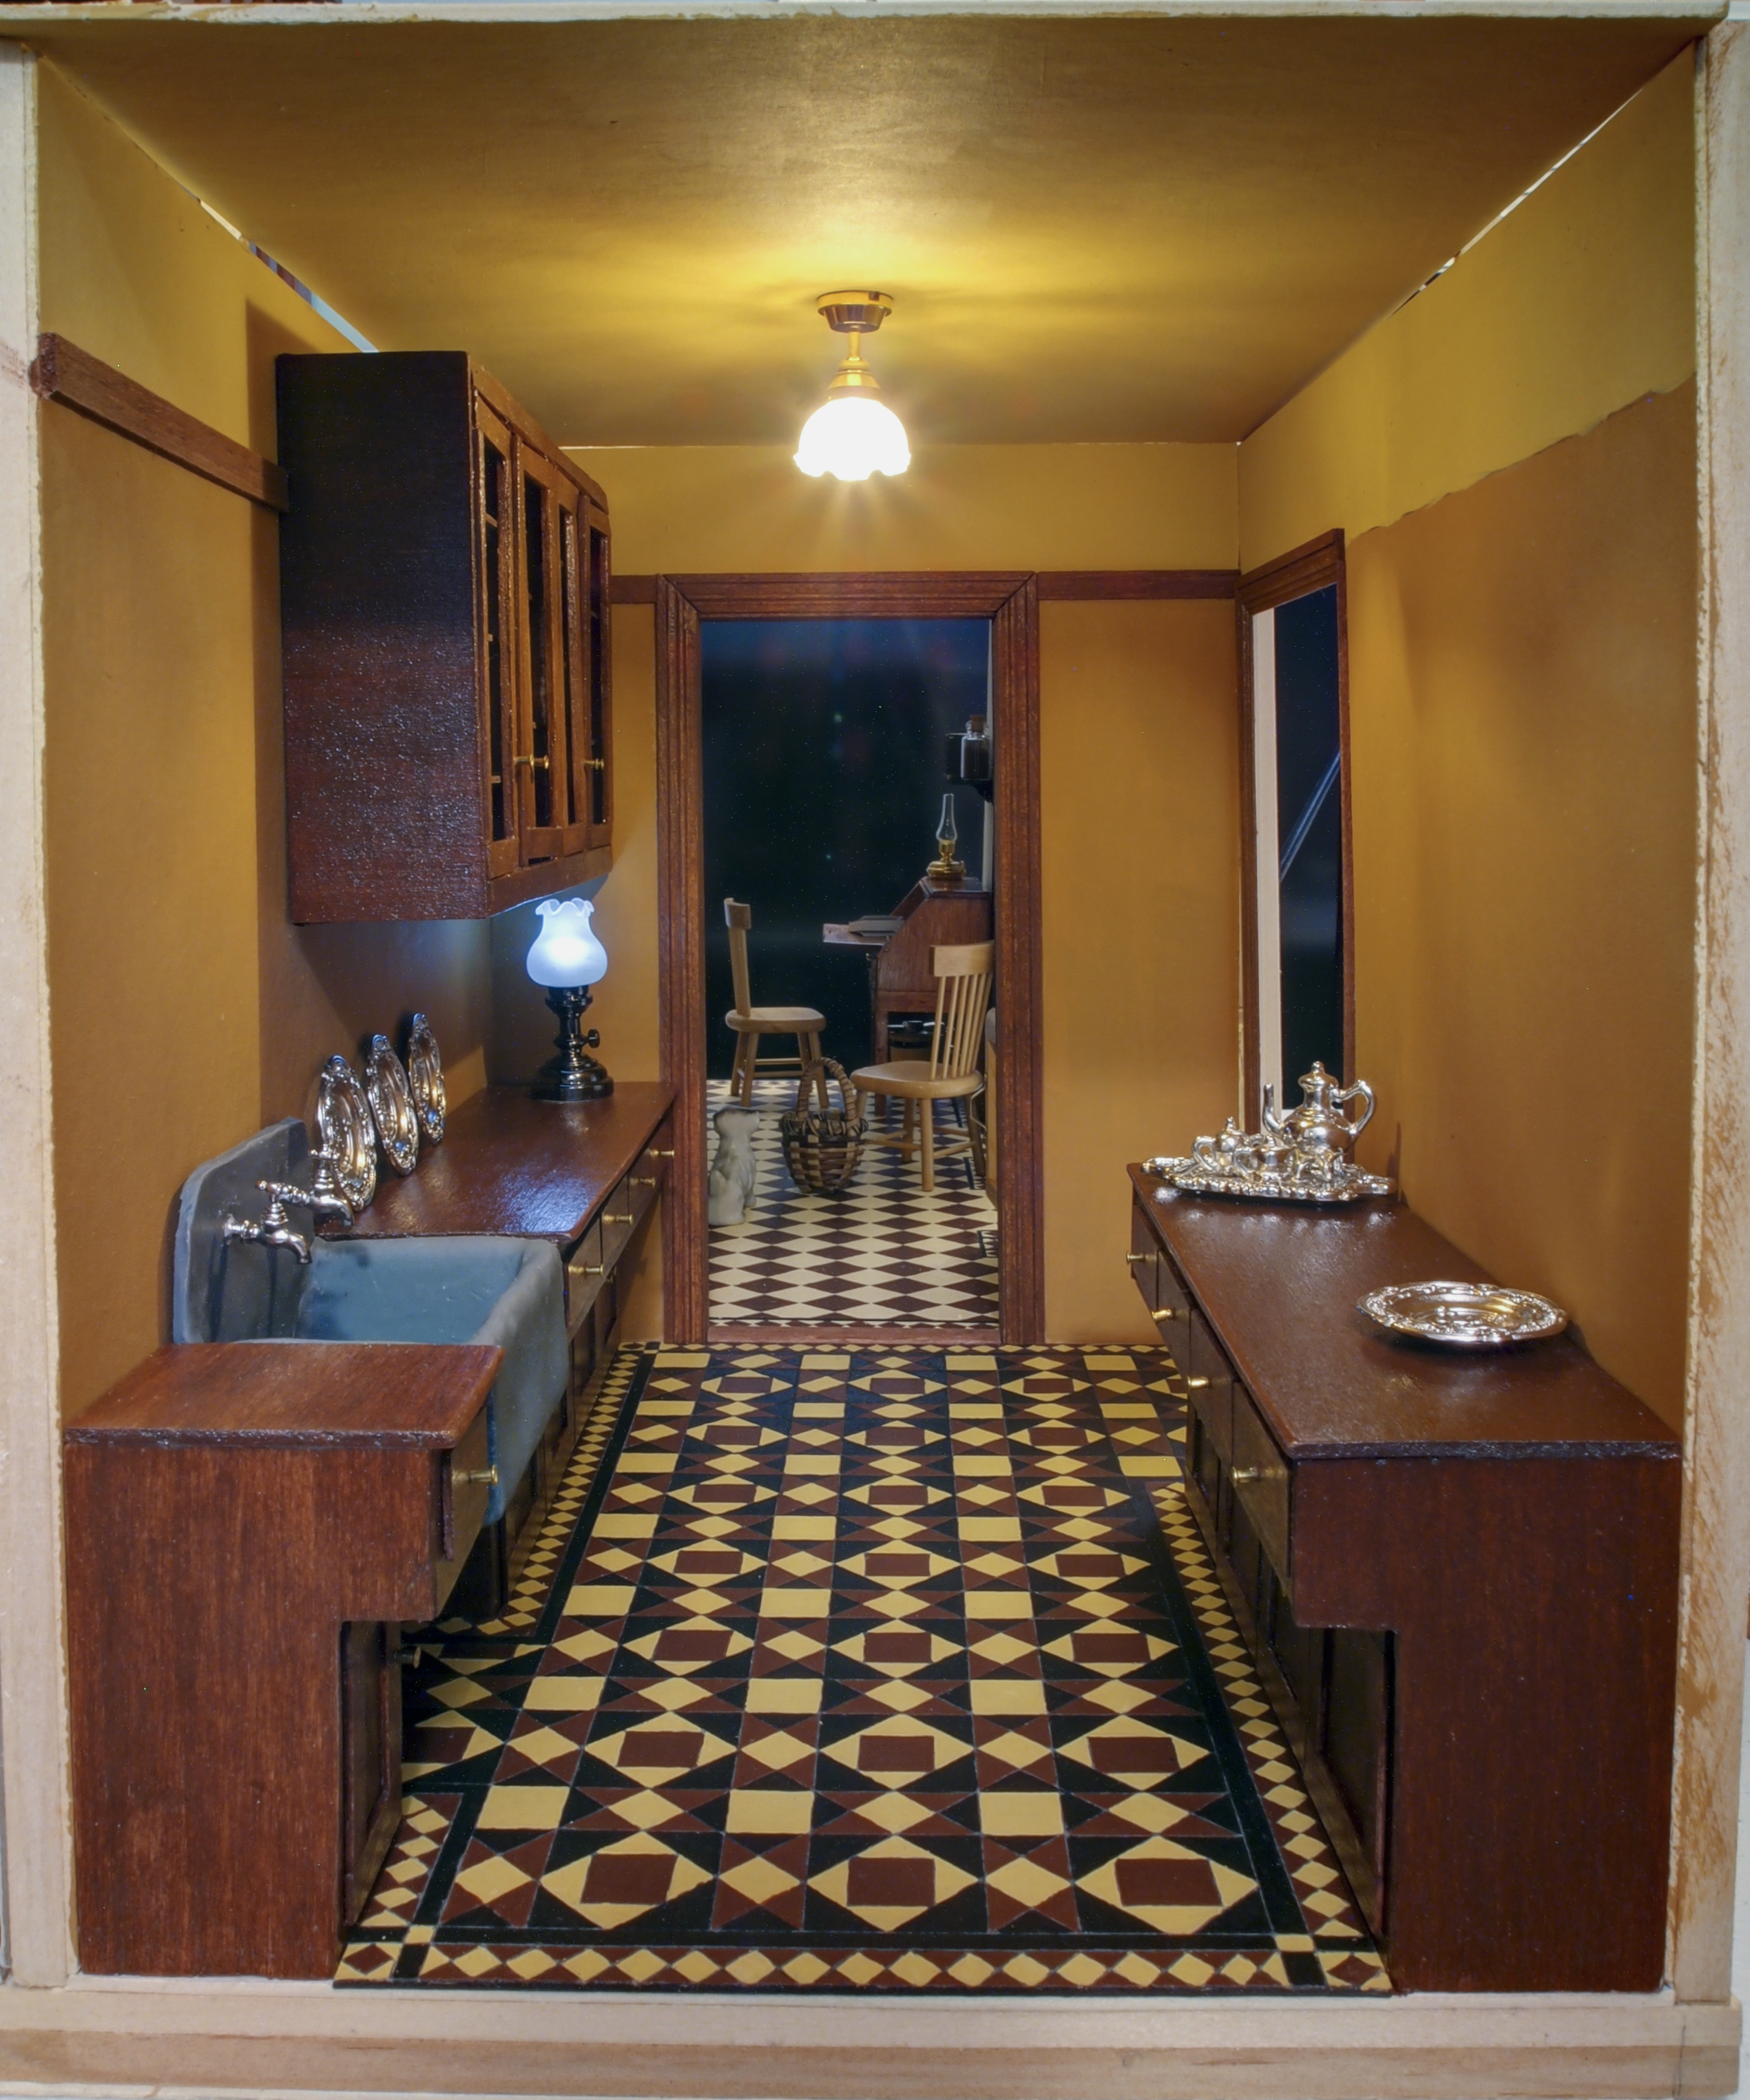
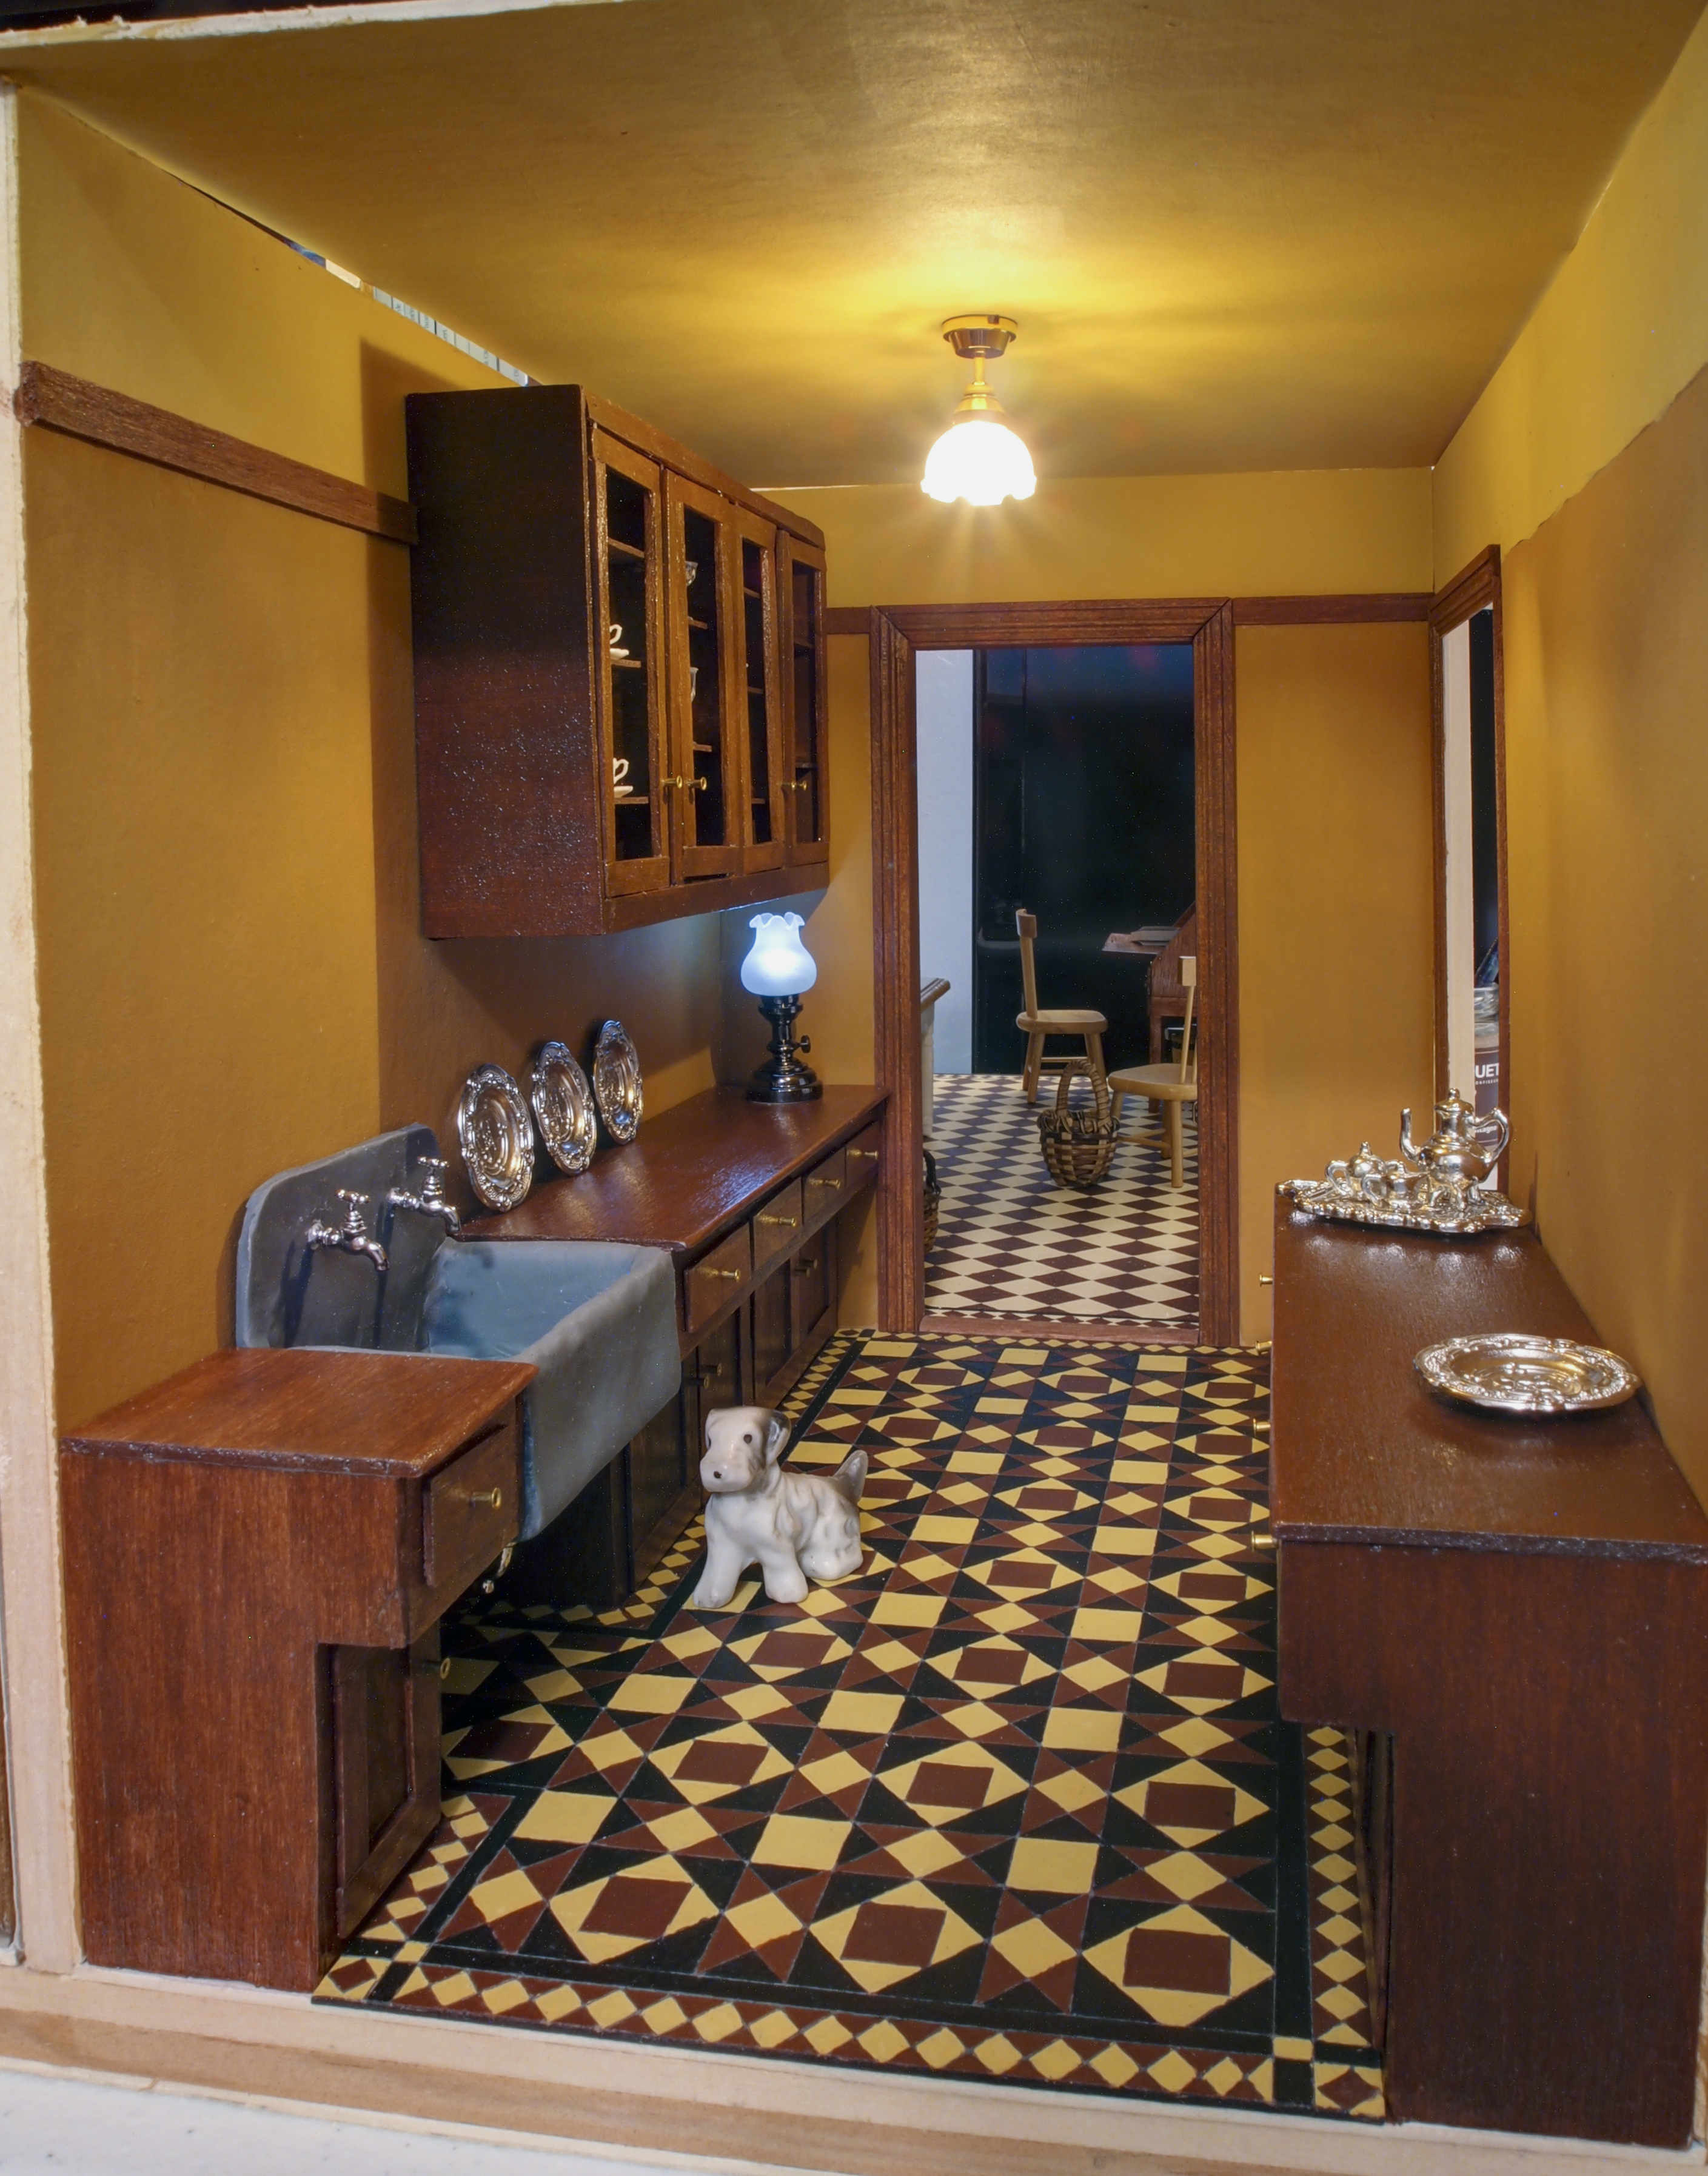
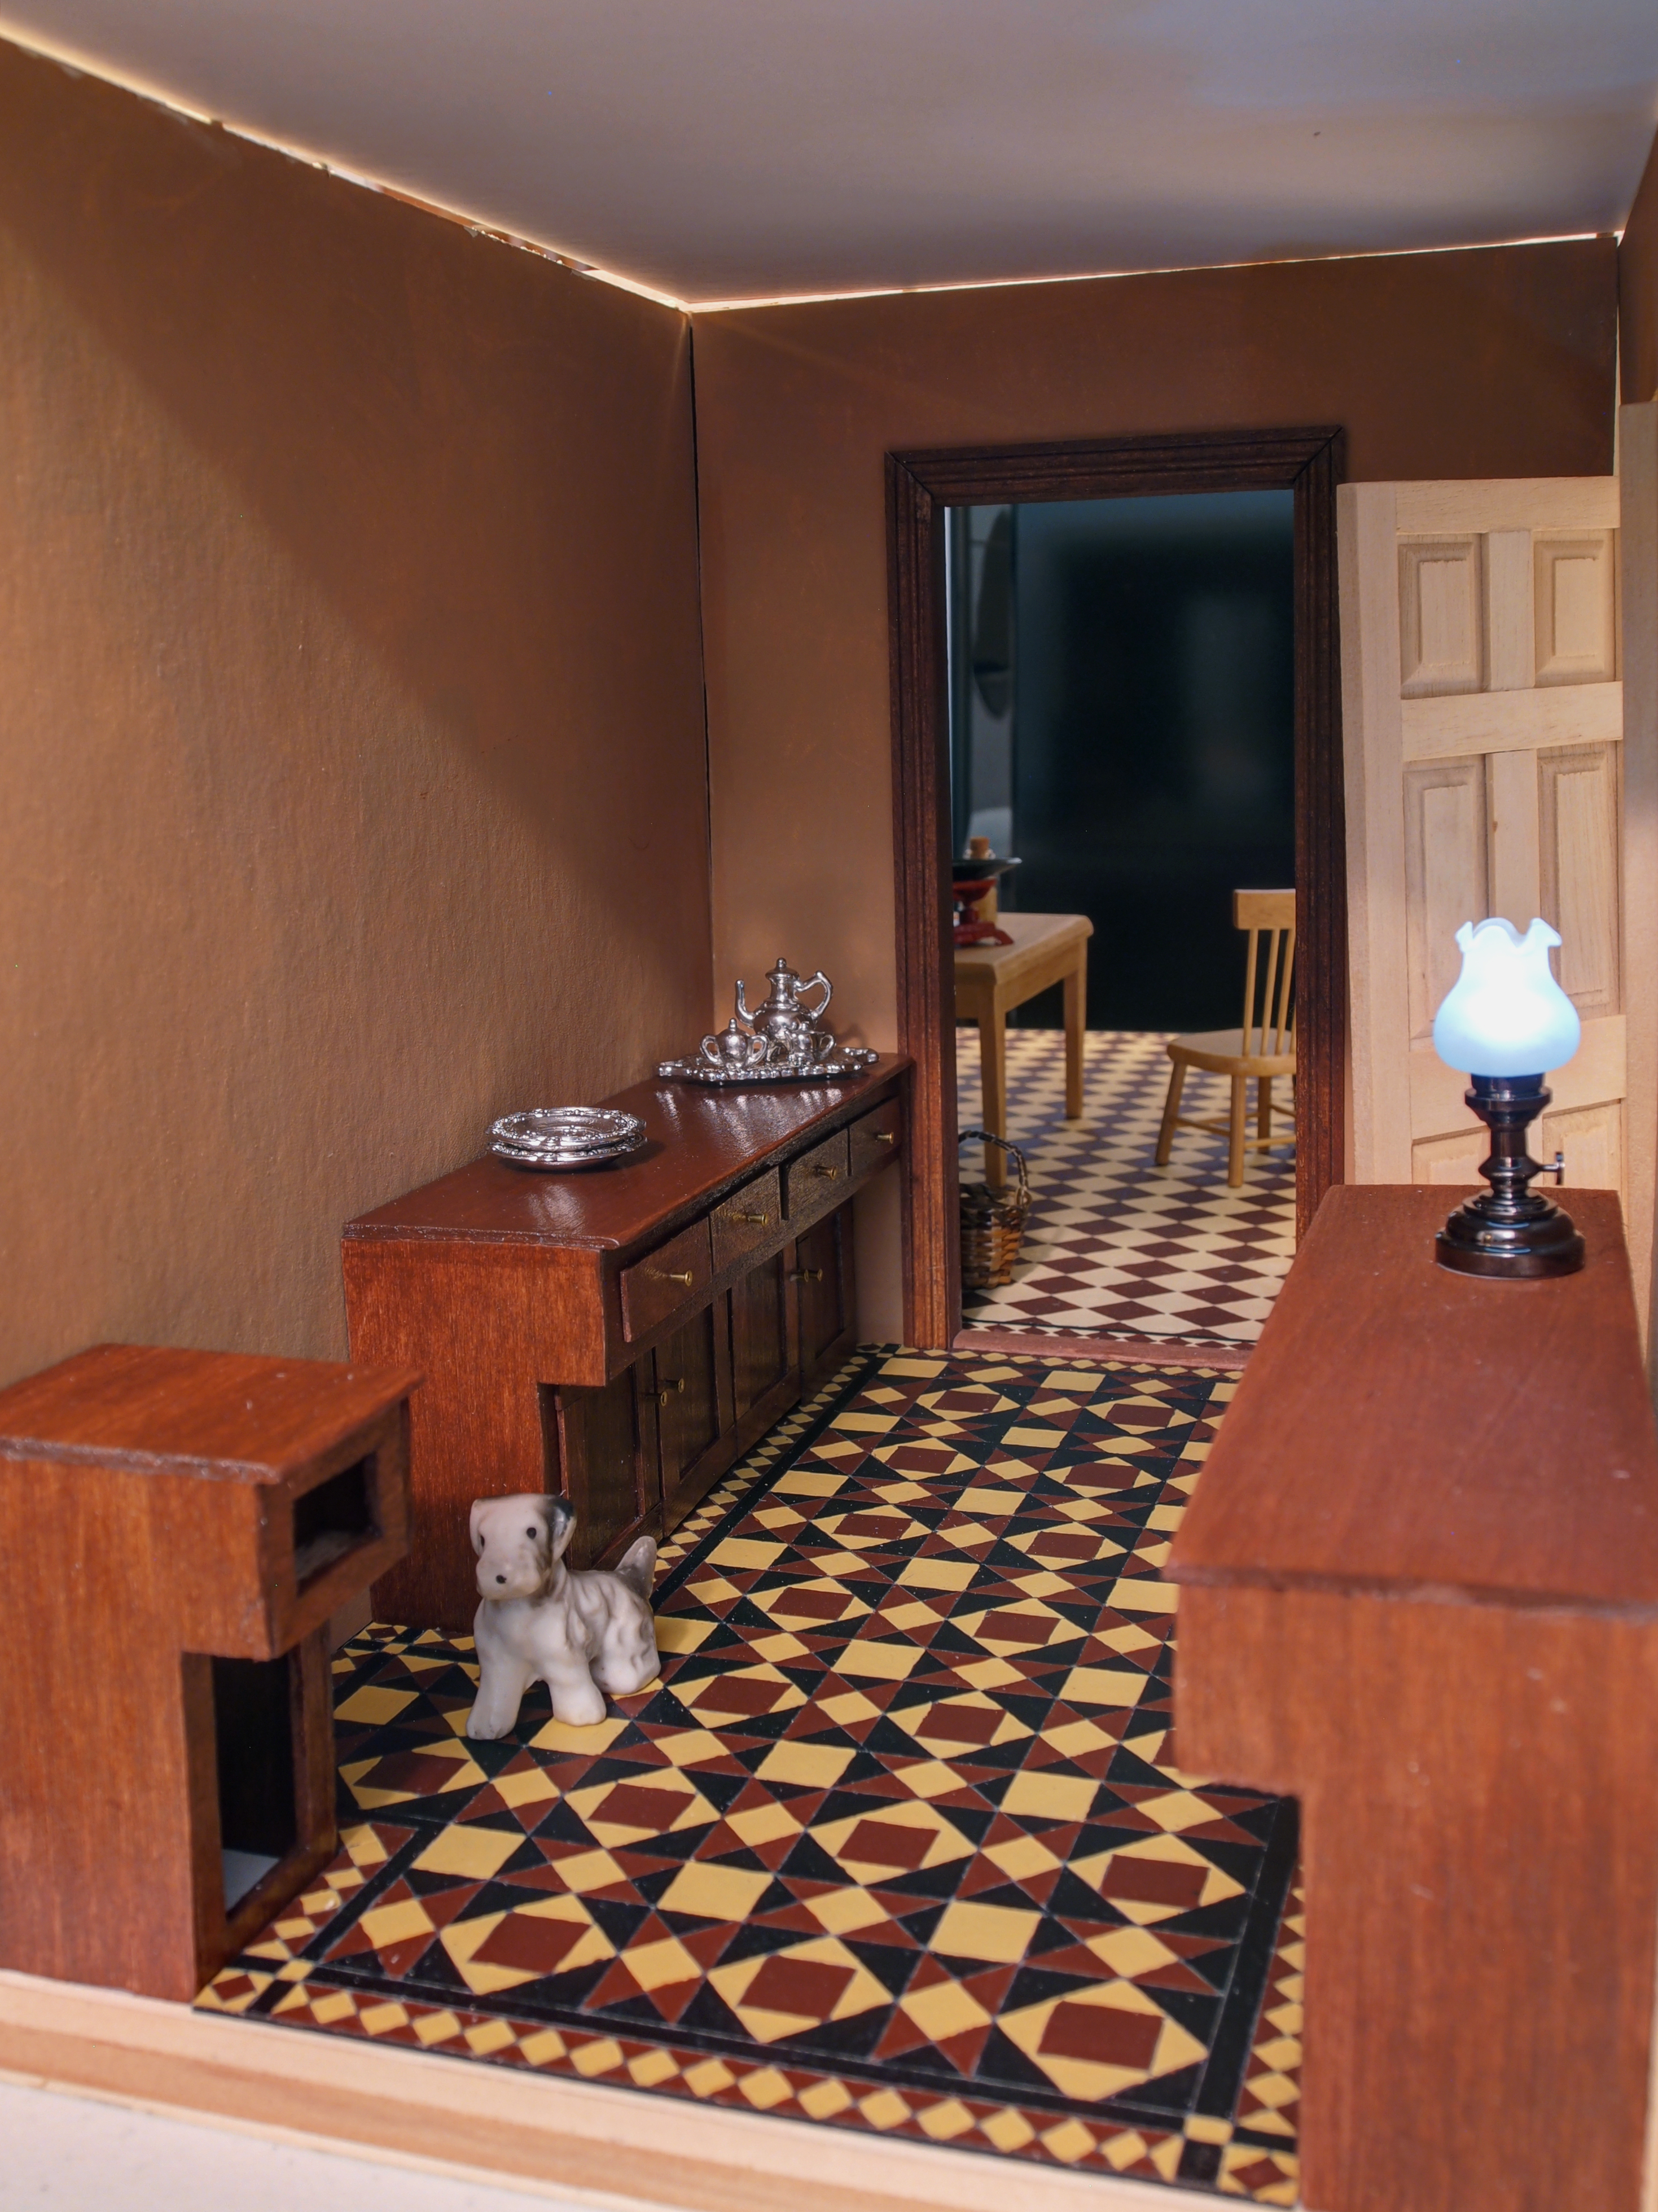
But for now, I will leave you with one last look at the completed pantry…

OLYMPUS DIGITAL CAMERA

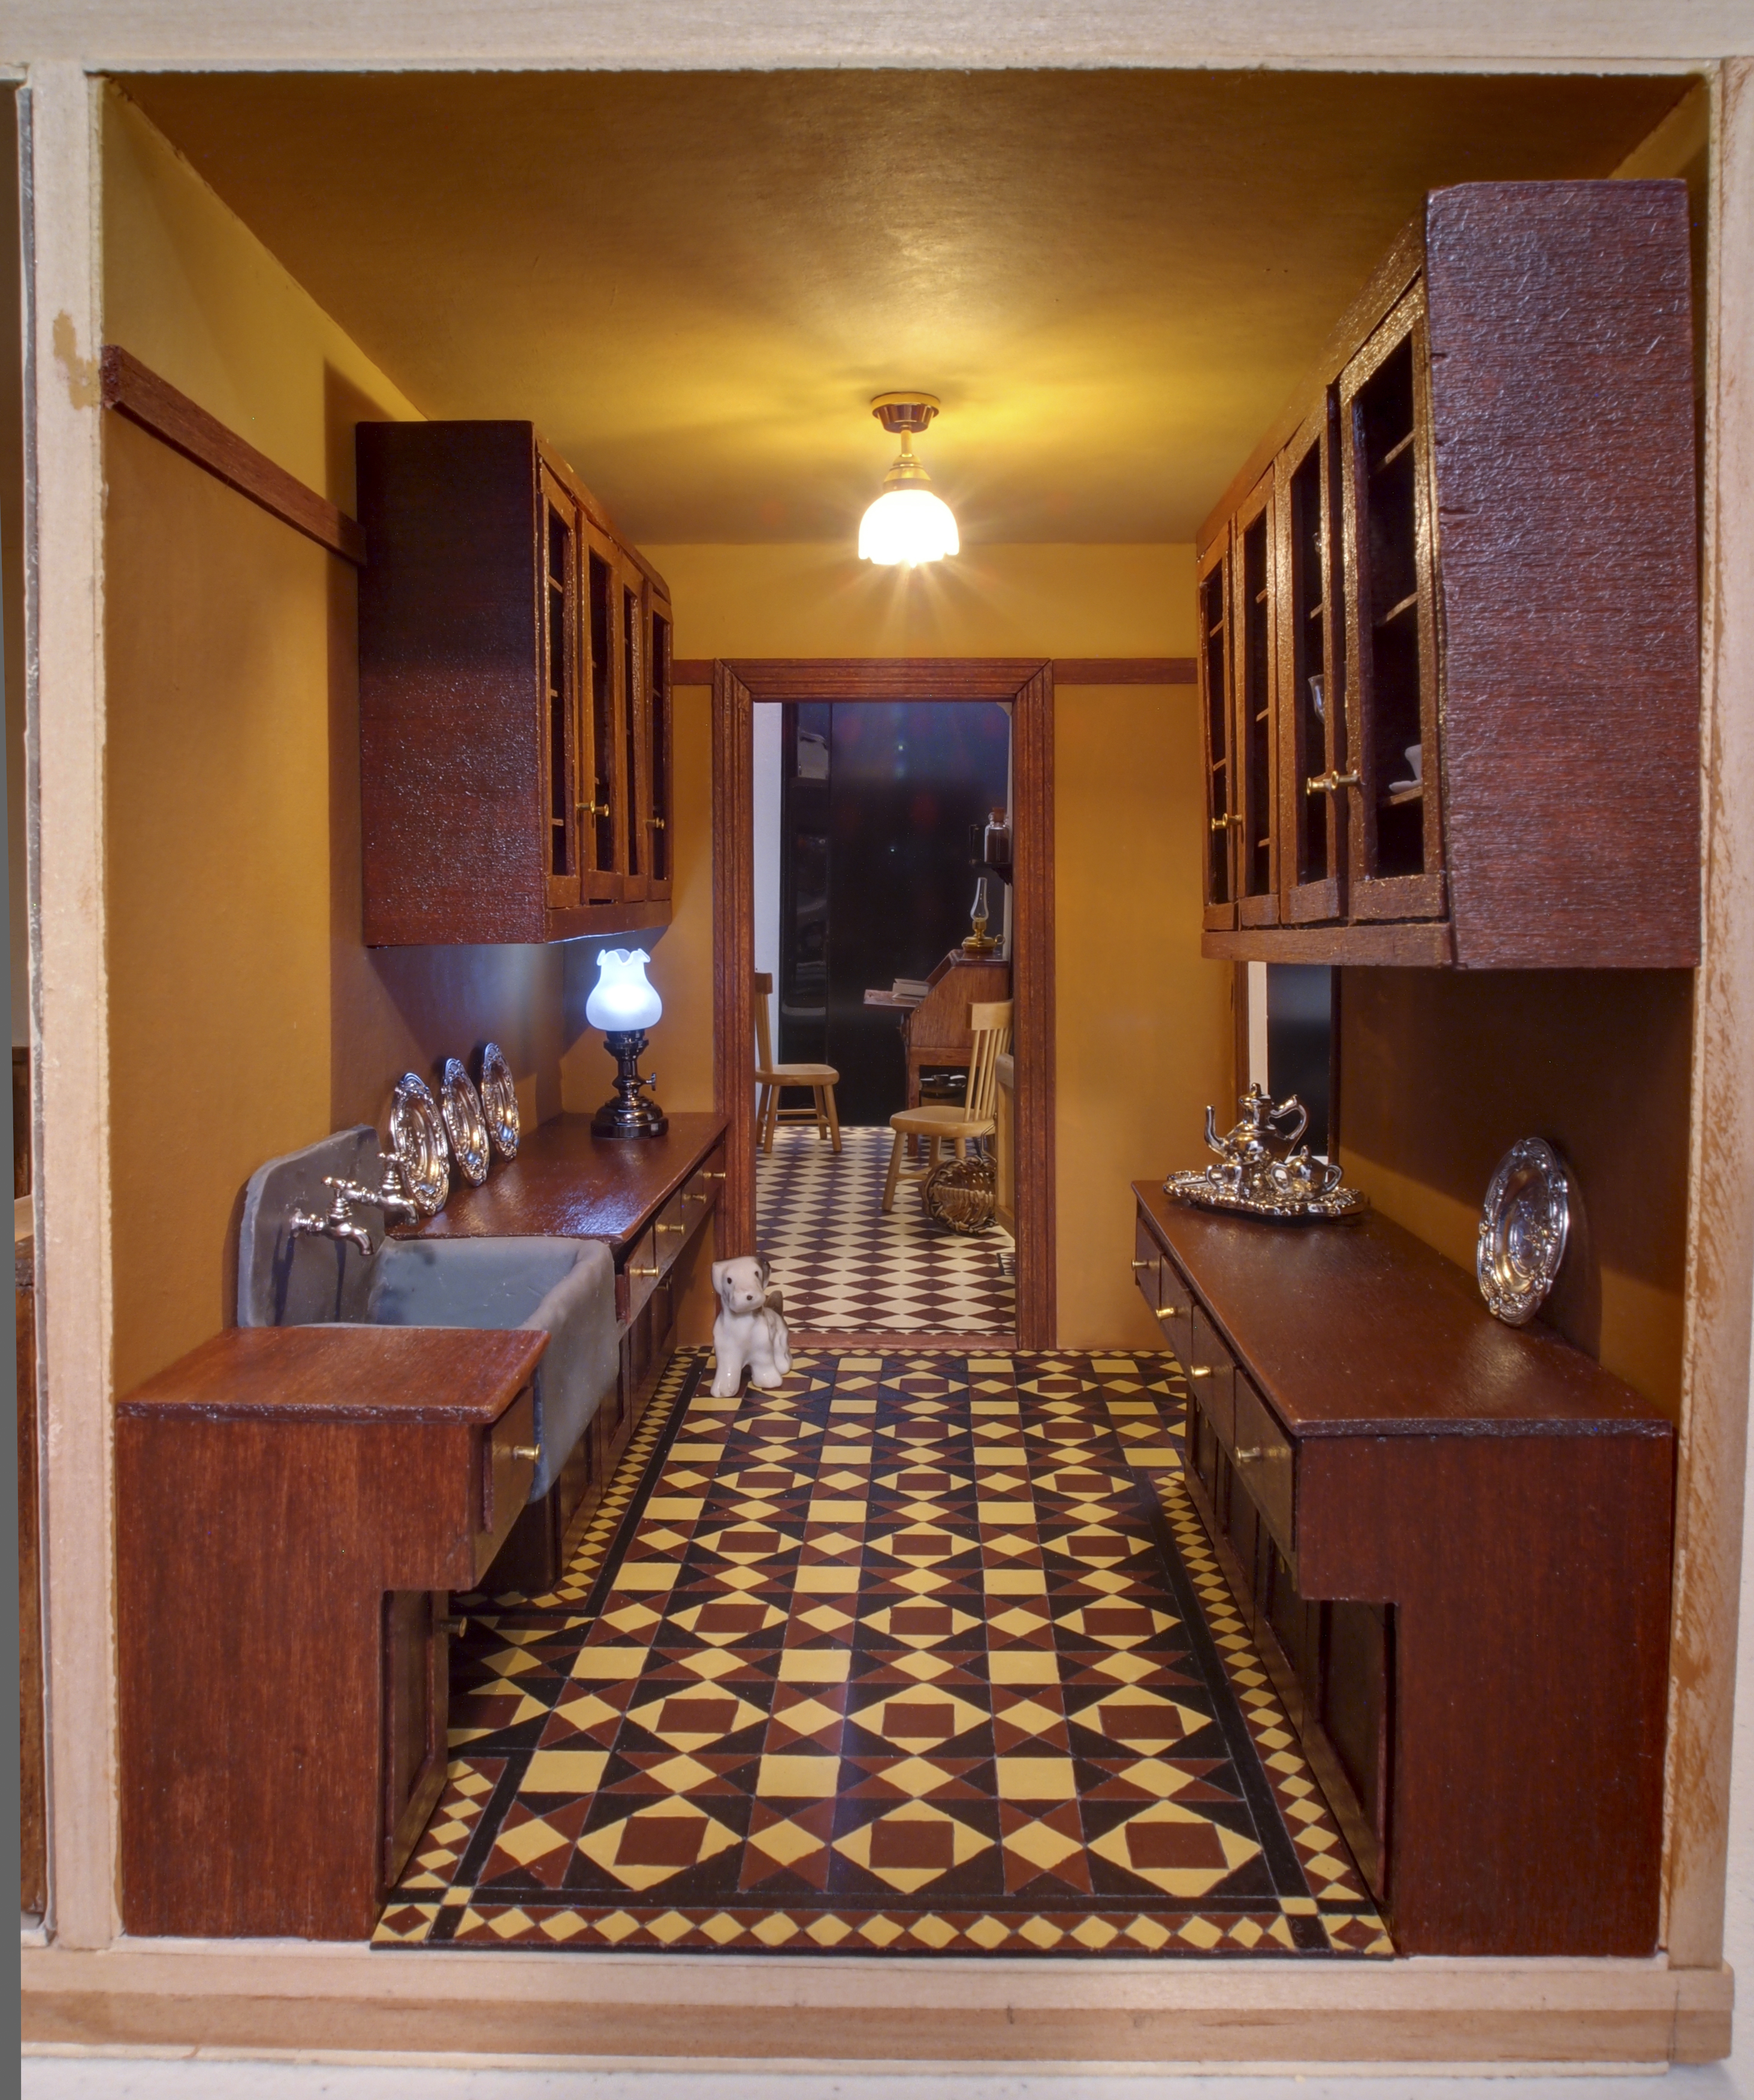
(Ack! I just noticed on this photo that the new shelves are pulling away from the wall on top as the glue is drying…I have added a clamp so it’ll dry correctly overnight…good thing I take so many photos!)

Good night.

Pantry ceiling done

Tags

, ,

I settled down to get through my checklist of things to do in the butler’s pantry.

Crack in the back right-hand corner filled and painted. Check.

OLYMPUS DIGITAL CAMERA

Ceiling trimmed and glued on. Check.

OLYMPUS DIGITAL CAMERA

OLYMPUS DIGITAL CAMERA

Angles between walls and ceiling painted. Check.

OLYMPUS DIGITAL CAMERA

Wooden strips cut out 3/8″ across to make cabinet doors. Check.

OLYMPUS DIGITAL CAMERA

Four doors measured, cut, glued, stained and varnished….

Oh…right…didn’t quite get those done. Two of them have been measured, cut, and glued but that’s it for tonight.

I’ll leave you for now with a view of both rooms next to each other–the most utilitarian of servant workrooms on the left, and the pantry leading out of the staff quarters and into the dining-room on the right.  The difference in style is rather striking.

OLYMPUS DIGITAL CAMERA

Good night.

Butler’s pantry nearly done

Tags

, ,

Two blog posts today, since I ended up having a bit of time left over after getting my work done this evening.

I made two more doors for the cabinets, along with their paper clip hinges.

Image

Stained them and varnished the entire cabinet. Then I put the doors in (in this photo, the top rail in which the hinges are fixed is not yet attached).

Image

I glued on the top rail and door knobs (actually little metal pieces of electrical wiring that I bought once and never used) and glued the cabinet onto the wall for good.

Image

It’s far from perfect but it’ll do for the butler’s pantry, where the servants work. Someday I’ll purchase some super-thin plastic sheets to put in the doors, but for now, I quite enjoy the practicality of being able to place the china and glassware on the shelves with the doors closed…

Image

Next I glued the right-hand wall in place.

Image

Took the view from above…

Image

…before laying the ceiling on top (not glued in yet).

Image

I still need to fill a crack where the right-hand wall meets the back wall, make two more sets of cabinet doors, glue in the last cabinet, and fix the ceiling on, but I’m so close to being done with this room…perhaps one more day of work…

Image

For now, good night.

Kitchen details

Tags

, ,

The kitchen desk came today, along with an umbrella and a grater. And I made a shelf where the cook could keep her recipes.

So here is the kitchen as it stands:

Image

Of course, there are still many little details to add…

Image

Most importantly a clock / servants call box on the wall, or else how could the kitchen function efficiently?

Image

But then, the rest of the house doesn’t exactly exist yet, so it’s not like there’s anywhere for the staff to be called to, or anywhere where the dinner needs to be served on time.

Image

So for now…

Image

…since the floor, the walls, and the ceiling are finished…

Image

…and the furniture and appliances are all in place…

Image

…I am officially declaring the kitchen done!

Which means two rooms down, and ‘only’ twenty to go…

Even more cabinets

Tags

, ,

Tonight my main goal was to finish these pantry cabinets…they have become more than tedious by now…

After a quick scare that the stores no longer carried the wood stain I’ve been using on them, I found out they still do…just under a different label. So I settled down to get these done.

I made and stained the doors and the drawers for the second counter.

Image

Then I put the individual shelves in the second wall cabinet.

Image

Next I got started on the cabinet doors, using tiny parts of paper clips to create hinges.

Image

That turned out to be a major headache, so I only got two done…

Image

Stained them and put the cabinet up on the wall temporarily.

Image

Propped the other wall and ceiling up and attached the other wall cabinet with tape to be able to see what the room looks like for now.

Image

Image

Image

So unfortunately I still have three pairs of cabinets doors yet to make.  But I’ll leave you with a photo of both rooms on this side of the house, with bits of the kitchen behind:

Image

It amuses me that you can glimpse full-sized objects through the doorways and windows.

Good night.

Still more cabinets

Tags

, ,

Spent some time this evening adding shelves to the wall cabinets…only got one of the two completely done.

Image

I also took a coffee stirrer and painted it silver to create pipes for the sink trap.

Image

Then I glued the plumbing beneath the sink.

Image

Next I put some plates and glasses in the cabinet. It still need doors on it, but it’s almost there. Then I’ll just need to finish the other one and add the drawers and doors to the other counter. I say “just” because I’m trying to encourage myself. These cabinets are getting a little tedious…

Image

Oh, and I ran the lamp through the ceiling. It’s not attached yet because I haven’t painted the ceiling, so it’s hanging a bit askew…but it lights up the room well.

Image

And yes, I did think the lighting through historically. If this house was built in 1891 and the ‘current’ owners were living in it about 15 years later, then given that electricity was available in most US cities by the 1890’s, this house could have a mix of gas and electric lamps…hence the ‘electric’ one here.

And now…good night.

Pantry sink

Tags

, ,

Sat down at the work table to create a sink today.

Image

Rolled the clay out and laid it on the cardboard frame I had made.

Image

Image

Then I baked it in the oven and propped it up to see if it fit right.

Image

Afterward, I figured it was time to fix the big crack in the corner of the wall.

Image

Then I painted the walls a warmer shade of orange (partly because I have no idea what color I used last time so I can’t reproduce it…but I like this color better anyway).

Image

And I glued the sink in between the two counters. The sink trap is still laying under the sink, since I haven’t made the rest of the pipes yet.

Image

Next I cut out and stained pieces for the wall shelves.

Image

Which I glued together and then taped up on the walls temporarily.

Image

Eventually they’ll look more like these…

Image

But for now it looks like this.

Image

Good night.

More butler’s pantry

Tags

, ,

The kitchen table came in the mail today. I’ll probably paint the white part a different color, but I love the shape and size of it.

Image

The sheets of outside siding came as well… Can’t put them on yet, though, until I’ve done the second floor electricity, since I’m running the wiring behind the siding.

Image

Went back to the pantry cabinets. Made a drawer, door, and shelves for the small cabinet.

Image

And filled the drawer with cutlery…

Image

The tiny metal faucets and sink plumbing came today as well. I built a cardboard version of the sink, which I was planning to use as a frame and cover with clay.

Image

It’ll end up here.

Image

Unfortunately, the clay was left over from four years ago and had gone bad. So I will have to do that part later.

Then I finished the right-hand counter frame…still need to do the drawers and doors. But the frame is done and varnished.

Image

So that’s what I have for now…

Image

Good night.

More cabinets

Tags

, ,

Did a bit more work on the cabinets for the butler’s pantry tonight. First I cut out, stained, and glued together the small cabinet for the other side of the non-existent sink.

Image

Image

It still needs a shelf, a door and a drawer. Then I started in on the last set of counters…

Image

Didn’t quite get done with that one, but some of the pieces are cut and stained…

Image

Hope you like the new blog format…

Good night.