Tiles finished
09 Wednesday Jan 2013
Posted in Uncategorized
09 Wednesday Jan 2013
Posted in Uncategorized
08 Tuesday Jan 2013
Posted in Uncategorized
06 Sunday Jan 2013
Posted in Uncategorized
Started today by scoring the tile pattern into the cardboard.
The score marks help create the illusion of tiles when you’re done. And they help keep the paint in the right place when you’re painting…
After scoring the whole floor, I started the painting. Slow going. Here it is in place to see how the colors work.
Put on a movie–Unforgiven (the Duck of Death and all)– and kept painting until I got tired.
Here’s what it looks like so far. Many more hours to go; good thing I’m still on vacation…
Good night.
06 Sunday Jan 2013
Posted in Uncategorized
After a few days off, I’ve come back to the kitchen floor. I decided that instead of using modeling clay to make tiles, I will use cardboard. So I started drawing a possible pattern.
I was vaguely using these Victorian tiles as inspiration:
I placed the half-finished design in the kitchen…
And added the furniture and props to see if the scale worked…
But I wasn’t sure if I liked the pattern. Something didn’t work right. So I changed this…
…into this…
I think that’ll be a lot better. Tomorrow I need to go get paint for the floor.
Good night!
31 Monday Dec 2012
Posted in Uncategorized
So today I thought I’d get to work on the kitchen, which was looking rather bare.
In a box, I found a lot of brown tiles I had started to make back in 2008 to create a kitchen floor, but when I lined them up, they didn’t look very good because they were quite irregular.
So I decided to trash them and start from scratch.
Based on my inspiration kitchen in Beaulieu Estate, I had bought a green paint yesterday and whatever packs of terracotta-looking modeling clay were in the local store.
I started by painting the wall pieces green and cream. It didn’t really matter how perfect the line between them was, since it was going to be covered by a black trim, which I also painted (you can see more of them them laid across the top of the pantry walls in order to dry).
I wanted to glue the black trim in, but to do that I needed to put the door frame trim in first. So I thought I’d put that in, but I needed to know how high the floor would be. So I thought I’d start on the floor, but I realized in order to do that, I needed to know exactly where the fireplace would be. So I glued in the studs for the right-hand wall instead. I would have done the left one, too, but I ran out of supplies halfway through. So the chimney still isn’t glued in…
Since the hobby stores were closed already, I started experimenting with other ways to create the floor. I tried several patterns and ended up with this one, but I’m not so happy with it. So I may try again tomorrow.
Here’s the kitchen so far…I laid a couple strips of trim against the back wall, just to see what the black would be like. I think I like the colors together… There will be plenty more black trim and shelves before I’m done with it.
Still a long way to go in the kitchen…
30 Sunday Dec 2012
Posted in Uncategorized
Today, I finally got started.
I needed to repair the scullery floor, because some creature(s) had decided to eat the buckwheat flour I had used as grout. Some of the flour had also gotten on the tiles and had stuck to them.
First, I used a fine steel wool to scrub the tiles.
Then I swept on a new layer of buckwheat flour.
And then gave the whole thing several coats of clear acrylic matte coating, so no bugs would go looking for a meal there again…
Which gave a pretty natural-looking result:
The ‘linoleum’ for the butler’s pantry also needed to be repaired…some of the paint had peeled away onto the cardboard that had been resting on top of it. So I repainted those bits and gave the whole thing a couple coats of acrylic as well.
Then, I glued the walls in and glued the linoleum onto the butler’s pantry floor (weighted down with professional weights, naturally…)
Back in the scullery, I made a chair rail to finish off the one I had started on the right-hand wall and created a windowsill (the wall on the left isn’t glued in yet).
I was inspired by this dish drying rack…
…and decided to build one for the scullery.
I started building a draining board to put under the drying rack, but I was getting tired. It’s propped up with modeling clay packages for now.
So here’s the scullery so far…
Good night.
28 Friday Dec 2012
Posted in Uncategorized
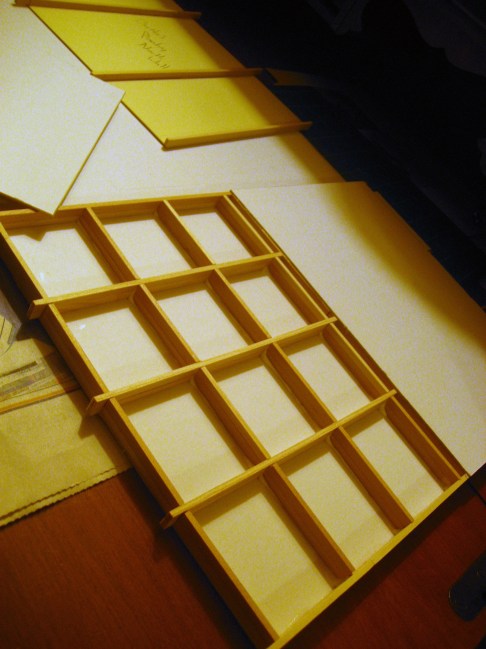
Toward the end of grad school, when I needed an outlet in the middle of dissertation-writing, I took the plans out again. After having researched different ways of creating dollhouses, I concluded, due to my lack of wood-working skills, that I would do best with a poster-board walls / wooden studs and joists approach.
Apparently it makes for a lighter house but creates a solid framework…just like an old Victorian wooden frame house.
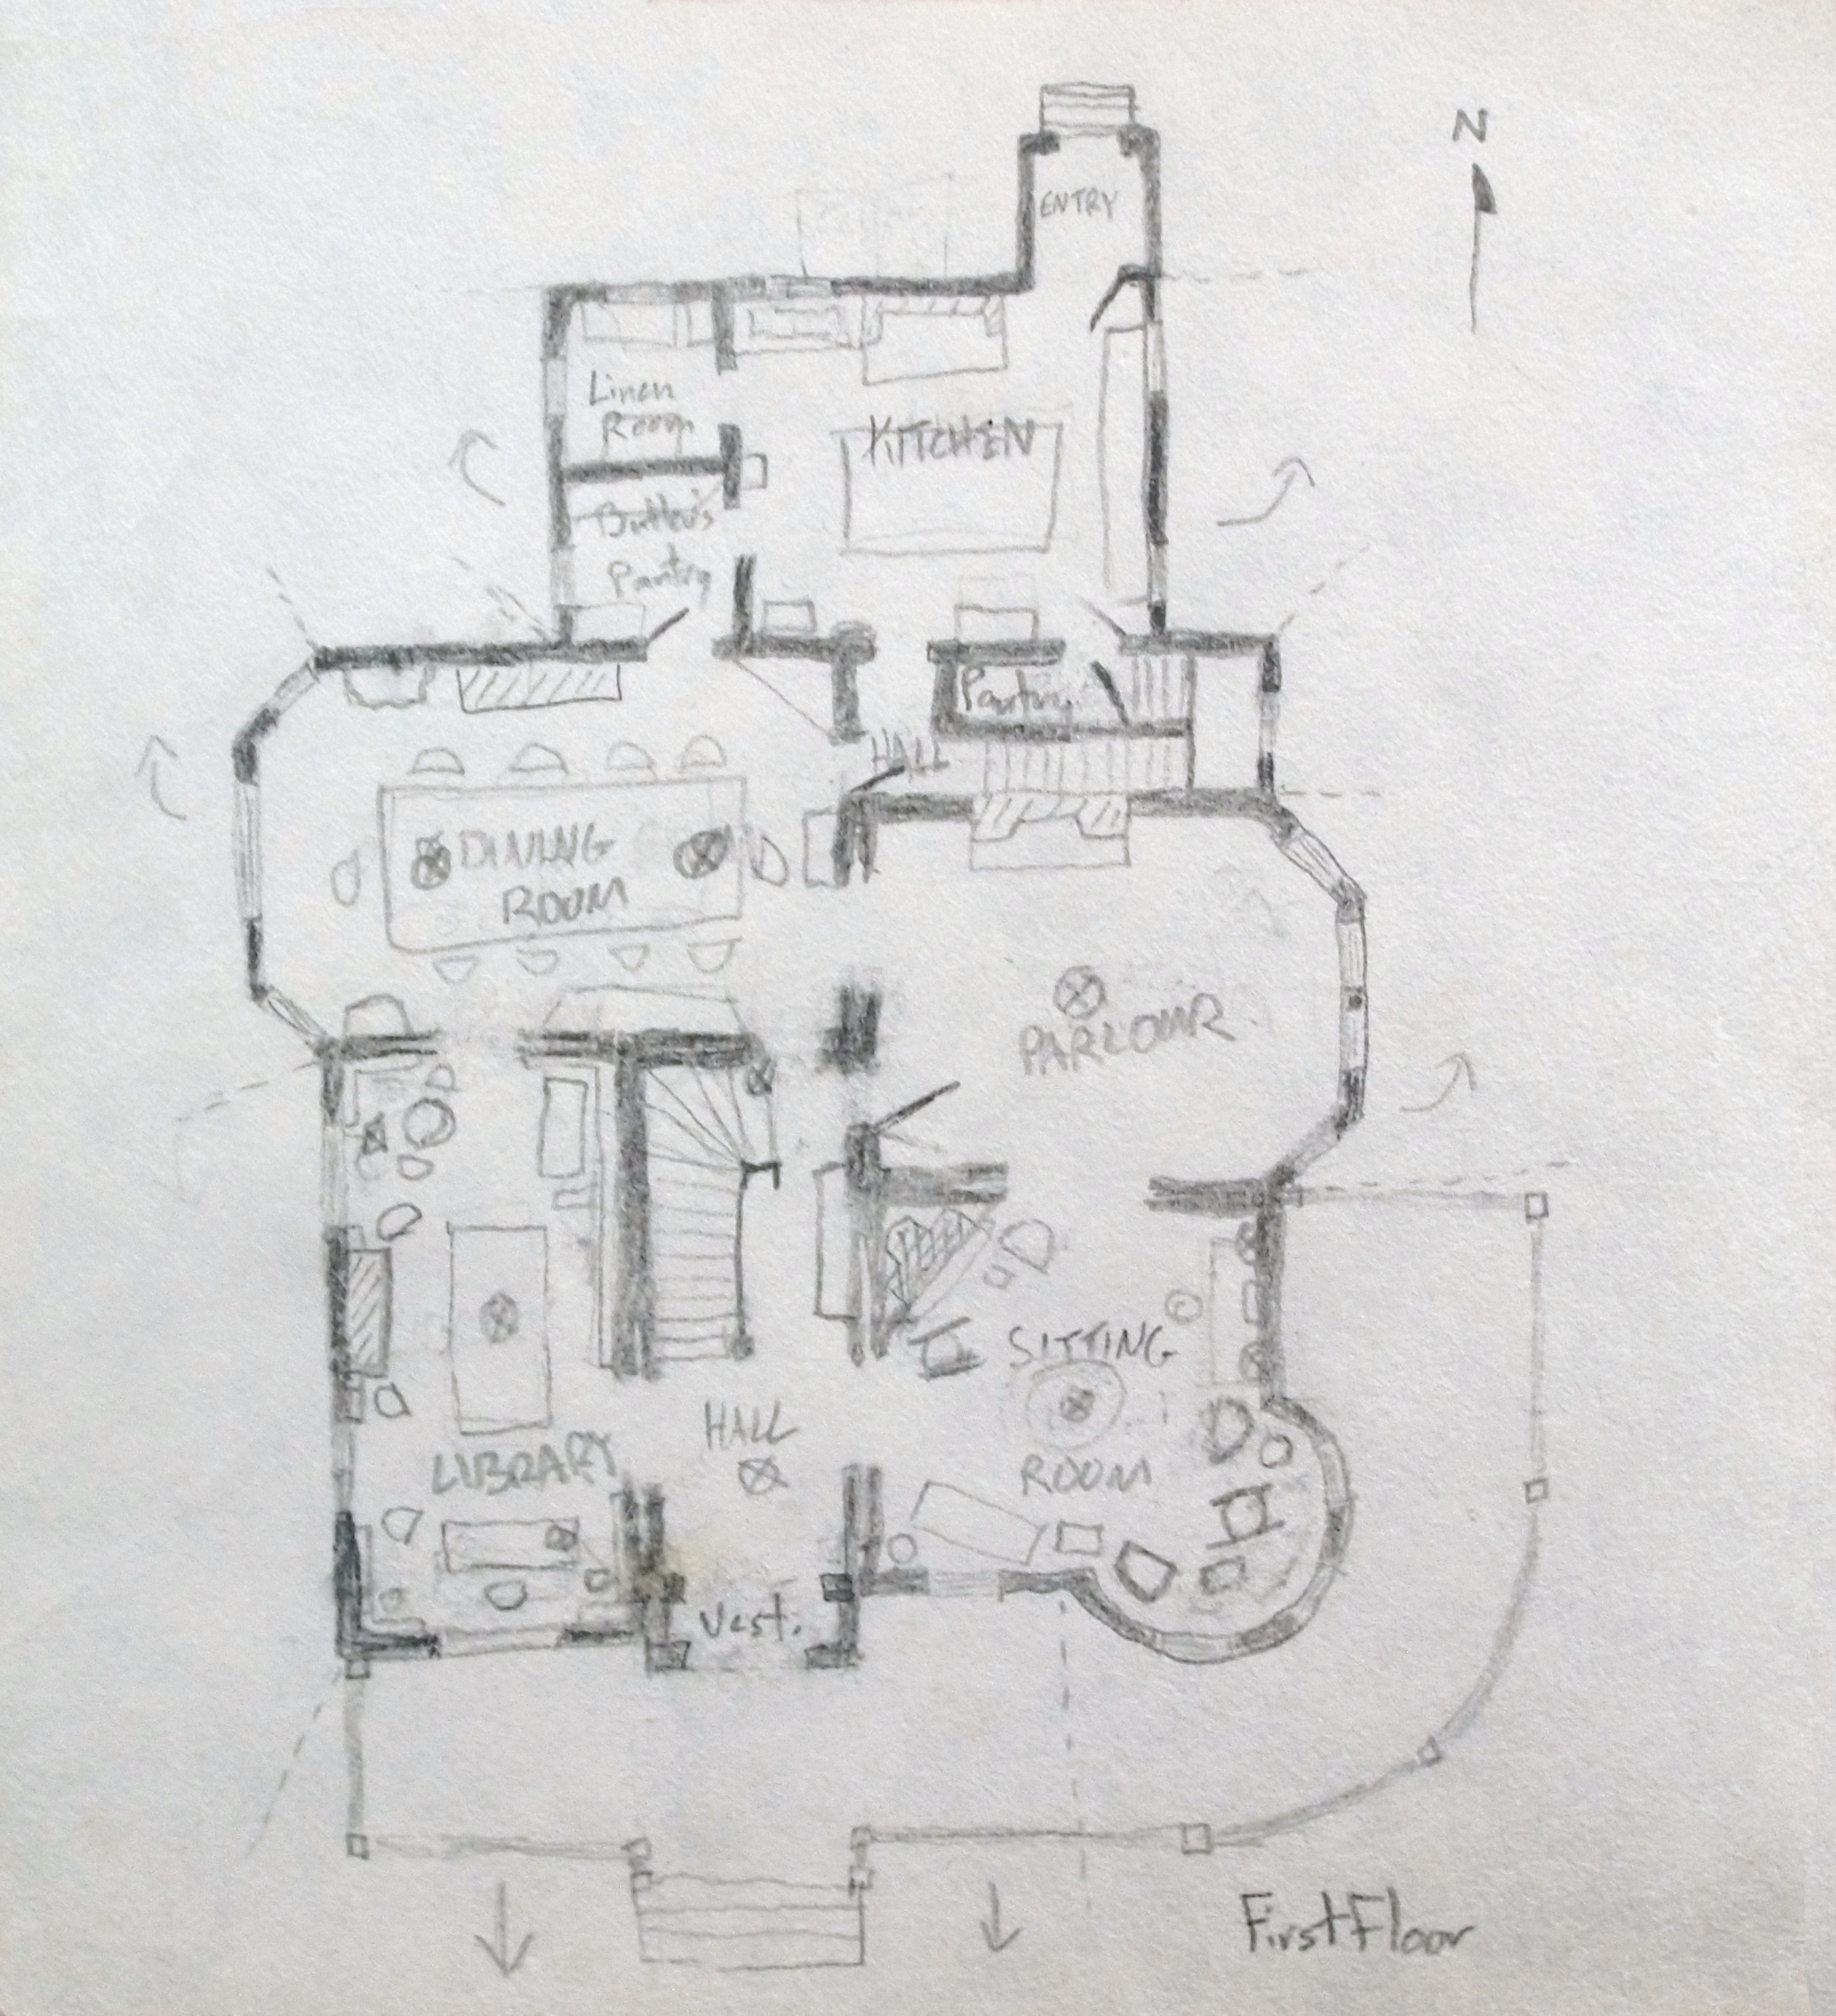
So early in 2008, I got to work. I started with the back of the house — the kitchen, scullery, and butler’s pantry area…I figured that would be the easiest place to begin.
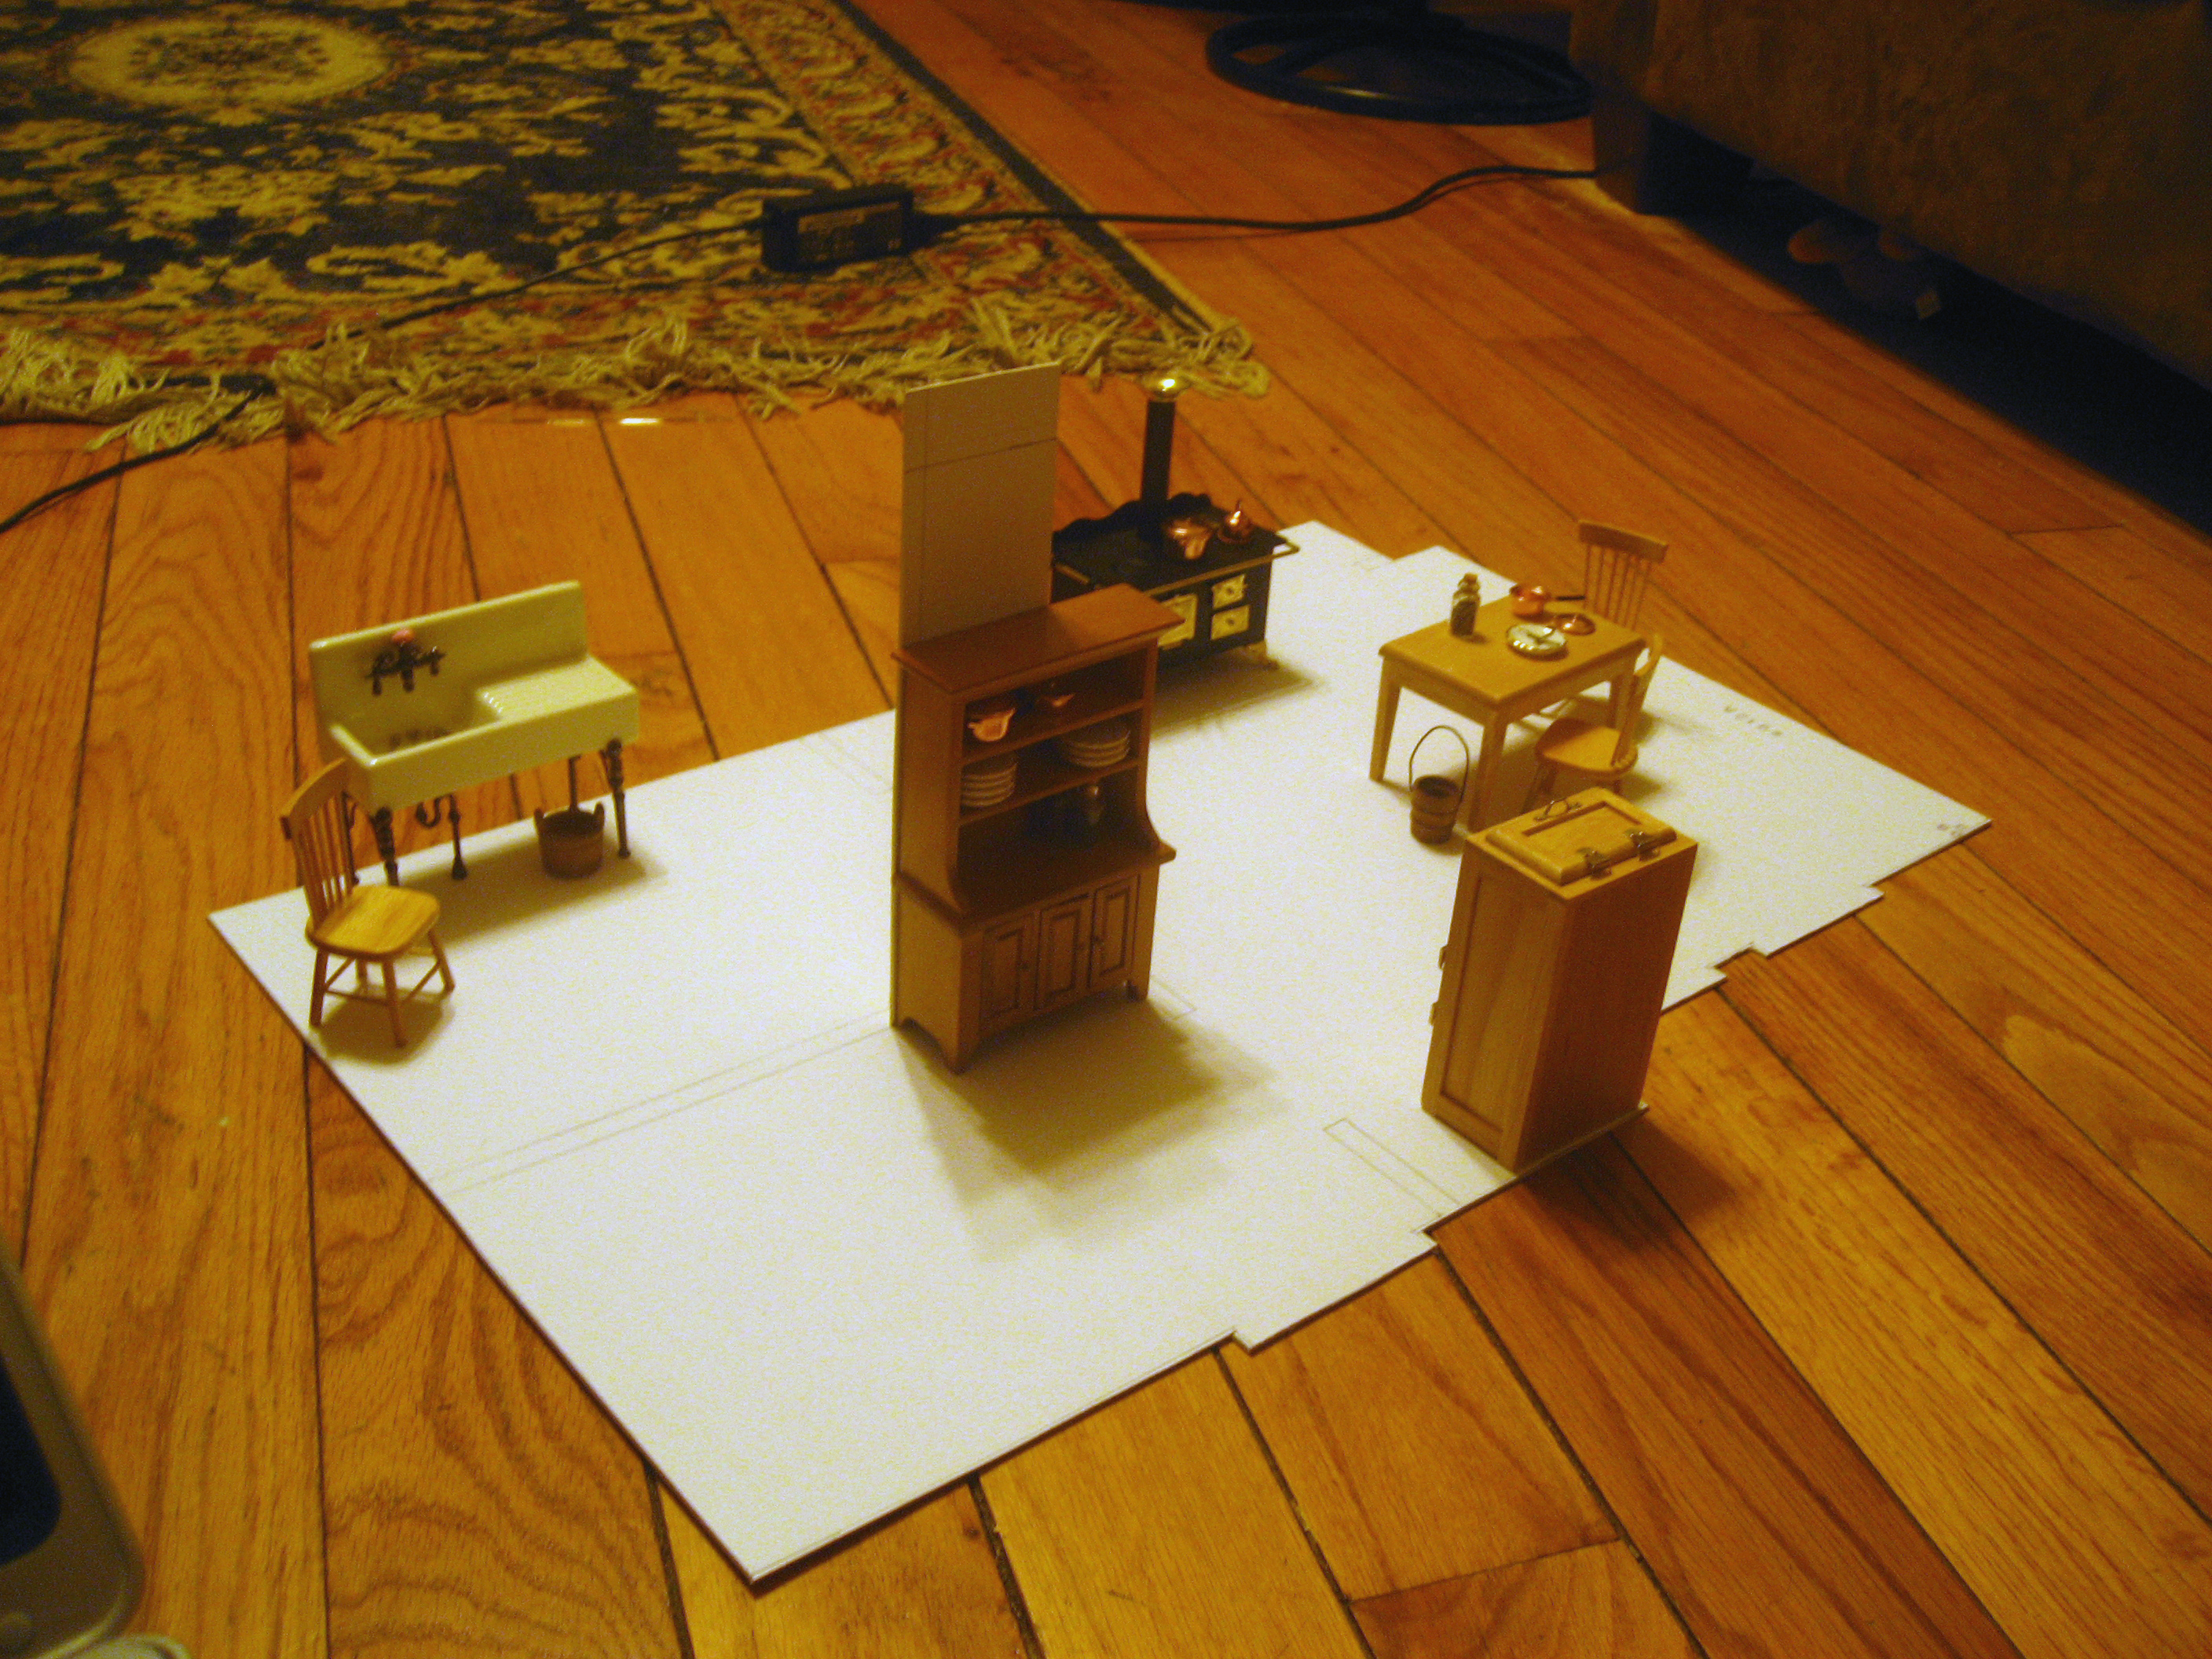
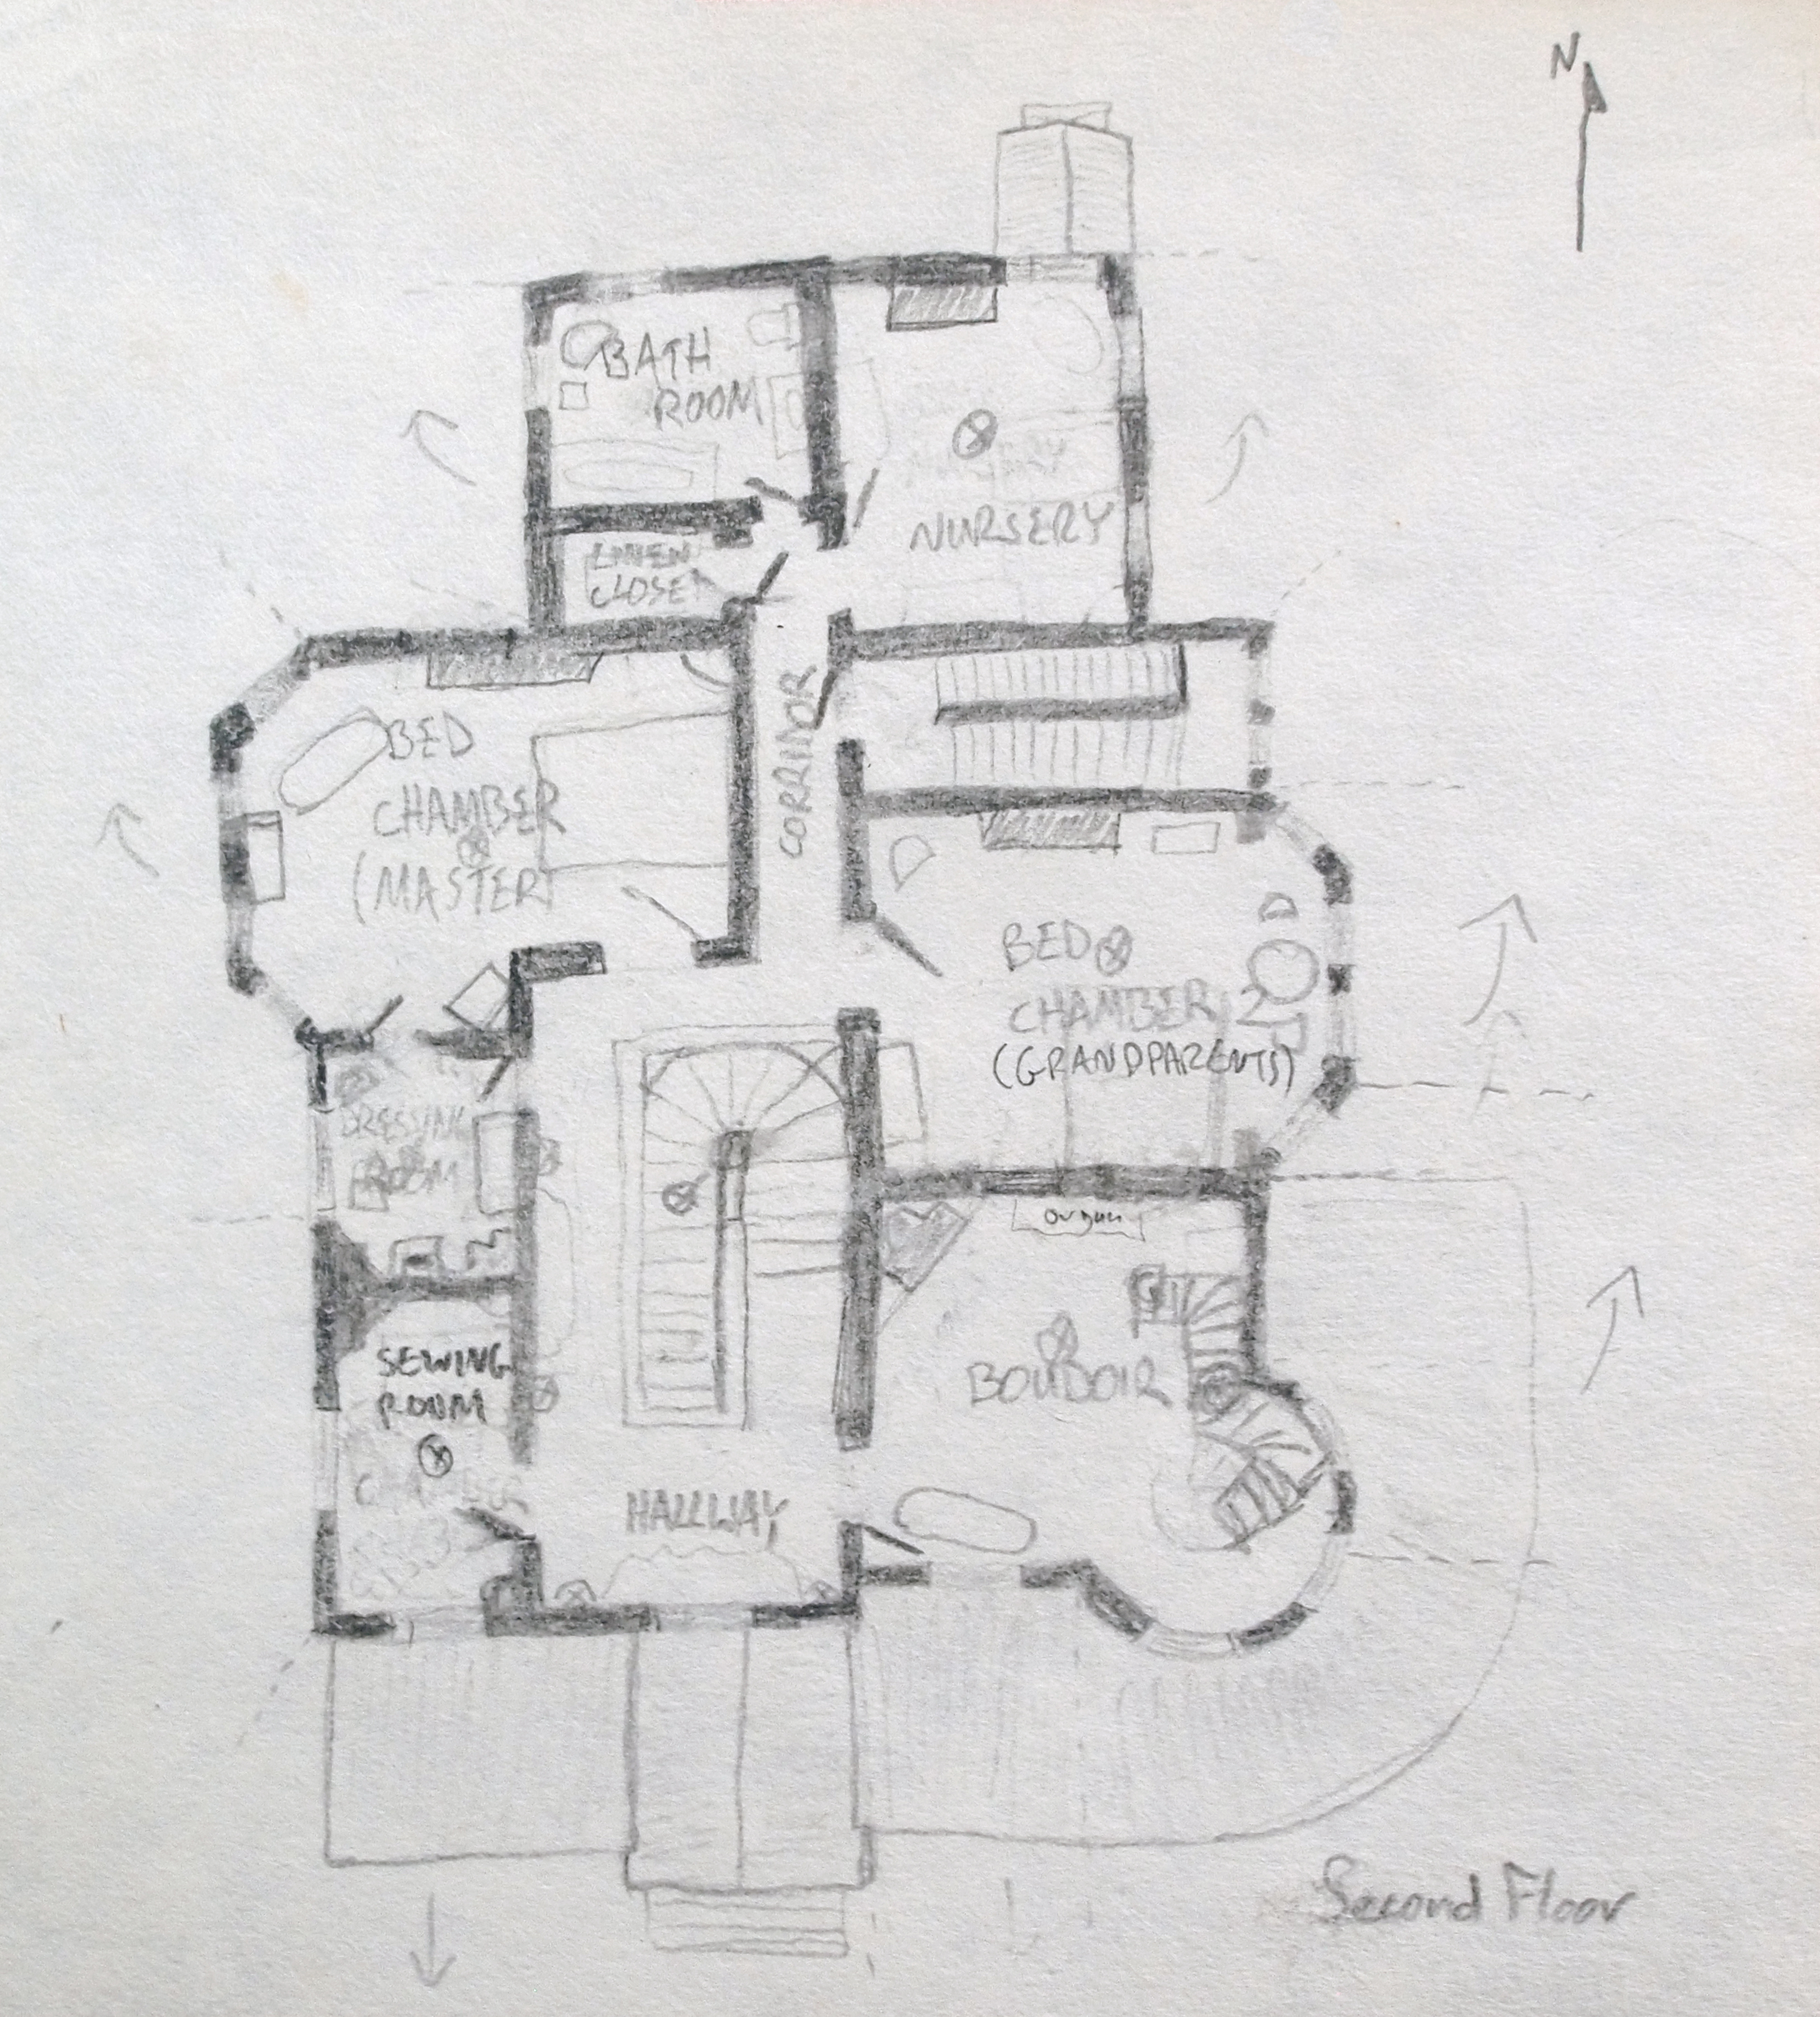
First, I traced out the floor plan on poster board and added some pre-built furniture to get a sense of the size of the rooms.
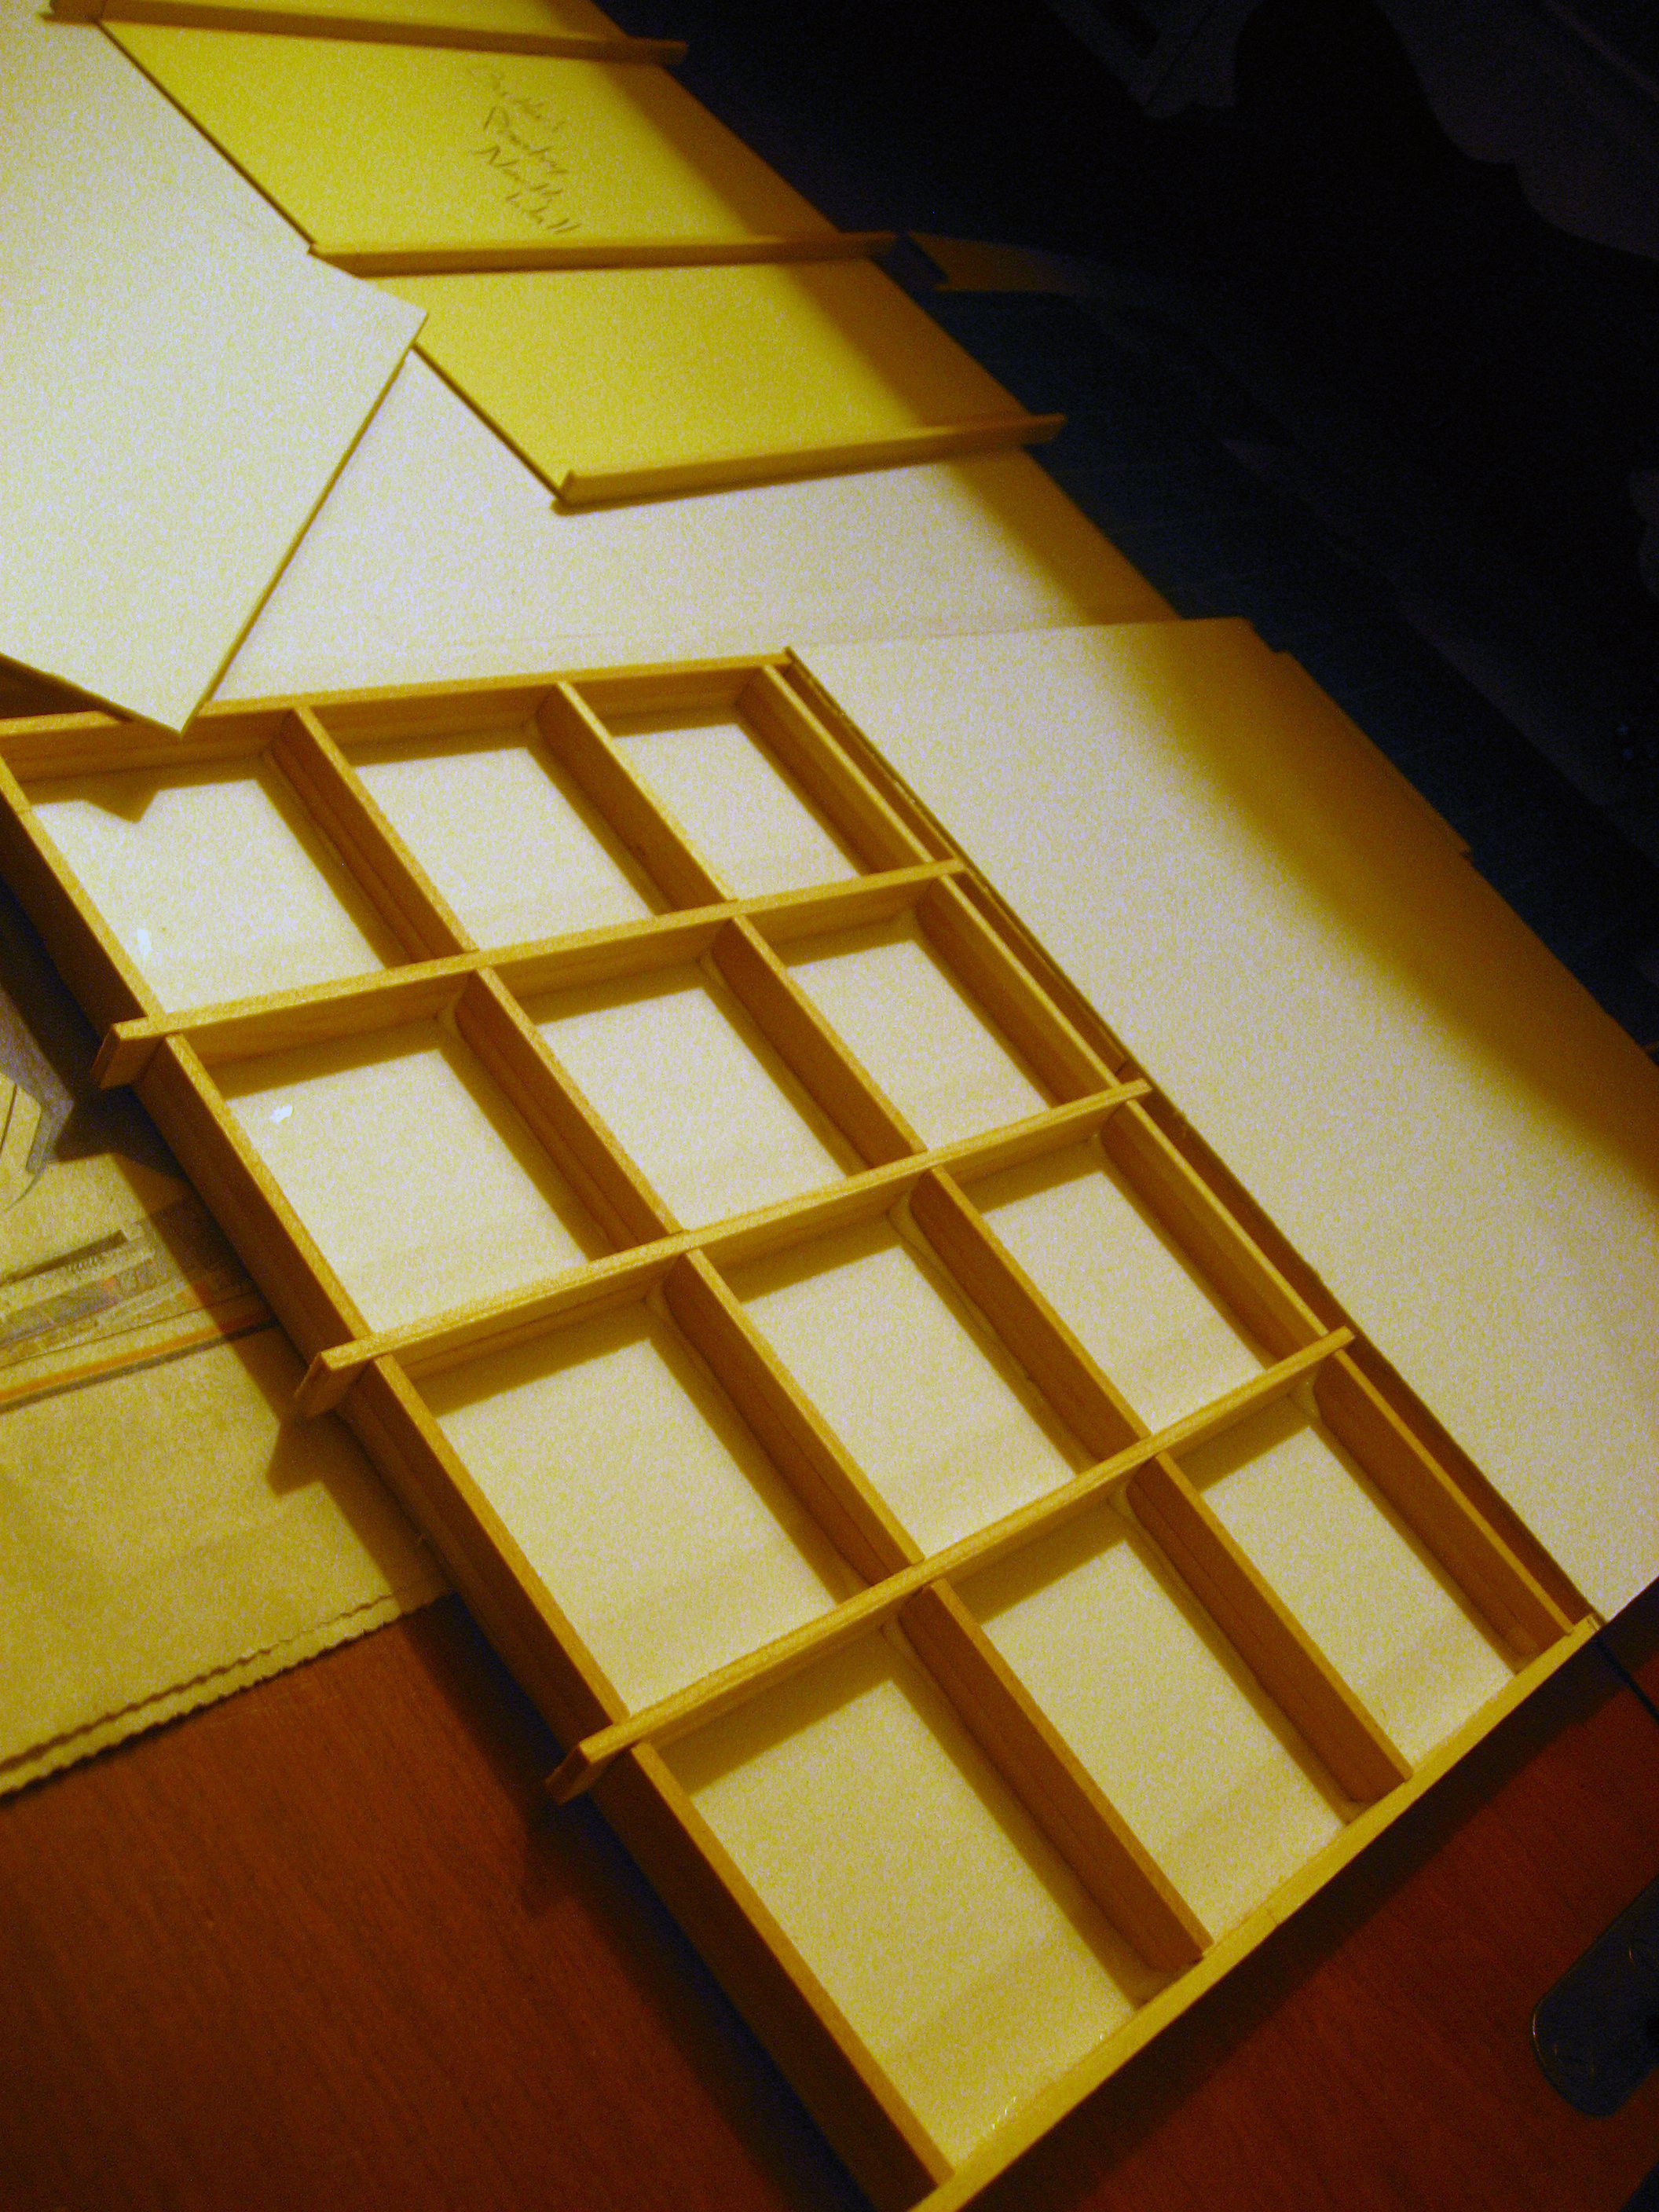
Then I cut the floor out.
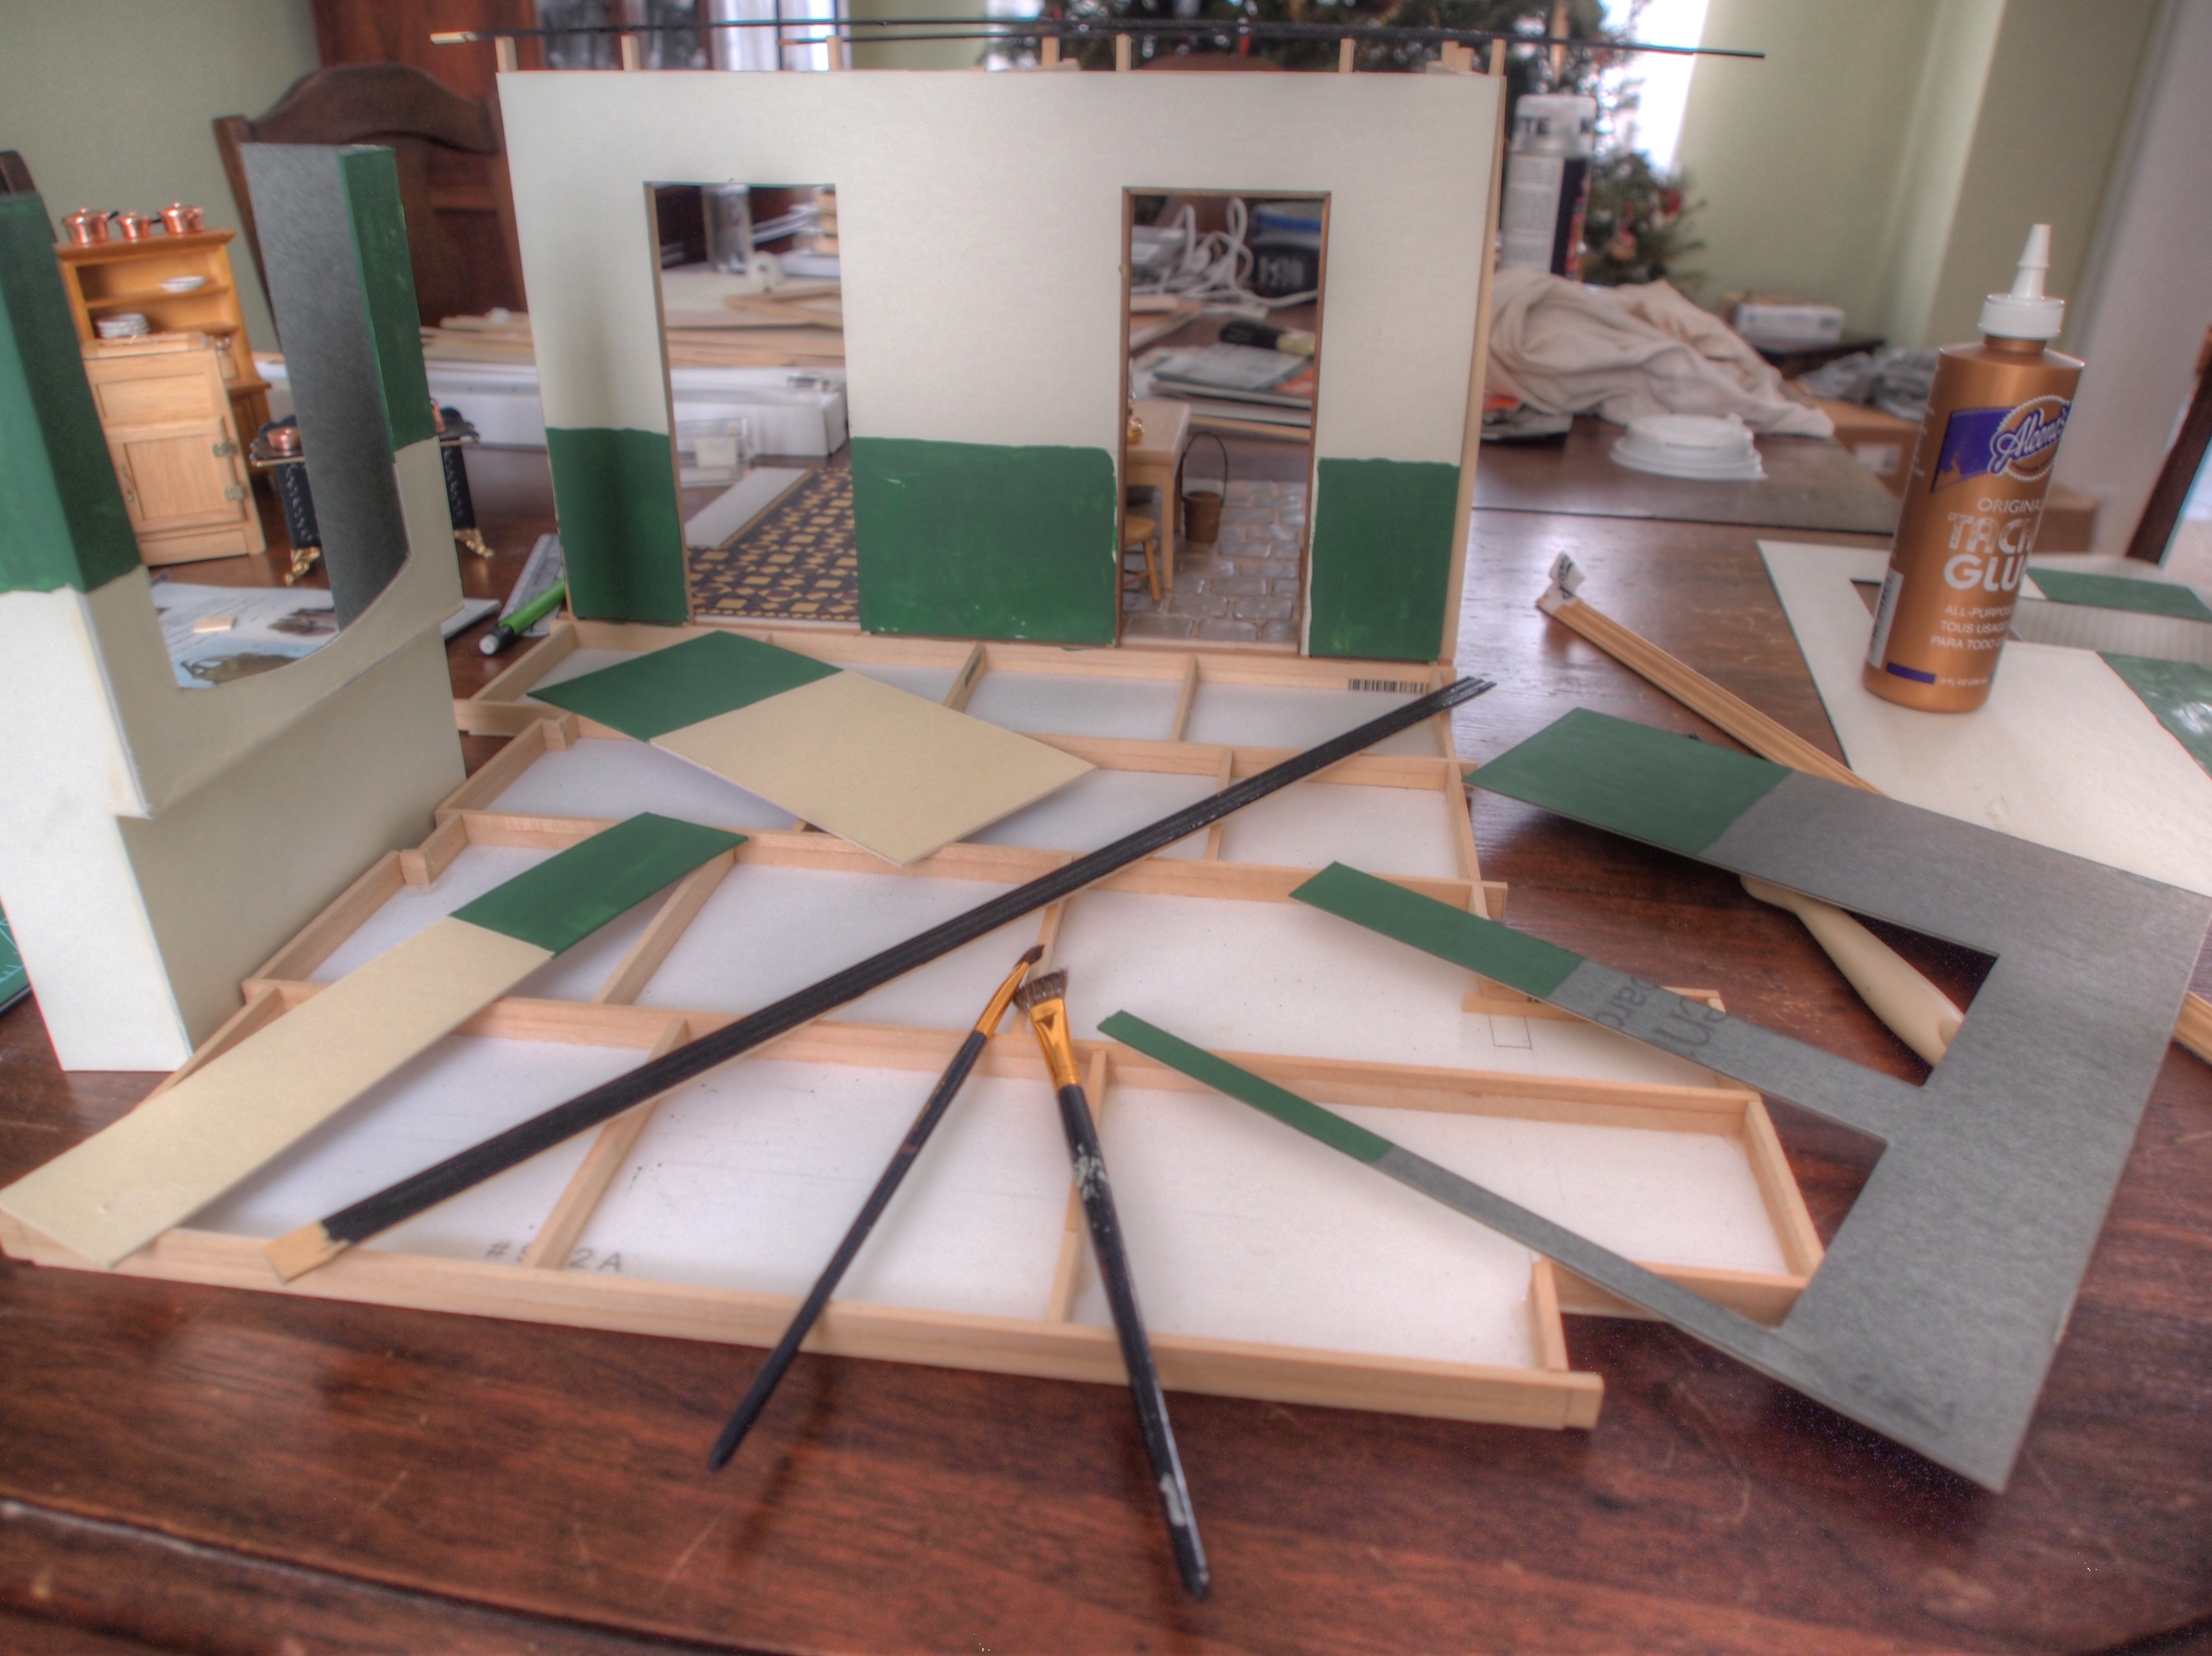
After cutting out a few walls, I propped them up to see what it would look like.
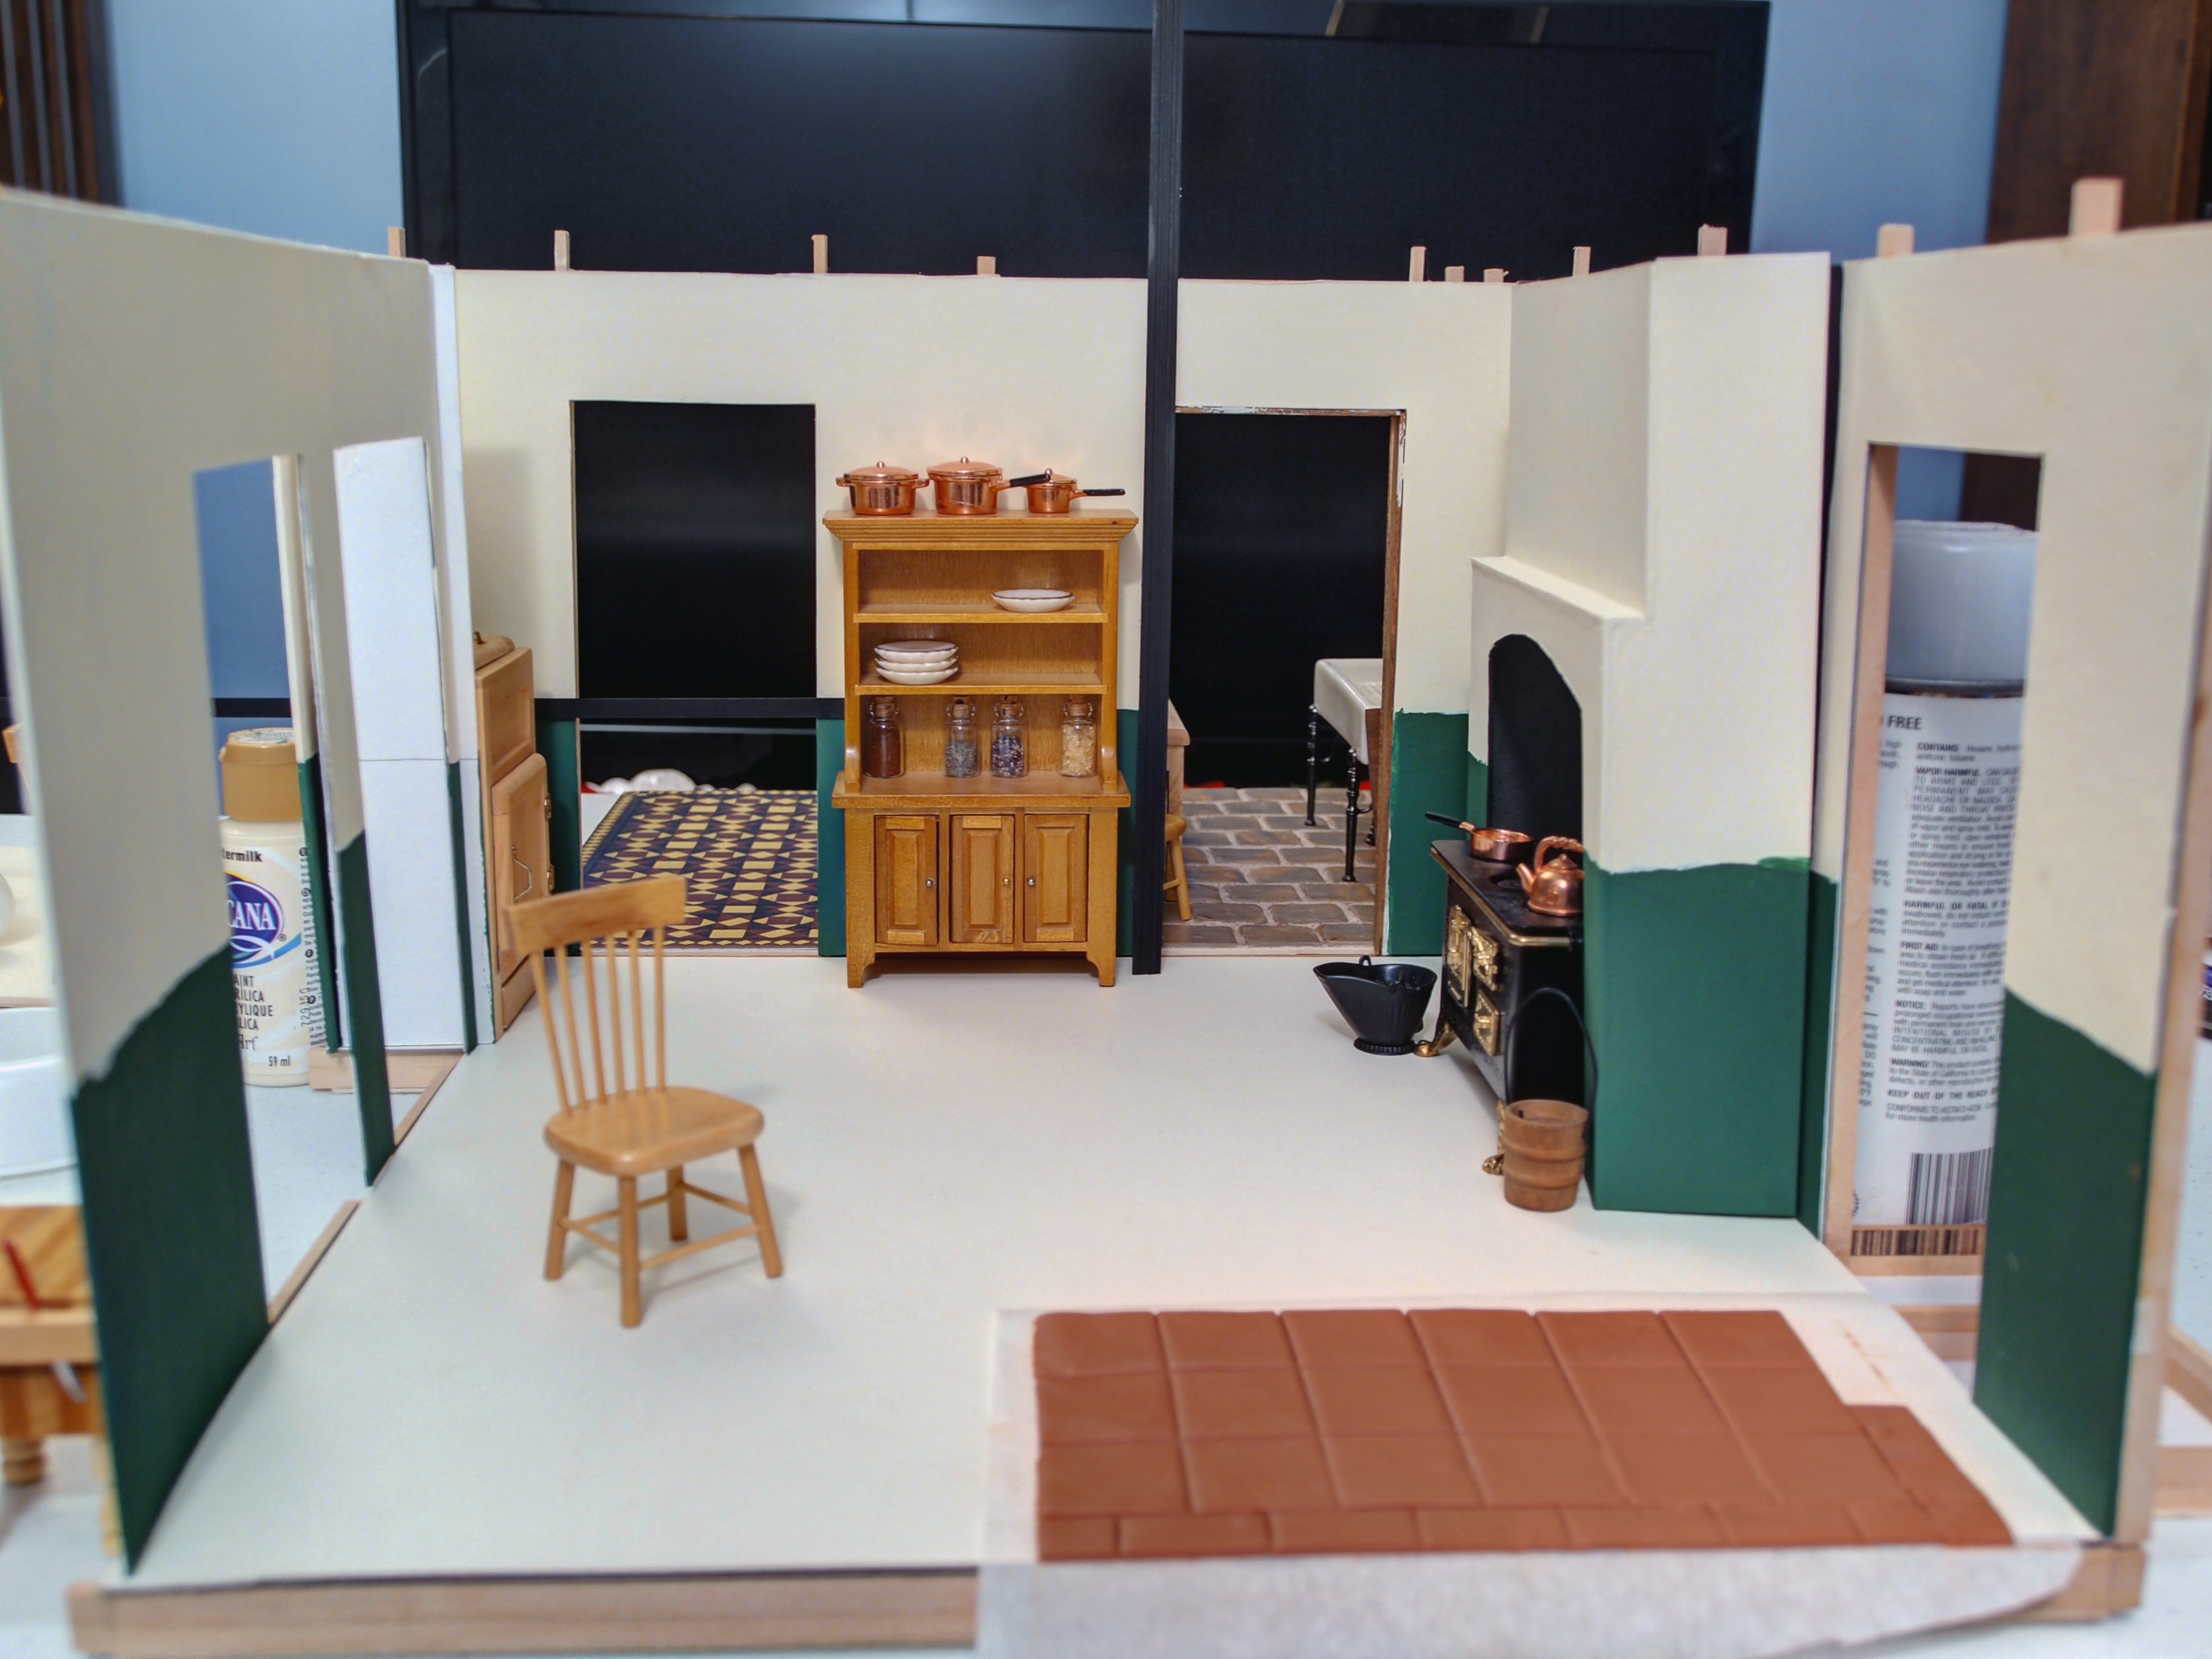
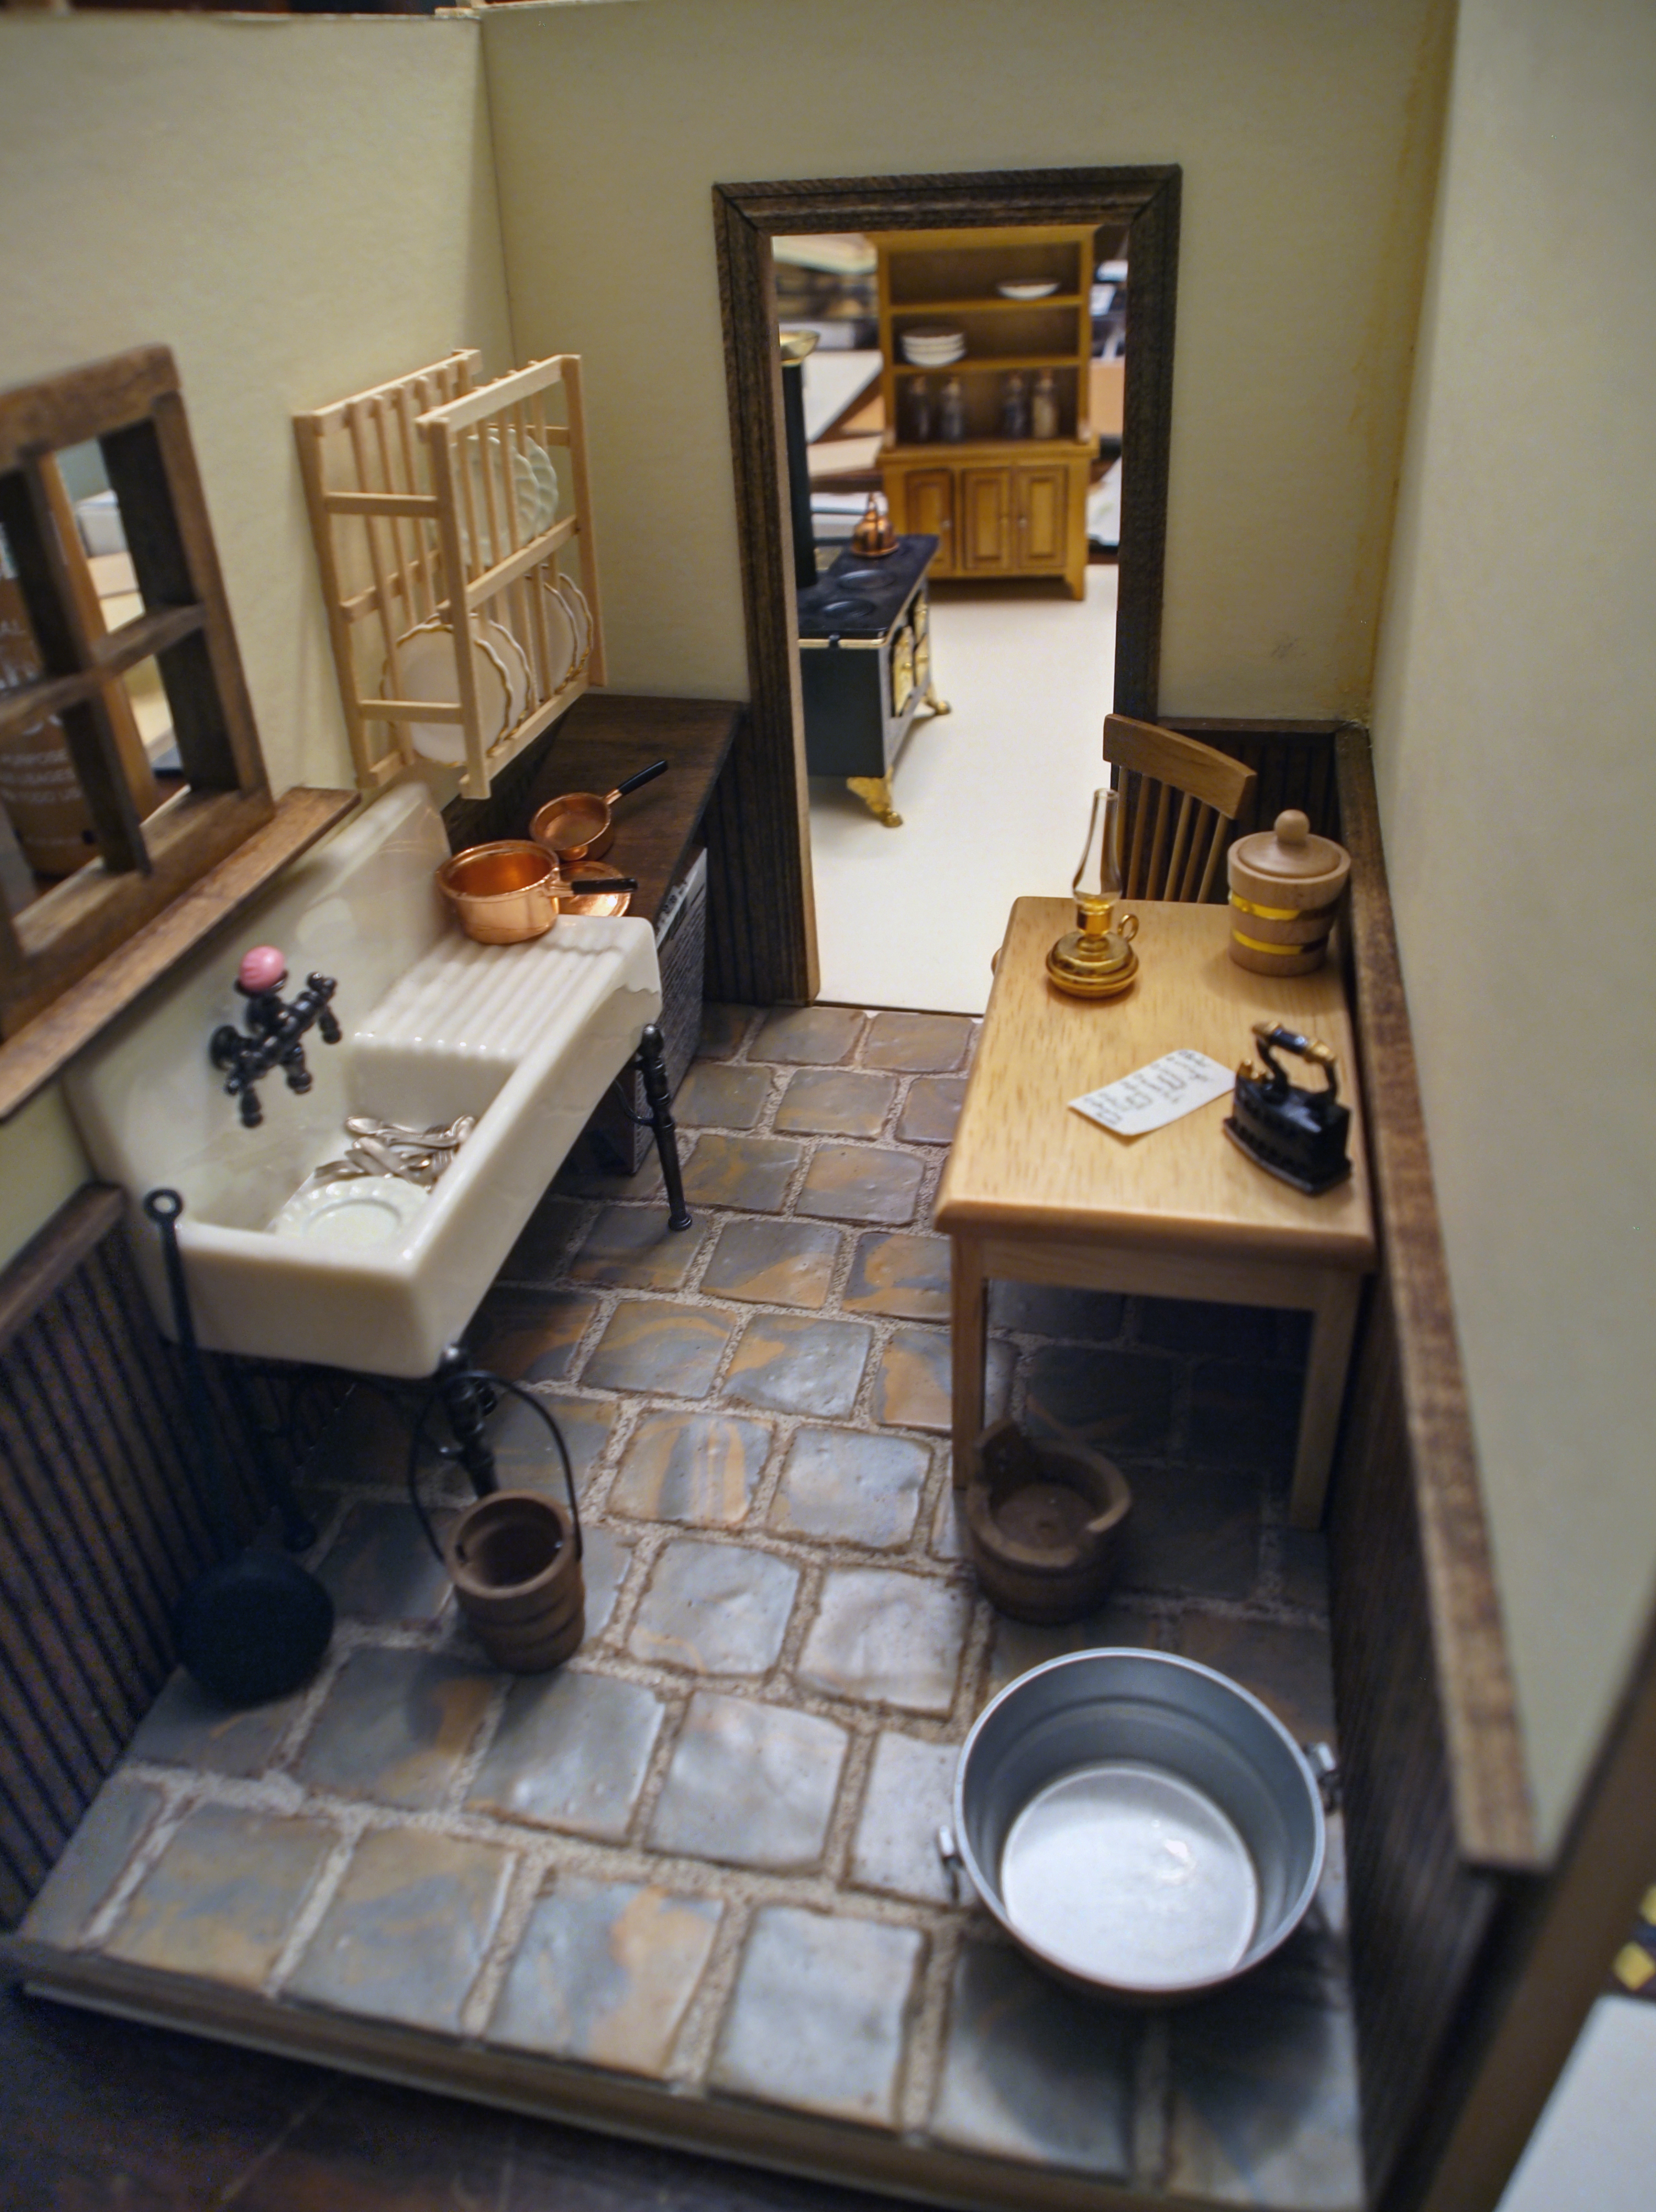
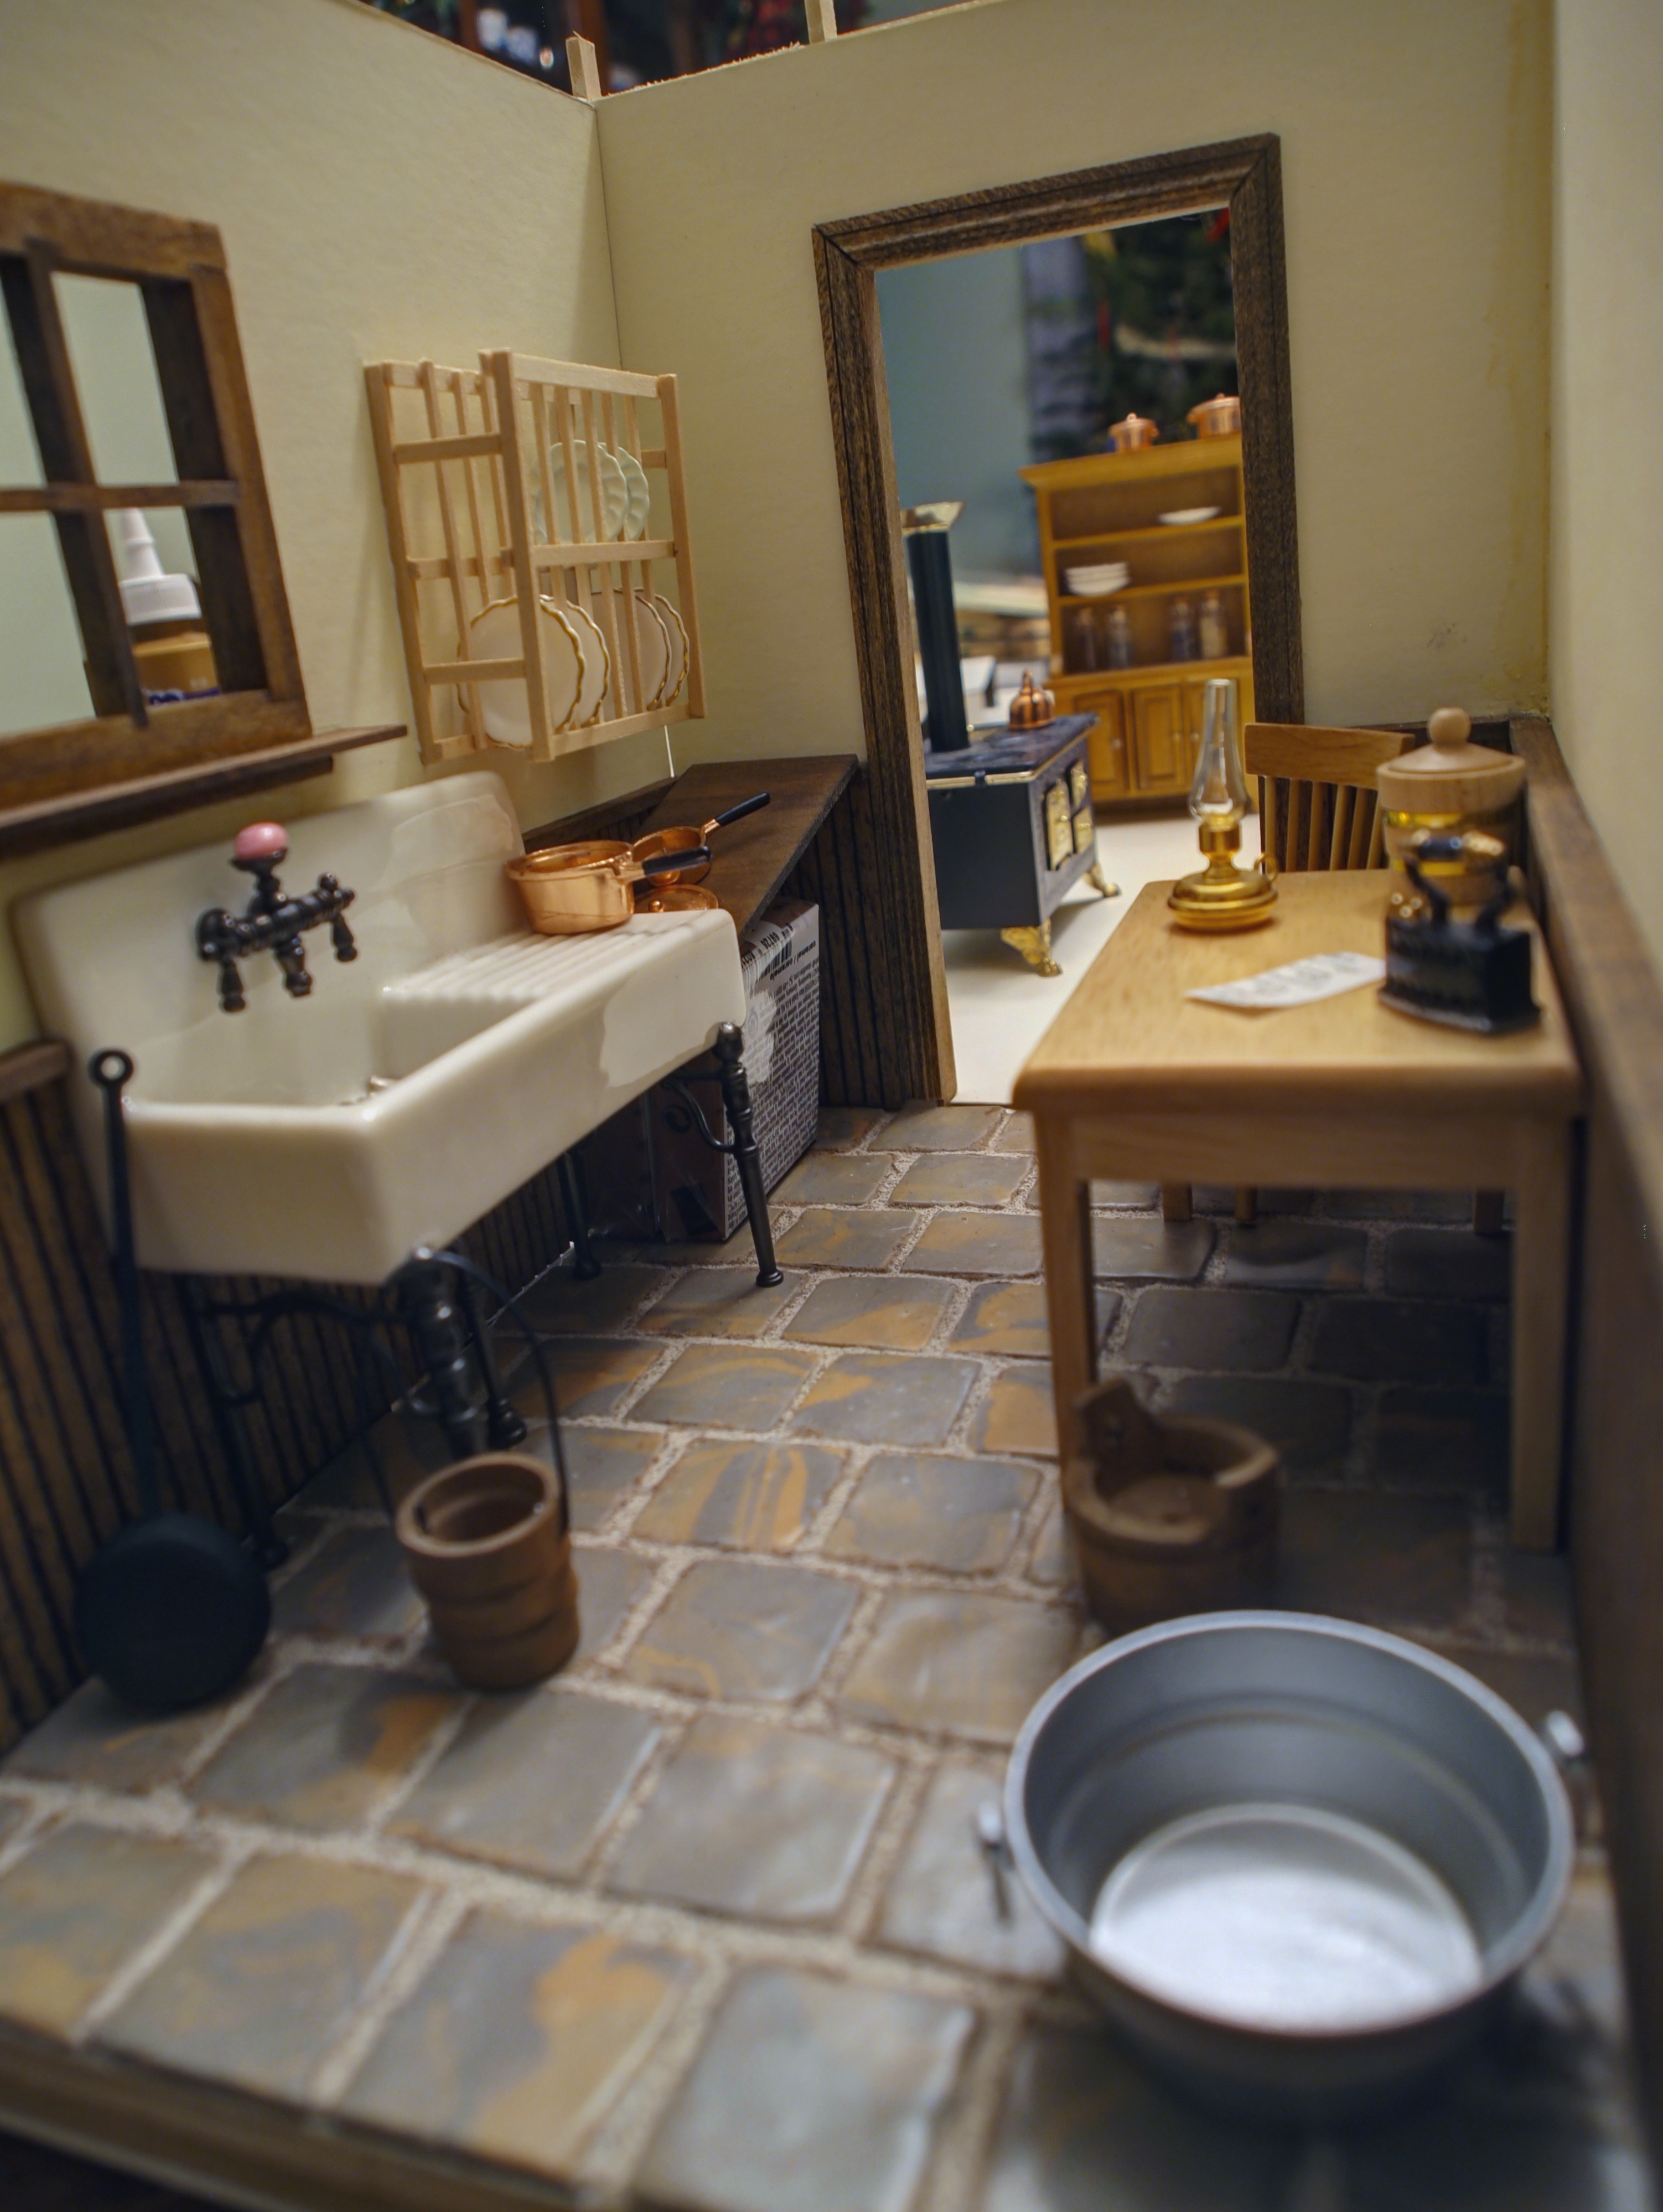
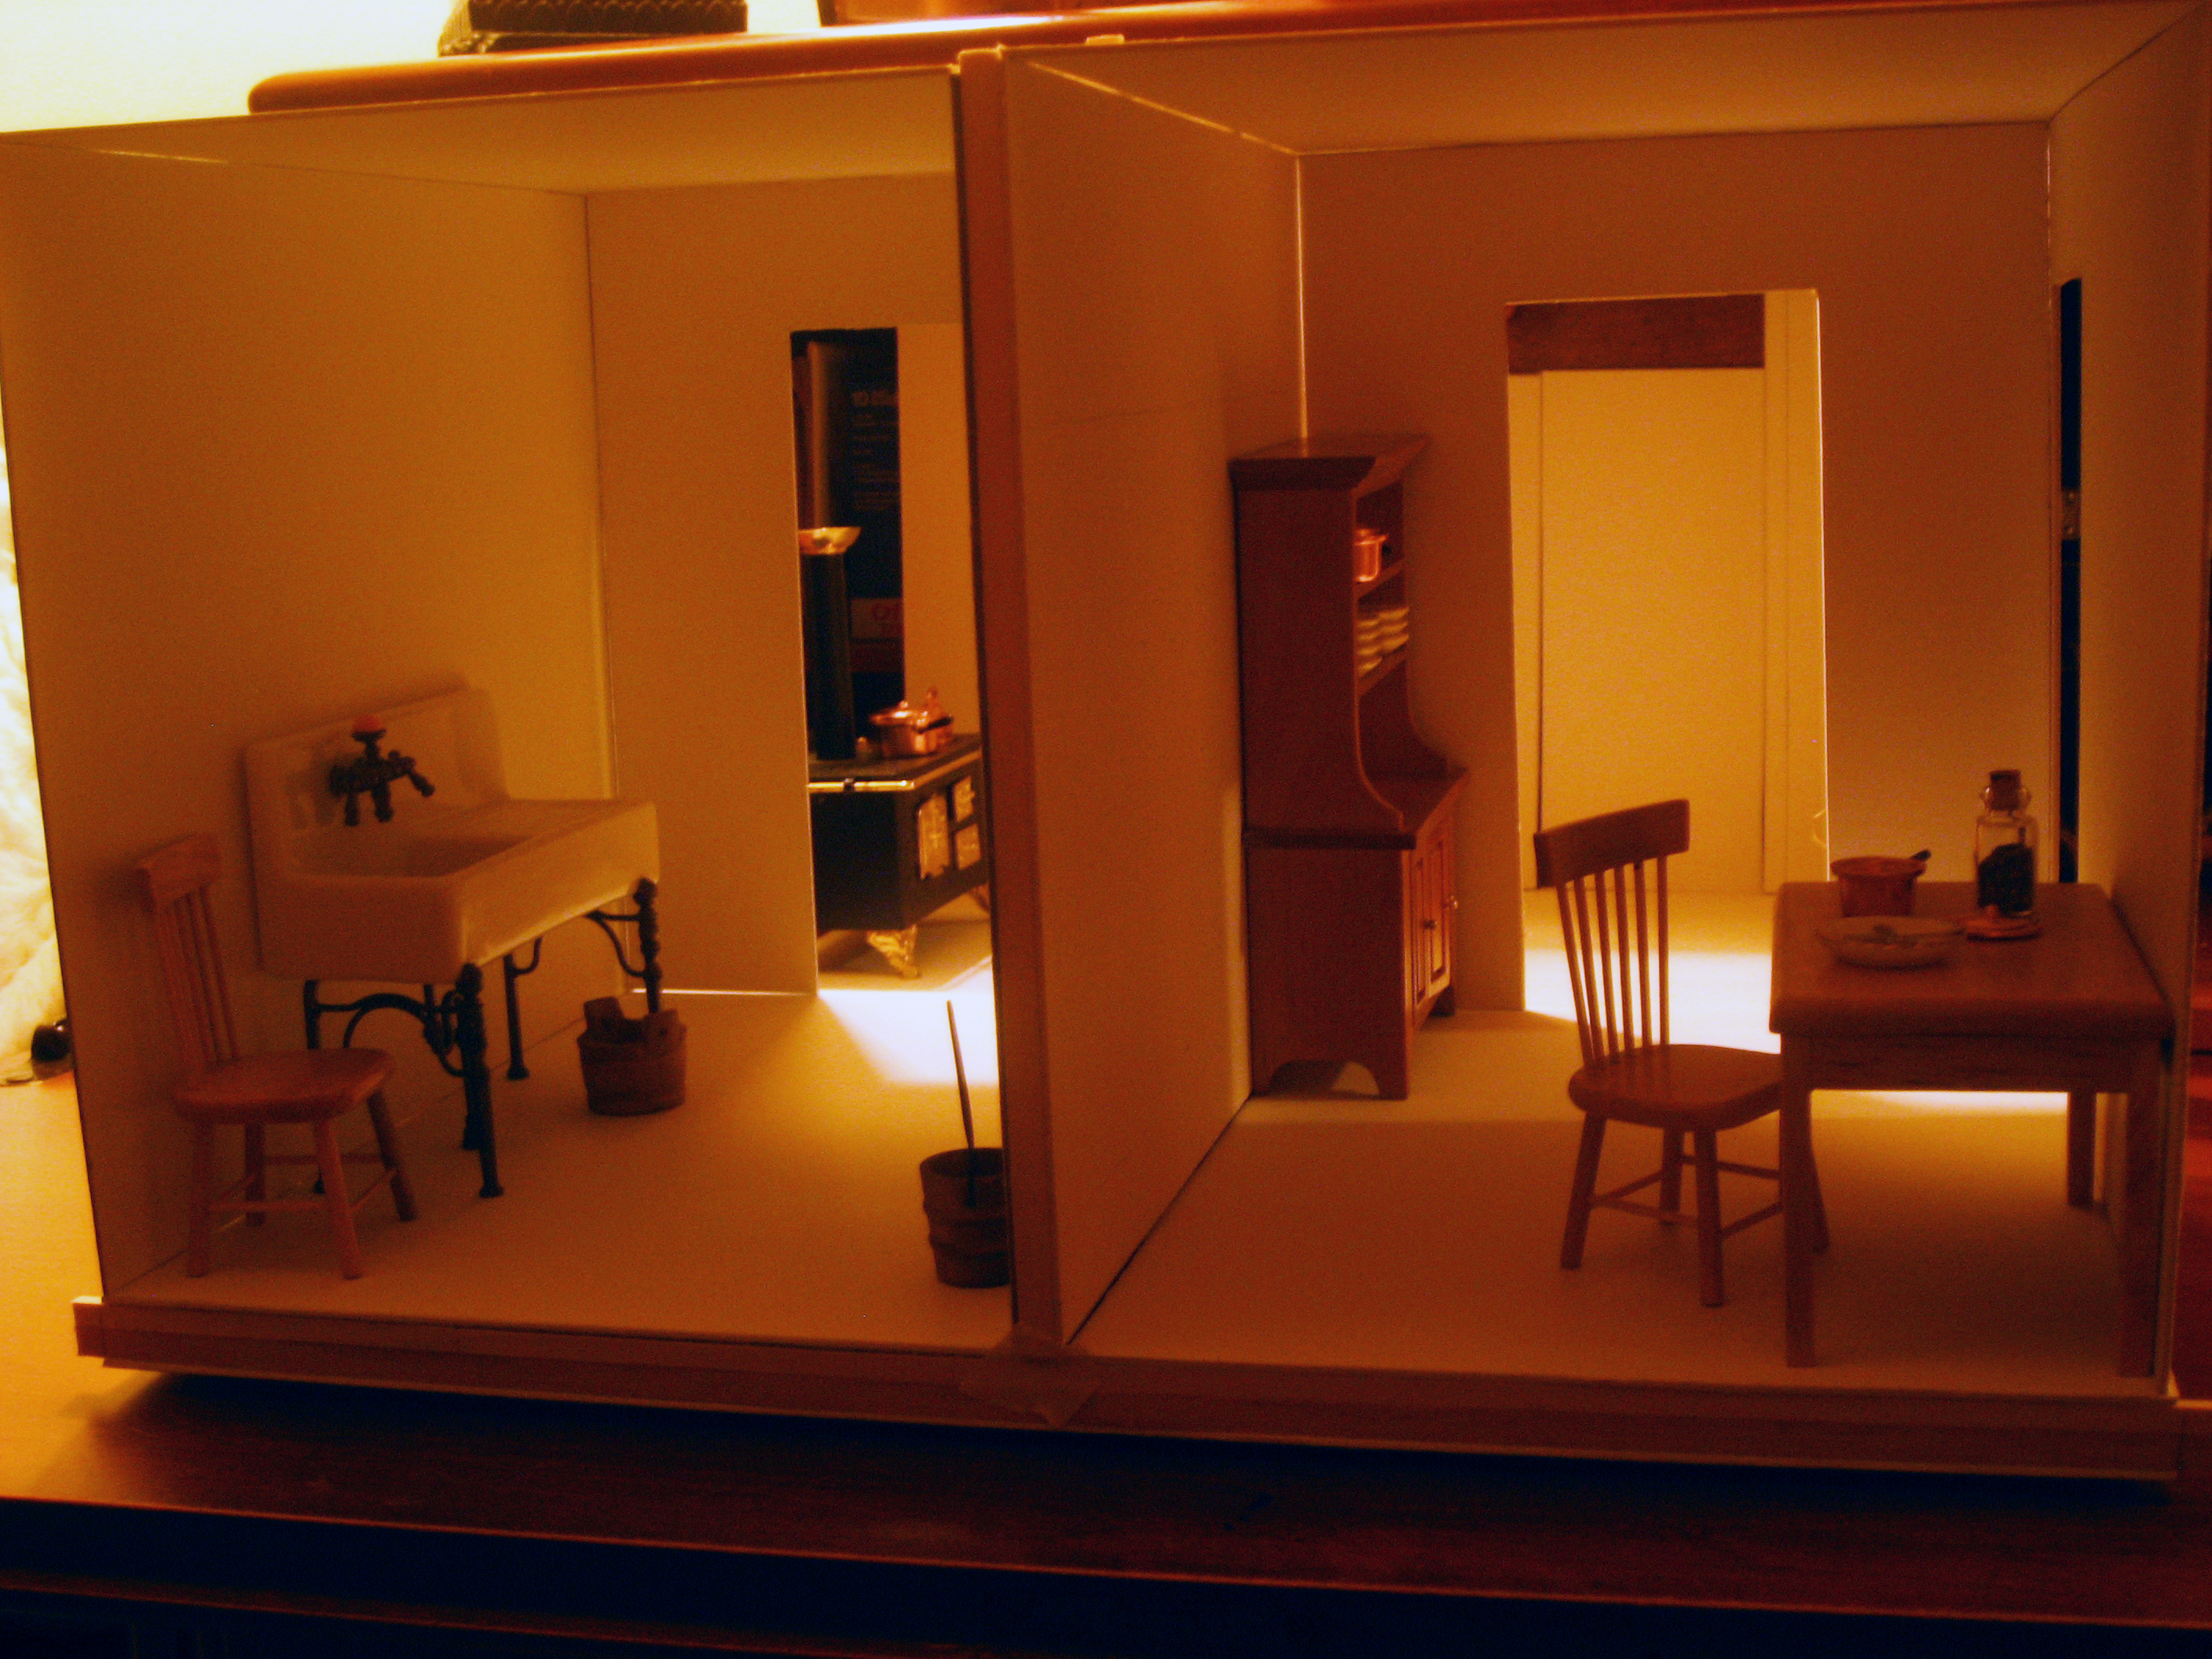
This is a view toward the kitchen, through the scullery on the left and the butler’s pantry on the right.
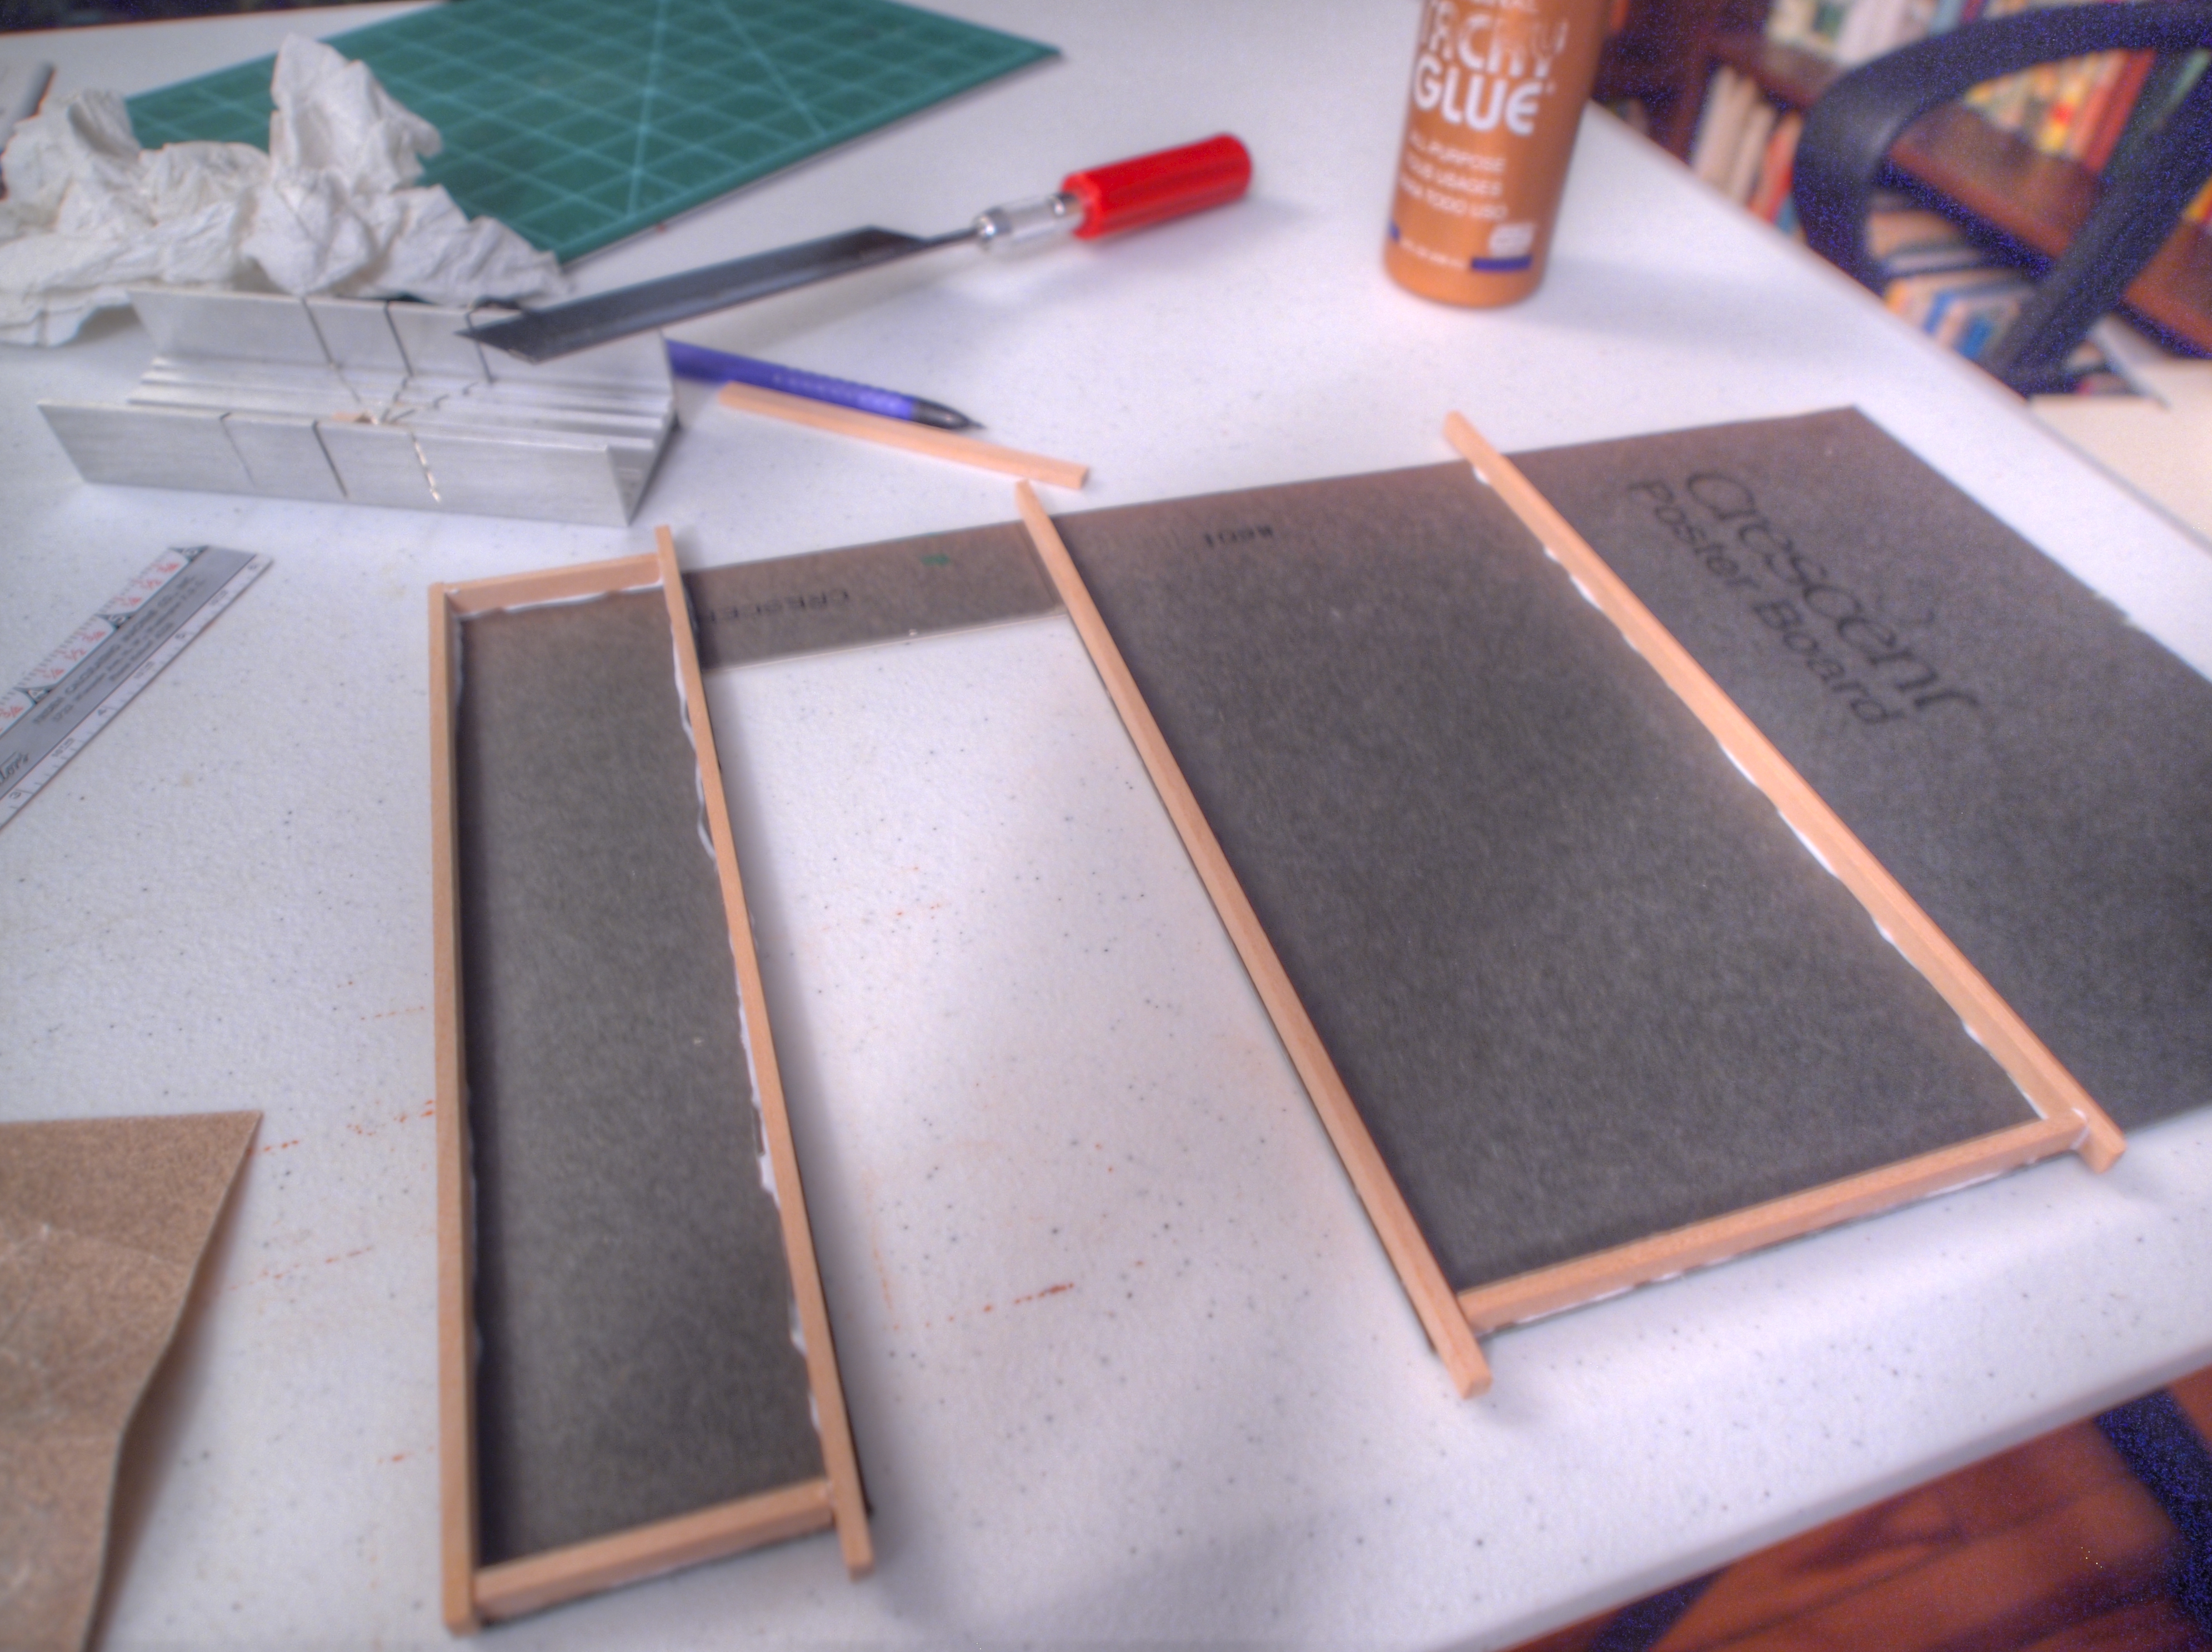
I glued the beams and joists in the floor and the studs in the walls:
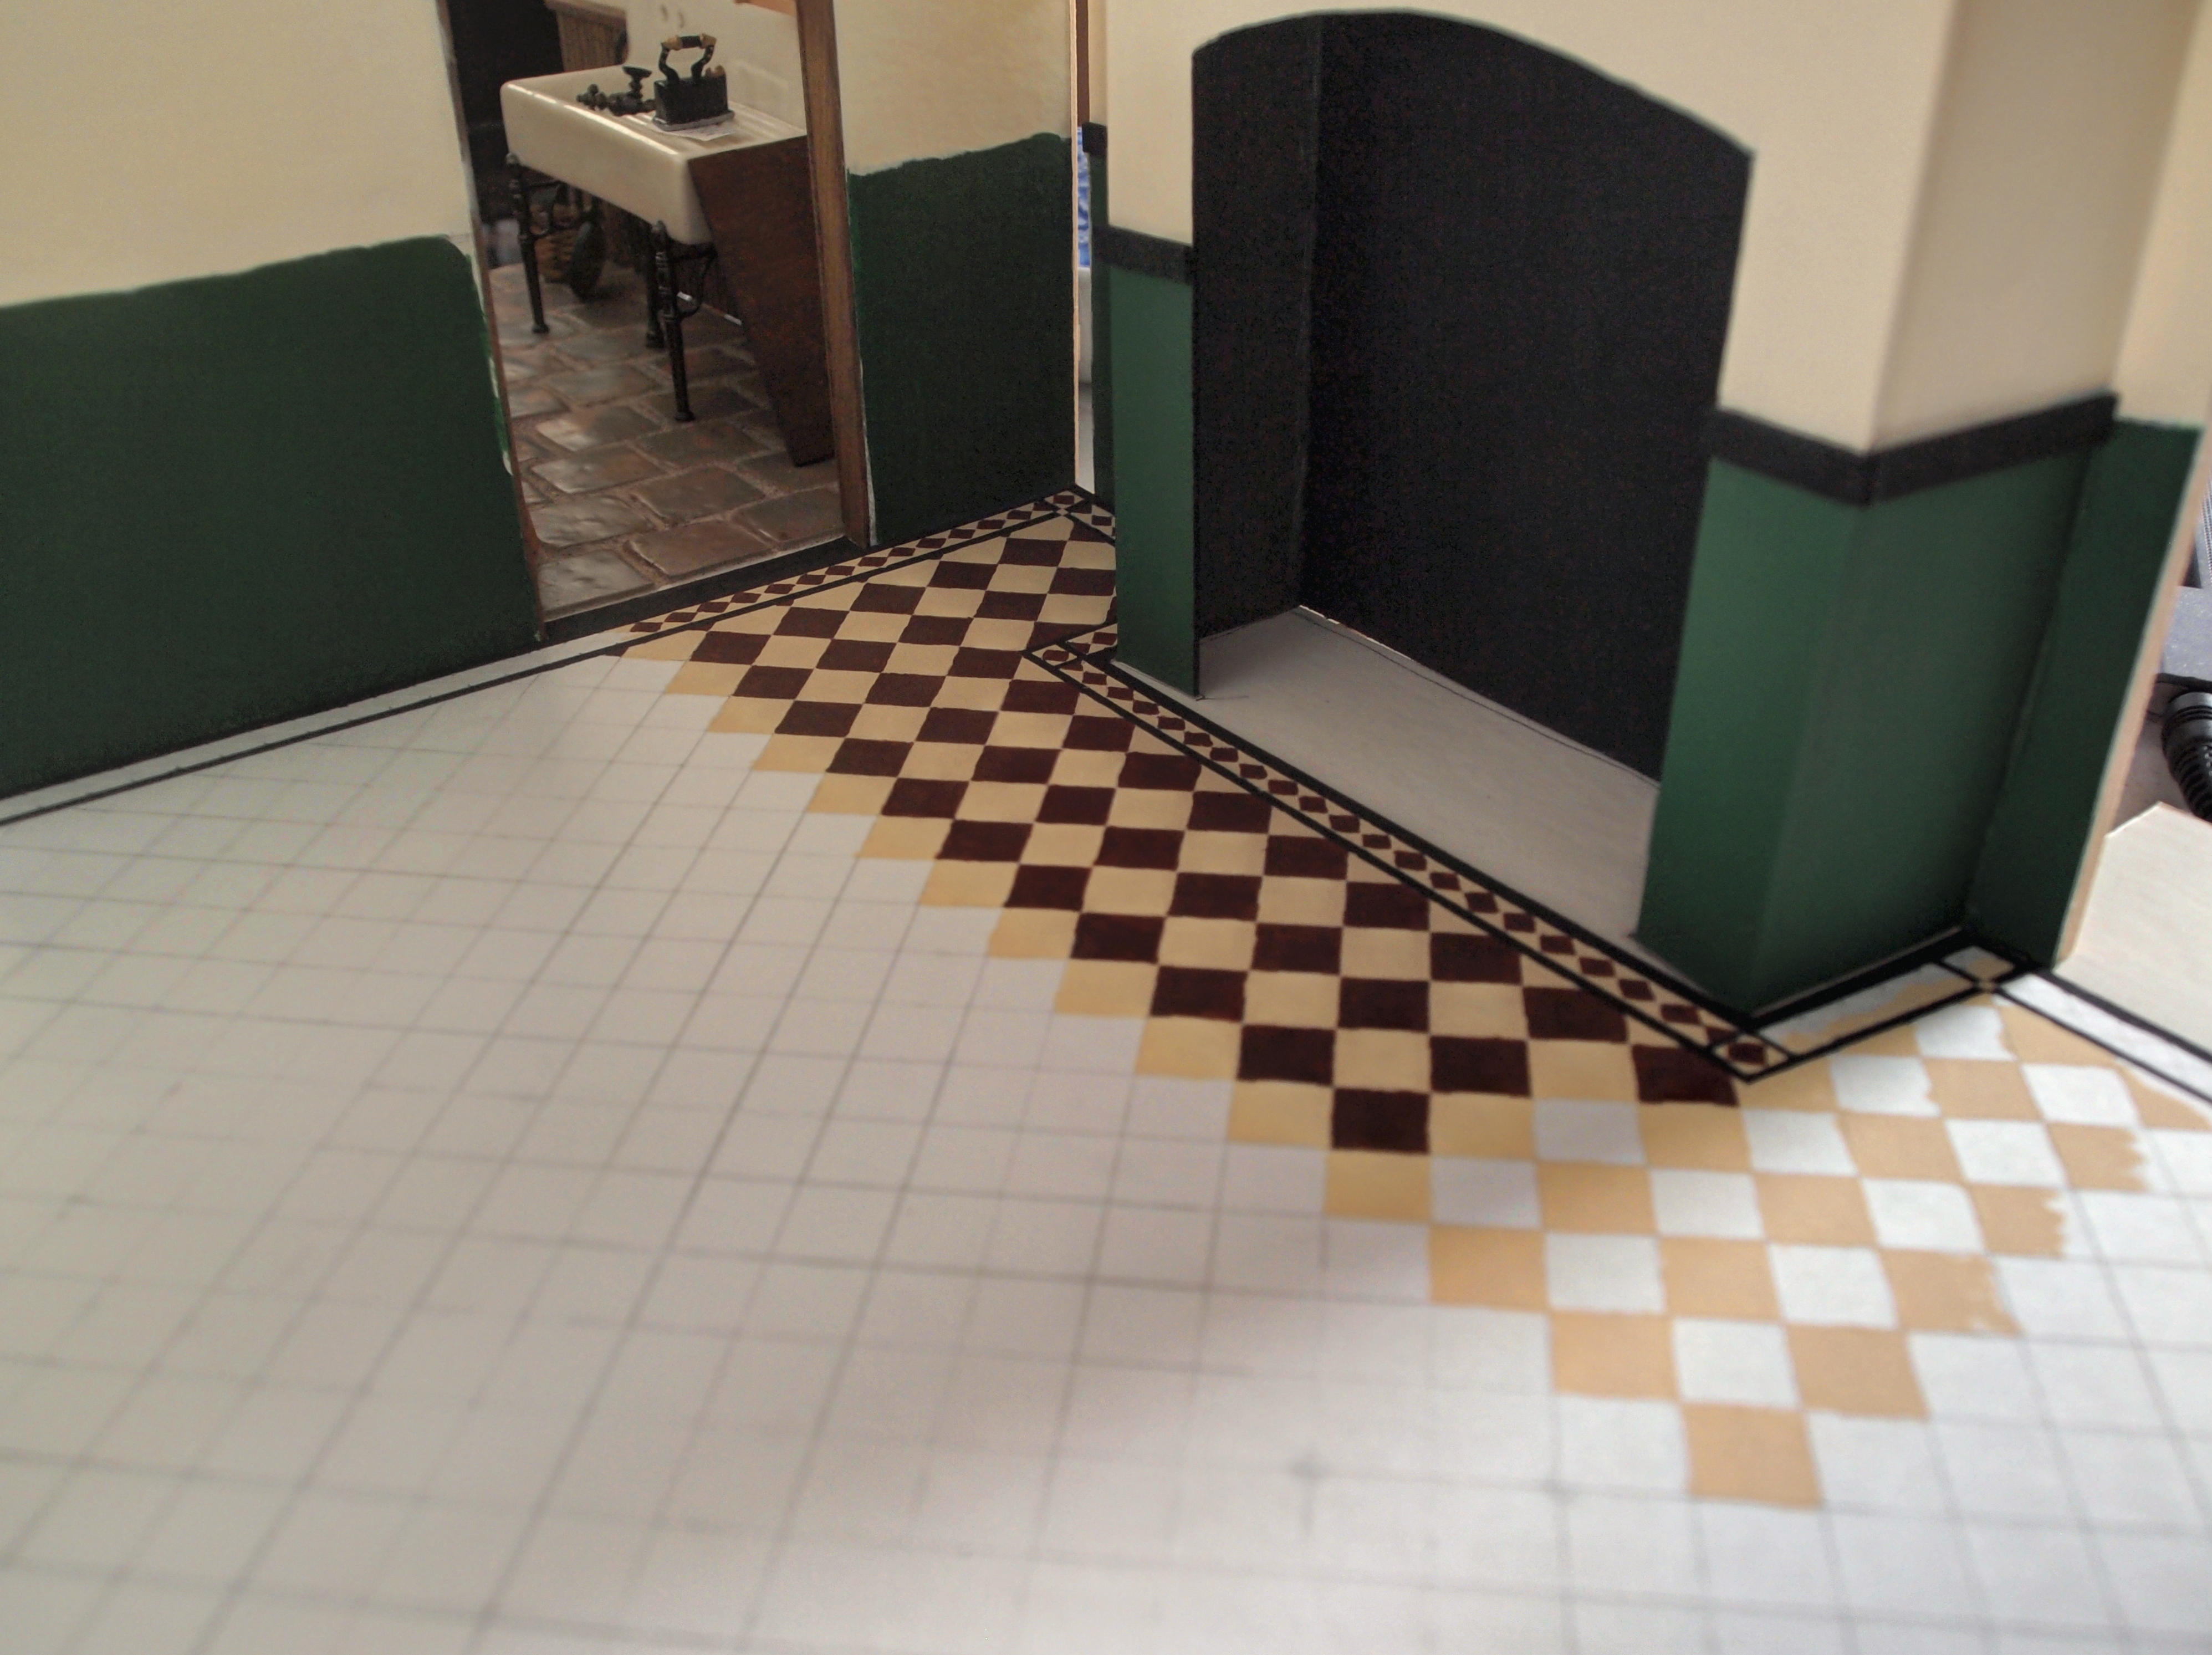
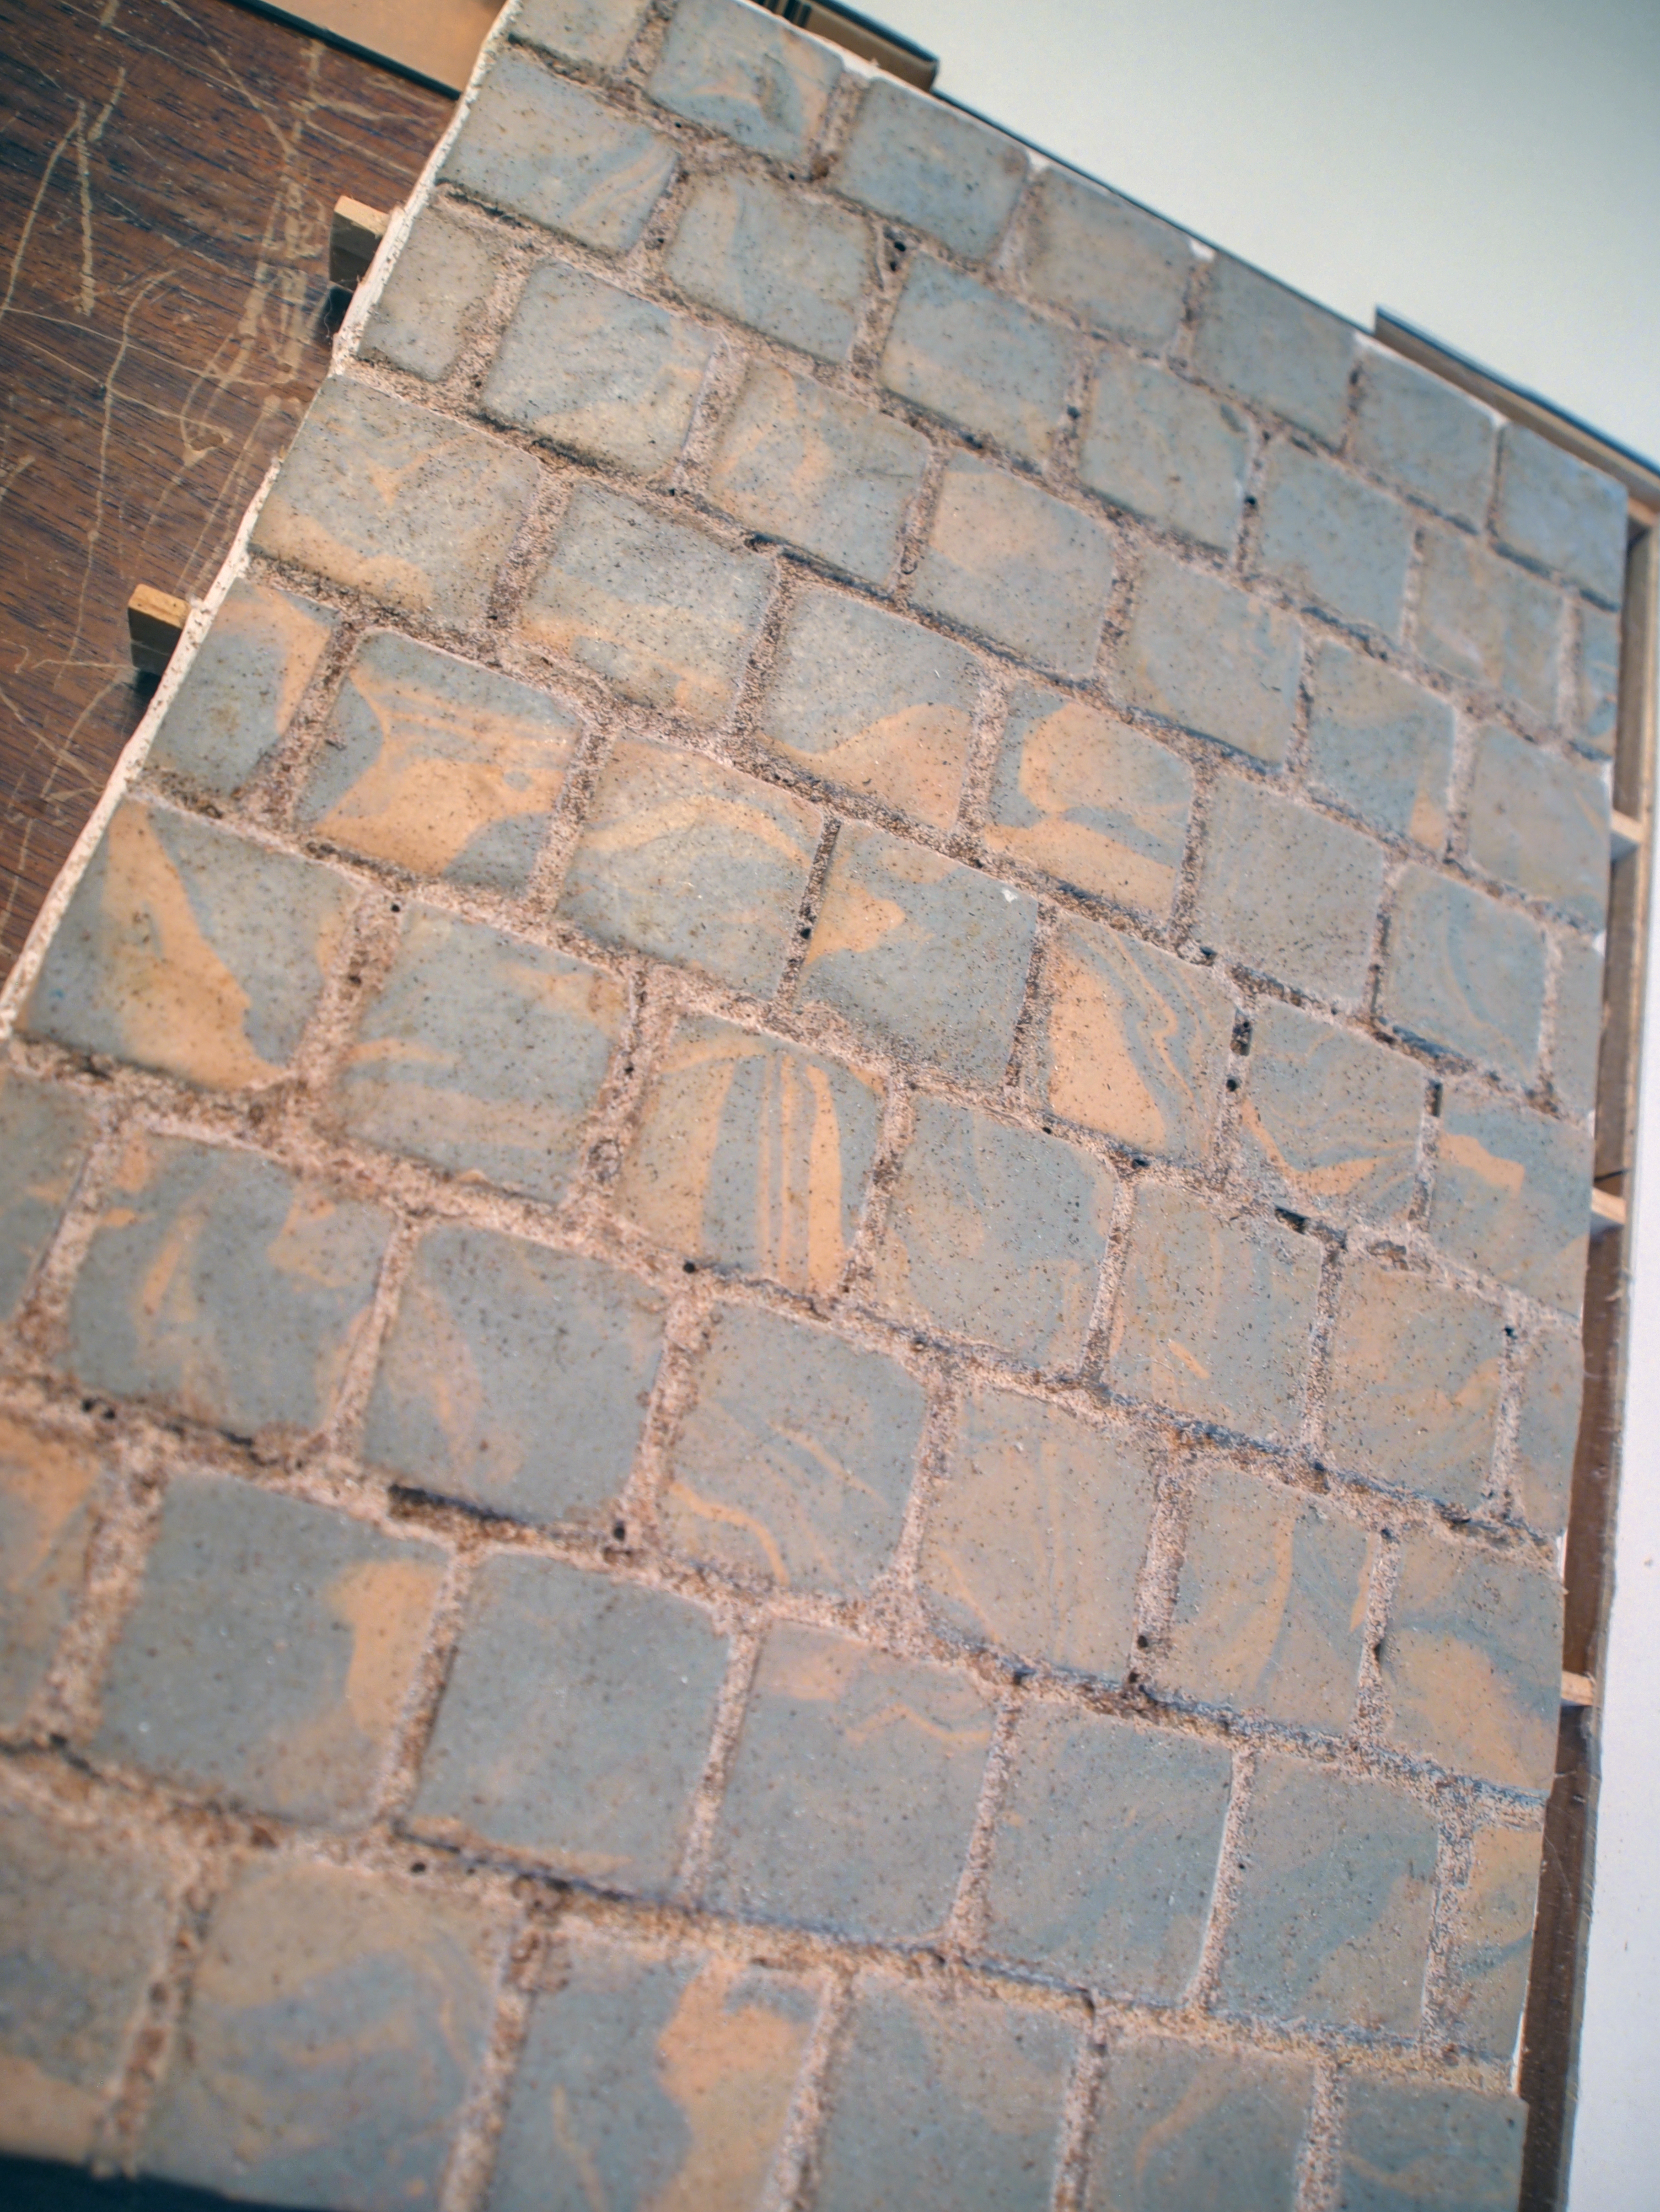
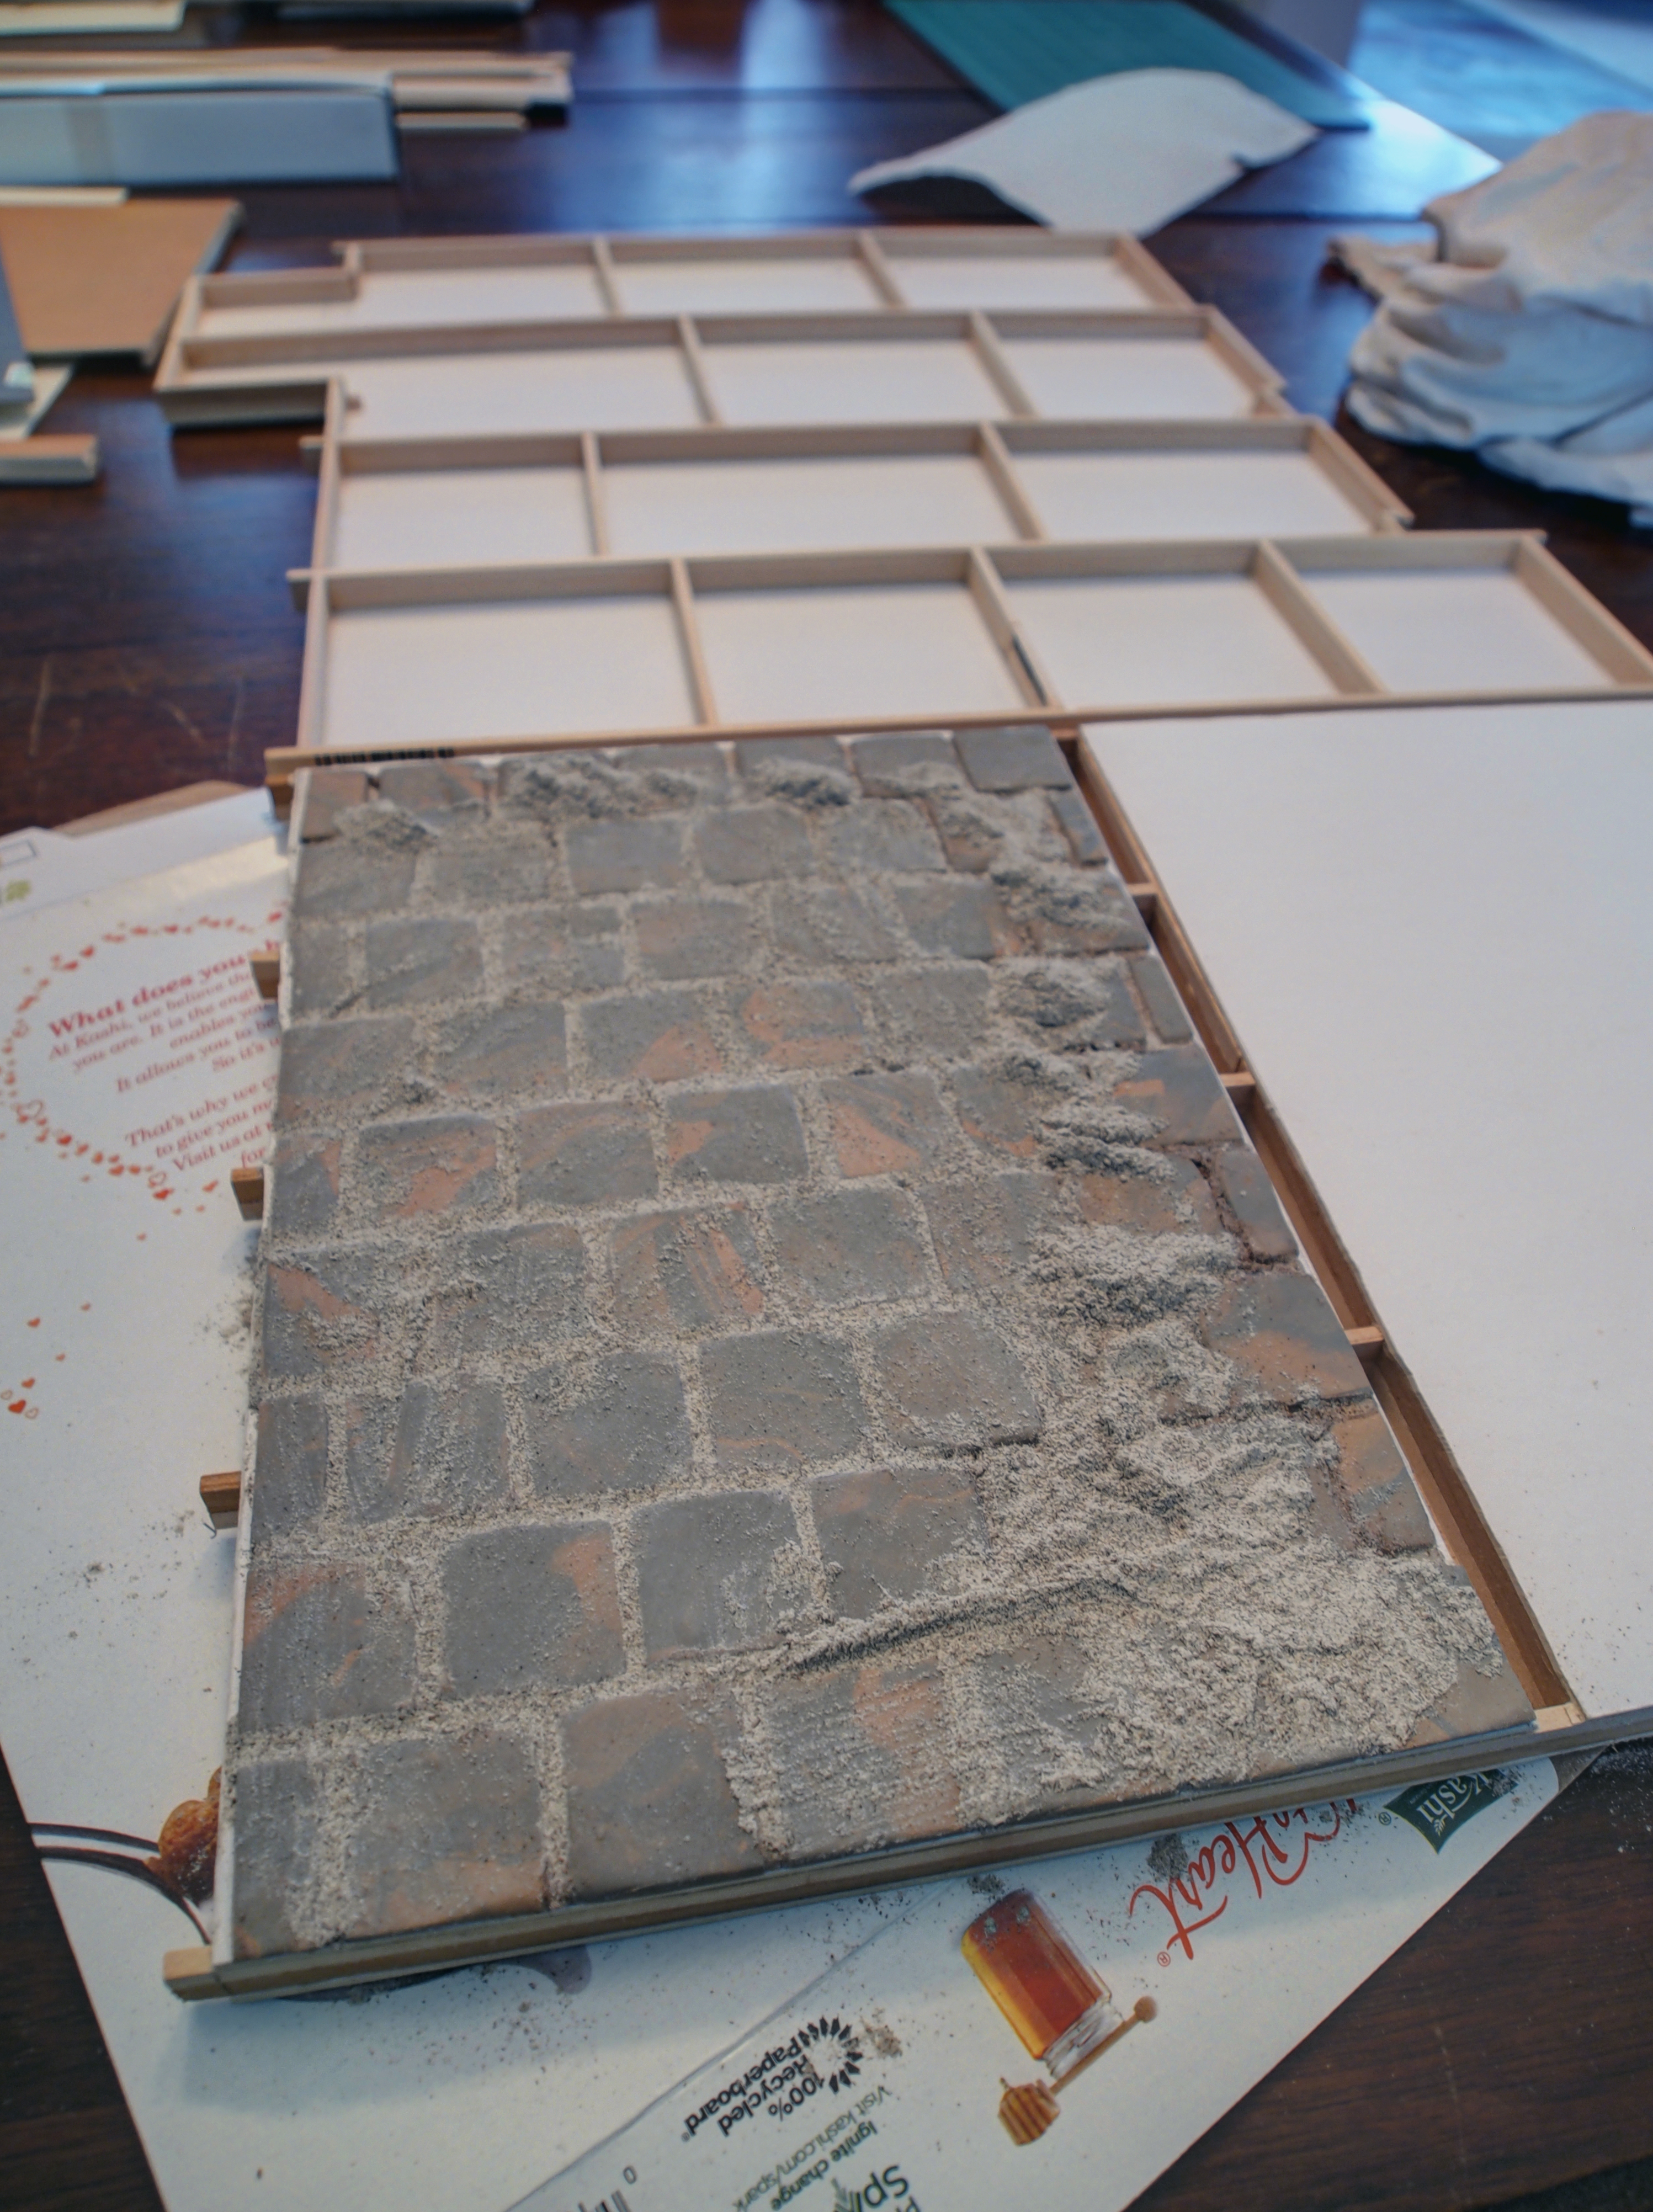
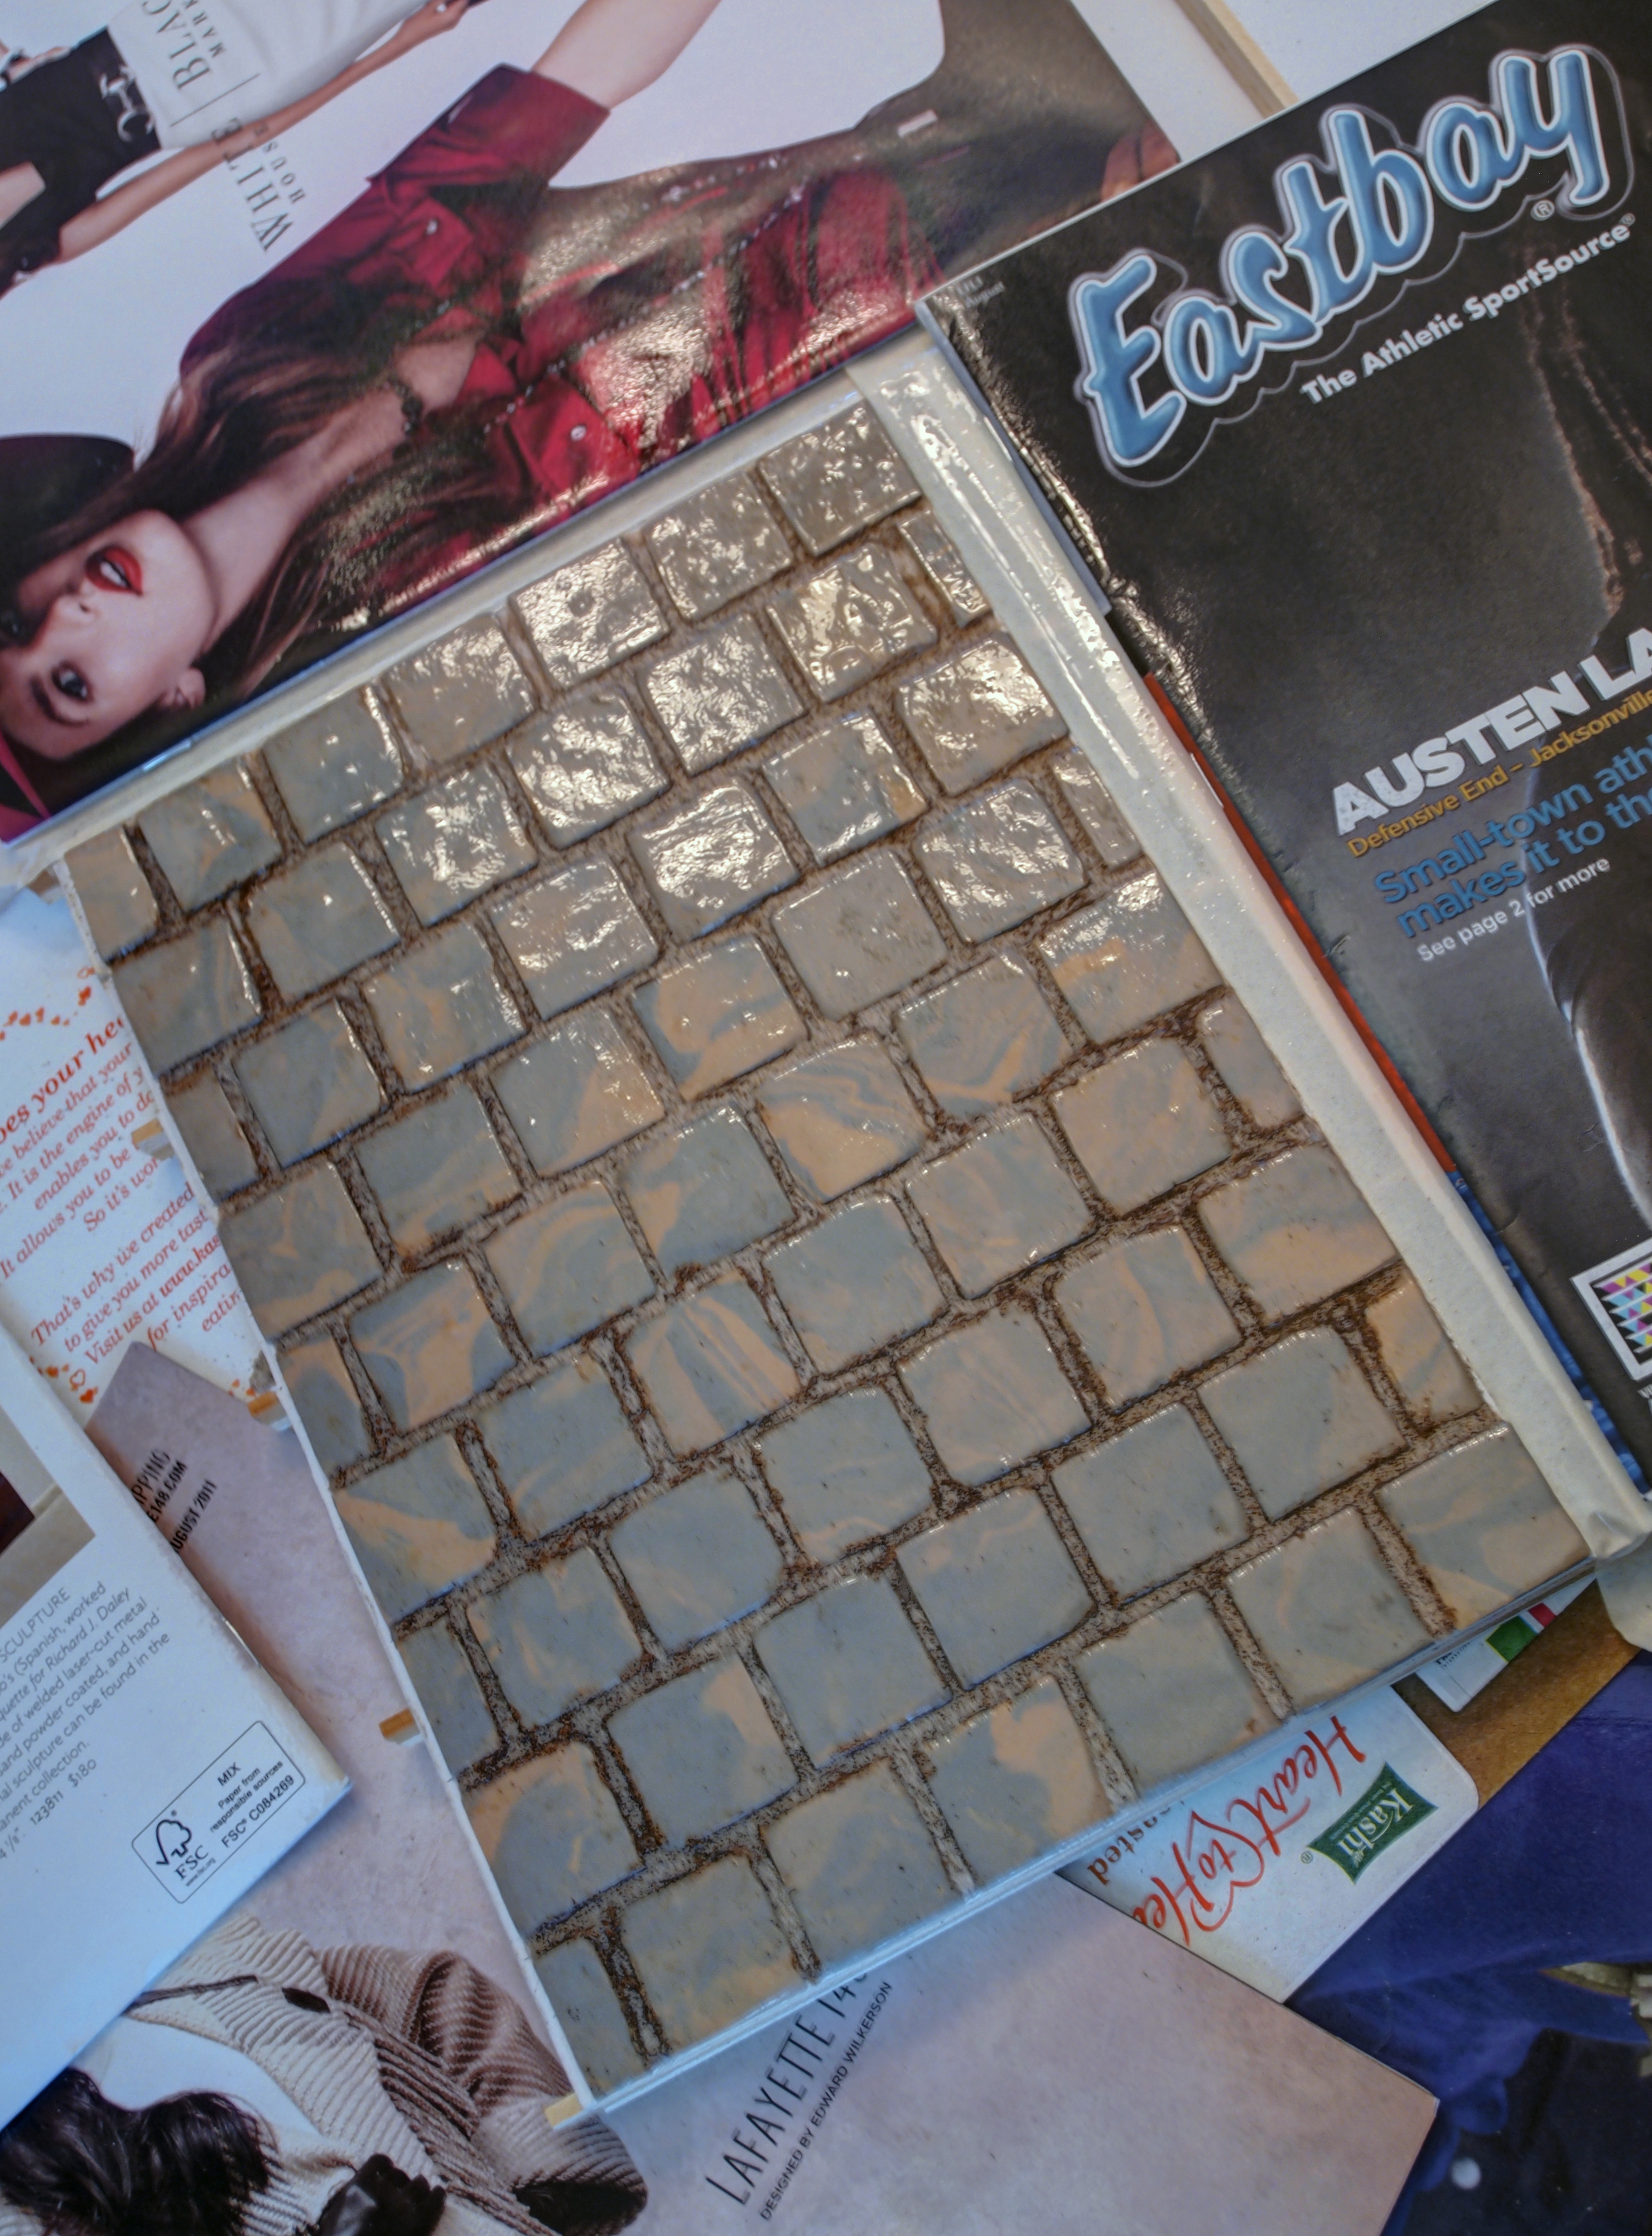
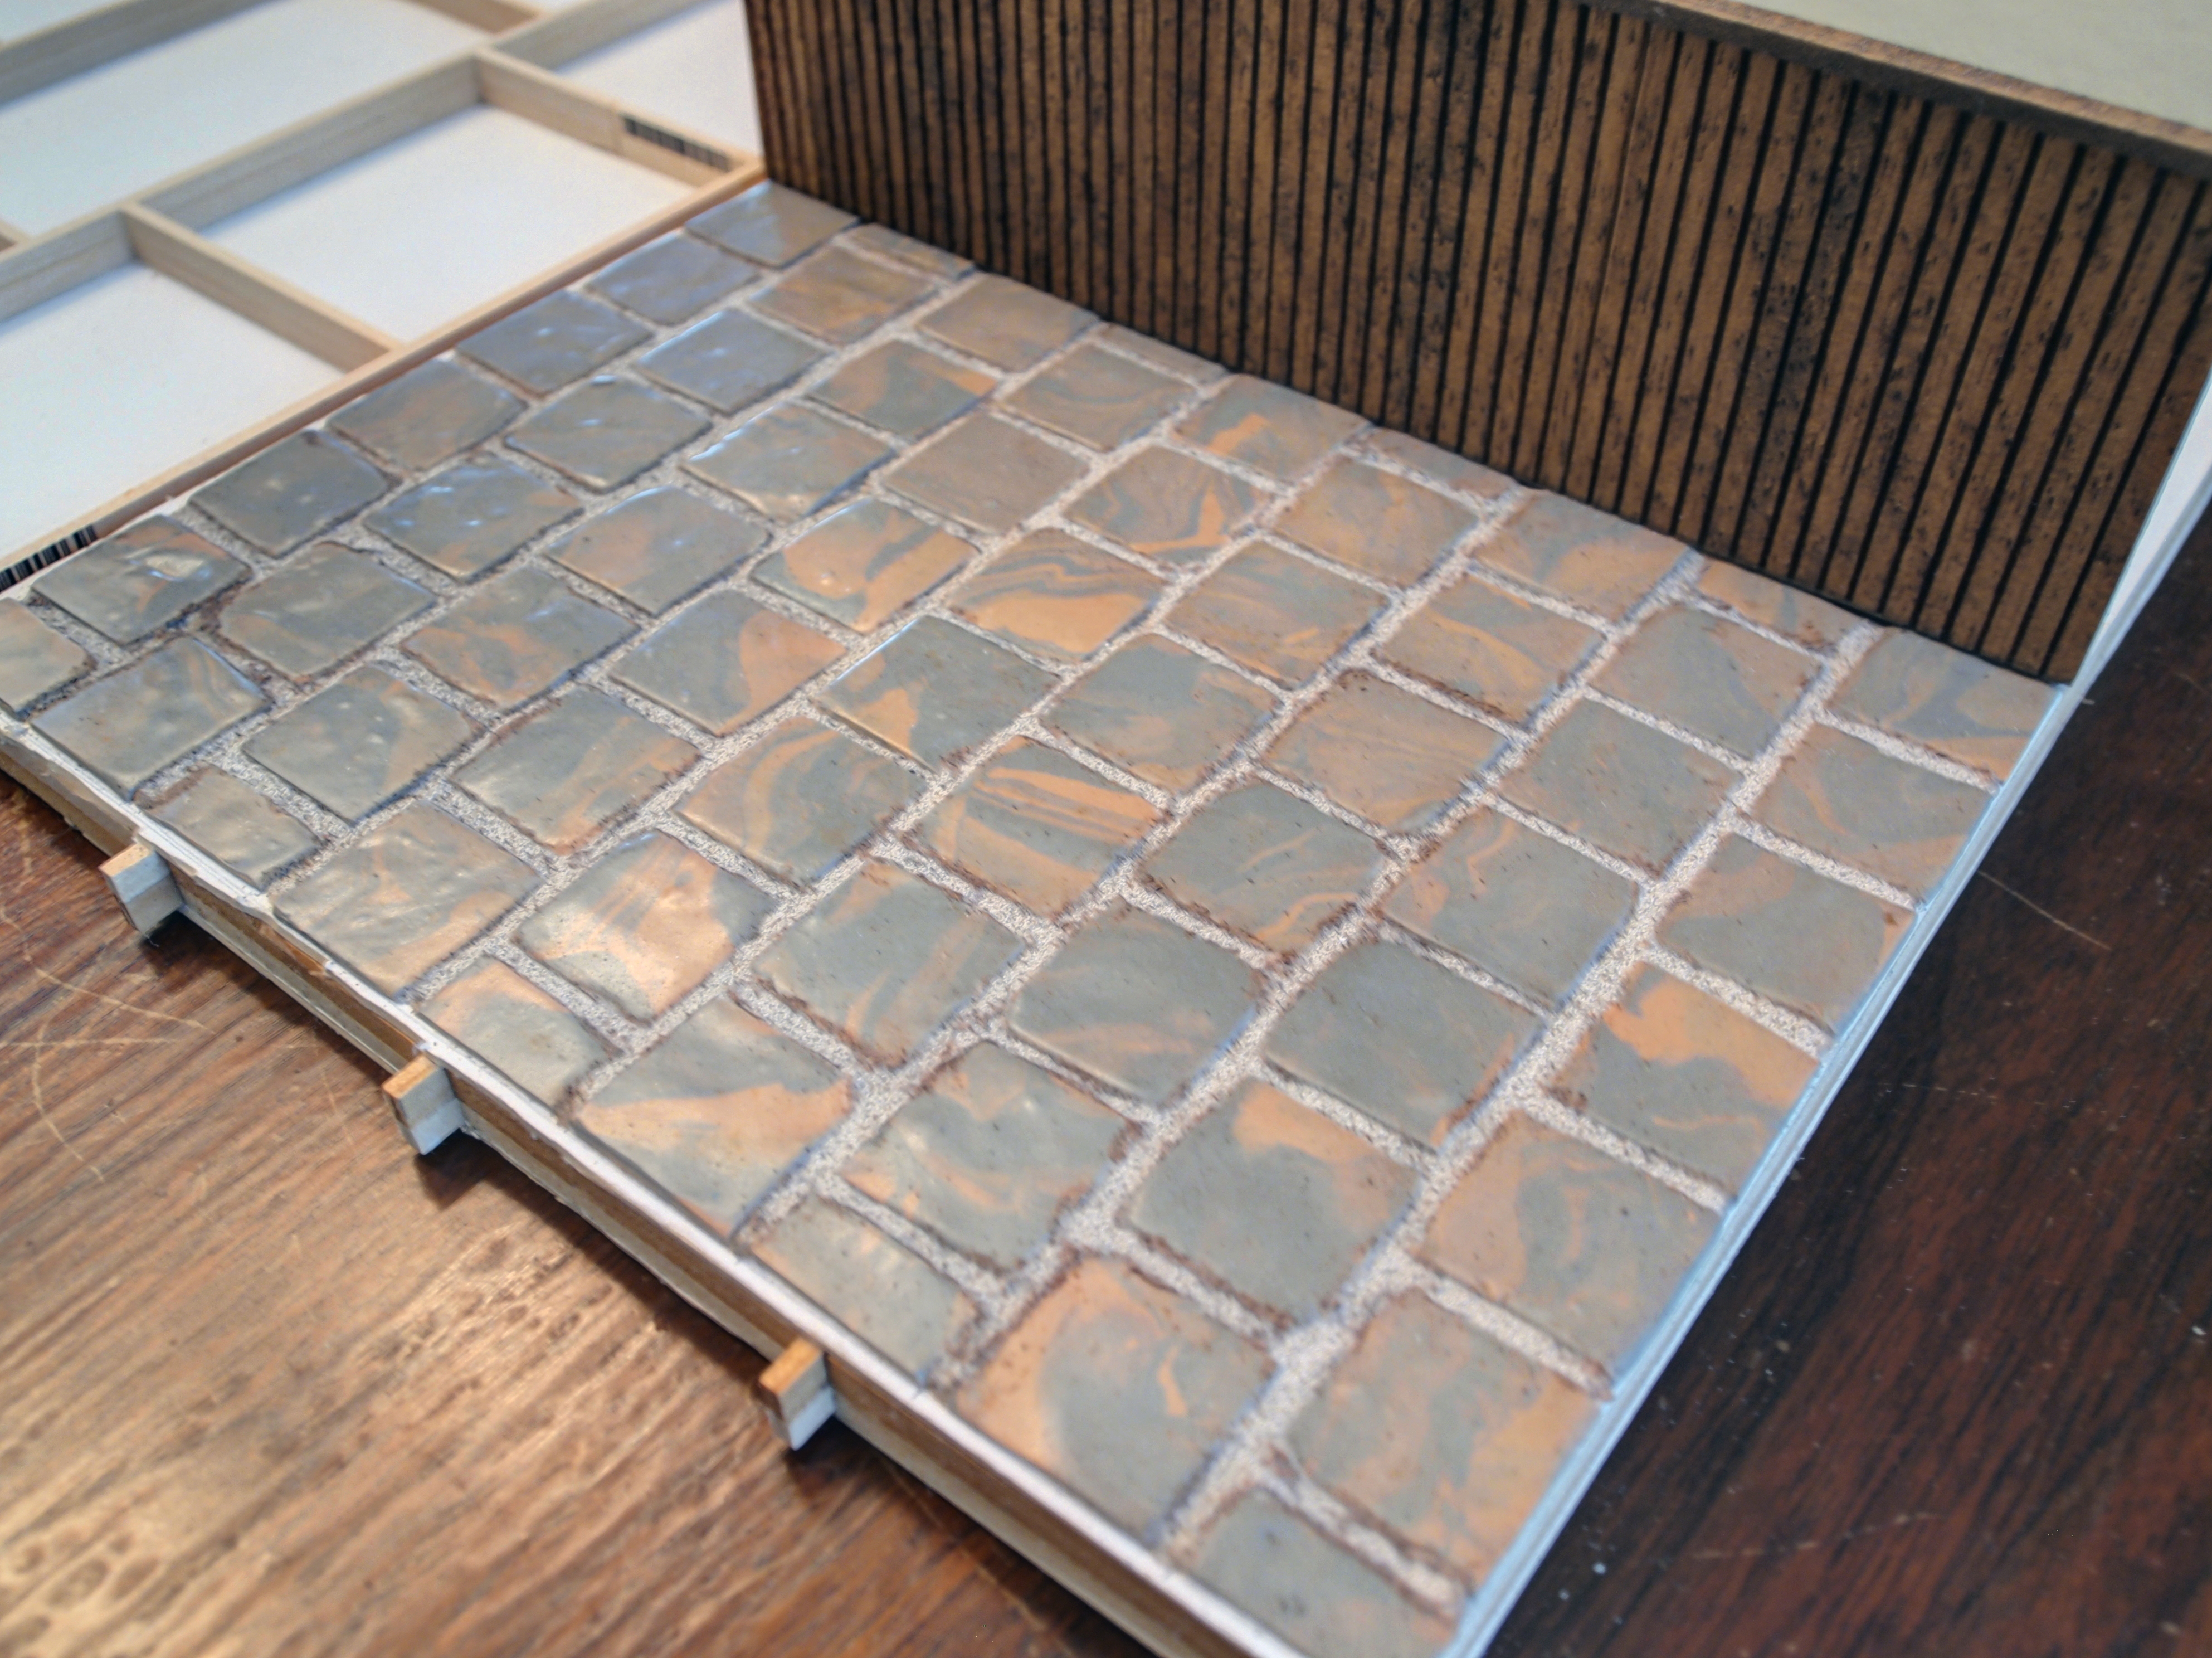
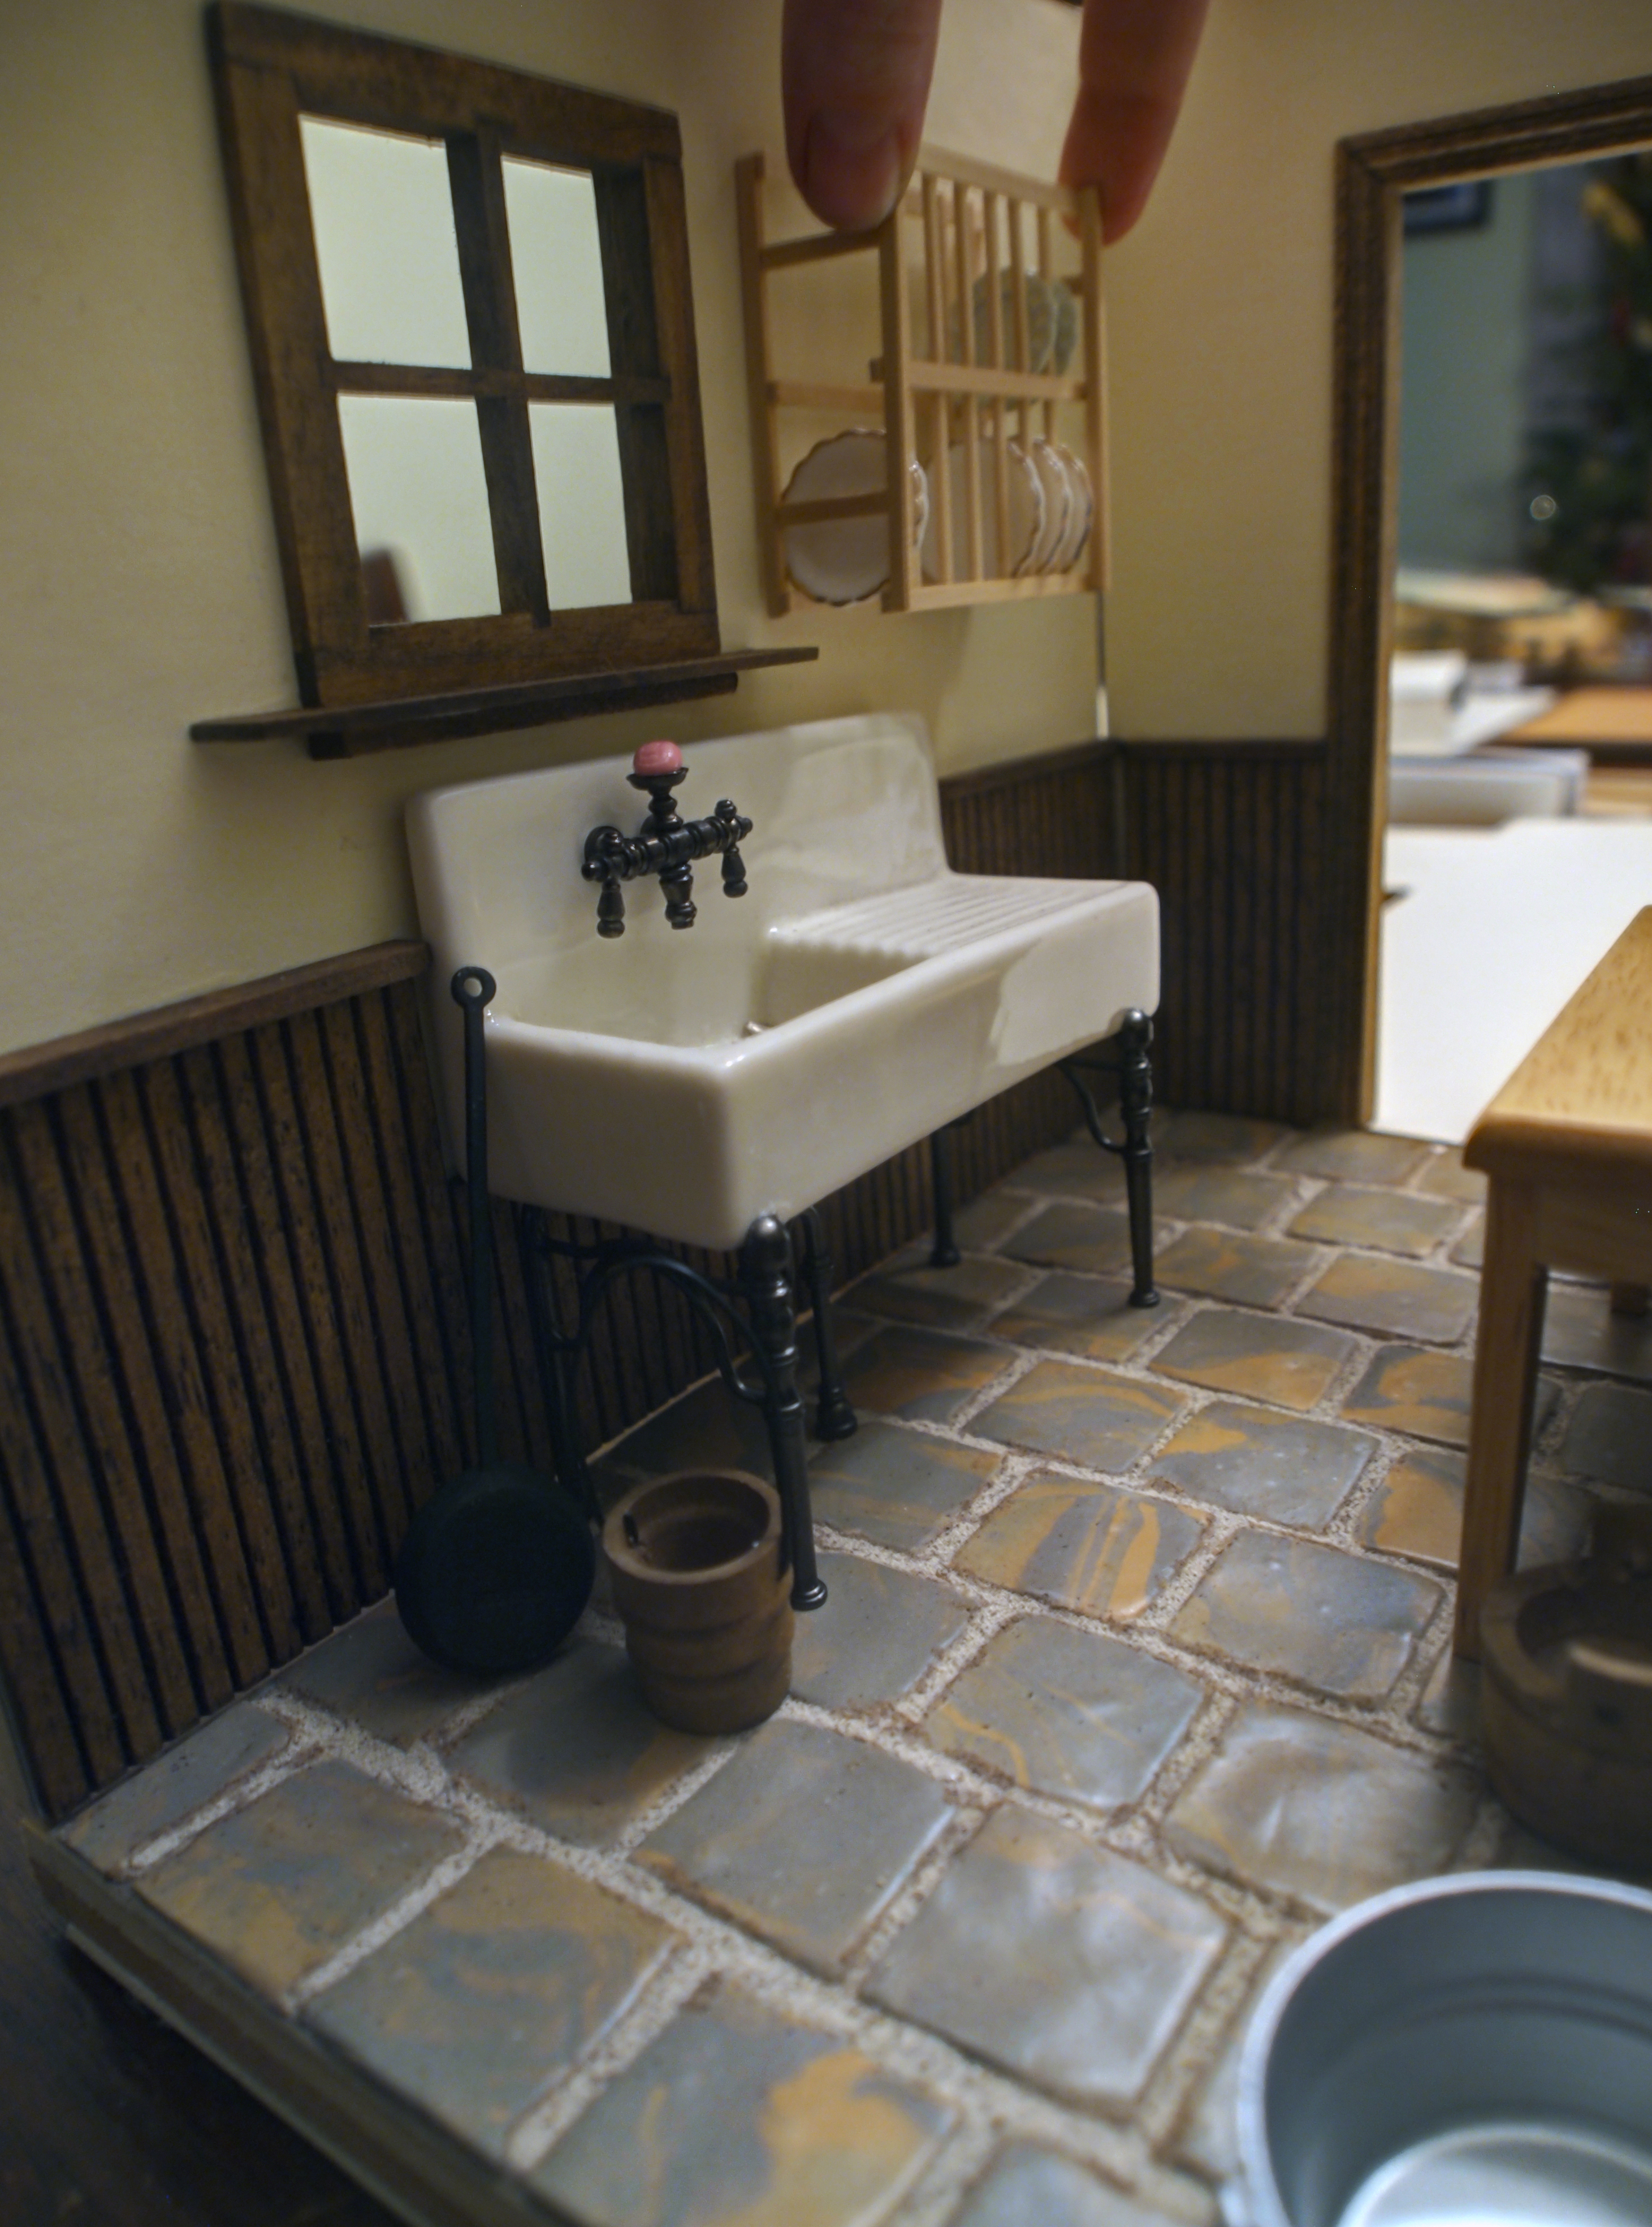
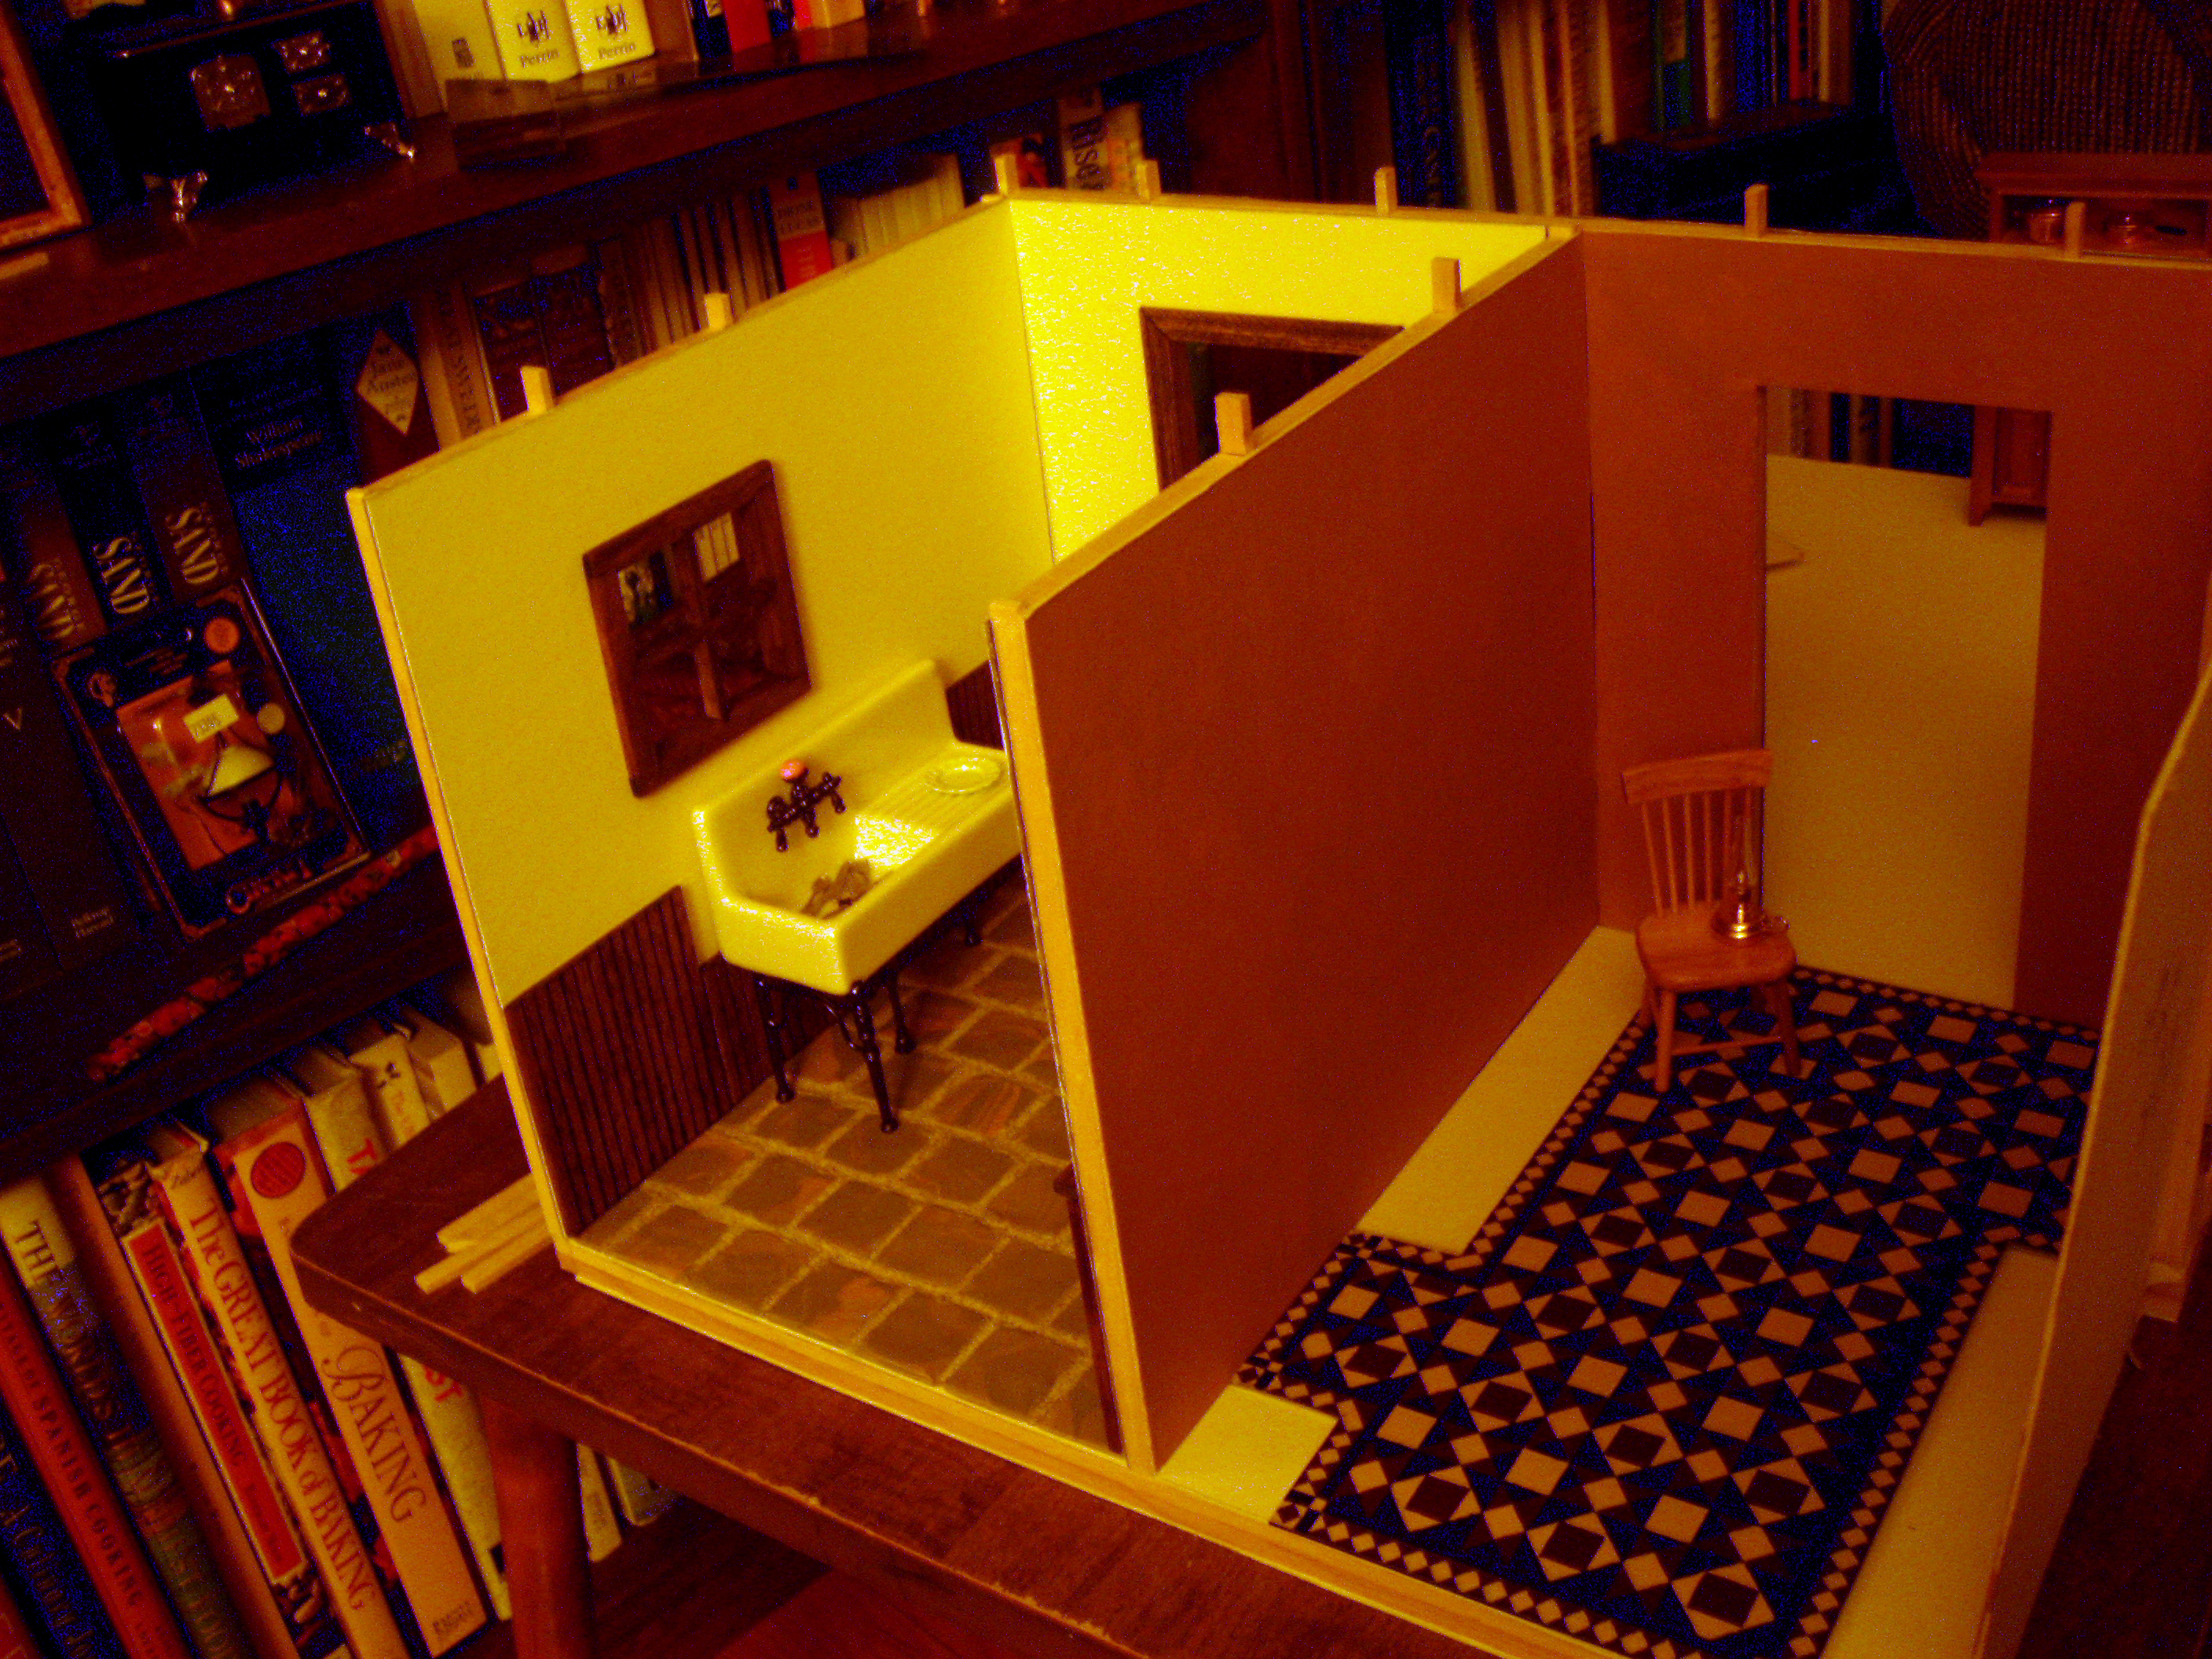
Then I got to work on the scullery / wash room. I figured this is where all the dish-washing and laundry would happen, so it needed a good, solid stone floor. I found a couple of modeling clay colors that would work well and created these stone tiles, which I baked in the oven to harden them.
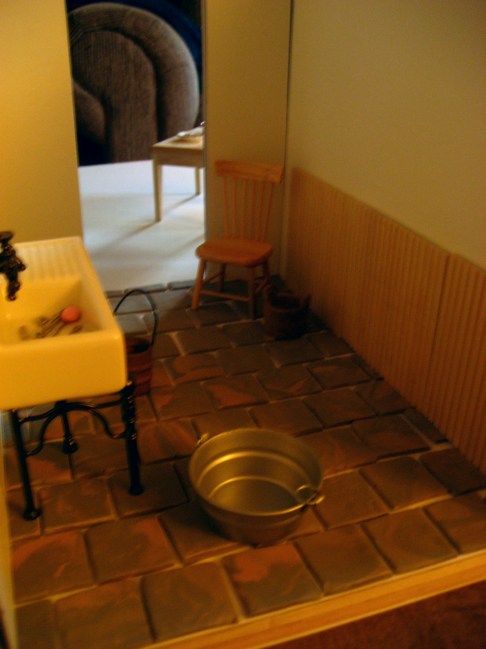
With a bit of wainscoting, a window, and the ceiling and lamp in place, the room almost looked believable…
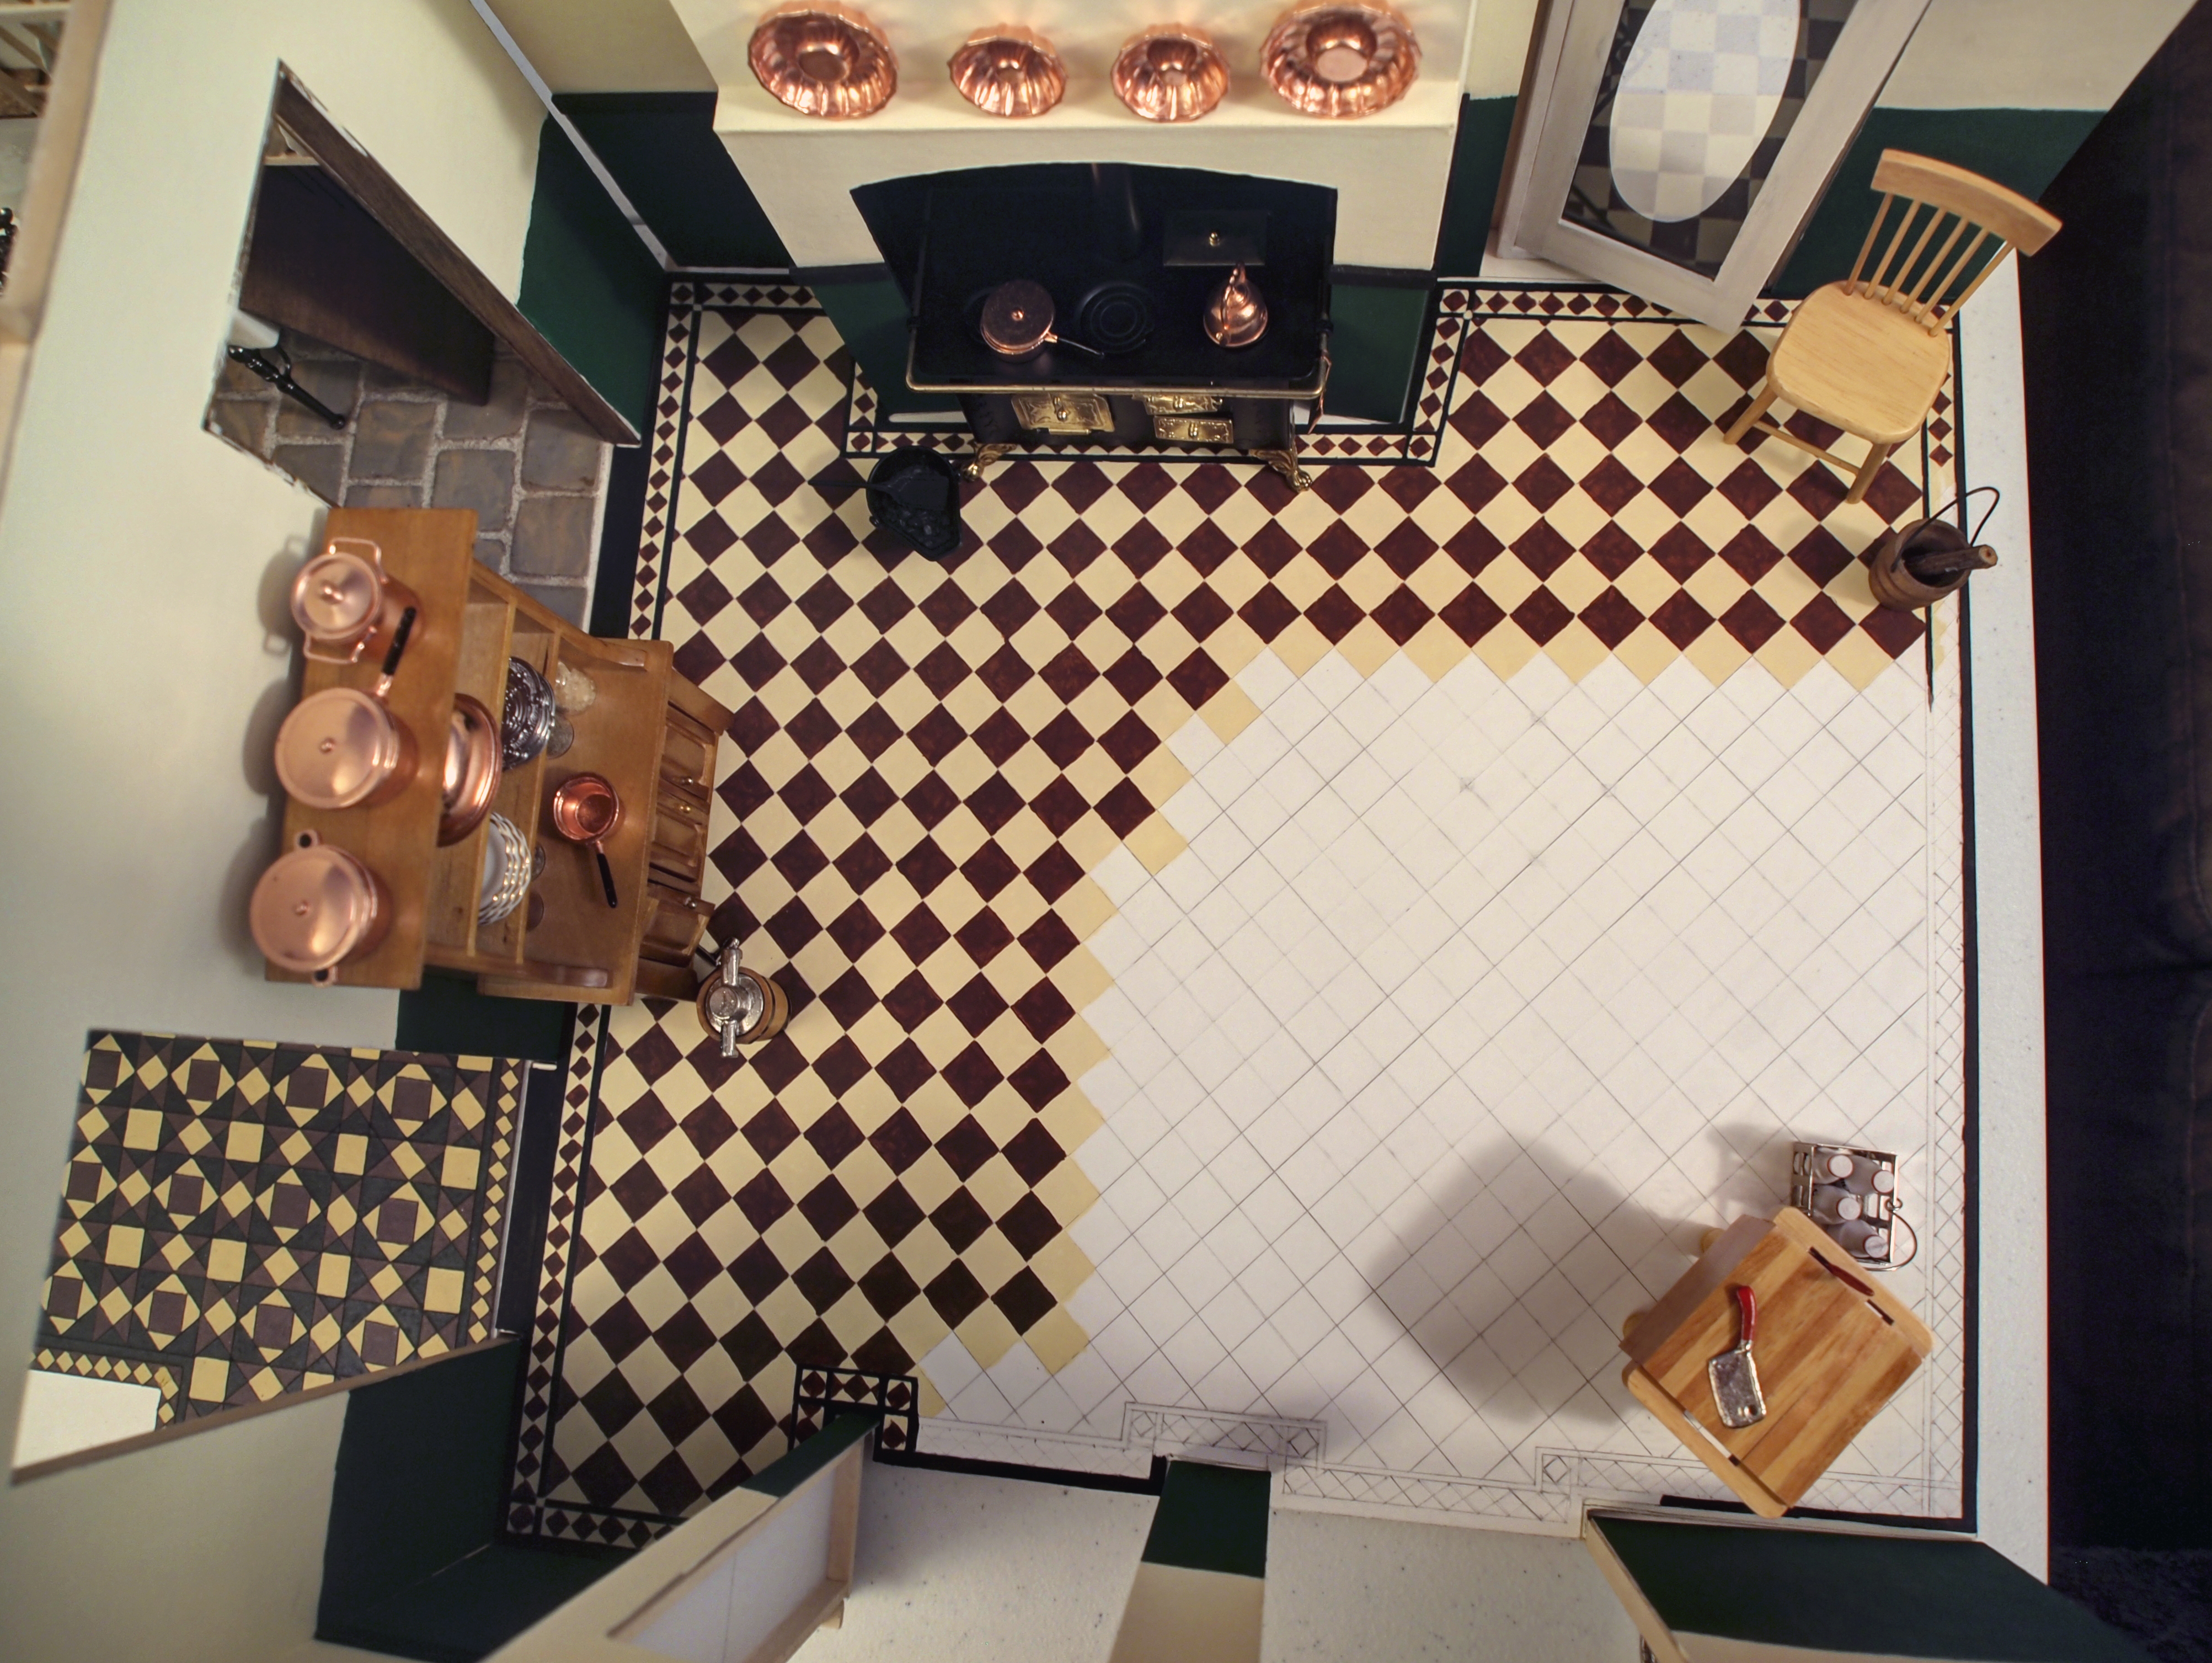
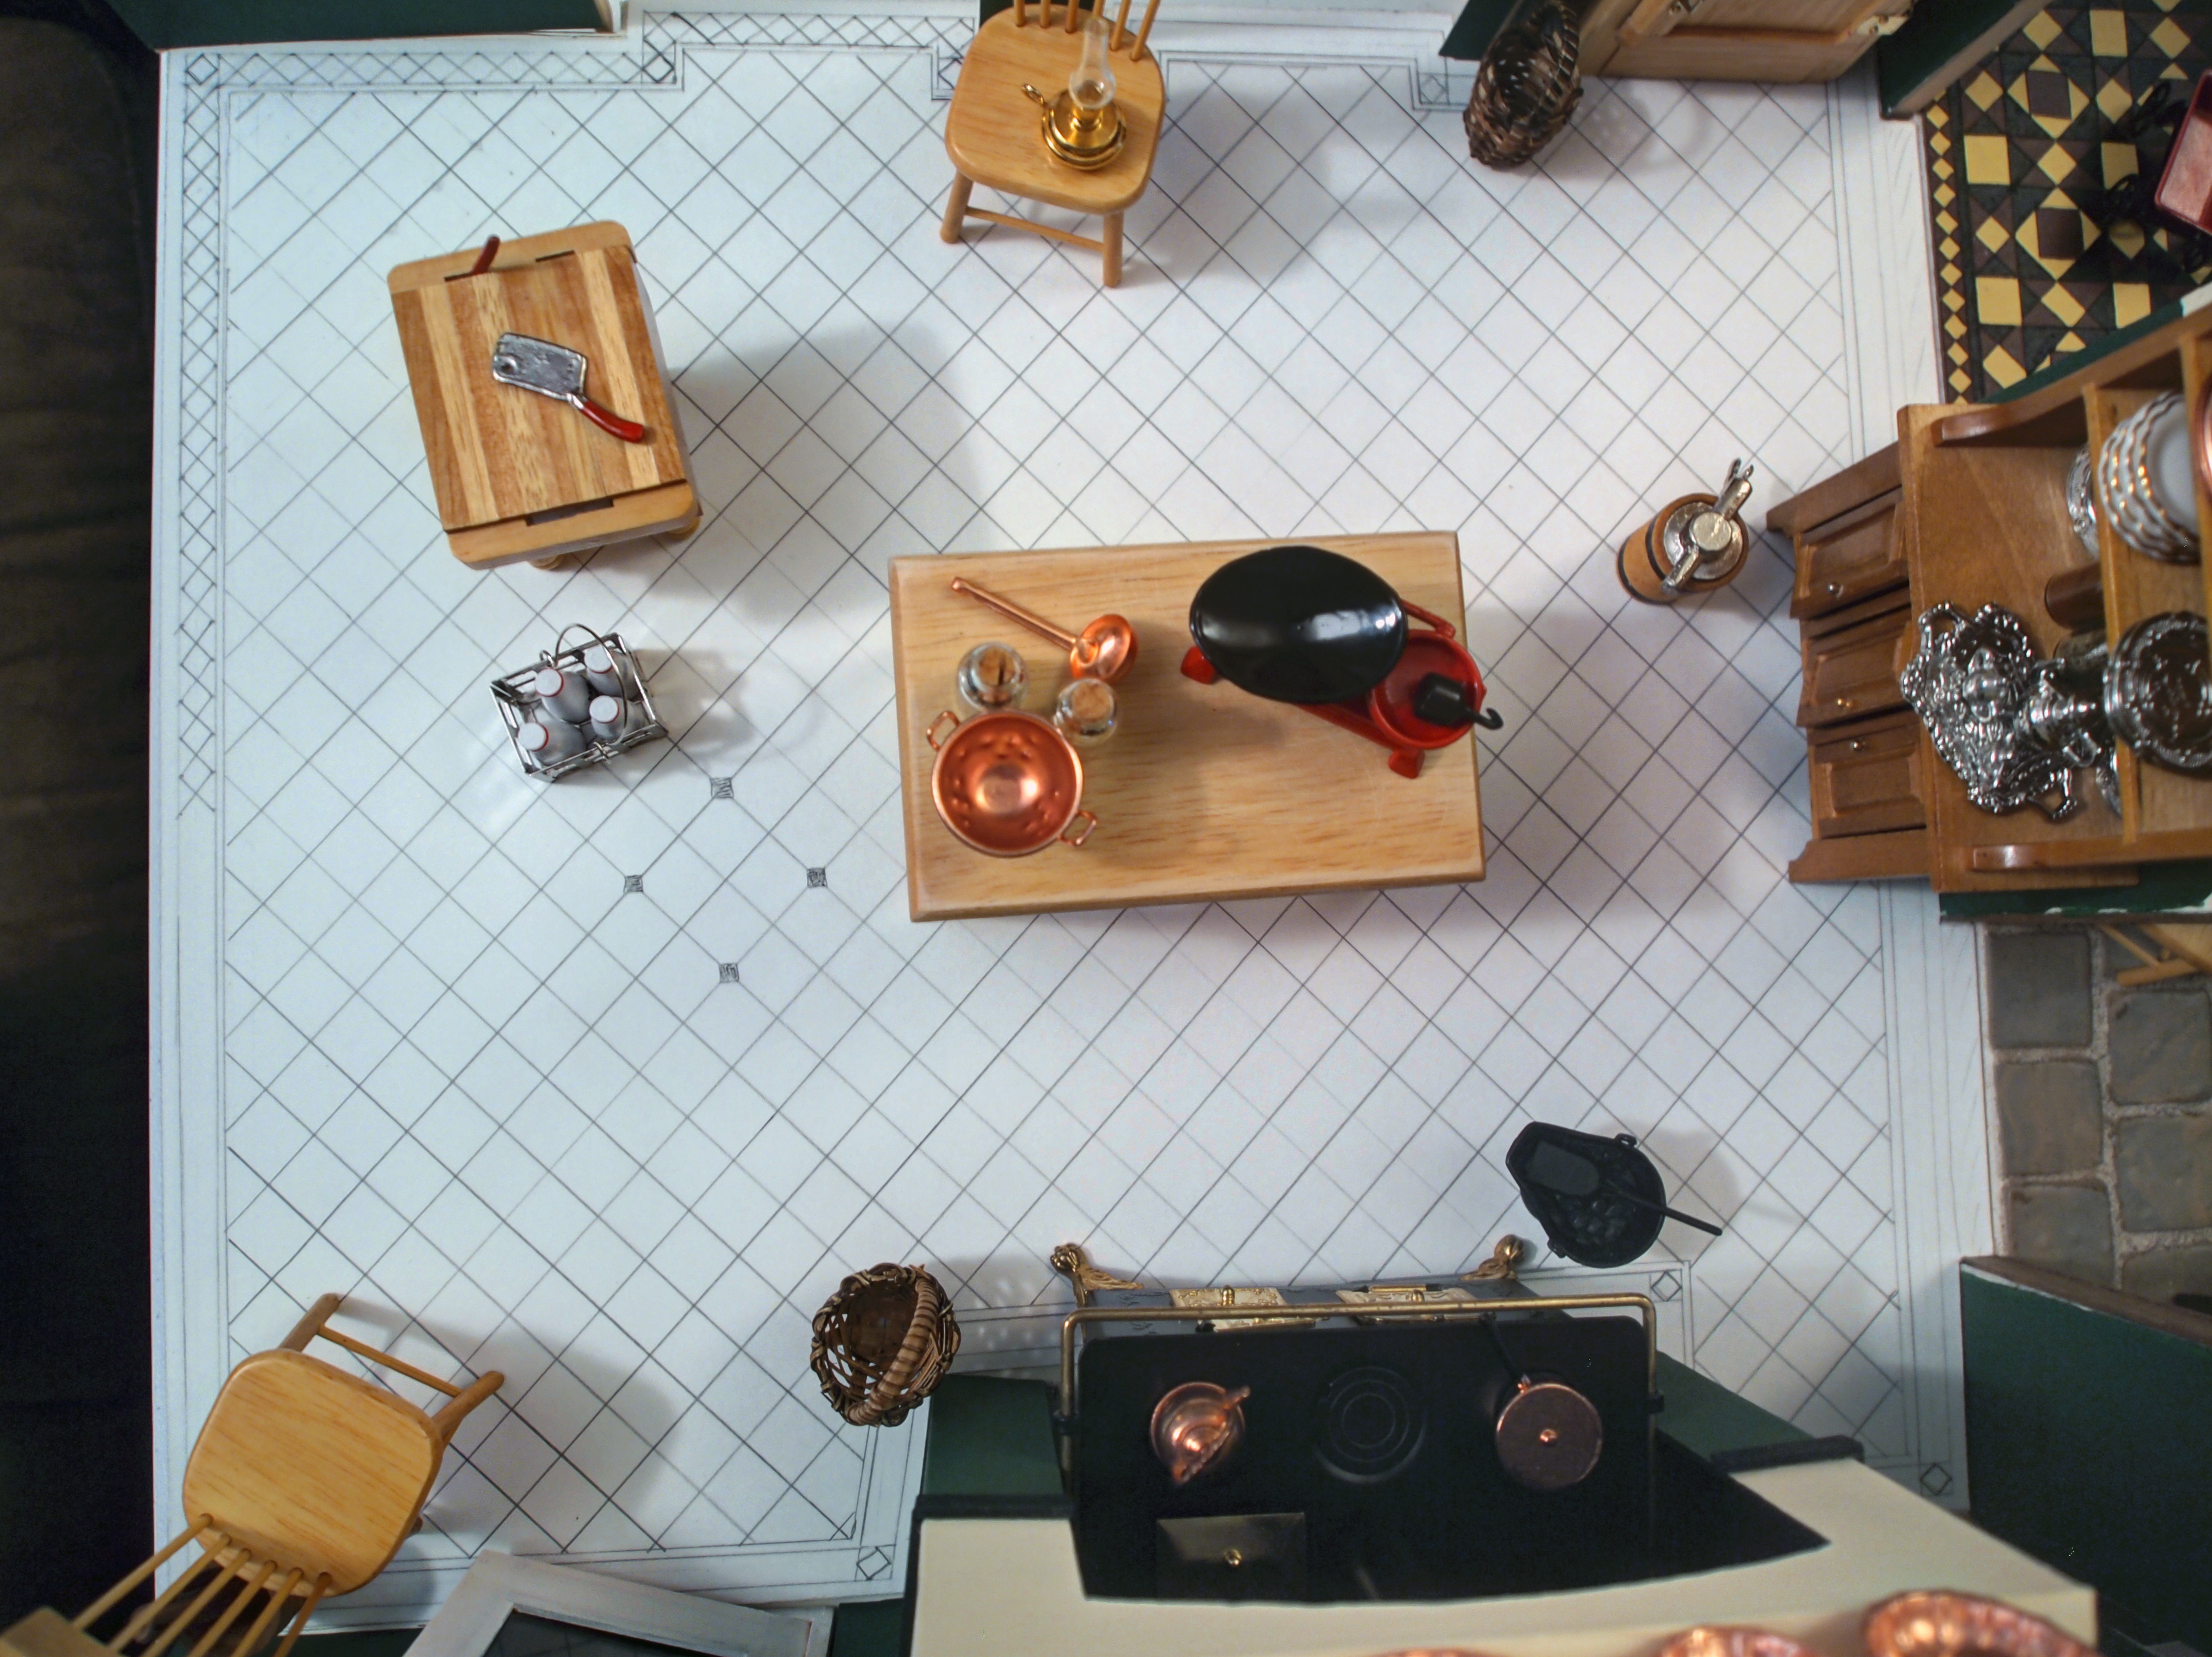
With a quick view from above to show how it worked:
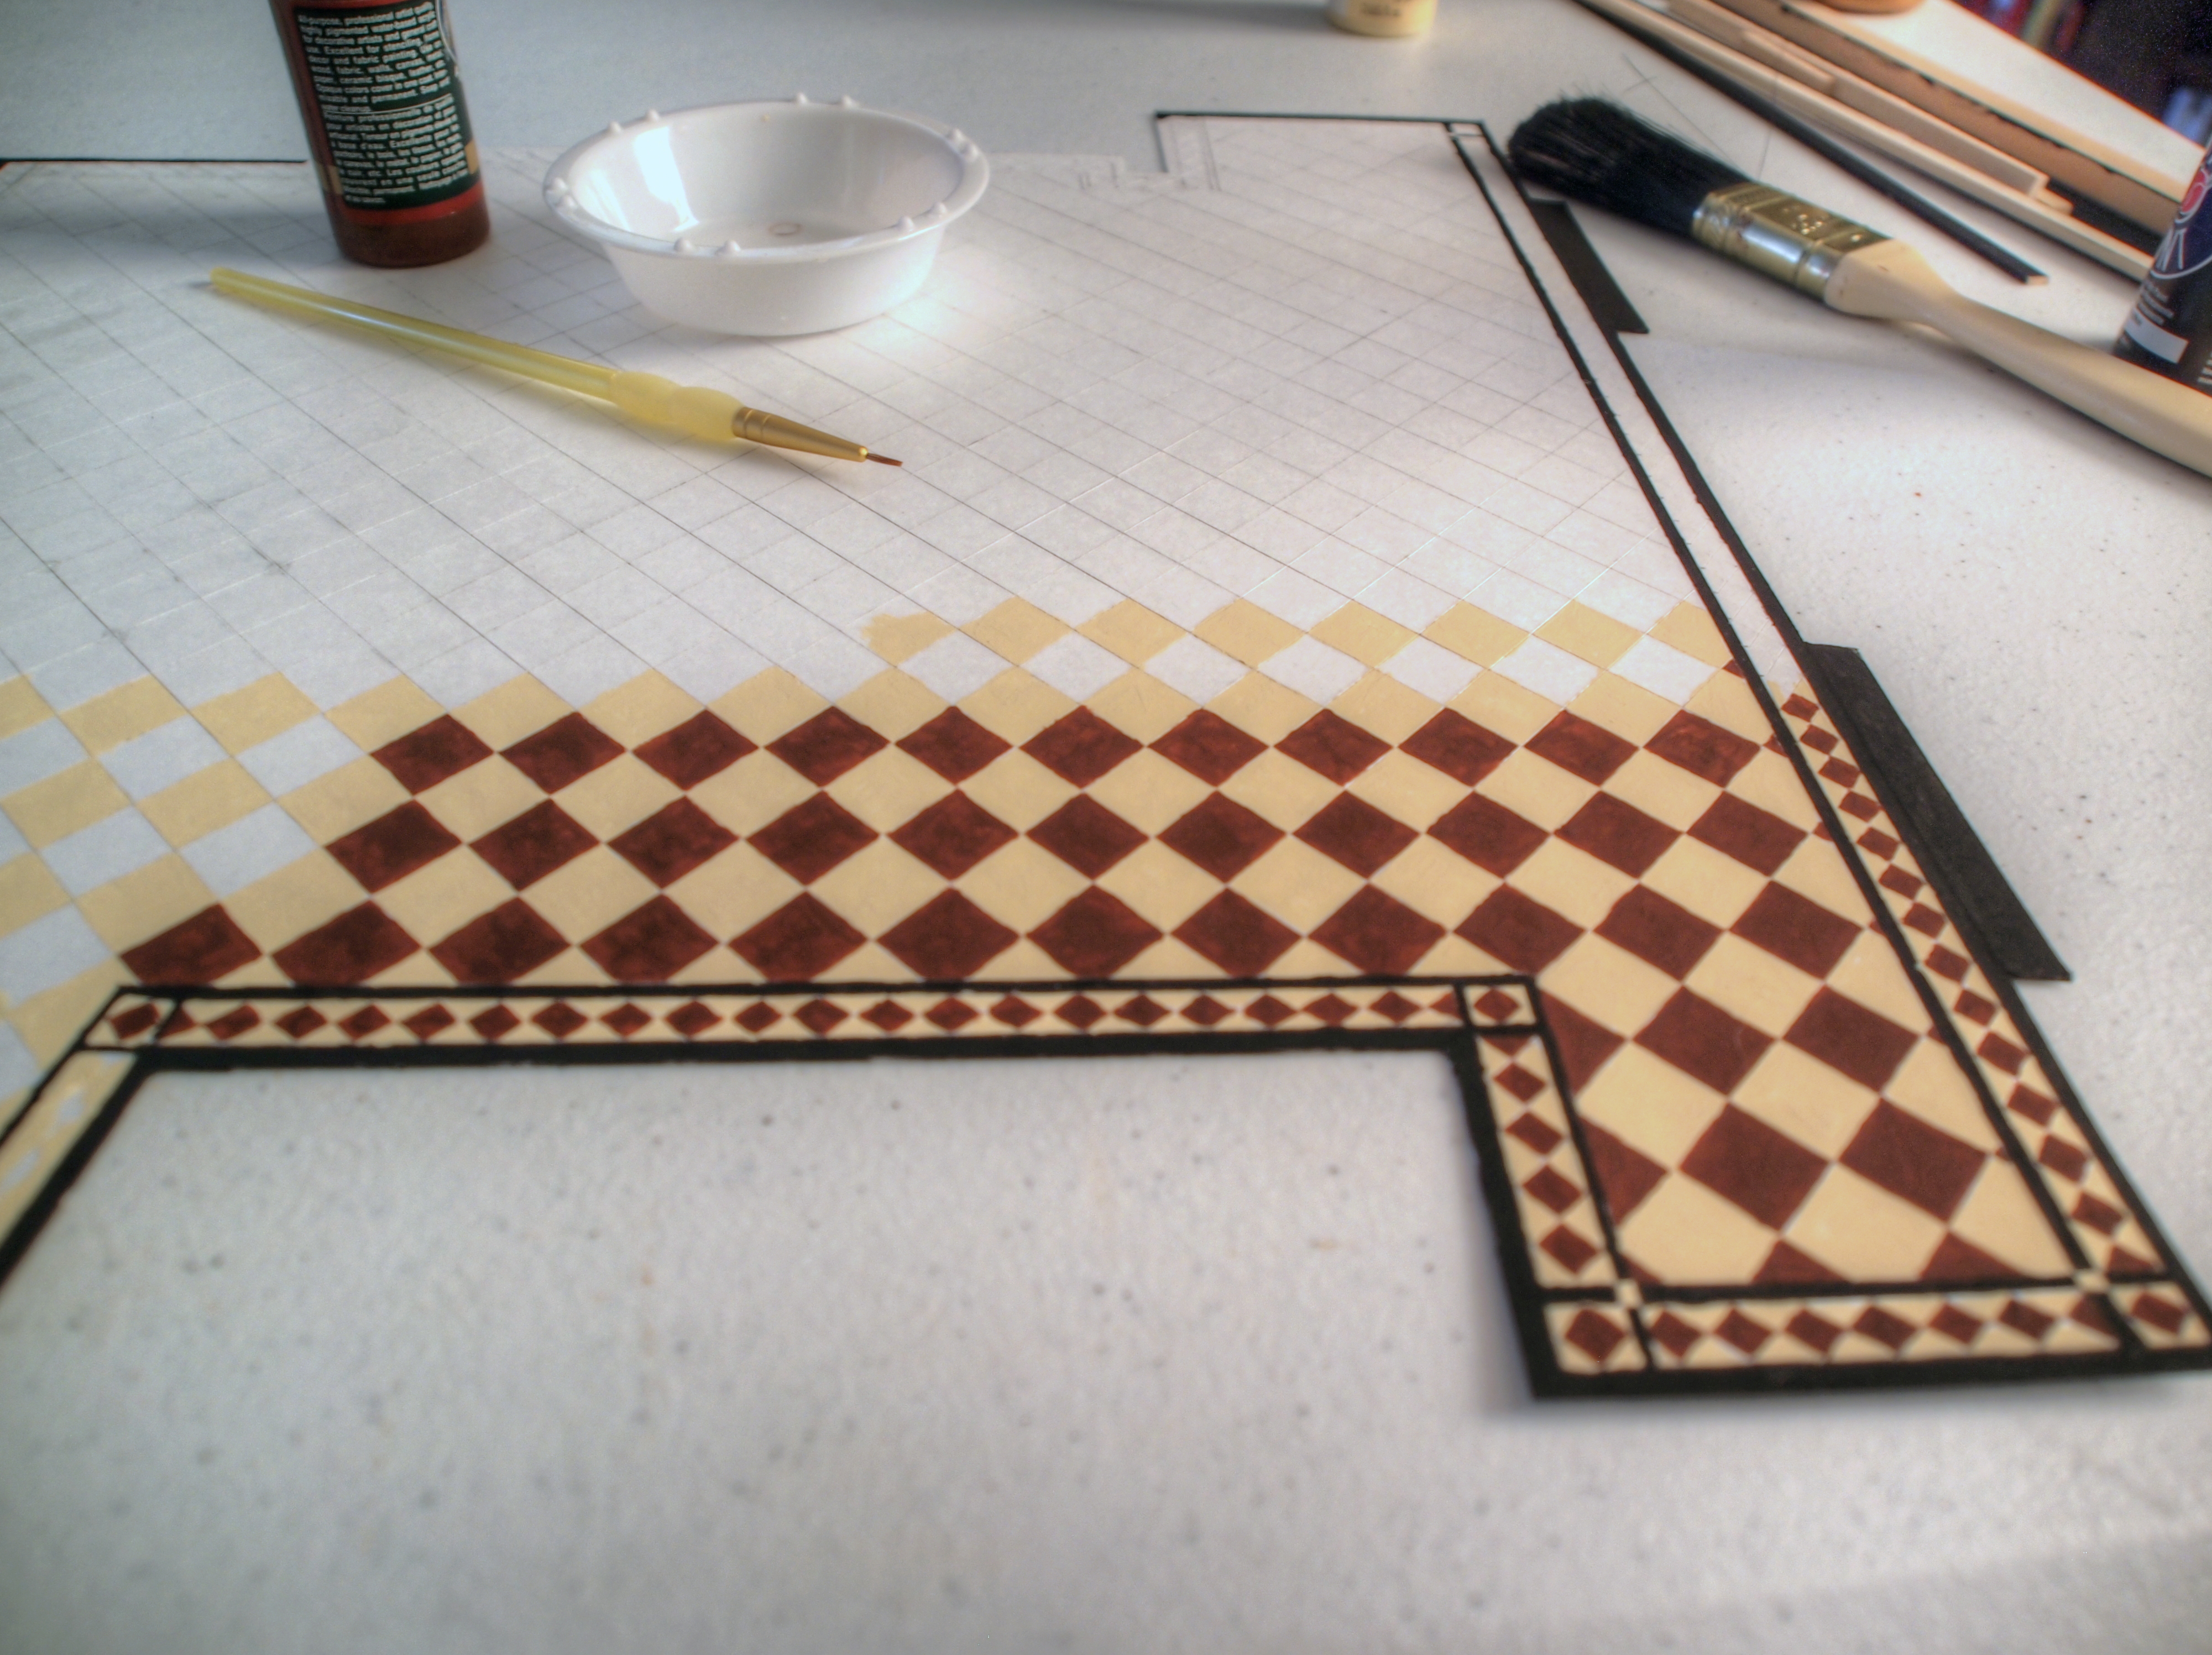
I experimented with various materials to form the sandy grout, and ended up using buckwheat flour and glue.
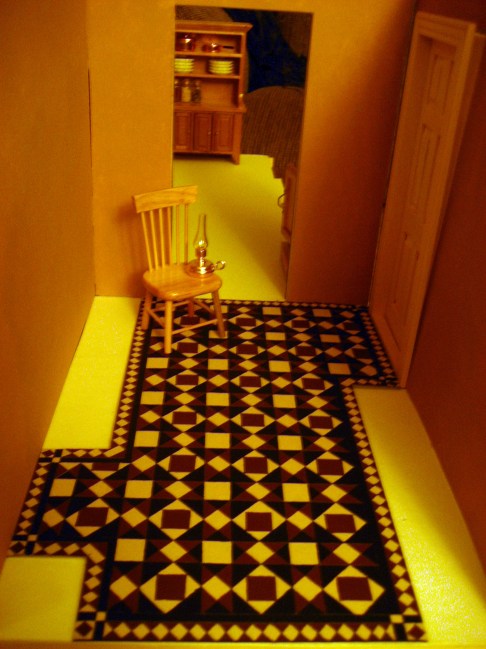
Then I started in on the butler’s pantry. I was inspired by a photo I found. Not sure where it came from. (Addendum: This butler’s pantry photo is from the Meyer May House, designed by Frank Lloyd Wright in Grand Rapids, Michigan.)
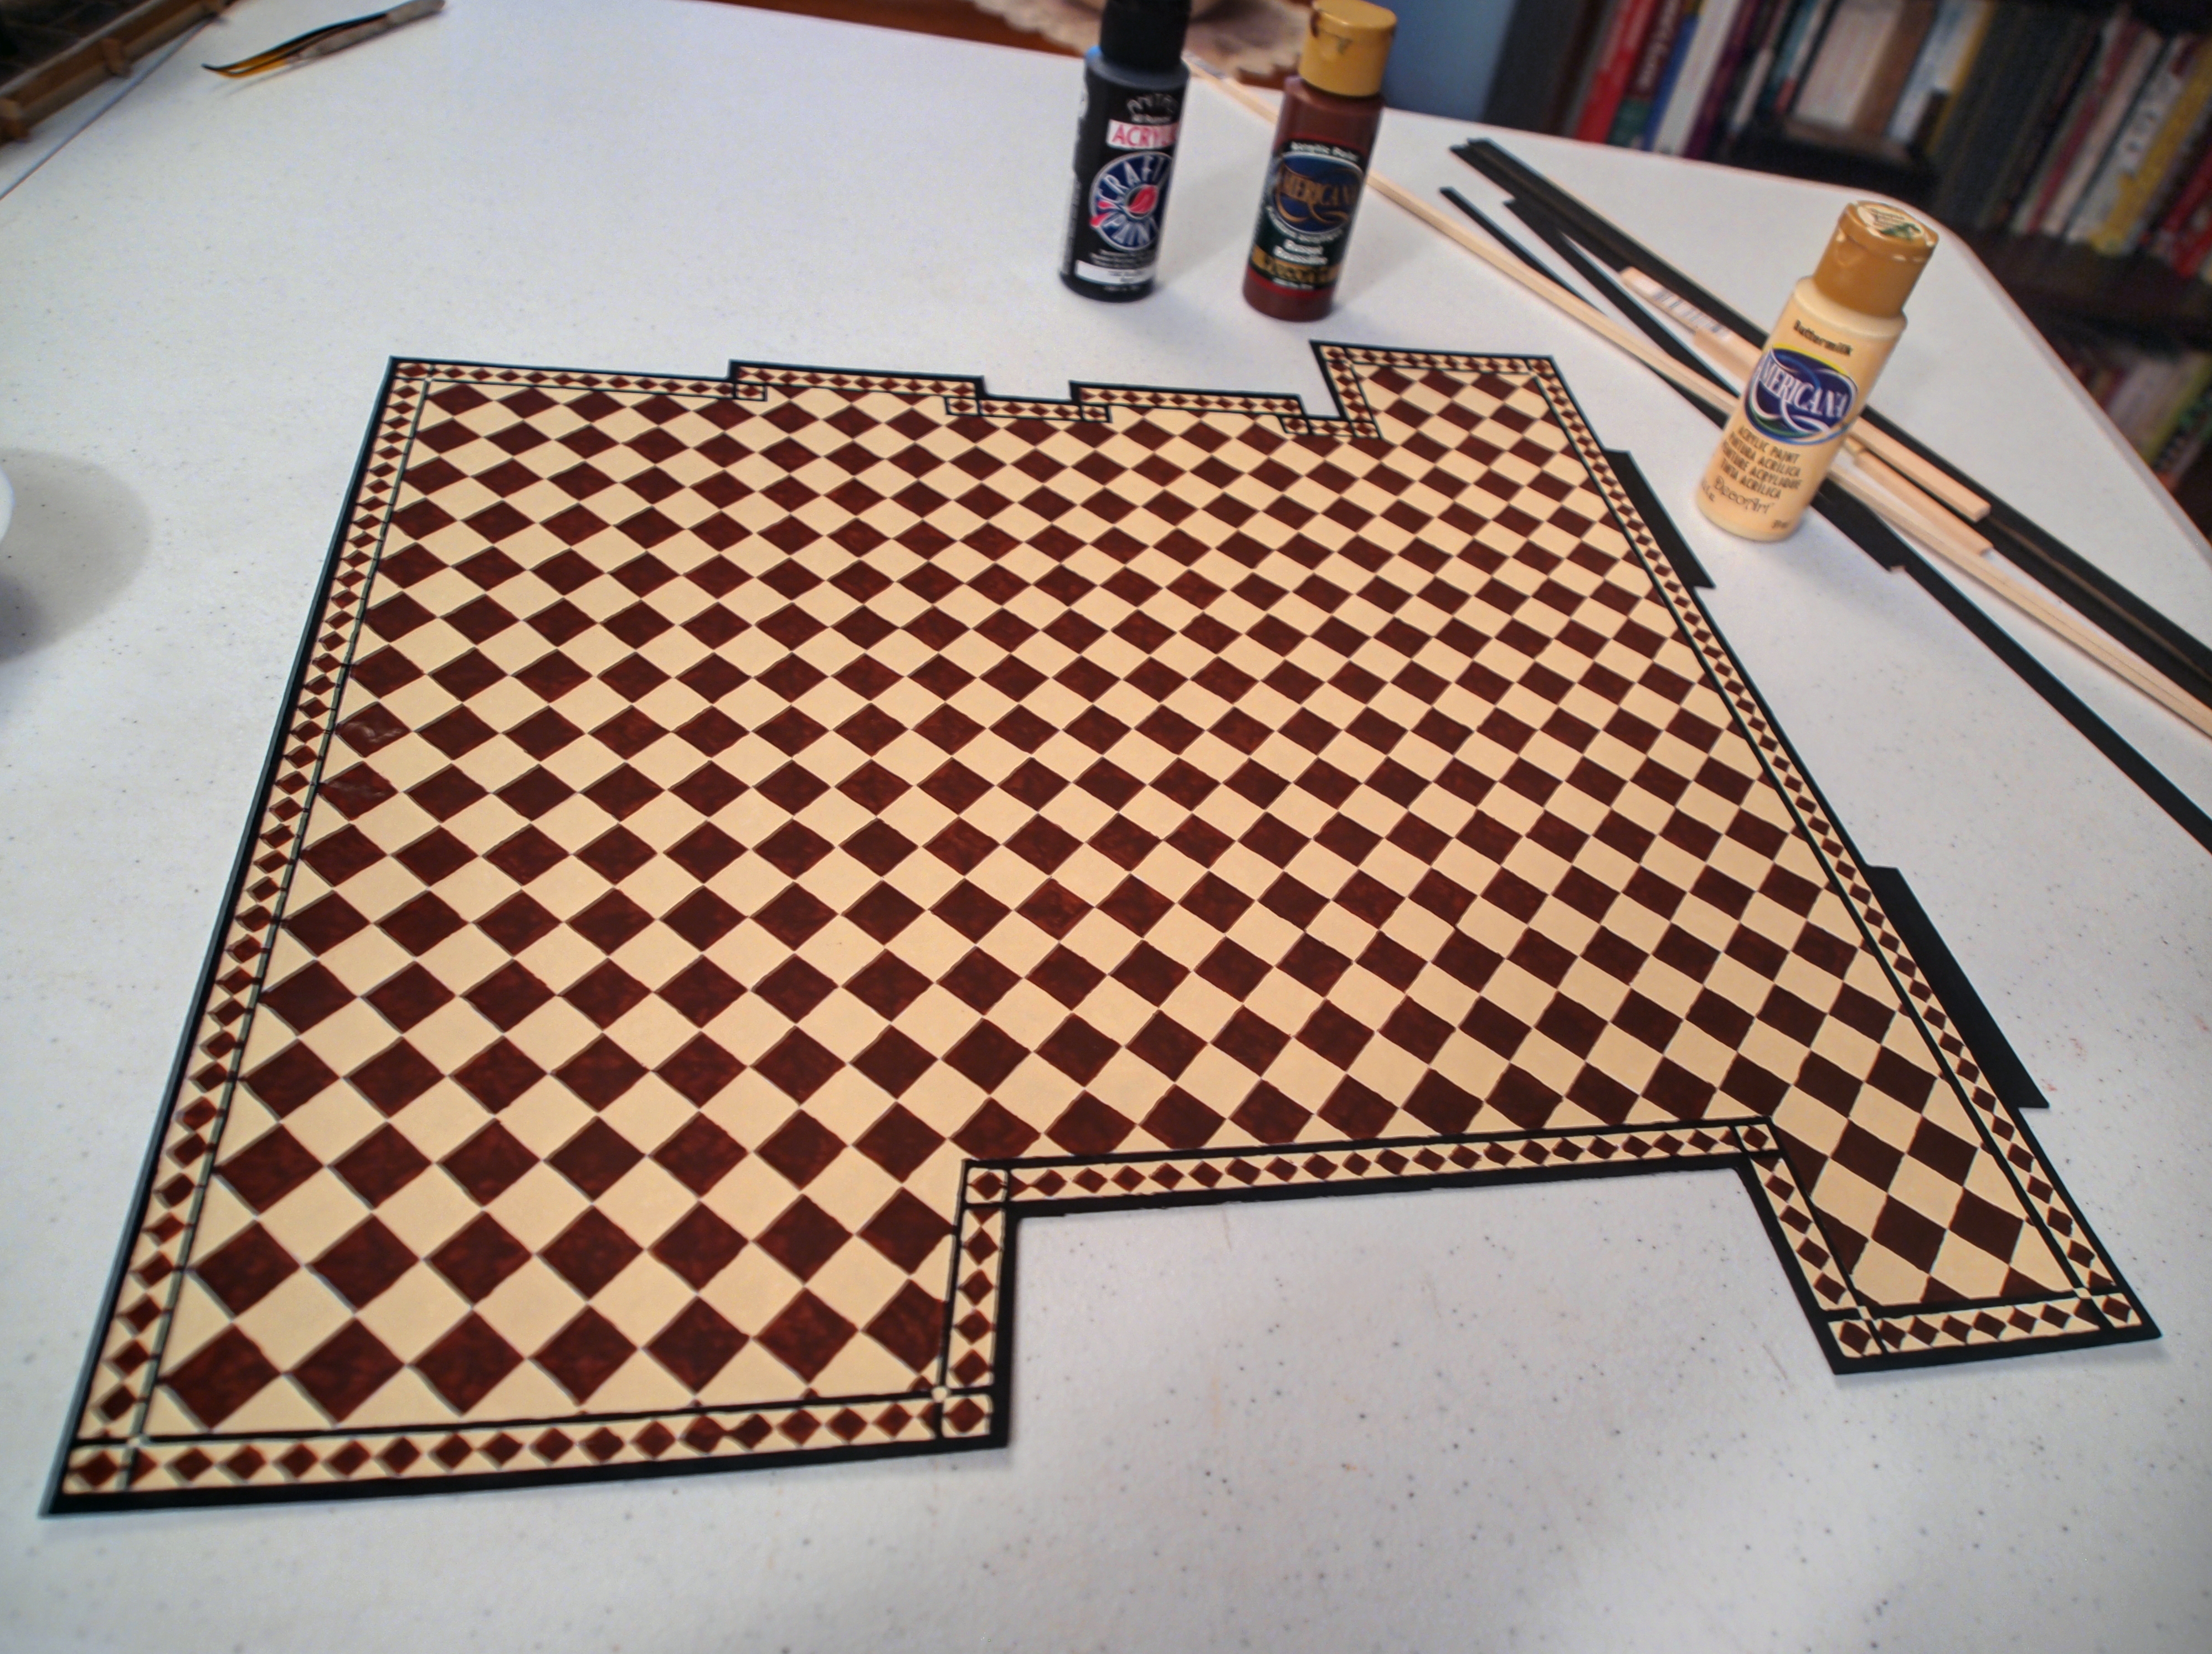
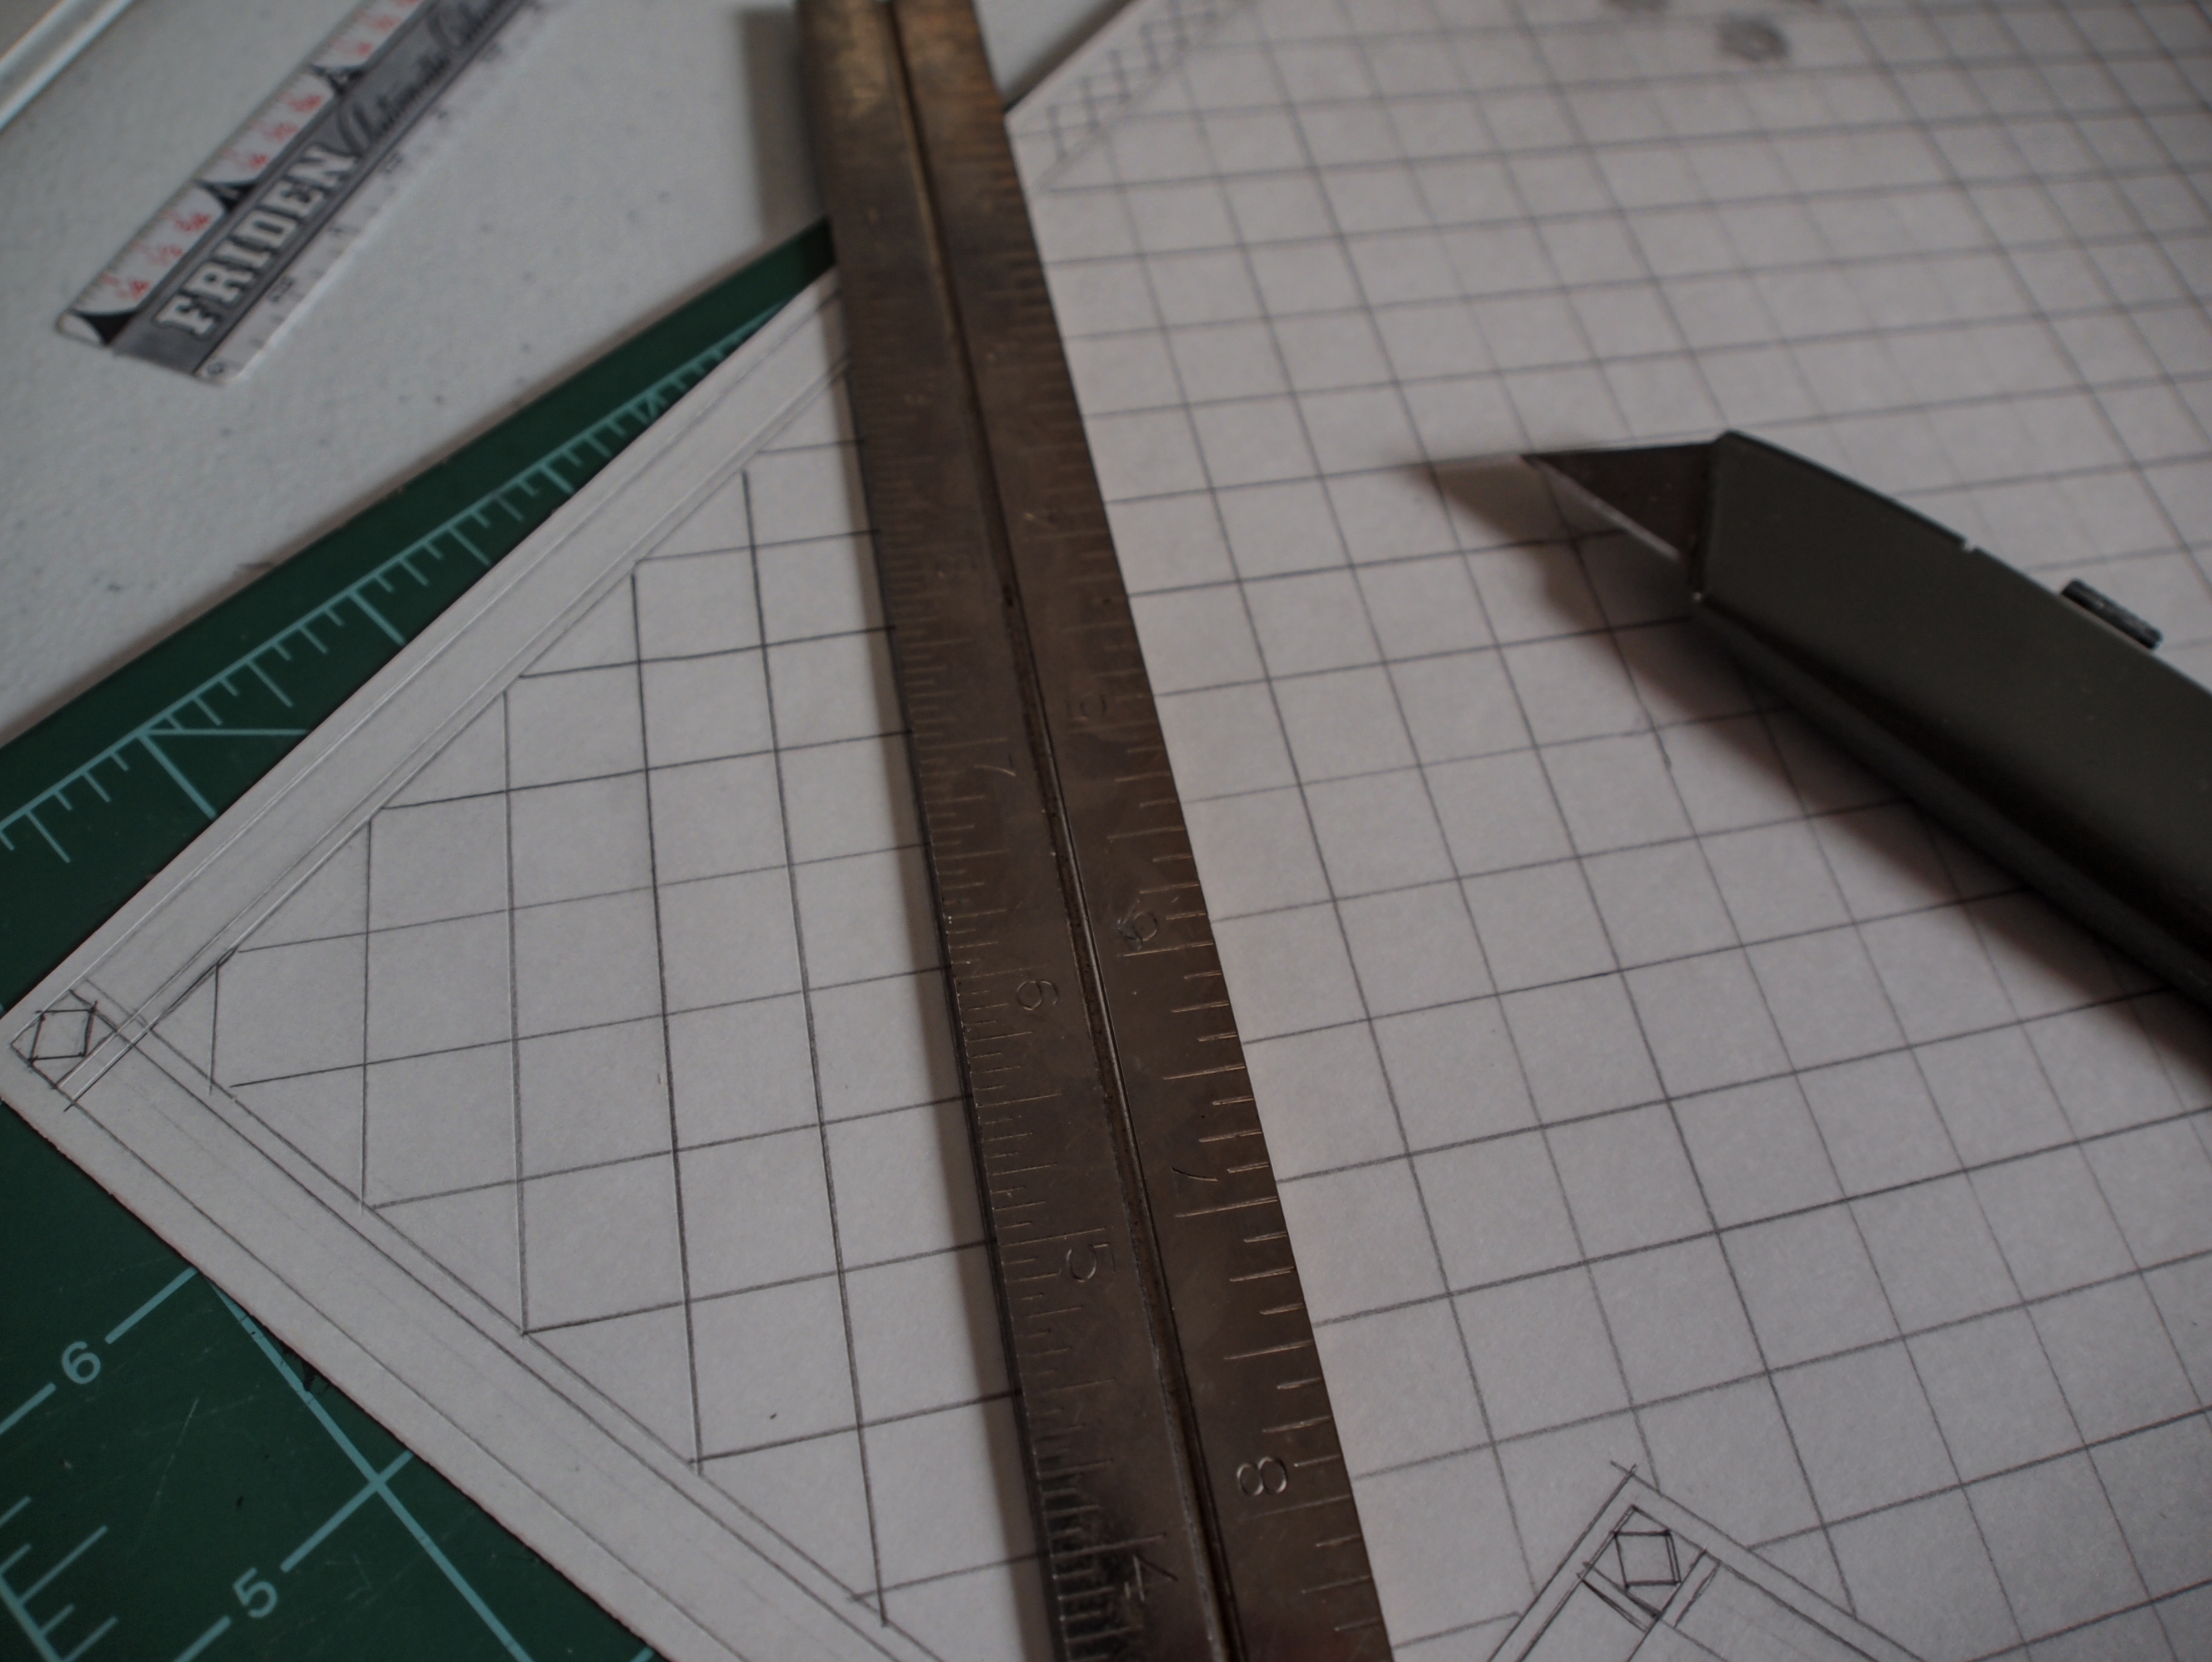
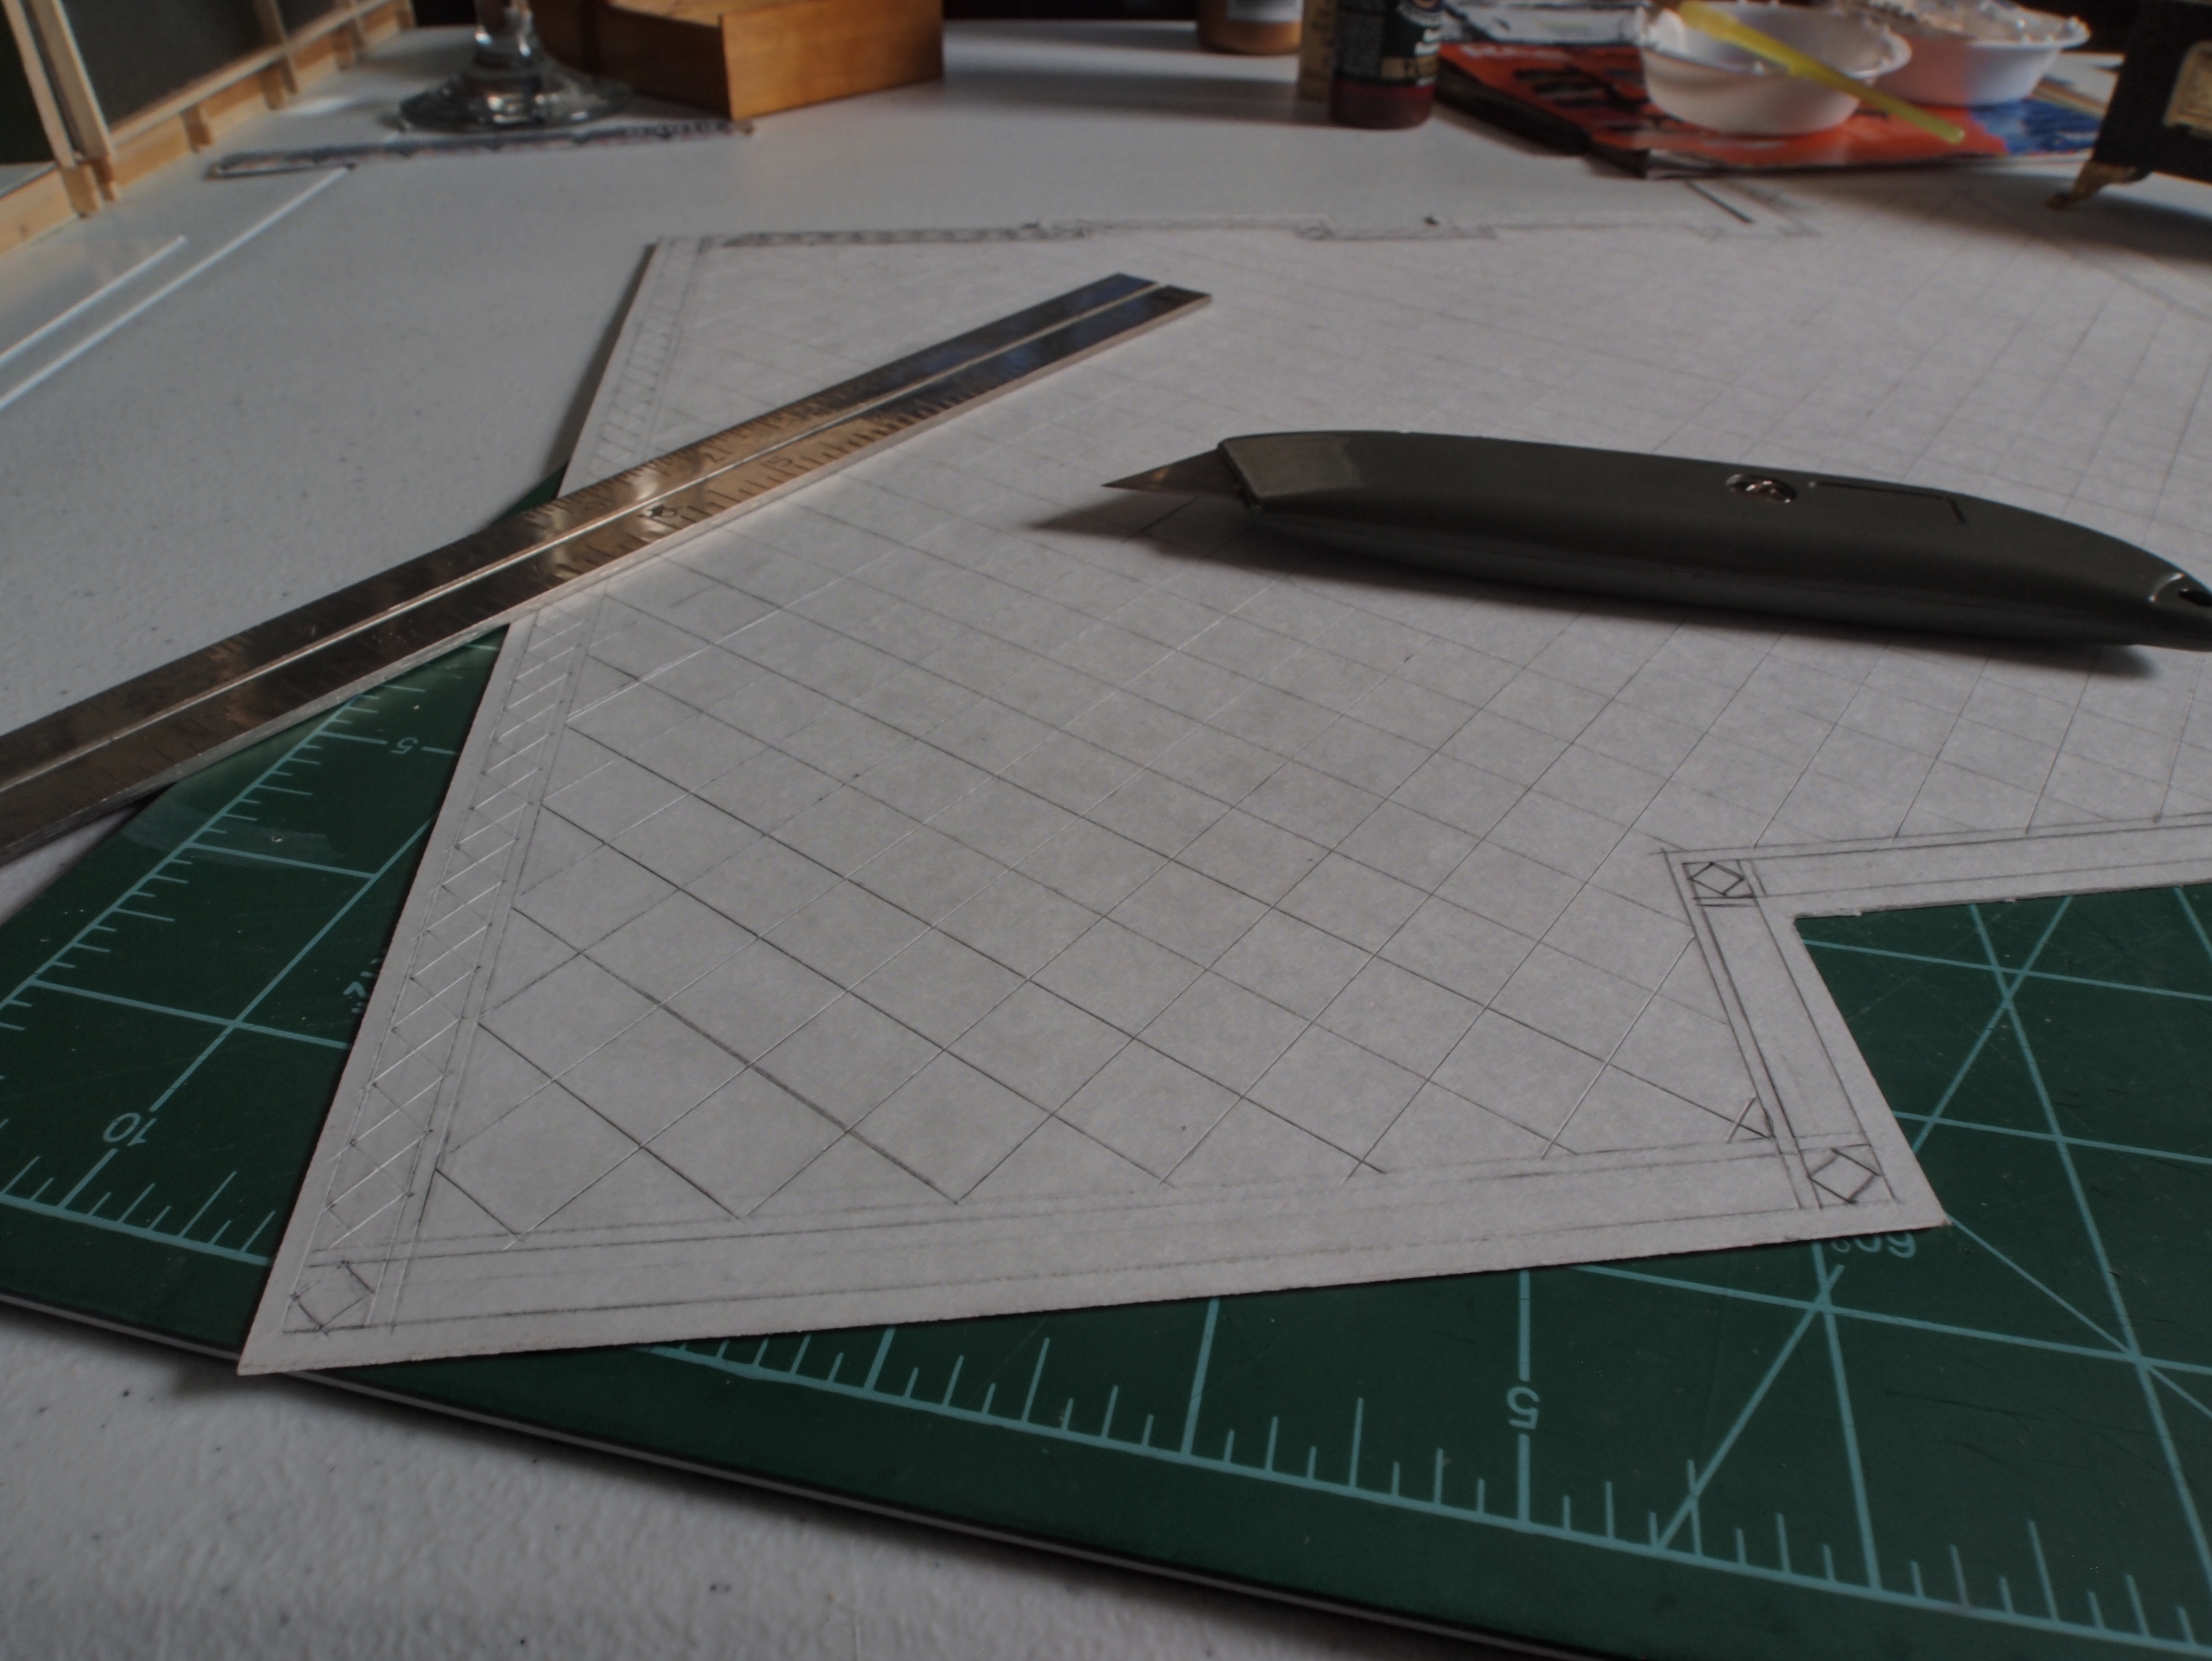
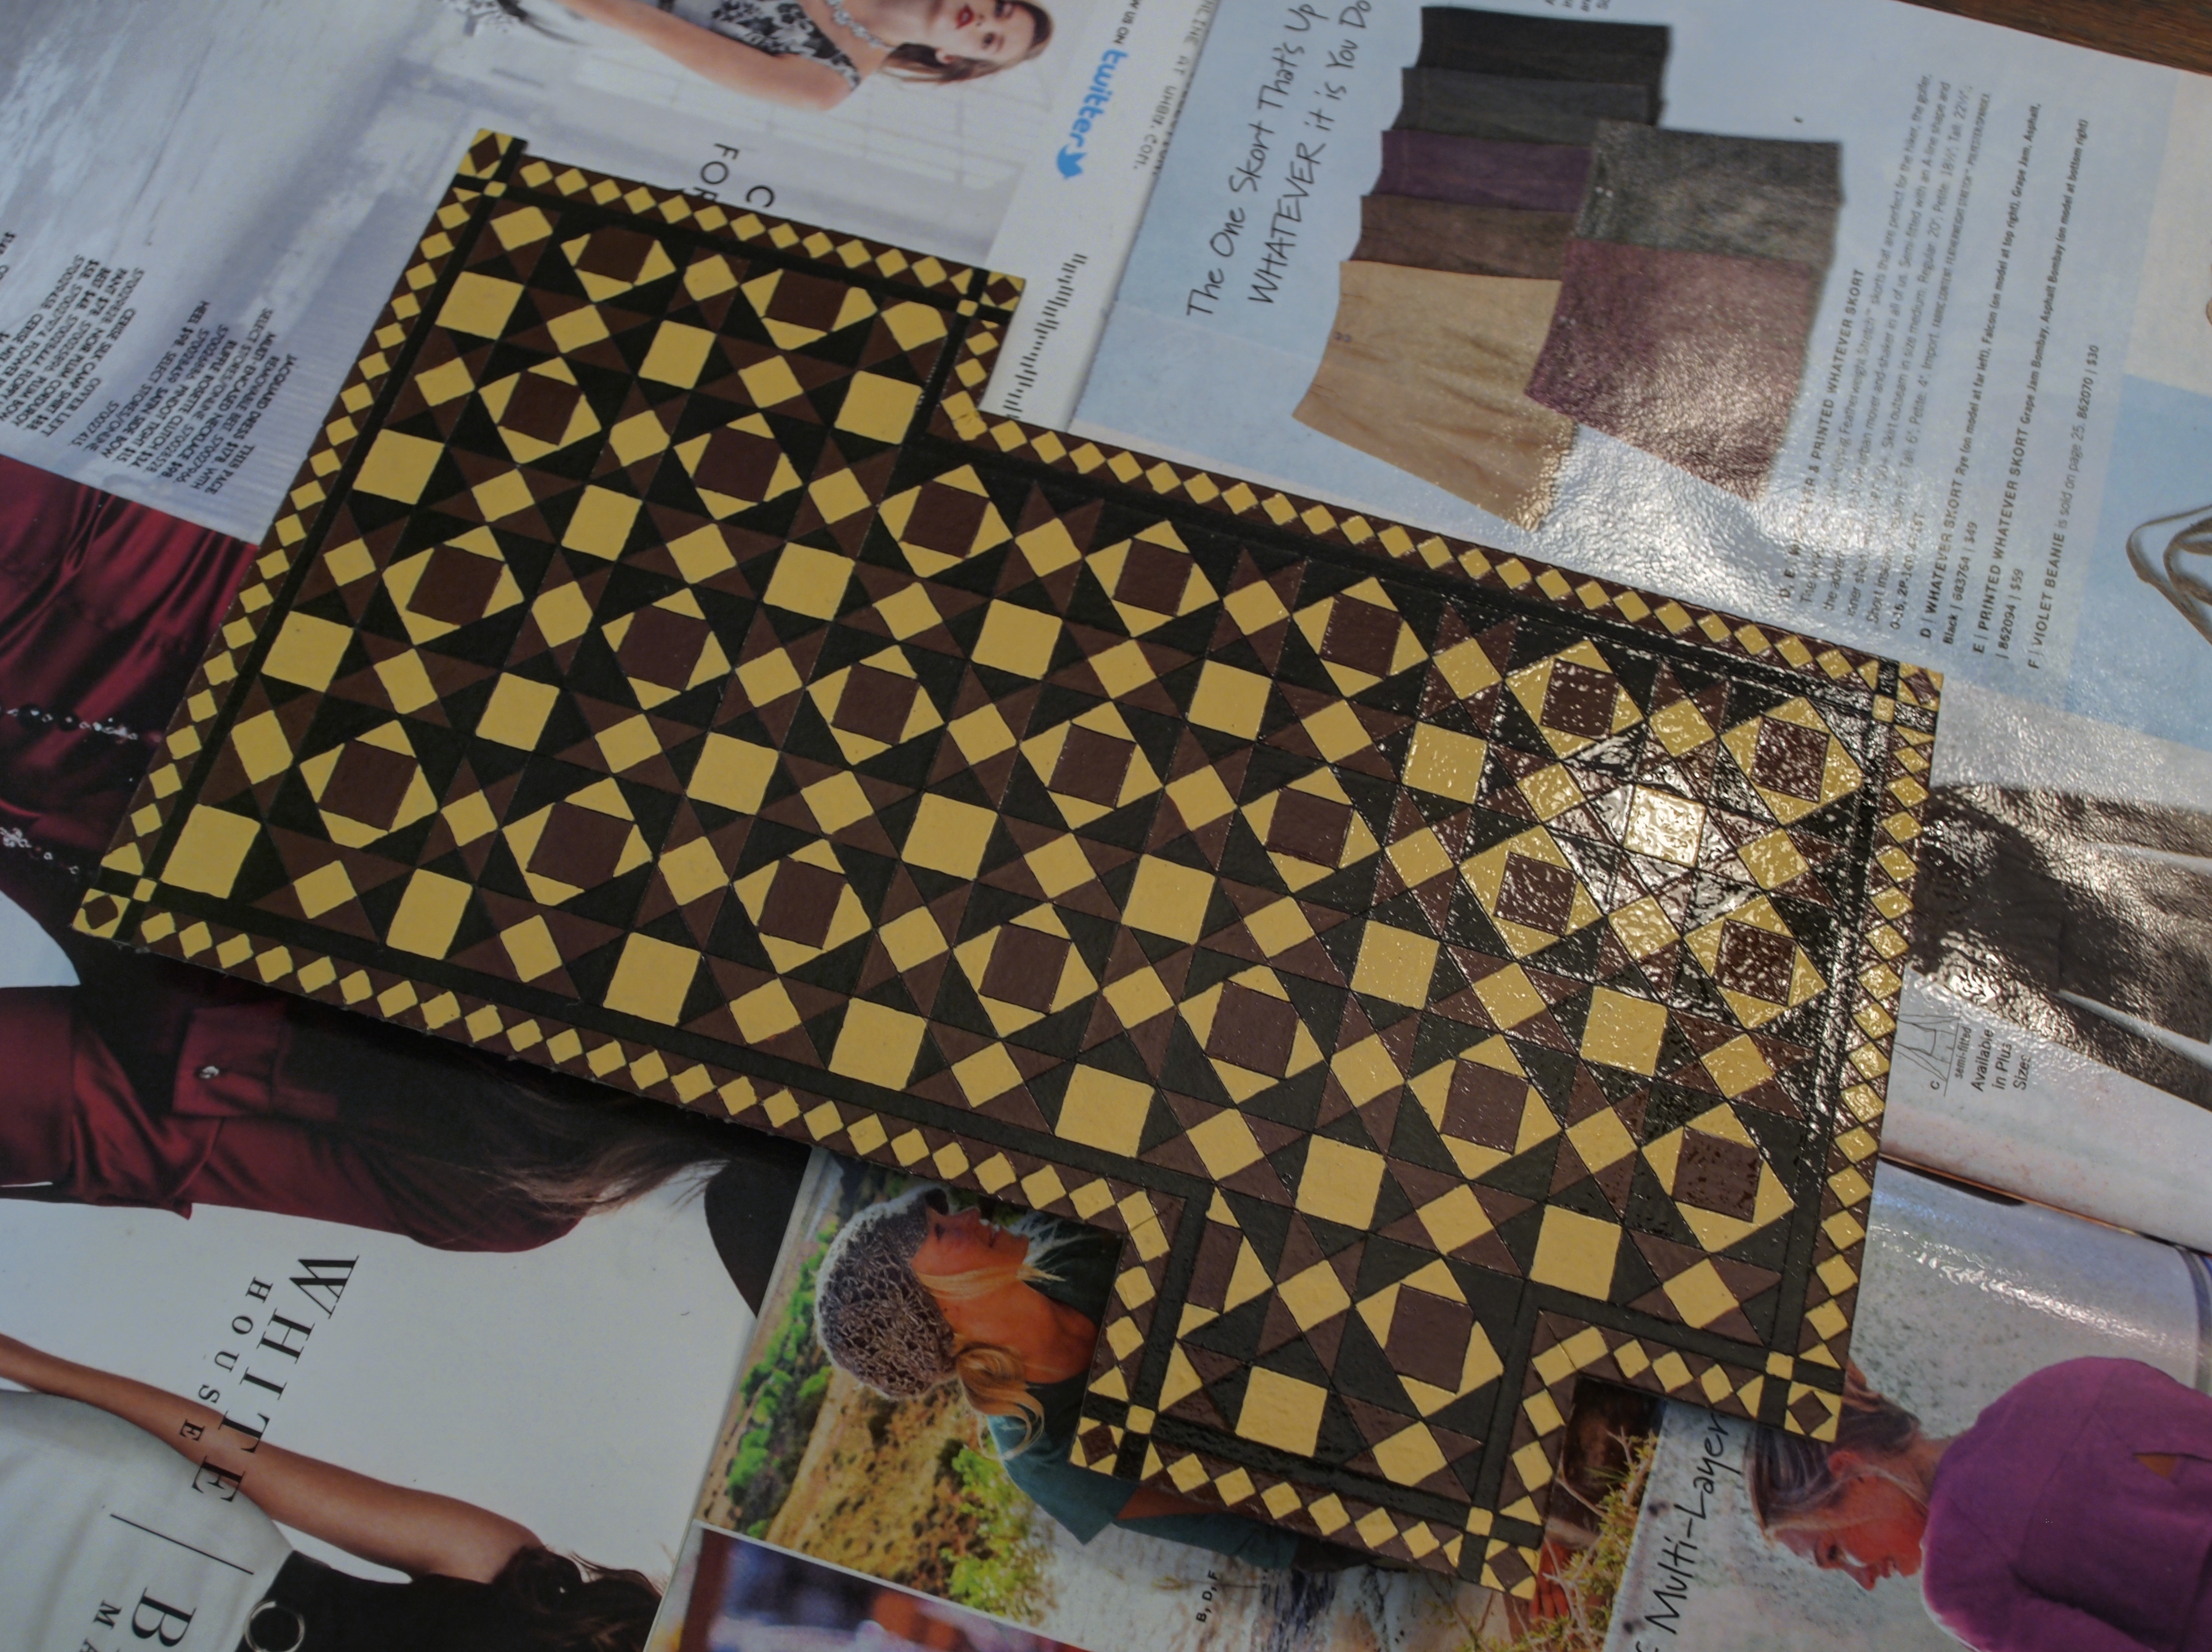
And also by a pattern for Victorian linoleum I found in a book.
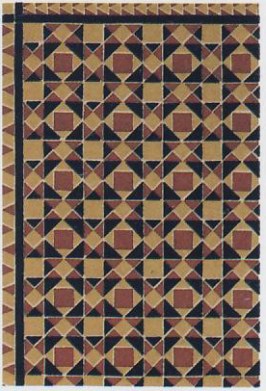
So I traced out a similar pattern on a piece of poster-board and used an X-acto knife to simulate the grooves.
And started painting away…
The parts with no linoleum are where I was planning to have built-in cabinets. (I have no idea how I’m going to make those yet…)
So now I had the basics for two of the rooms:
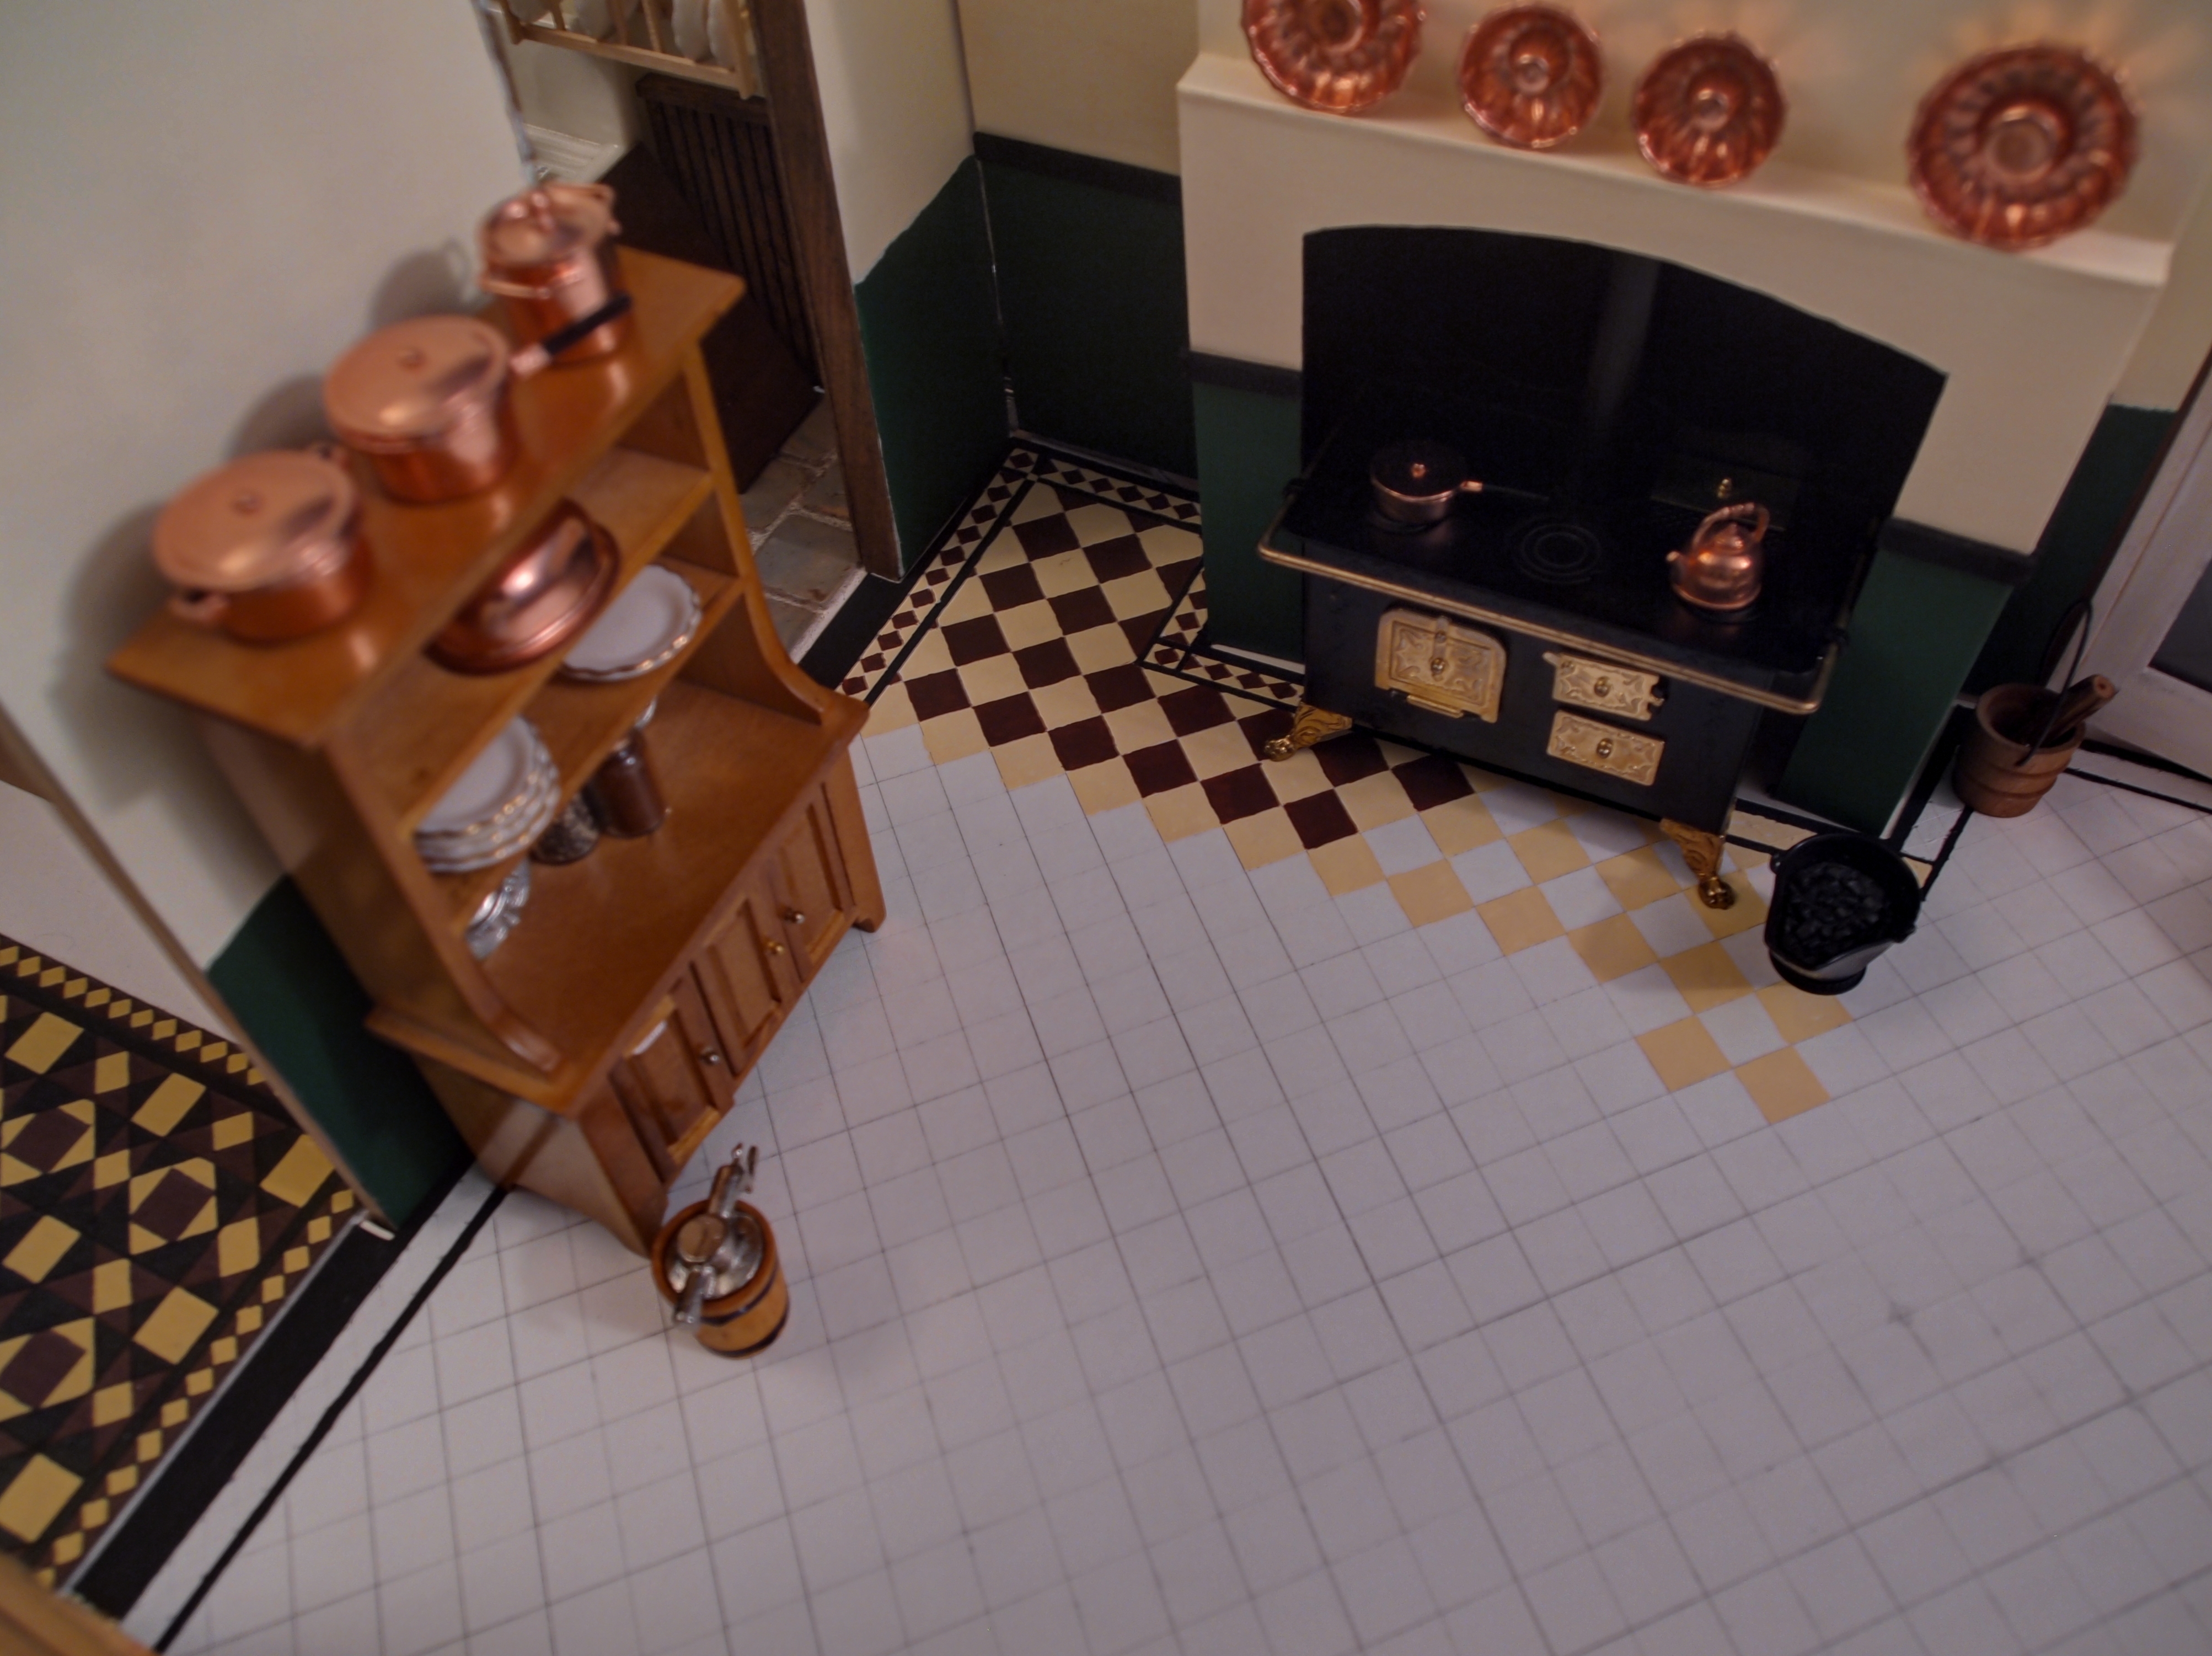
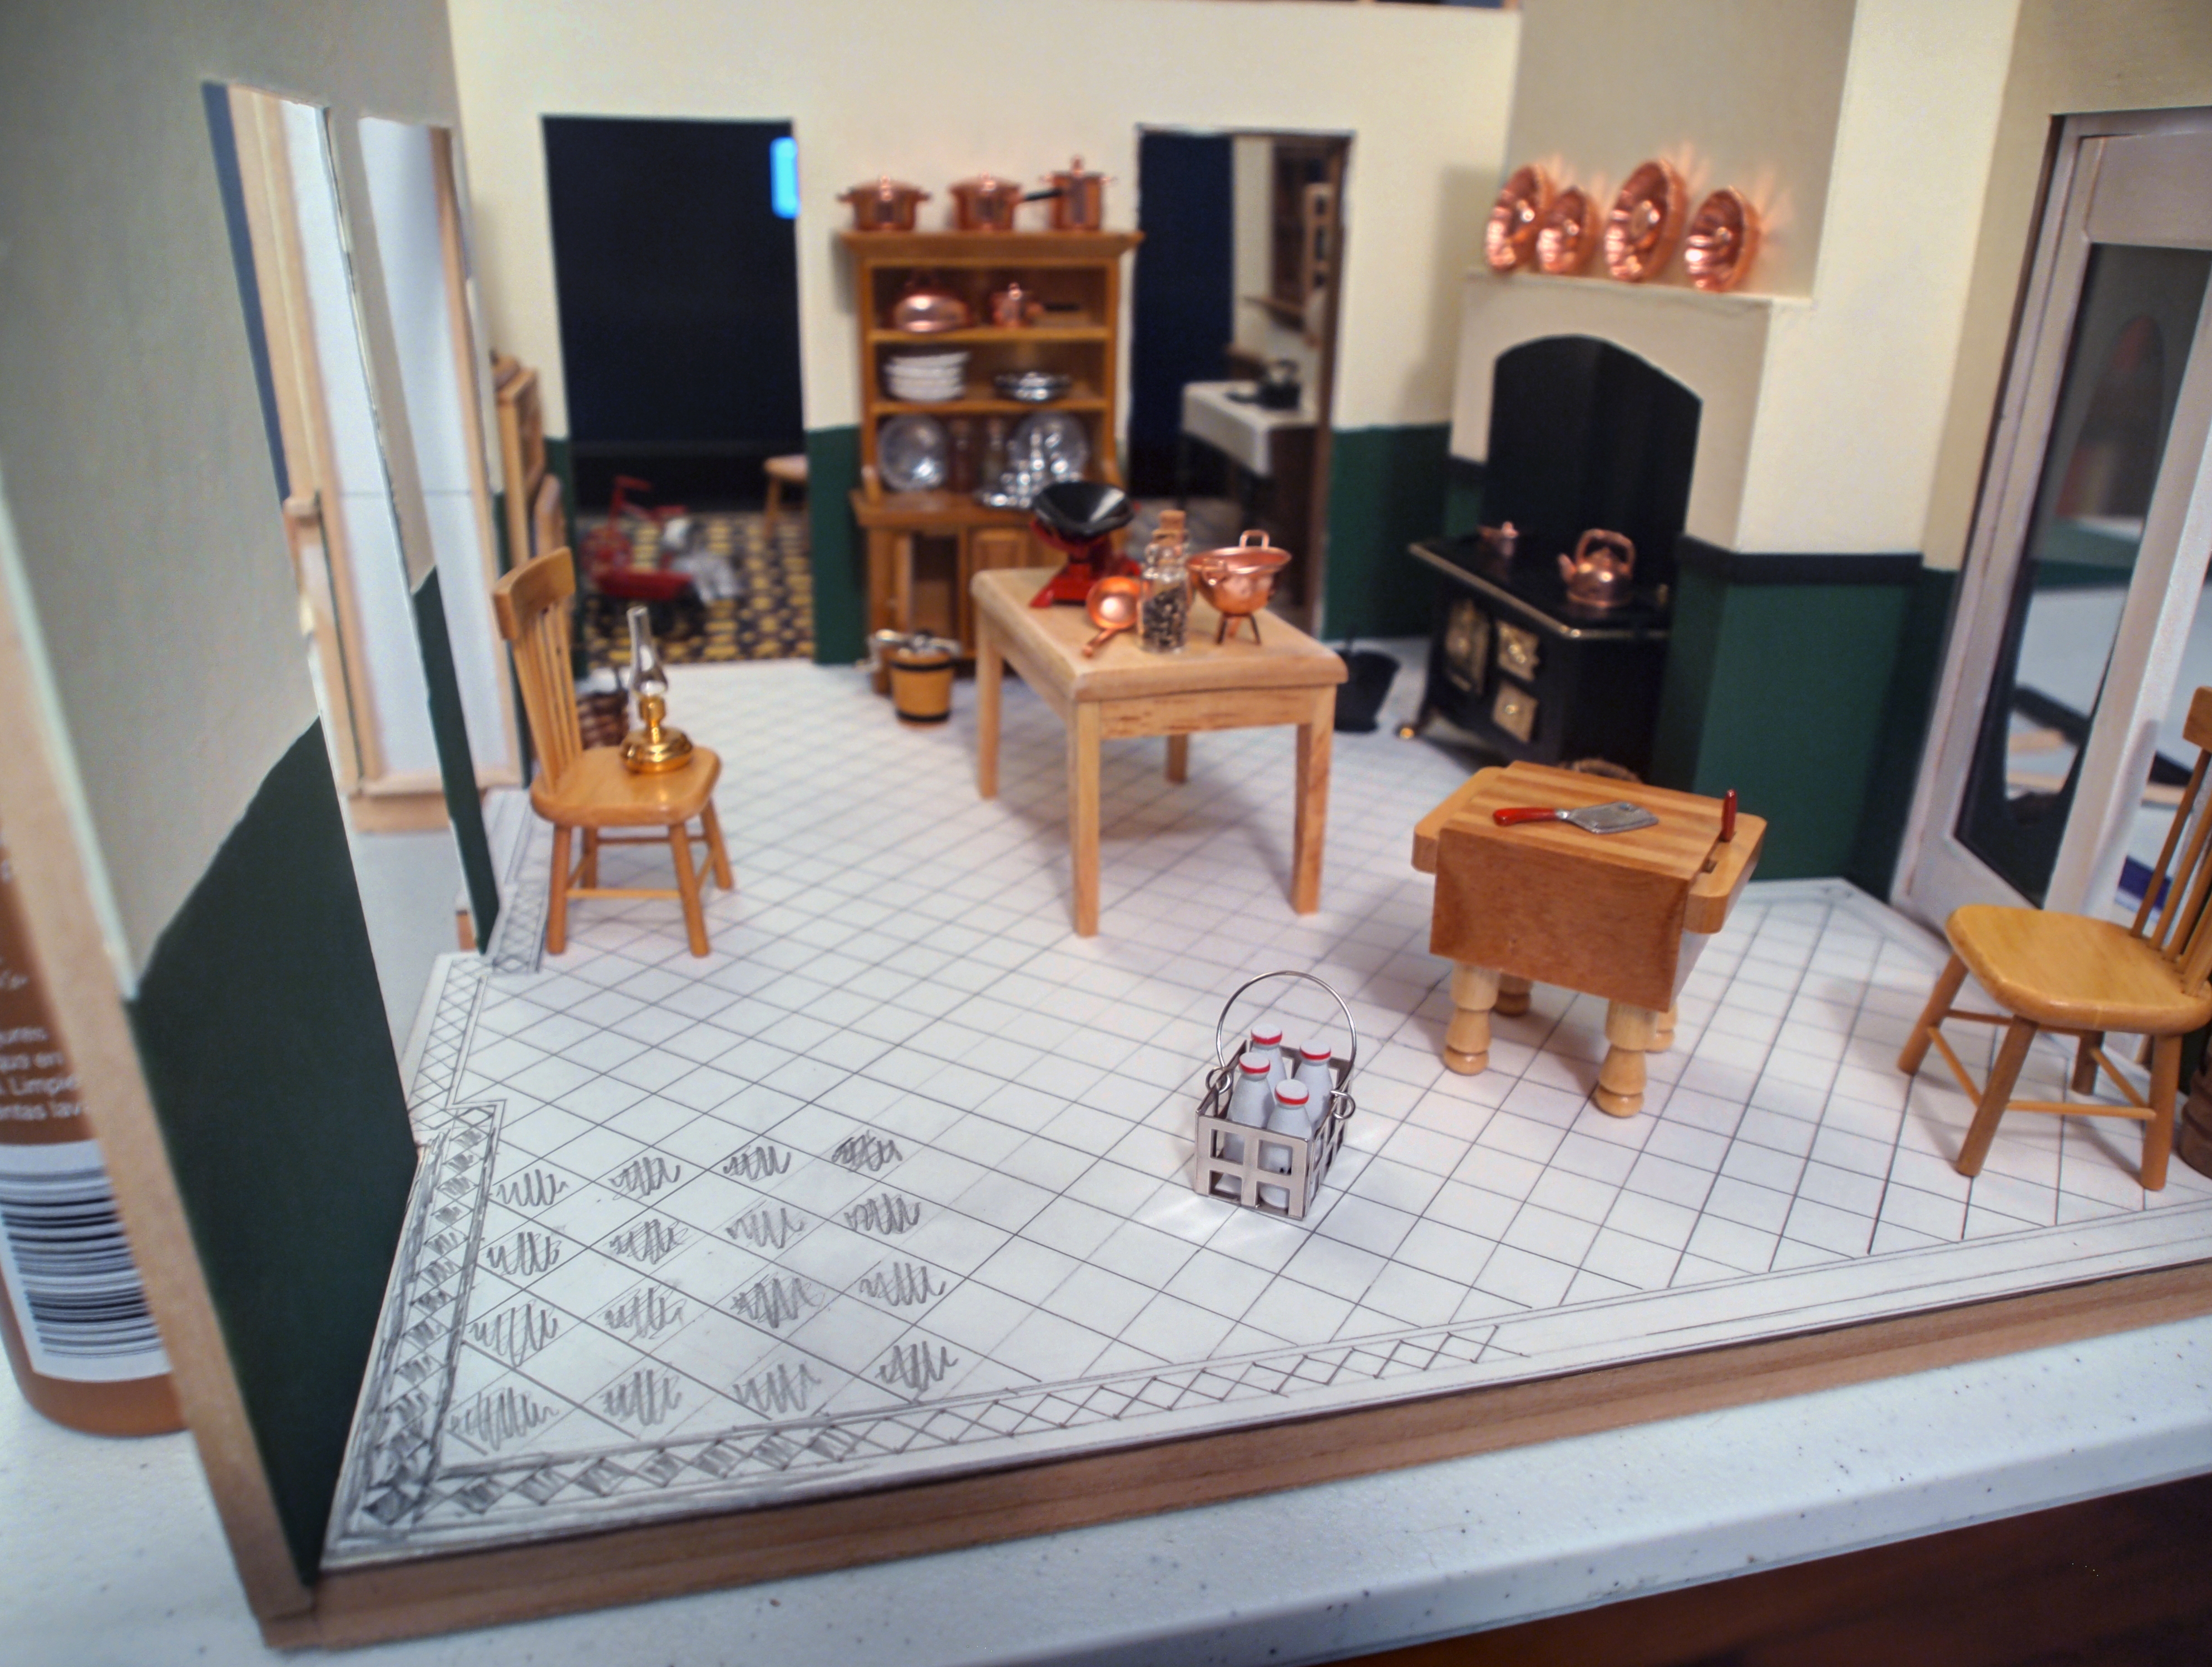
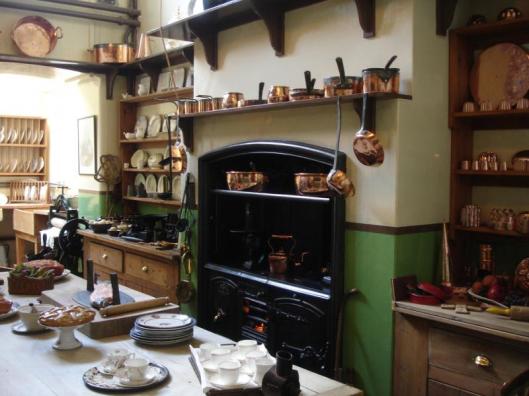
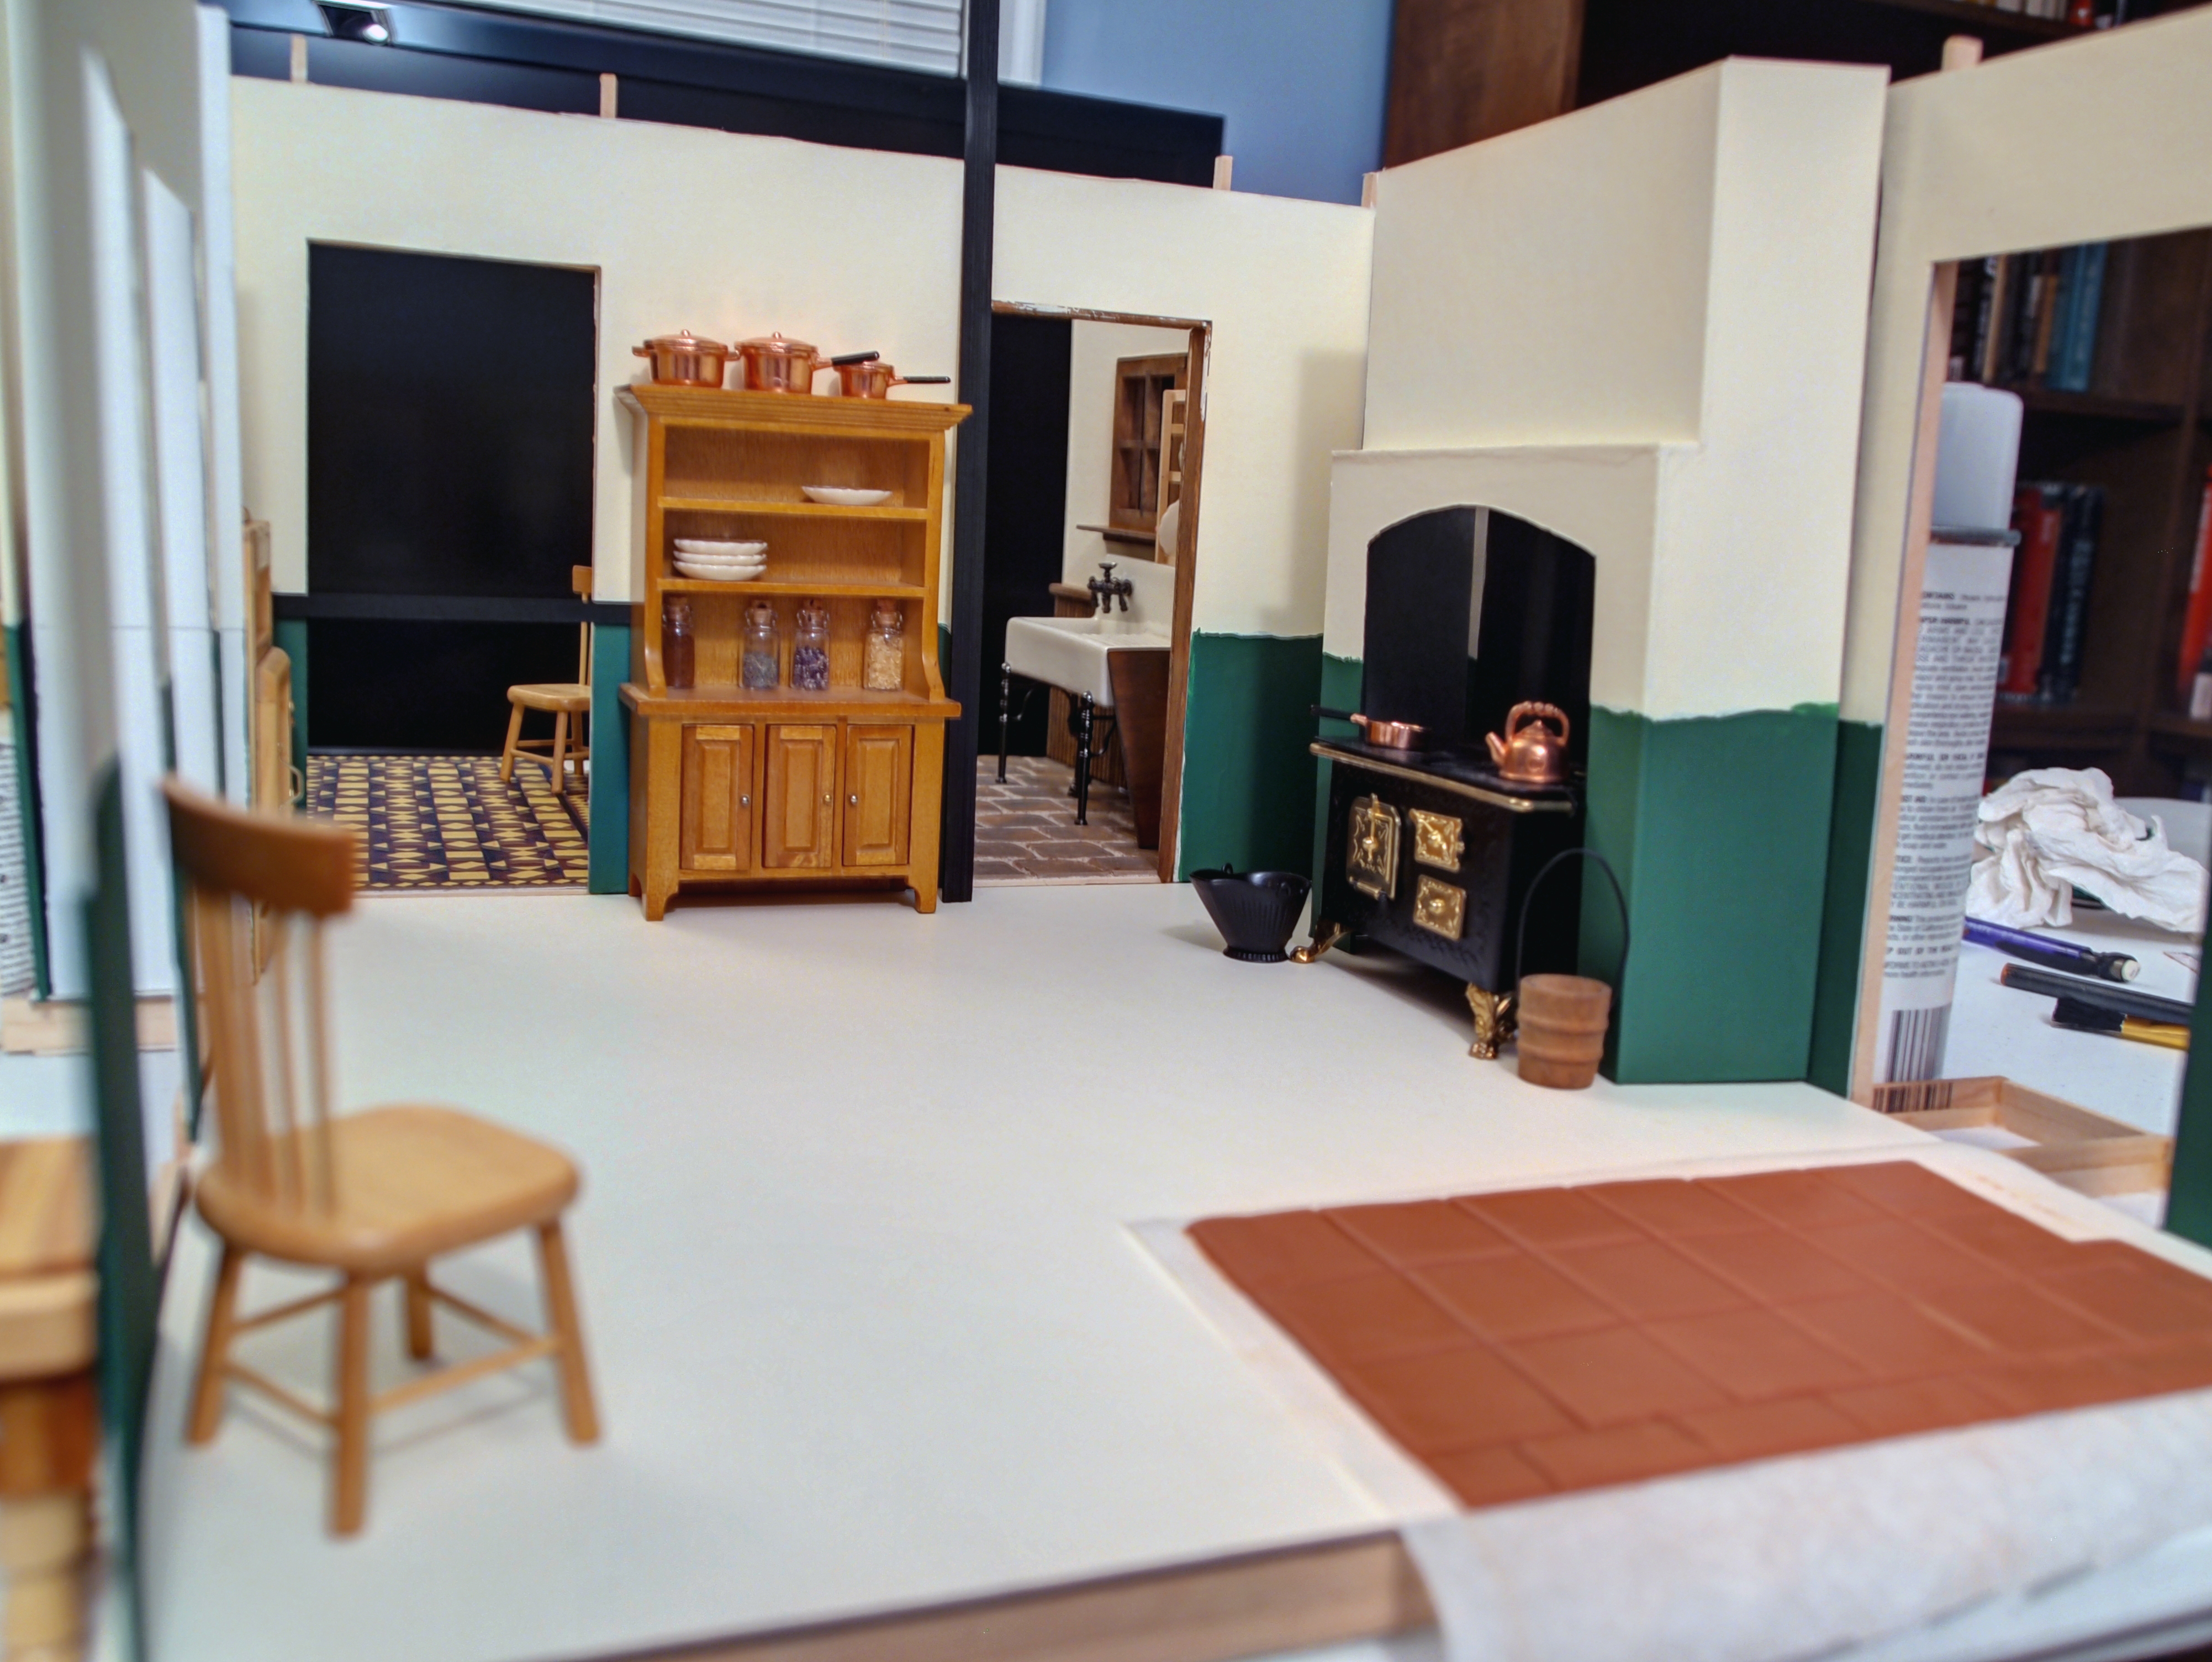
Finally, I started the kitchen. I wanted to model it loosely on the kitchen at Beaulieu, in Hampshire, England, which was fully rebuilt during the 19th century (notice the scullery in the background):
So I built a couple walls and a chimney to surround the stove I had bought.
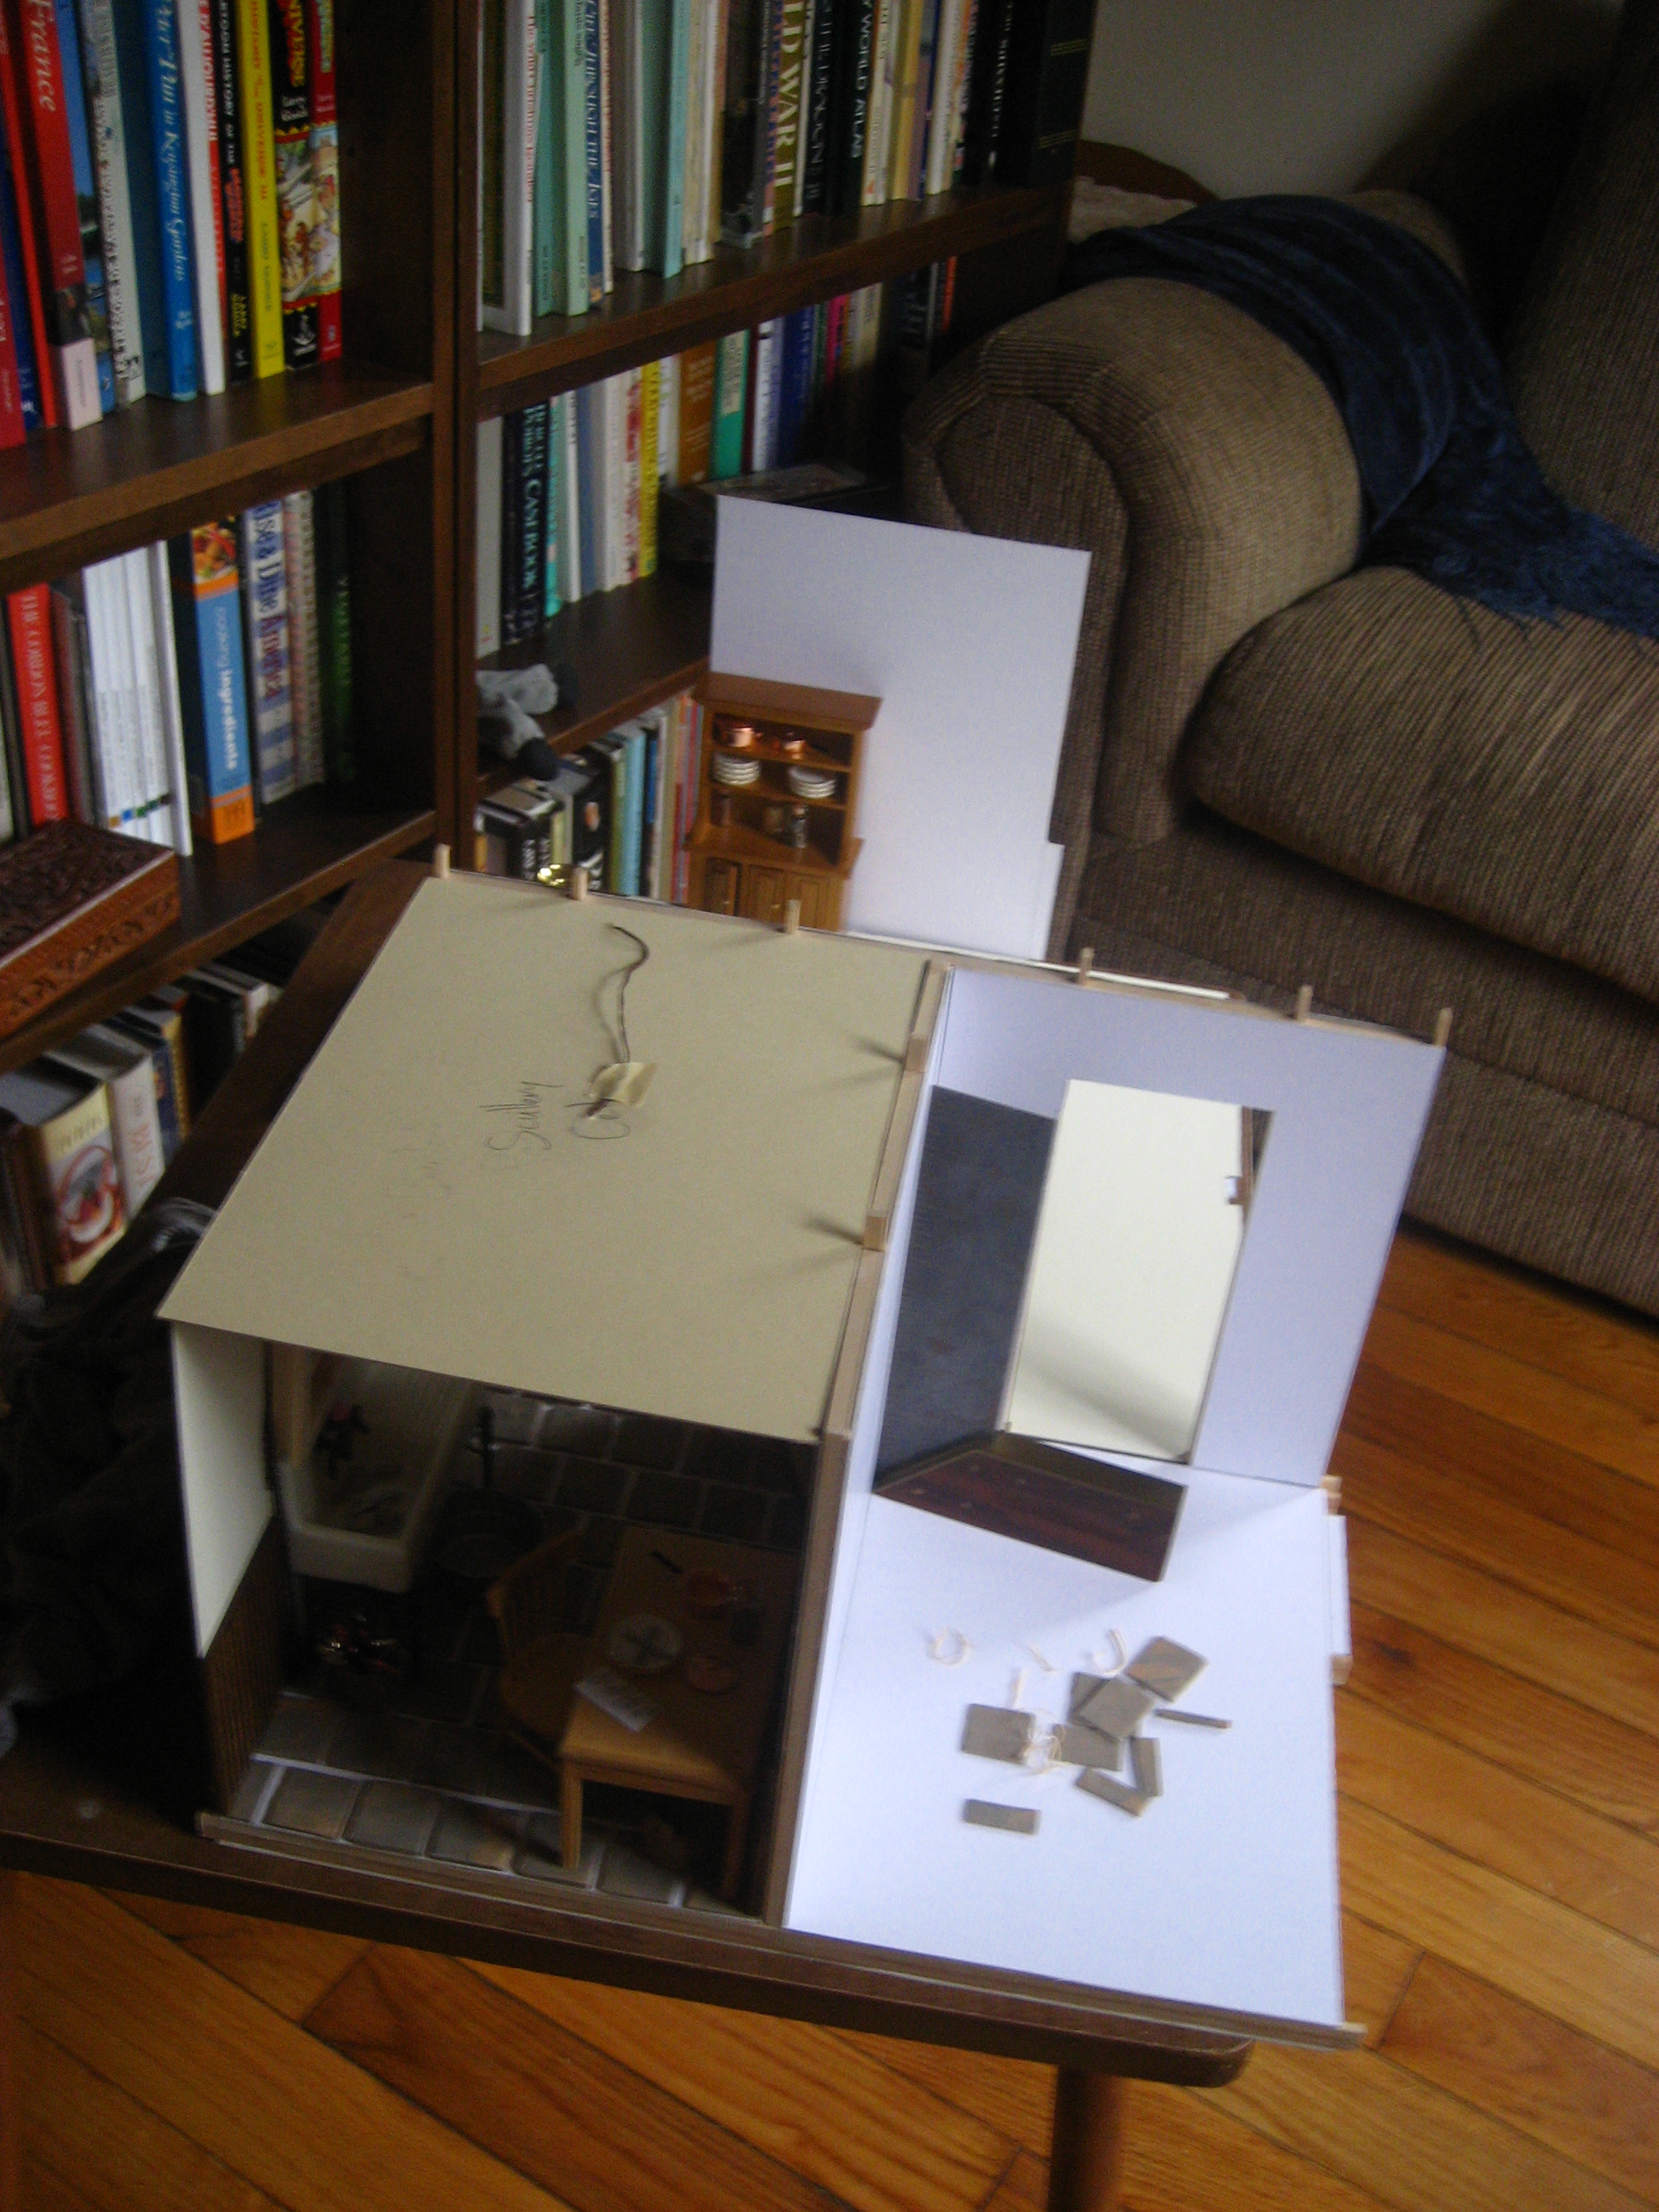
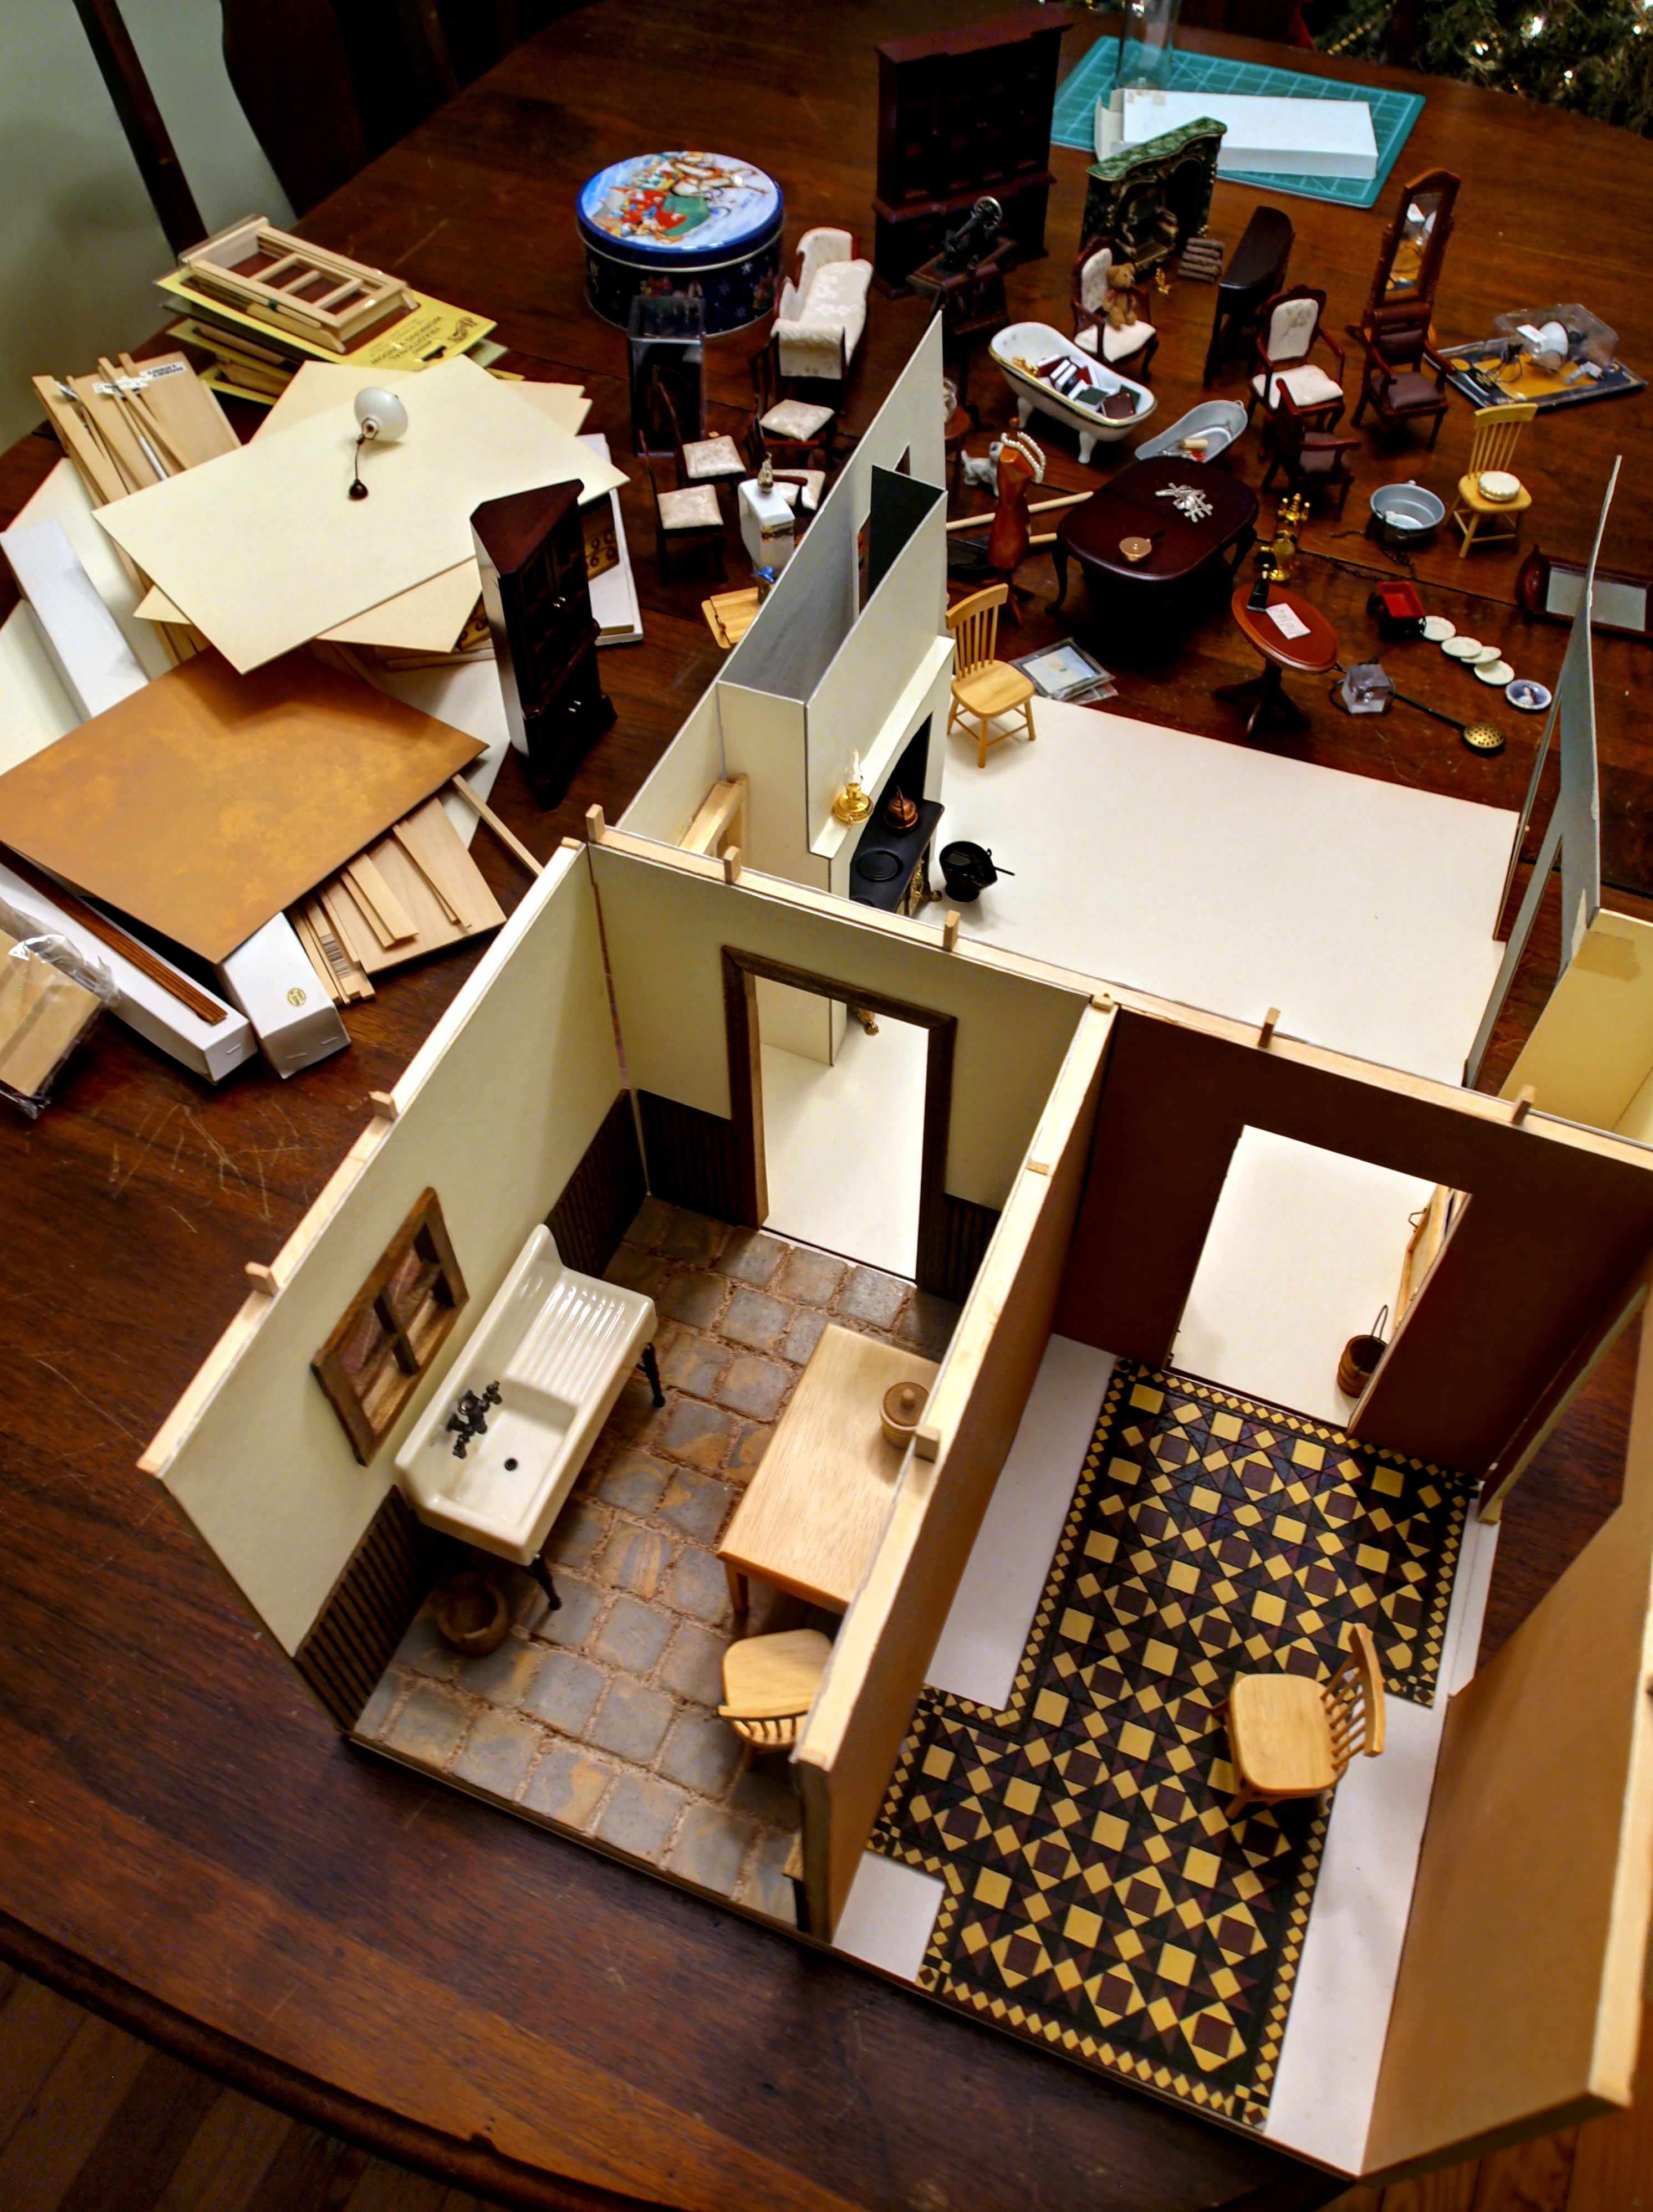
And then somewhere around that time, I got busy with other things (finishing grad school, looking for jobs) and I packed everything into boxes (the walls were not glued in yet so it collapsed easily) and forgot about it all.
After a move to Indiana and a further move to Pennsylvania, I still had not unpacked the boxes, when, after having visited various local historic houses, I remembered I still had this in the garage somewhere.
So I dug it out. It seems to have weathered the moves well.
The buckwheat grout seems a bit destroyed (did something try to eat it?…) but the rest is just fine.
So now my challenge to myself is to go on with this project and document it as I go.
Time, I’ll find some somehow. Inspiration, I have plenty of it. But technique, skills, materials, and patience…well, those I’ll just have to improvise as I go along.
(Please excuse the poor quality of these early photos. I had a lousy point-and-shoot at the time and I had no idea what white balance was. Sigh…)
28 Friday Dec 2012
Posted in Uncategorized
It started in the late 1990’s….well, actually, it started a long time before then. I have always been fascinated by miniatures and by old houses. But sometime in the late 90’s I was skimming through the shelves of the local library and I ran across a tall, slim book, full of architectural plans from 1891.
Fascinated, I took it home.
Somewhere in my brain, I decided one of these would be wonderful to turn into a miniature house, and I settled on this one:
Along with the description:
$10,000 for a whole house…maybe the dollhouse version might cost about that now.
Of course, there were a few things I wanted to add to the house….like a library. Every good Victorian house needs a library. And a nursery.
So I started sketching a little model of what I wanted the floors to look like.
First Floor Plan: With a huge library… The arrows on the outside show where I wanted the walls to swing outward so you could see the inside of the house.
(I’m not sure why I thought it was important to show which direction was north, but apparently…) 
Second Floor Plan : with a sewing room and nursery added…
Third Floor Plan: under the eaves…with a billiard room in the attic, just like Samuel Clemens. Although I pity the servants who had to haul that slate up to the third floor…
(I think the numbers on the bottom right are the total numbers of lamps I thought I’d need for the rooms.)
And finally the roof tops:
Then I started measuring and sketching and making actual scale plans of the entire thing. My imagination was running wild, but I had no idea how to make these plans a reality. So I dropped the whole project and went back to grad school instead…
28 Friday Dec 2012
Posted in Uncategorized
Tags
I have a Victorian house in my head, plans and all…I’ve always wanted to turn it into a miniature house.
A few years ago, I started making that a reality, and then got distracted with more important things…life, jobs, etc.
Tonight I dug out the boxes in which I had packed away the project–boxes that had made it through two cross-country moves unopened–and here’s what I found.
Maybe if I start a blog, I’ll be inspired to get back to work on it again…