Walls east side

Tags

, ,

Started cutting out walls for the rooms on the east side of the house tonight.

Walls for the back stairwell:

OLYMPUS DIGITAL CAMERA

Walls for the formal drawing room:

OLYMPUS DIGITAL CAMERA

And walls for the front sitting room:

OLYMPUS DIGITAL CAMERA

From the side, then, the view will be the back stairs (the stairs will come up from the door on the left, with a landing halfway up, and end in the back on the right above the doorway…under the stairs, there will be the kitchen pantry and the wine cellar)…

OLYMPUS DIGITAL CAMERA

…the drawing room (with a view of the dining room behind…the two small diagonal walls on both sides in front will have windows as part of a bay window area)…

OLYMPUS DIGITAL CAMERA

…and the sitting room (the octagonal tower section will be full of windows, as will the left wall and the drawing room wall on the right, so the walls won’t look quite so solid and imposing).

OLYMPUS DIGITAL CAMERA

Which will end up a bit like this:

OLYMPUS DIGITAL CAMERA

And like this from the other side of the house:

OLYMPUS DIGITAL CAMERA

These front rooms, as they are more formal and built to impress, are a good two inches taller than the back rooms, which explains why I needed to add a few steps in the upstairs hallway so I could connect the front and back hallways correctly.

OLYMPUS DIGITAL CAMERA

A couple views from above…

OLYMPUS DIGITAL CAMERA

OLYMPUS DIGITAL CAMERA

And one of the front of the house, which will be full of windows (and, of course, a front door) when it’s finished.

OLYMPUS DIGITAL CAMERA

Good night.

Floors, beams, and sub-floors

Tags

, ,

Started out today by cutting out the floors for the right side of the house.

OLYMPUS DIGITAL CAMERA

So I got to place some furniture around the rooms and get an idea of what it would look like.

OLYMPUS DIGITAL CAMERA

Cut out the rest of the beams and glued them onto the sub-floor for the left side.

OLYMPUS DIGITAL CAMERA

Glued it onto the bottom floor and weighted it down.

OLYMPUS DIGITAL CAMERA

Next I cut out and glued on beams for the right side, but I ran out of supplies (again!), so I couldn’t quite finish up the middle of the rooms.

OLYMPUS DIGITAL CAMERA

But I’ve got enough for it to stand up straight and to give an idea of what the floor plan will look like.

OLYMPUS DIGITAL CAMERA

Even added labels (with Photoshop) to show what everything will be.

OLYMPUS DIGITAL CAMERA

Next time, while I’m waiting for more supplies, I think I’ll start cutting out the walls…

Good night.

New floor boards

Tags

, ,

I decided to start building the floor boards for the two front sections of the house today (two sections instead of one so they can easily fit through doorways…)

Began with the paper plans I had made earlier…

OLYMPUS DIGITAL CAMERA

Cut out one of the floors…

OLYMPUS DIGITAL CAMERA

Transferred the position of the walls and doorways…

OLYMPUS DIGITAL CAMERA

OLYMPUS DIGITAL CAMERA

Cut out the walls so I could pass studs through them later, created a base for underneath, and started gluing the beams between the two layers (oh, and Cider showed up in this photo because he wanted to go for a walk…)

OLYMPUS DIGITAL CAMERA

Ran out of wood for the beams so I couldn’t finish, but here’s what I have so far…

OLYMPUS DIGITAL CAMERA

Haven’t started the right-hand floor yet because I’m a bit stymied when it comes to drawing the octagonal tower. But I’ll figure that out later.

Next, I decided I didn’t like the green on the siding…clashed too much with the colors inside the rooms.  So I repainted it all with two coats of tan paint.

OLYMPUS DIGITAL CAMERA

A bit duller, but I already like it better…

OLYMPUS DIGITAL CAMERA

And it doesn’t make a mess with the rest of the house anymore…

OLYMPUS DIGITAL CAMERA

Still not sure if I’d rather not just replace the siding between the rooms with polished wood, but that can wait for now..

OLYMPUS DIGITAL CAMERA

Be well.

Side siding

Tags

, ,

Thought I’d try out my idea of using siding between the rooms…

OLYMPUS DIGITAL CAMERA

…so I painted a little sample piece and taped it on to see what it would look like.

OLYMPUS DIGITAL CAMERA

Thought it’d look good, so I started cutting out strips of siding…

OLYMPUS DIGITAL CAMERA

…all the way up…

OLYMPUS DIGITAL CAMERA

…and did the same for the other side.

OLYMPUS DIGITAL CAMERA

Then I mixed up some paint (for future reference when I need to do more outside paint, it was equal parts light avocado and buttermilk, then bits of avocado until it got dark enough), and painted the back of the house.

OLYMPUS DIGITAL CAMERA

Finished the back and painted the pieces for the sides.

OLYMPUS DIGITAL CAMERA

Then I taped the side strips back on (not glued in yet because I’m still not sure if I like the effect).

OLYMPUS DIGITAL CAMERA

I was trying to make it look like the walls had been cut into to show inside the rooms (that corner trim will eventually be dark green instead of brown)…

OLYMPUS DIGITAL CAMERA

…but I’m not sure if this just doesn’t look a bit sloppy and if it wouldn’t look slightly classier with just polished wood between the rooms.

OLYMPUS DIGITAL CAMERA

Or maybe it’s the green that’s interfering with the room colors and it would work better if I painted the siding a light tan.

Too tired to figure it out now…I’ll think about it again tomorrow.

For now…good night.

More siding

Tags

, ,

Got back to work on the siding for the back of the house today.

Measured a new piece…

OLYMPUS DIGITAL CAMERA

…cut out the holes for the windows…

OLYMPUS DIGITAL CAMERA

OLYMPUS DIGITAL CAMERA

…then decided to glue all the siding pieces on from the bottom up.

OLYMPUS DIGITAL CAMERA

Placed the side trim and the floor line trim back on (not glued yet)…

OLYMPUS DIGITAL CAMERA

Next I added three columns to support the peak of the roof.

OLYMPUS DIGITAL CAMERA

Added a frame for the roof line.

OLYMPUS DIGITAL CAMERA

Measured and cut out one more layer of siding…

OLYMPUS DIGITAL CAMERA

…and glued it on.

OLYMPUS DIGITAL CAMERA

I’m planning to create a more complicated design for the siding of the gable roof pediment, in keeping with a Queen Anne style Victorian, so I’ve stopped here for today.

Be well.


Hallway light

Tags

, ,

With all the traveling and working I’m doing this semester, I feel the house is being neglected a little….sigh.

In any case, I got the extra electric wire I needed in the mail, so I hooked up the hallway light.

OLYMPUS DIGITAL CAMERA

OLYMPUS DIGITAL CAMERA

Which means I could finally start building up the siding on the back of the house (that covers the wires).

OLYMPUS DIGITAL CAMERA

OLYMPUS DIGITAL CAMERA

OLYMPUS DIGITAL CAMERA

Also means I can now leave the hall light on and let it shine into the other rooms…

OLYMPUS DIGITAL CAMERA

OLYMPUS DIGITAL CAMERA

More siding next time, but for now…good night.

Nursery details

Tags

, ,

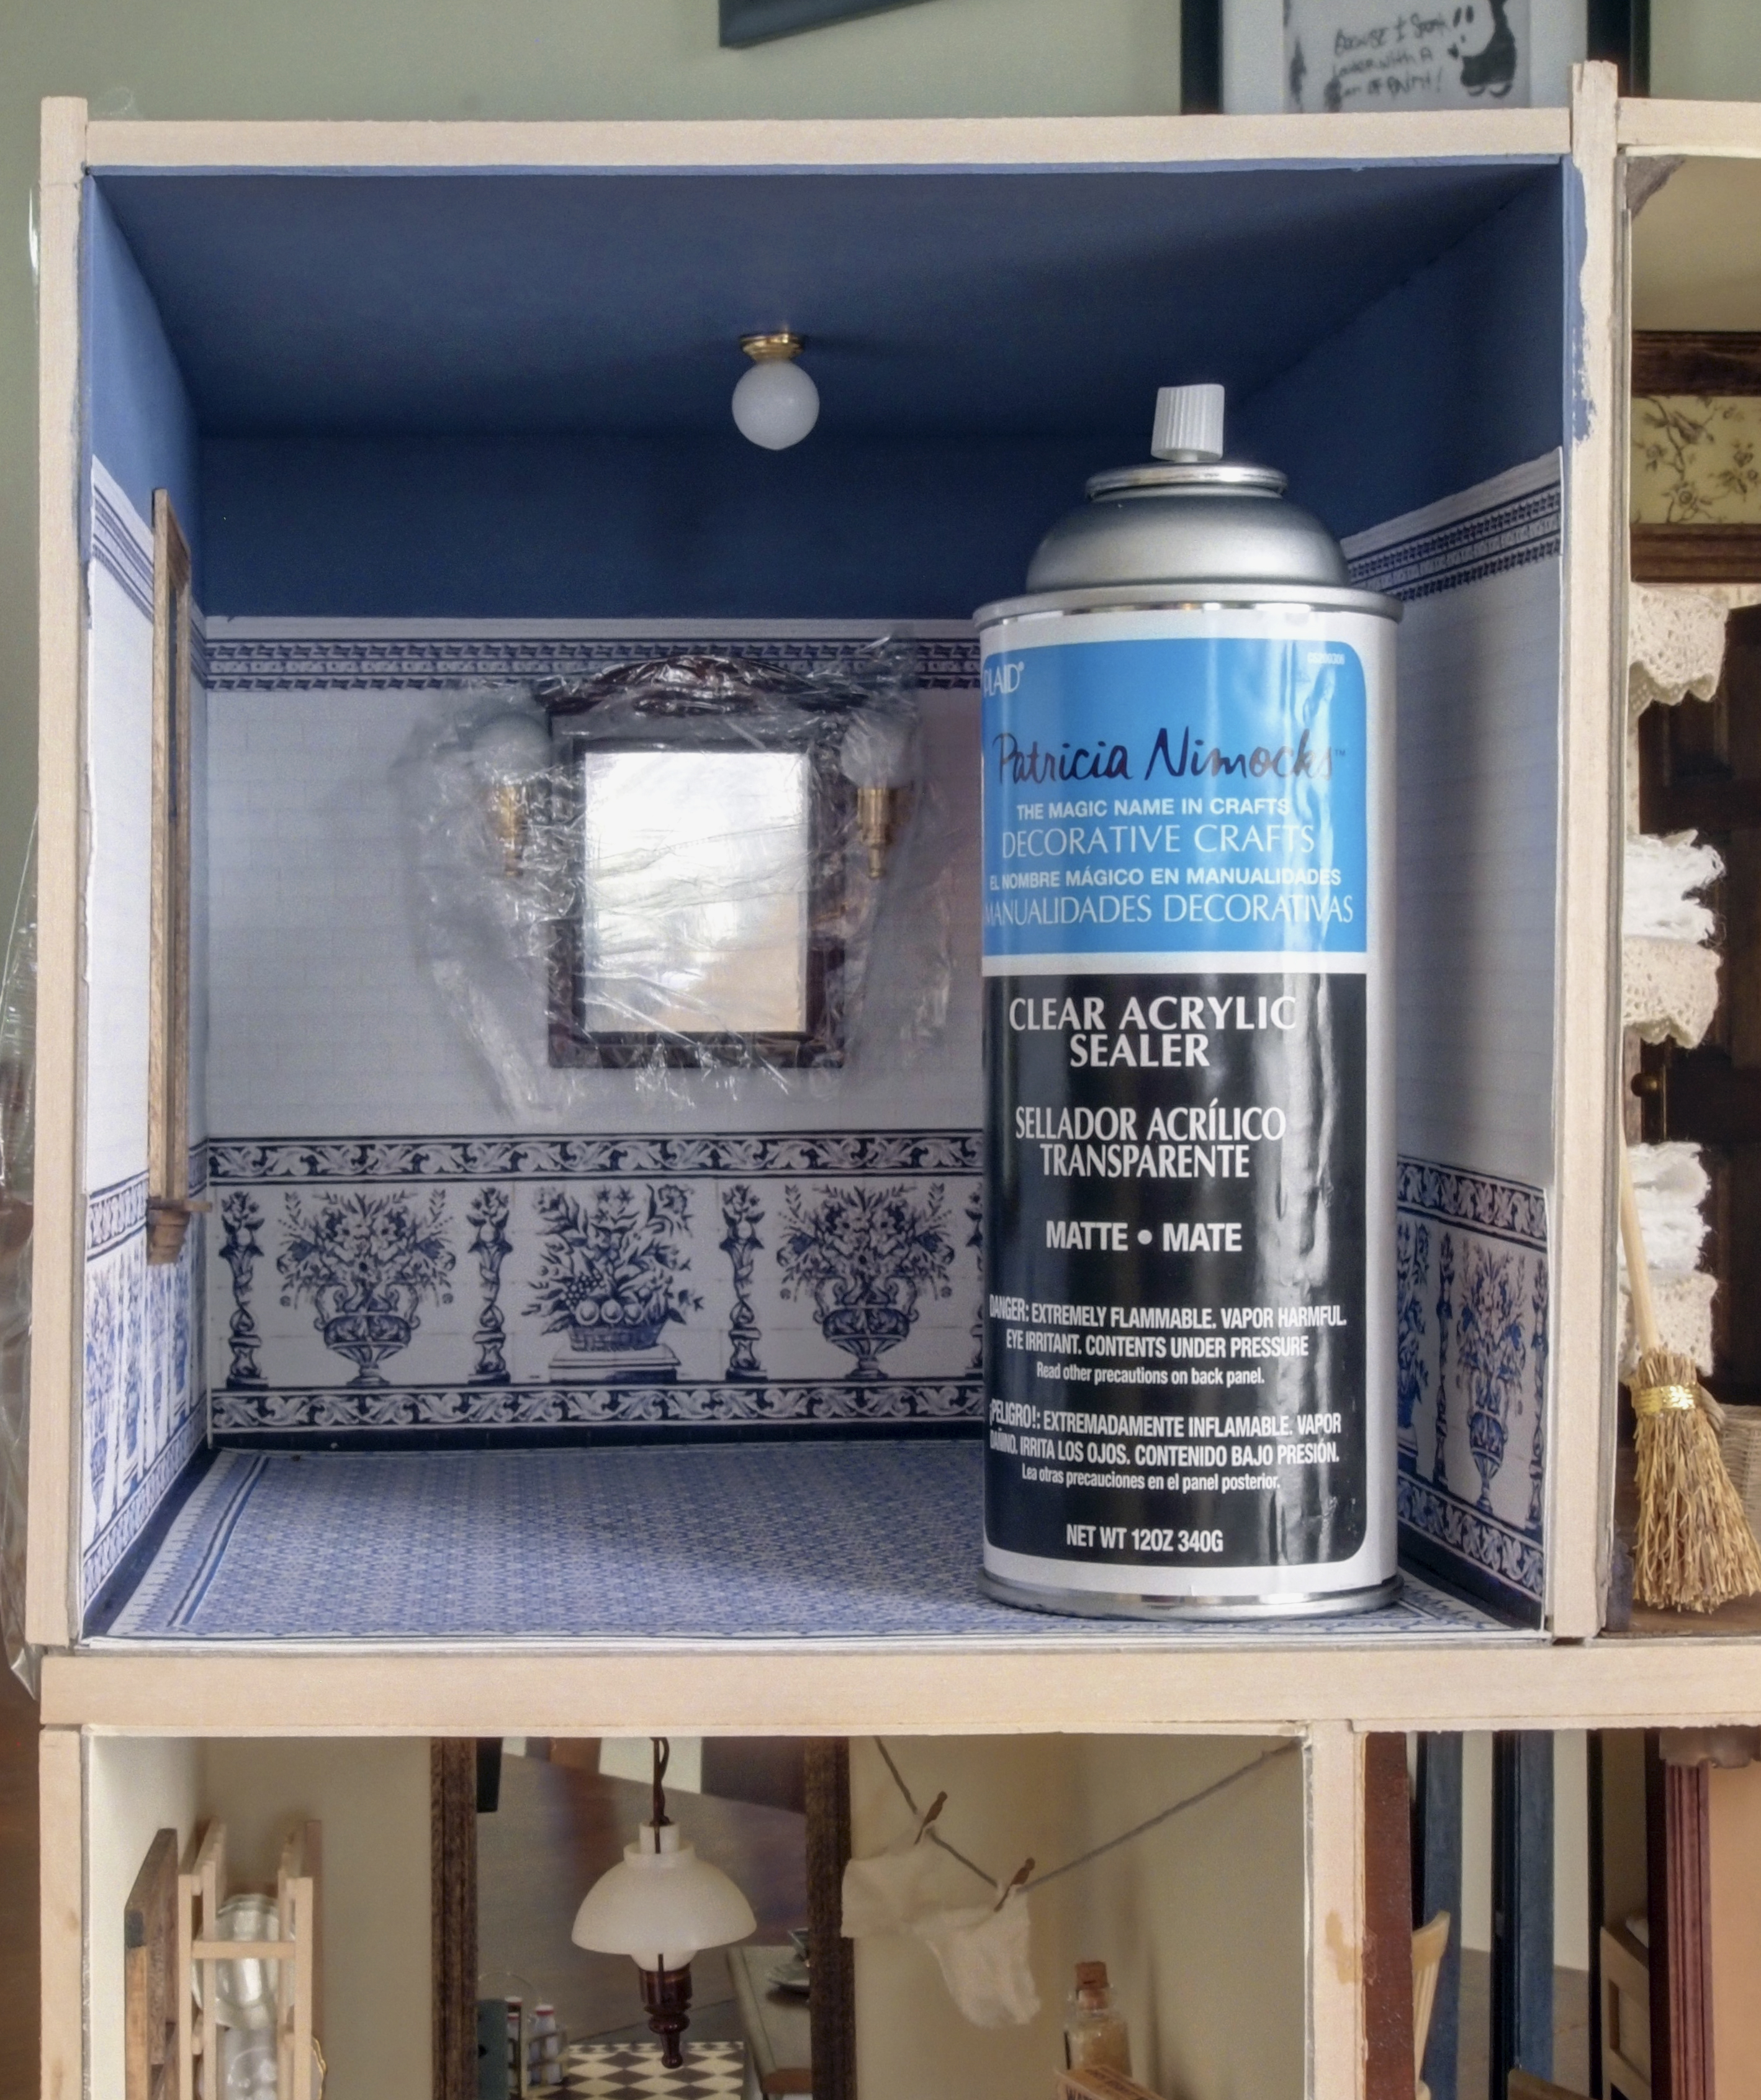
Decided that between the piles of grading I had to do this weekend, I was going to finish the nursery.

Started by spraying the room with acrylic.

OLYMPUS DIGITAL CAMERA

When I was wandering around the country this summer, I stopped by a wonderful little shop in Indiana, called Jeeper’s Dollhouse Miniatures (http://www.jeepersminiatures.com).

There I started a conversation with the lovely owner of the store. She warned me that dollhouse wallpaper fades very quickly, especially when it’s printed at home (different quality ink and paper) and highly recommended I buy some of this particular brand of matte acrylic spray, that would help protect the colors.

Finally bought the spray and went back and sprayed all the wallpapered rooms in the house today…

OLYMPUS DIGITAL CAMERA

Thank you for the tip!

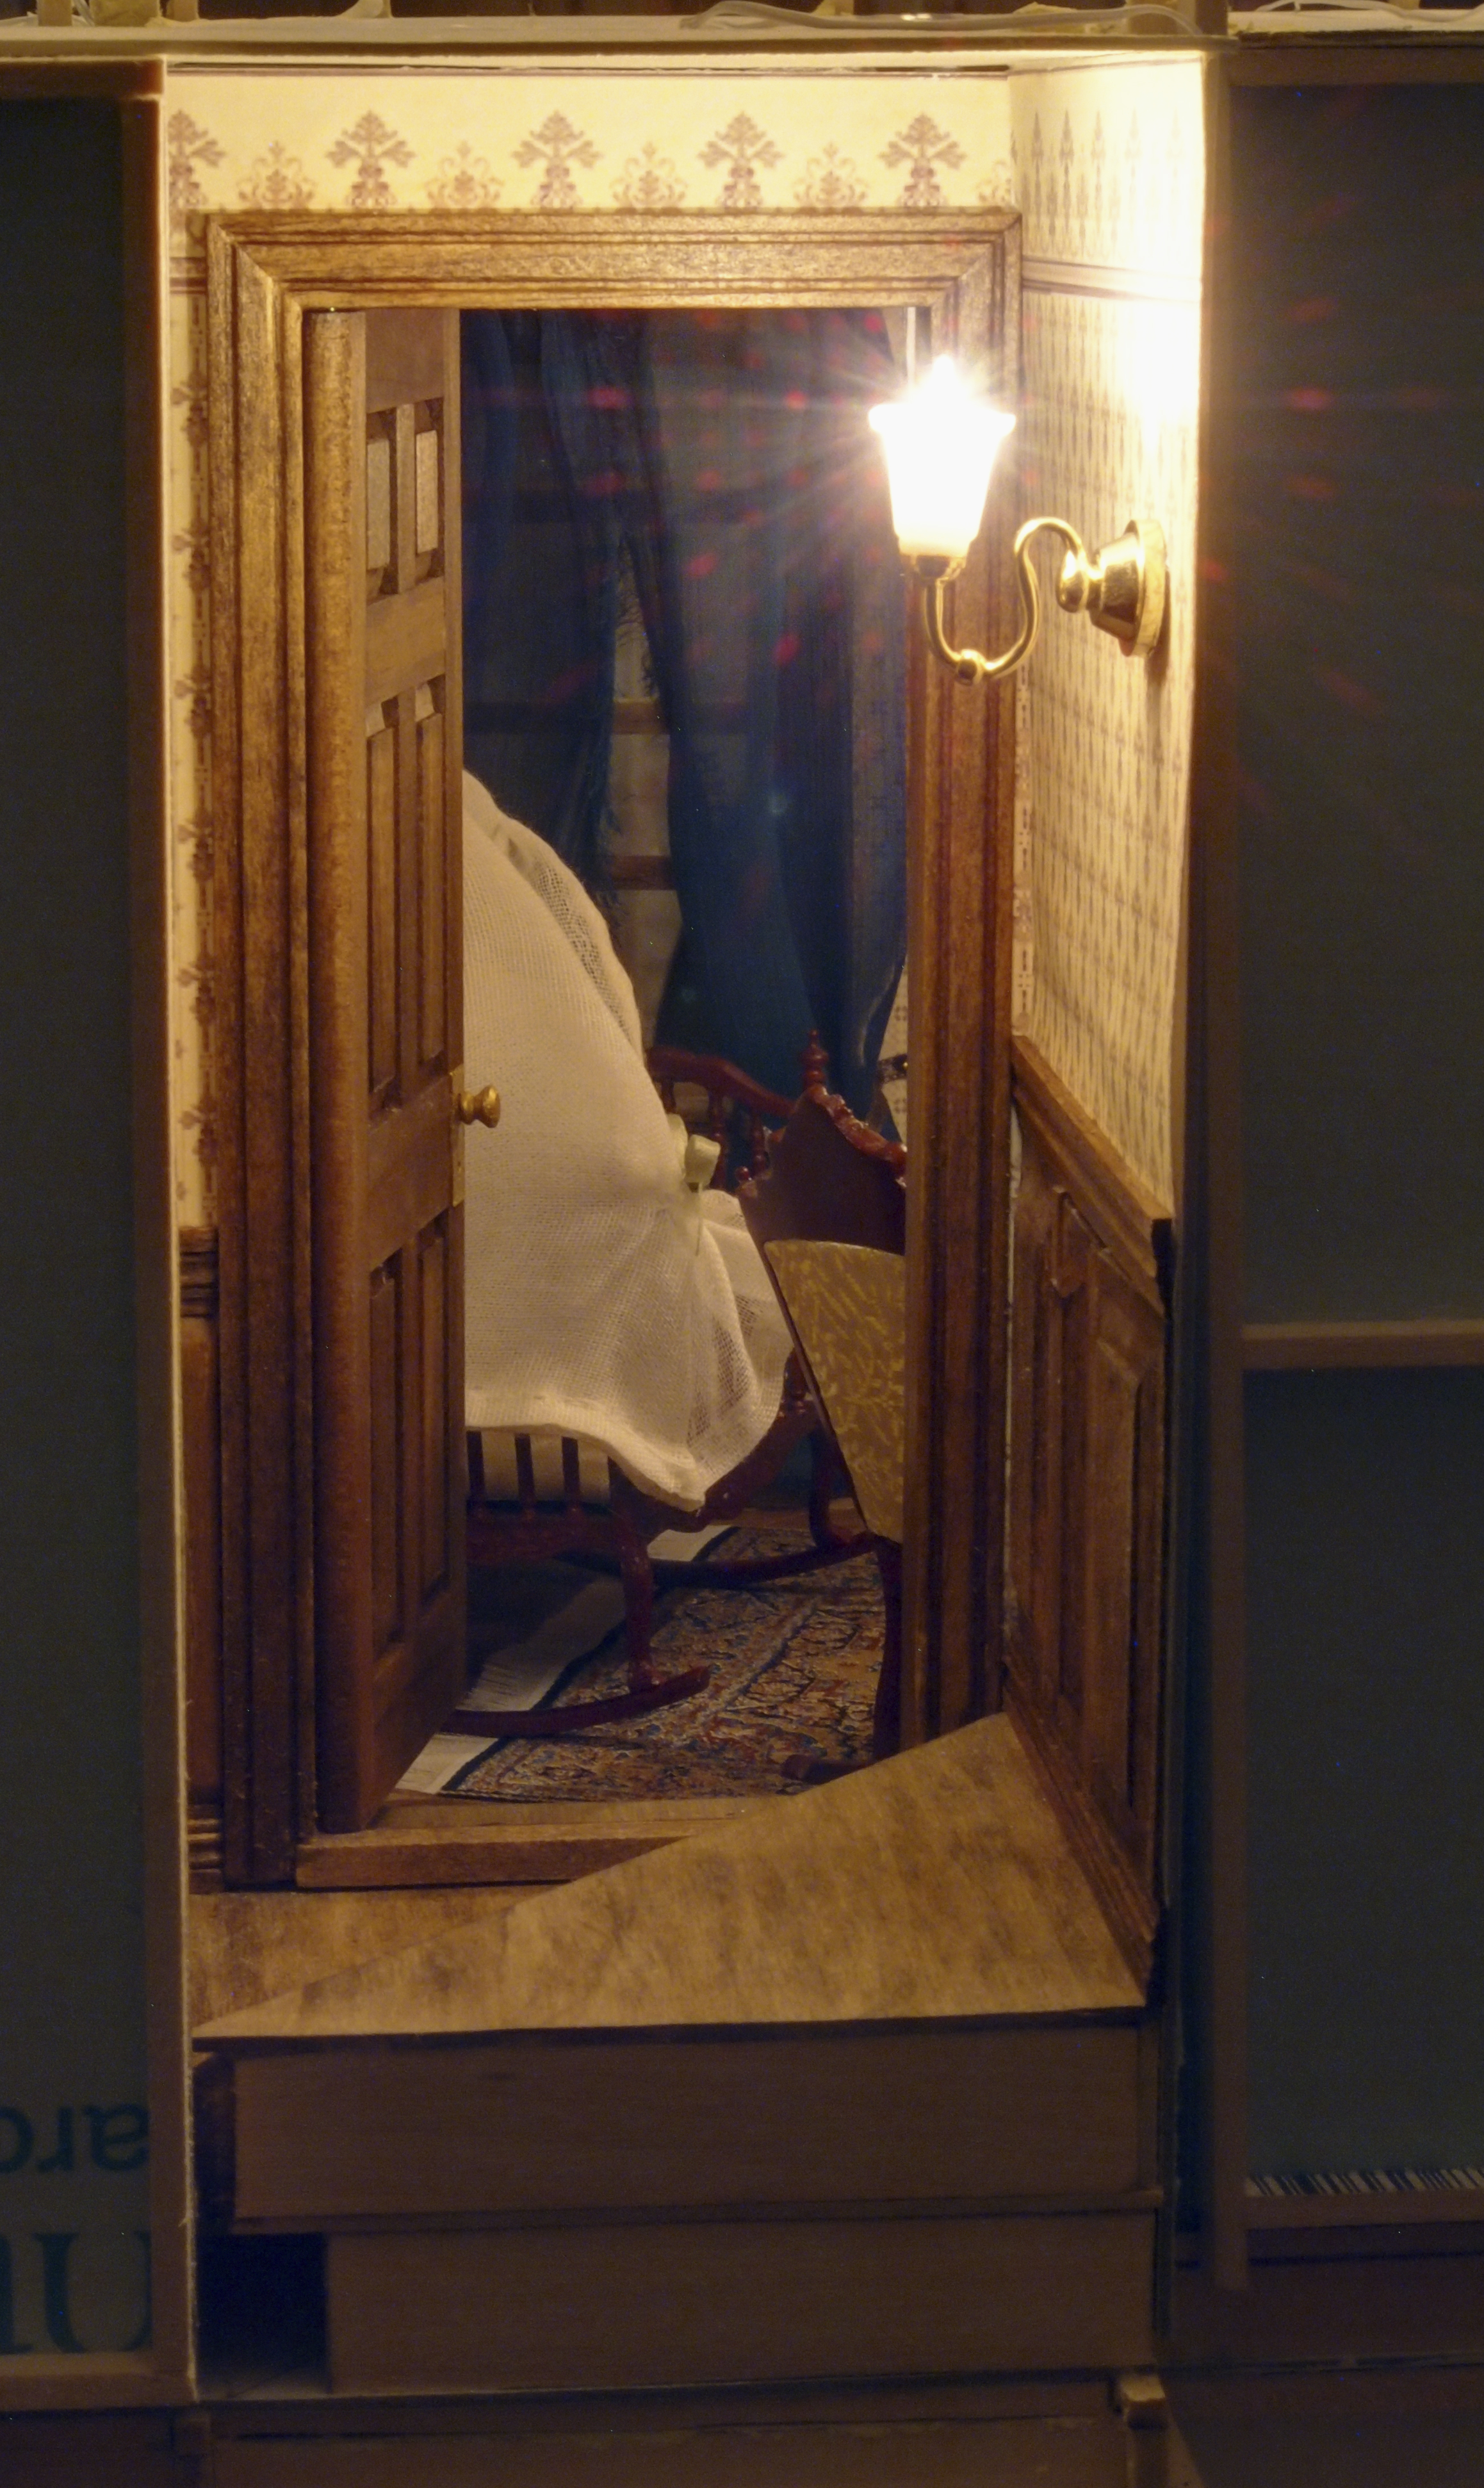
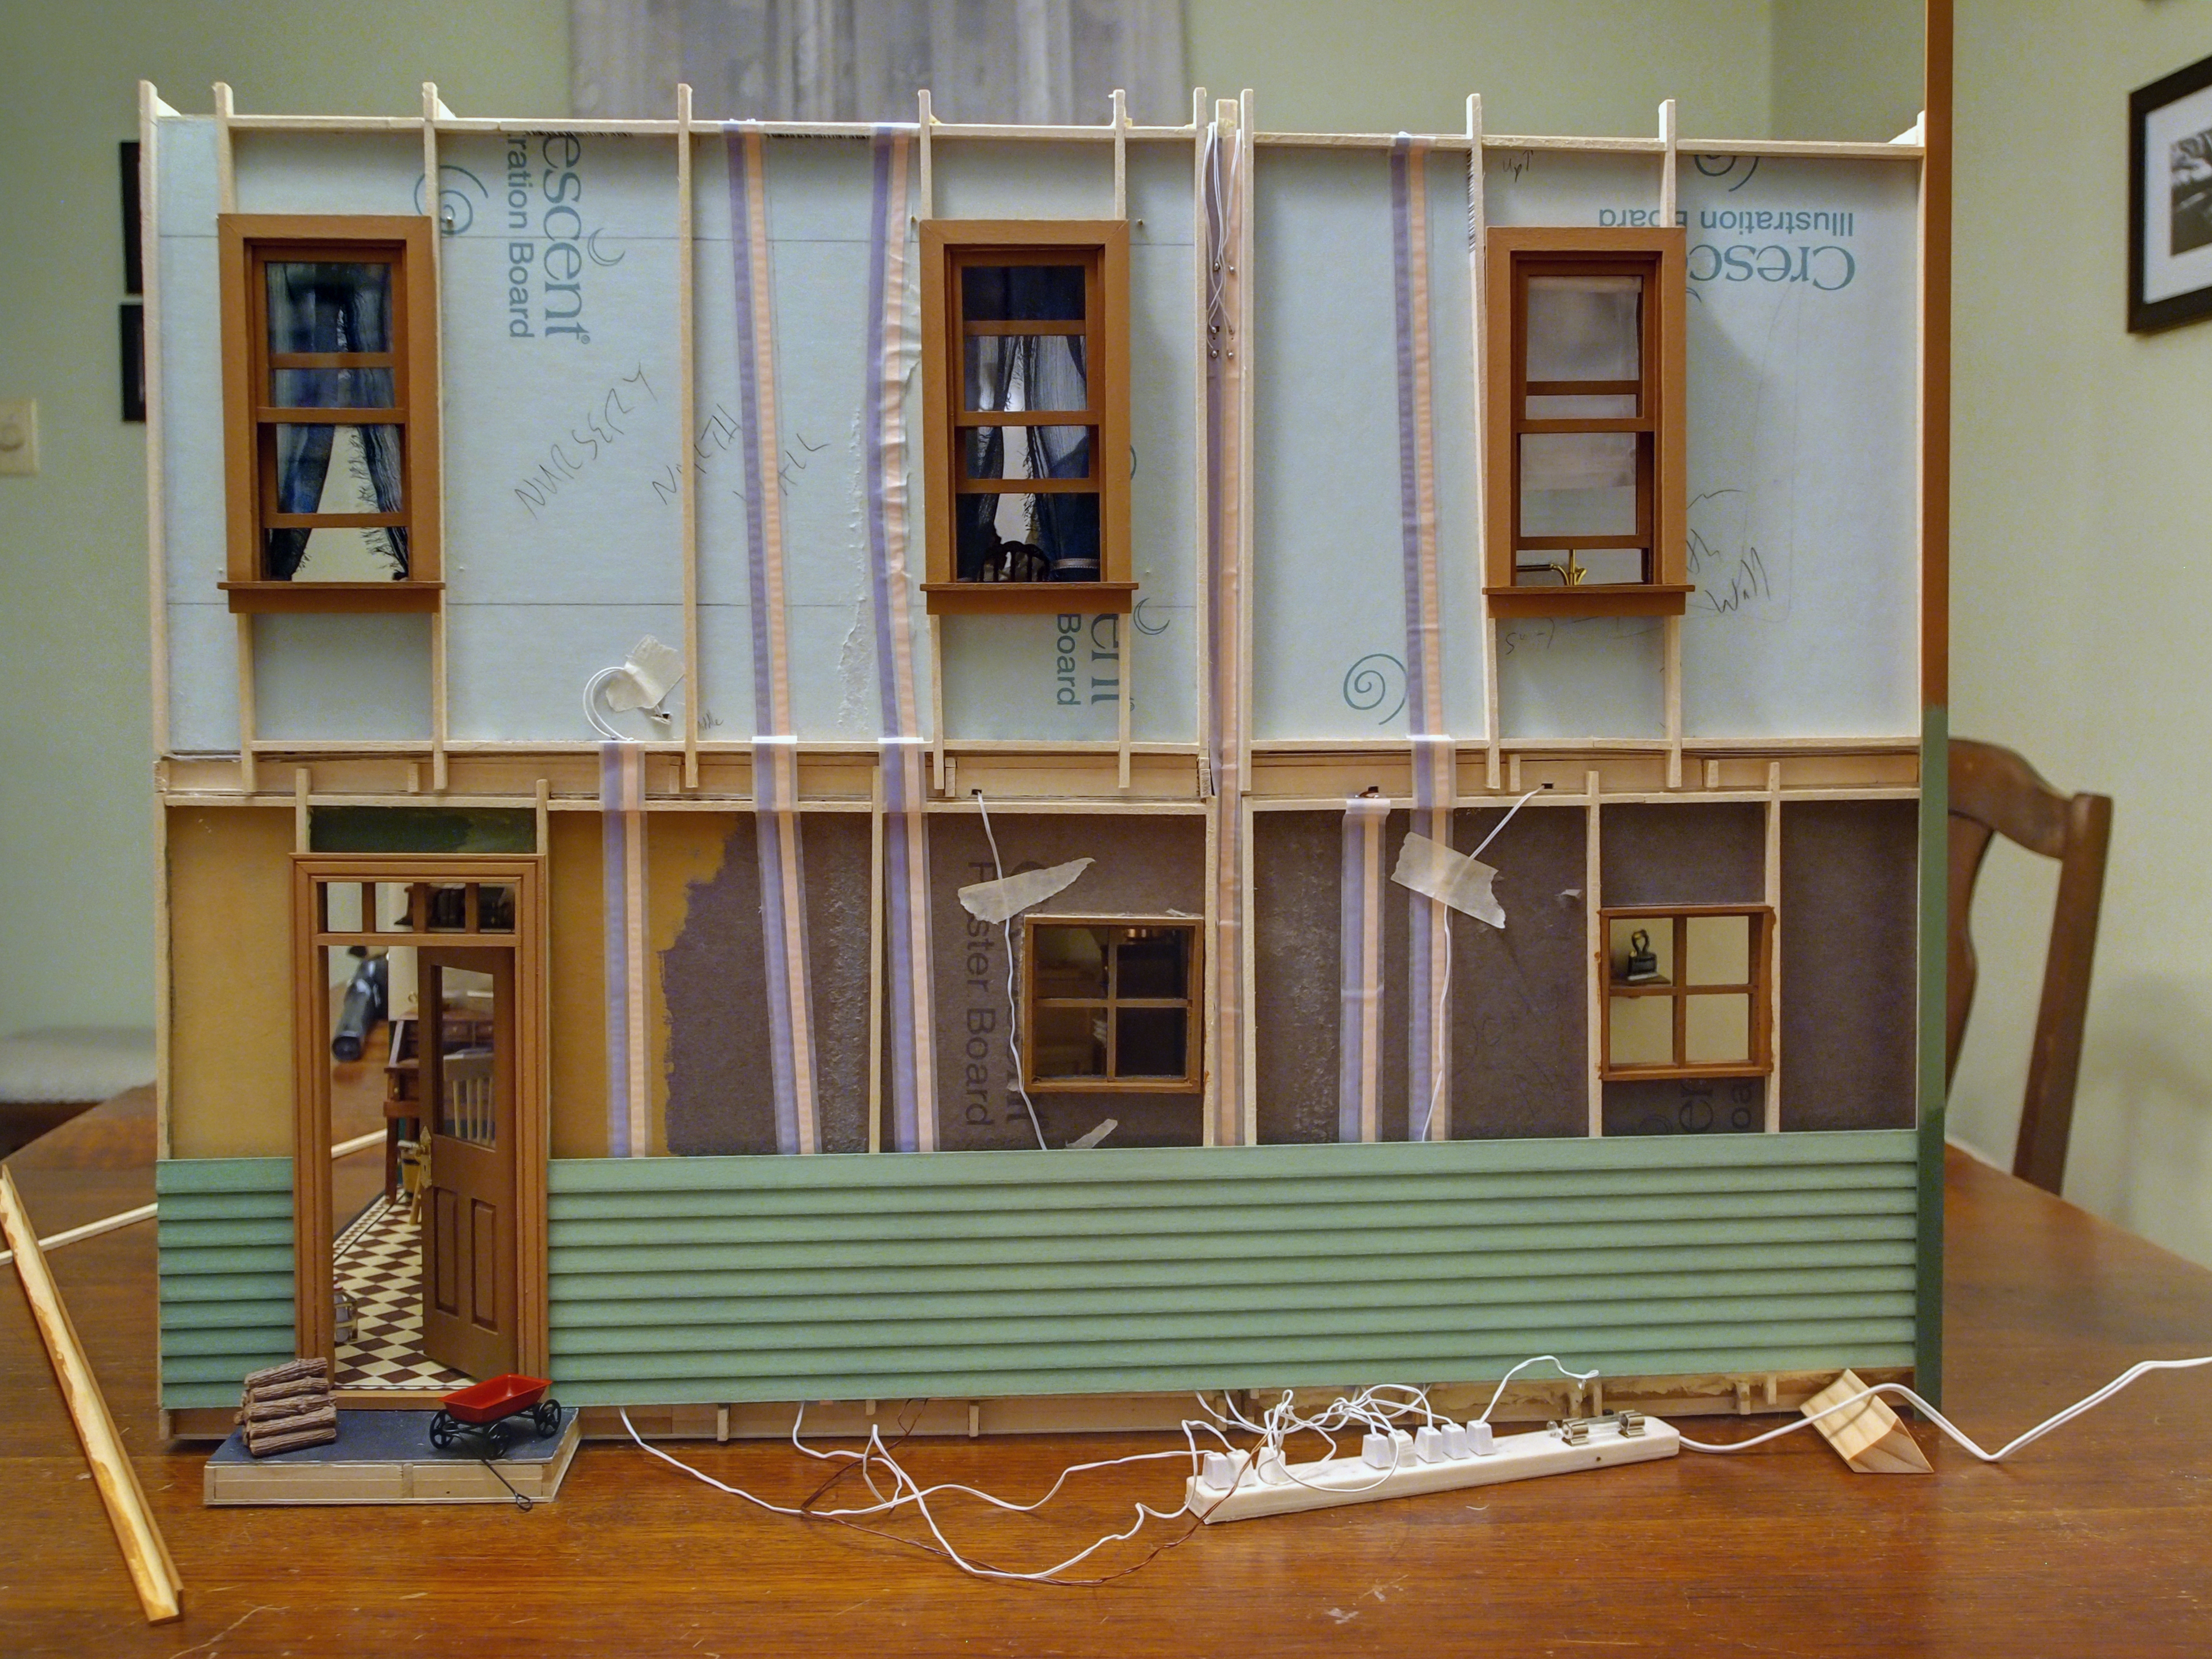
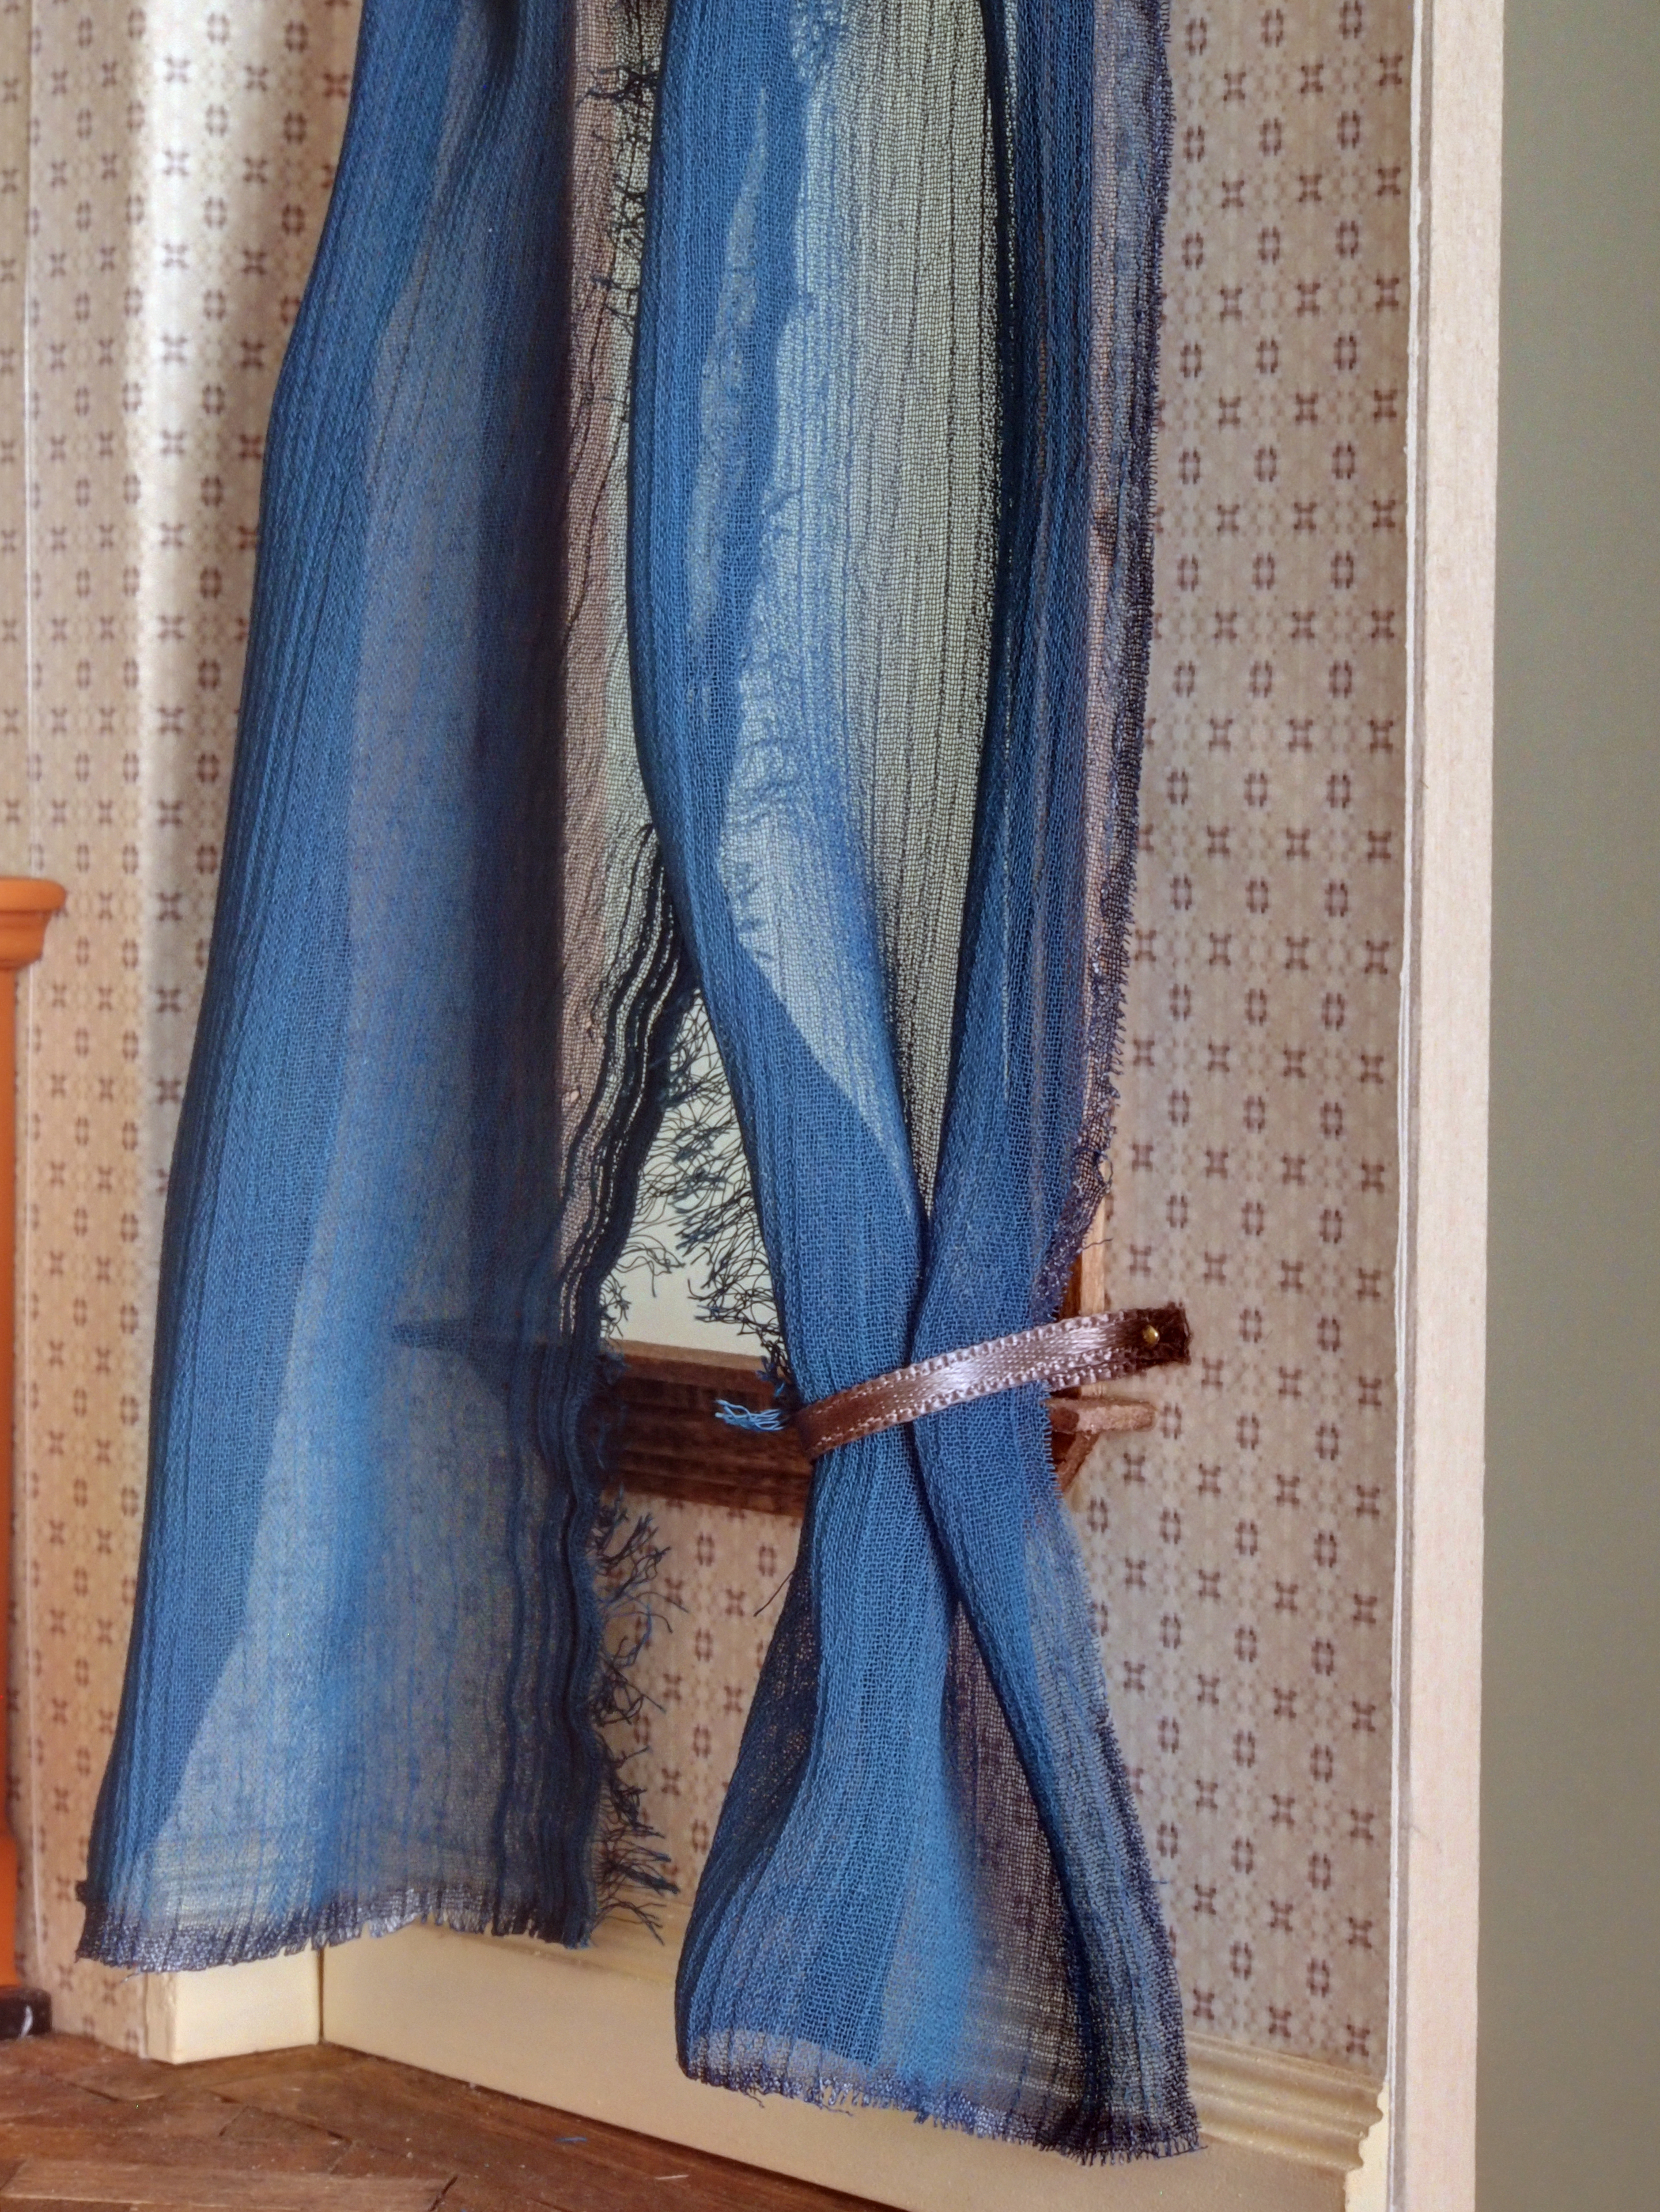
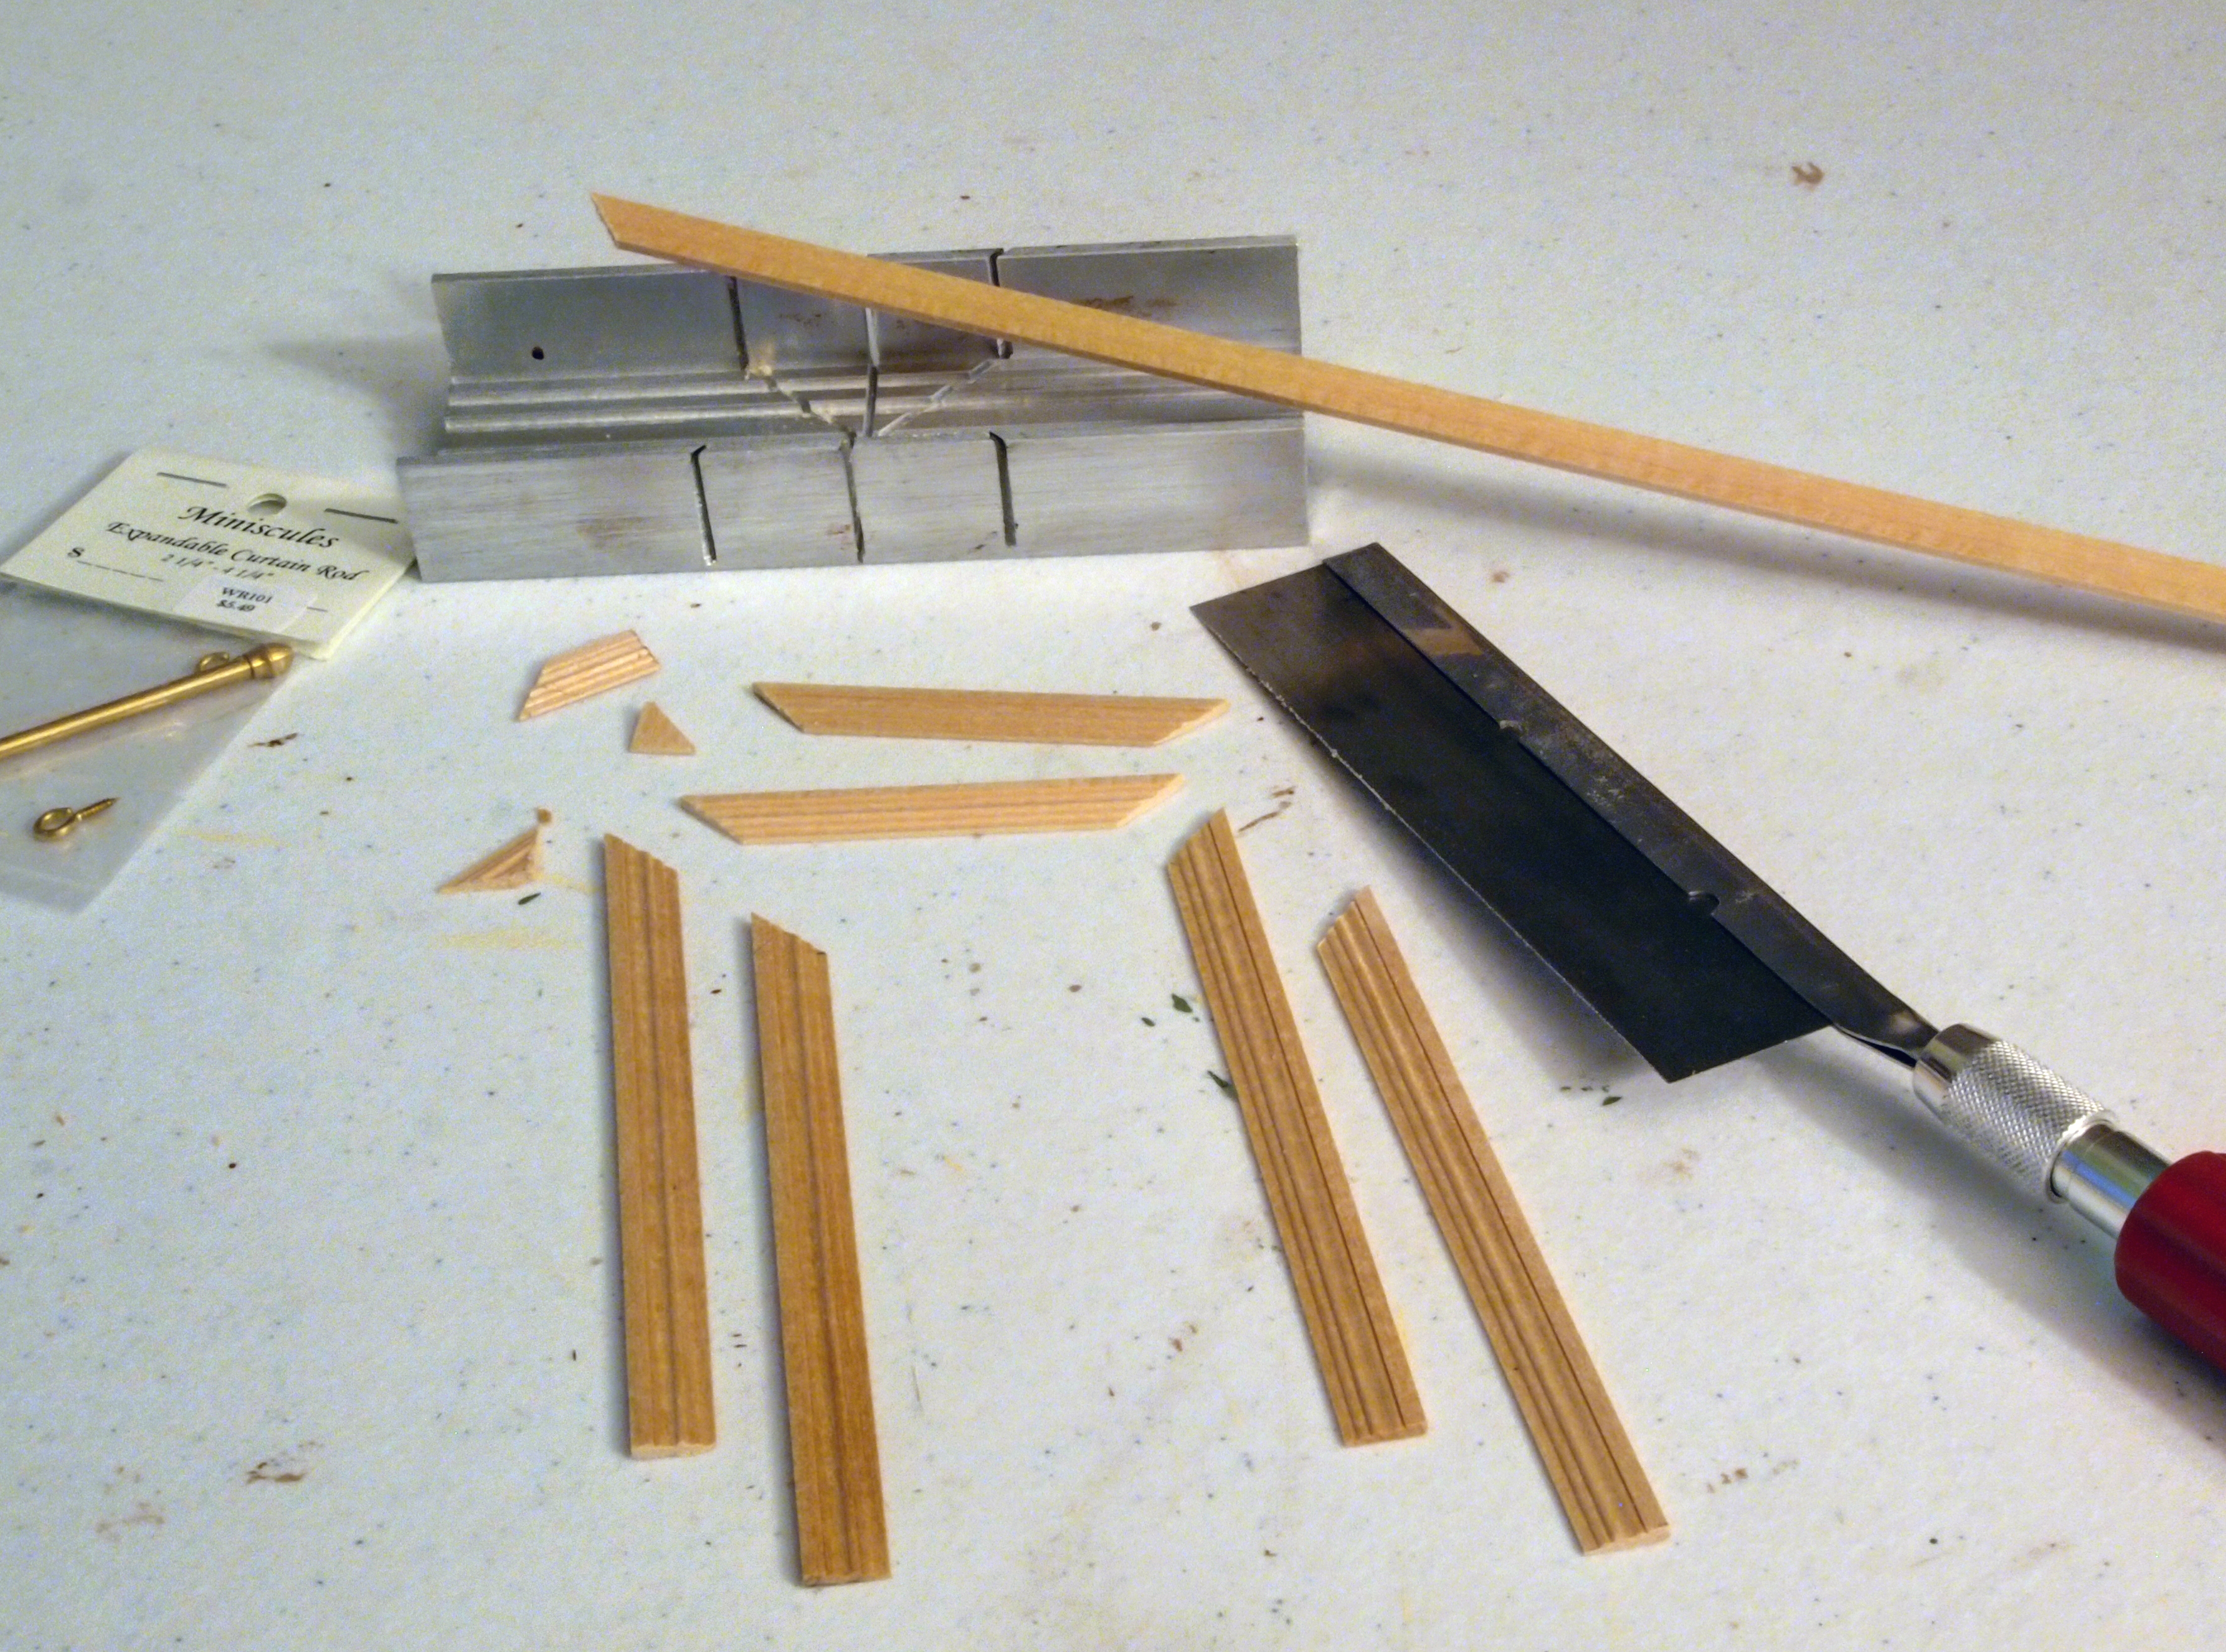
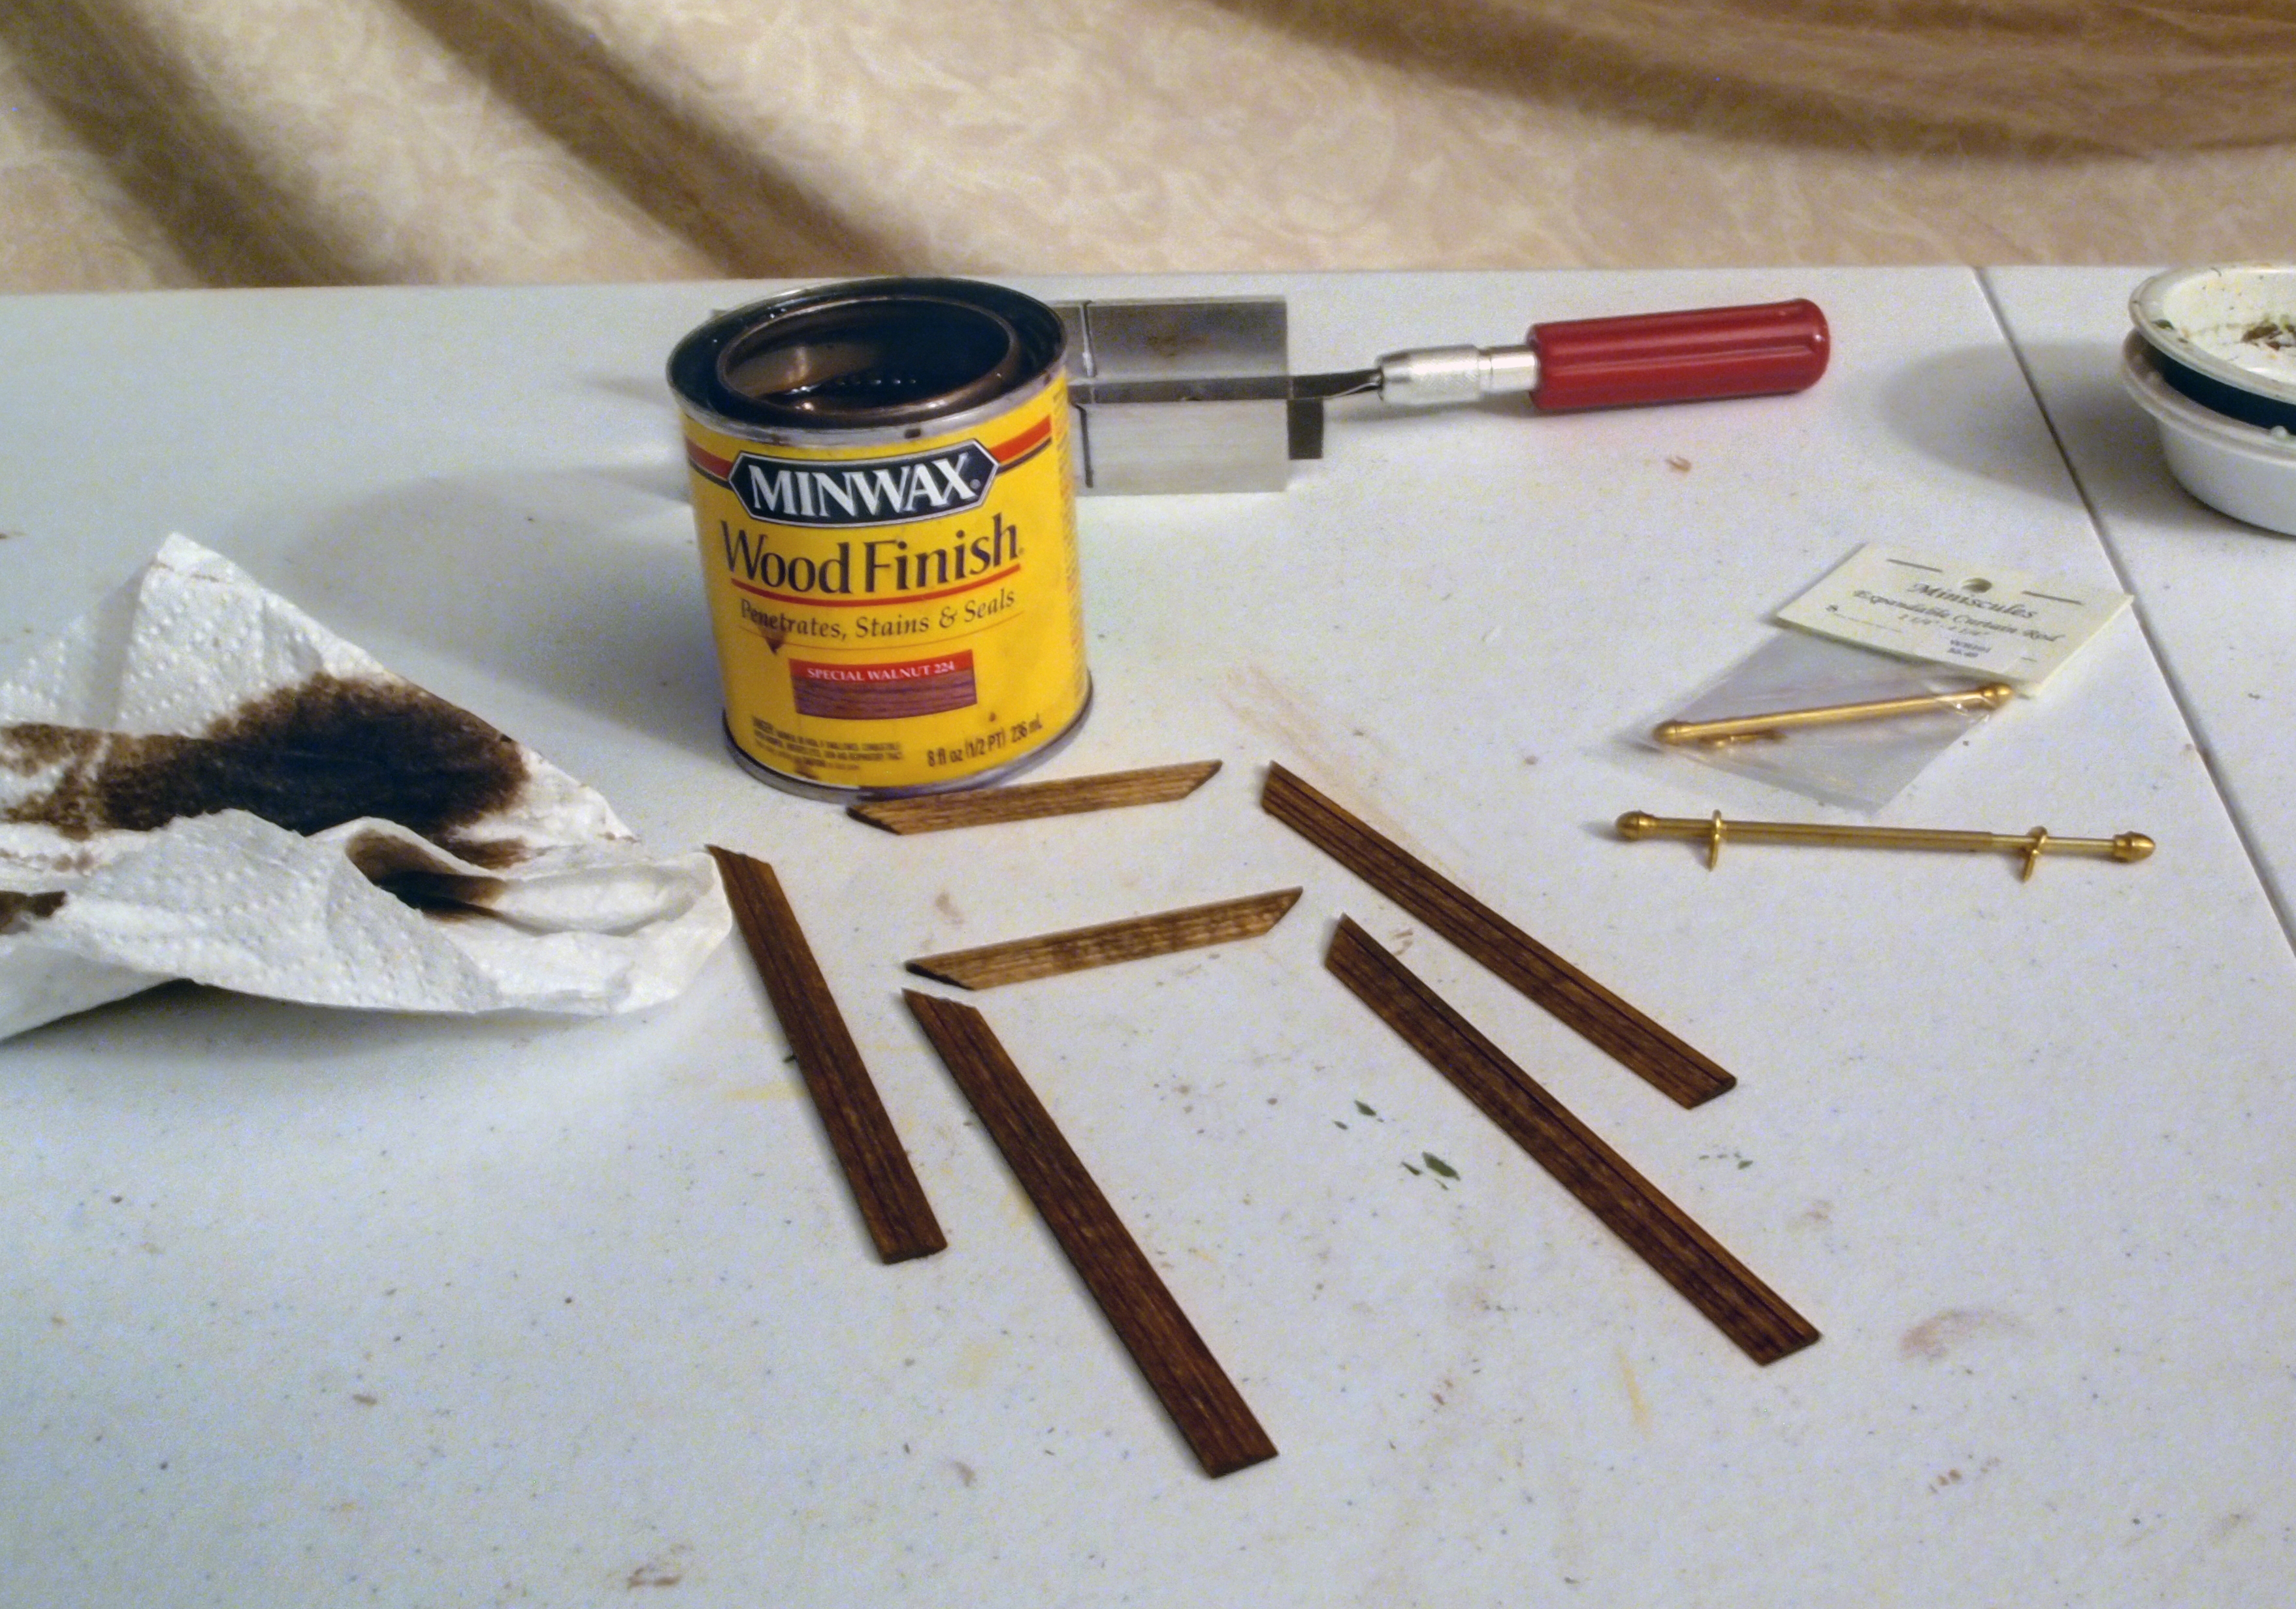
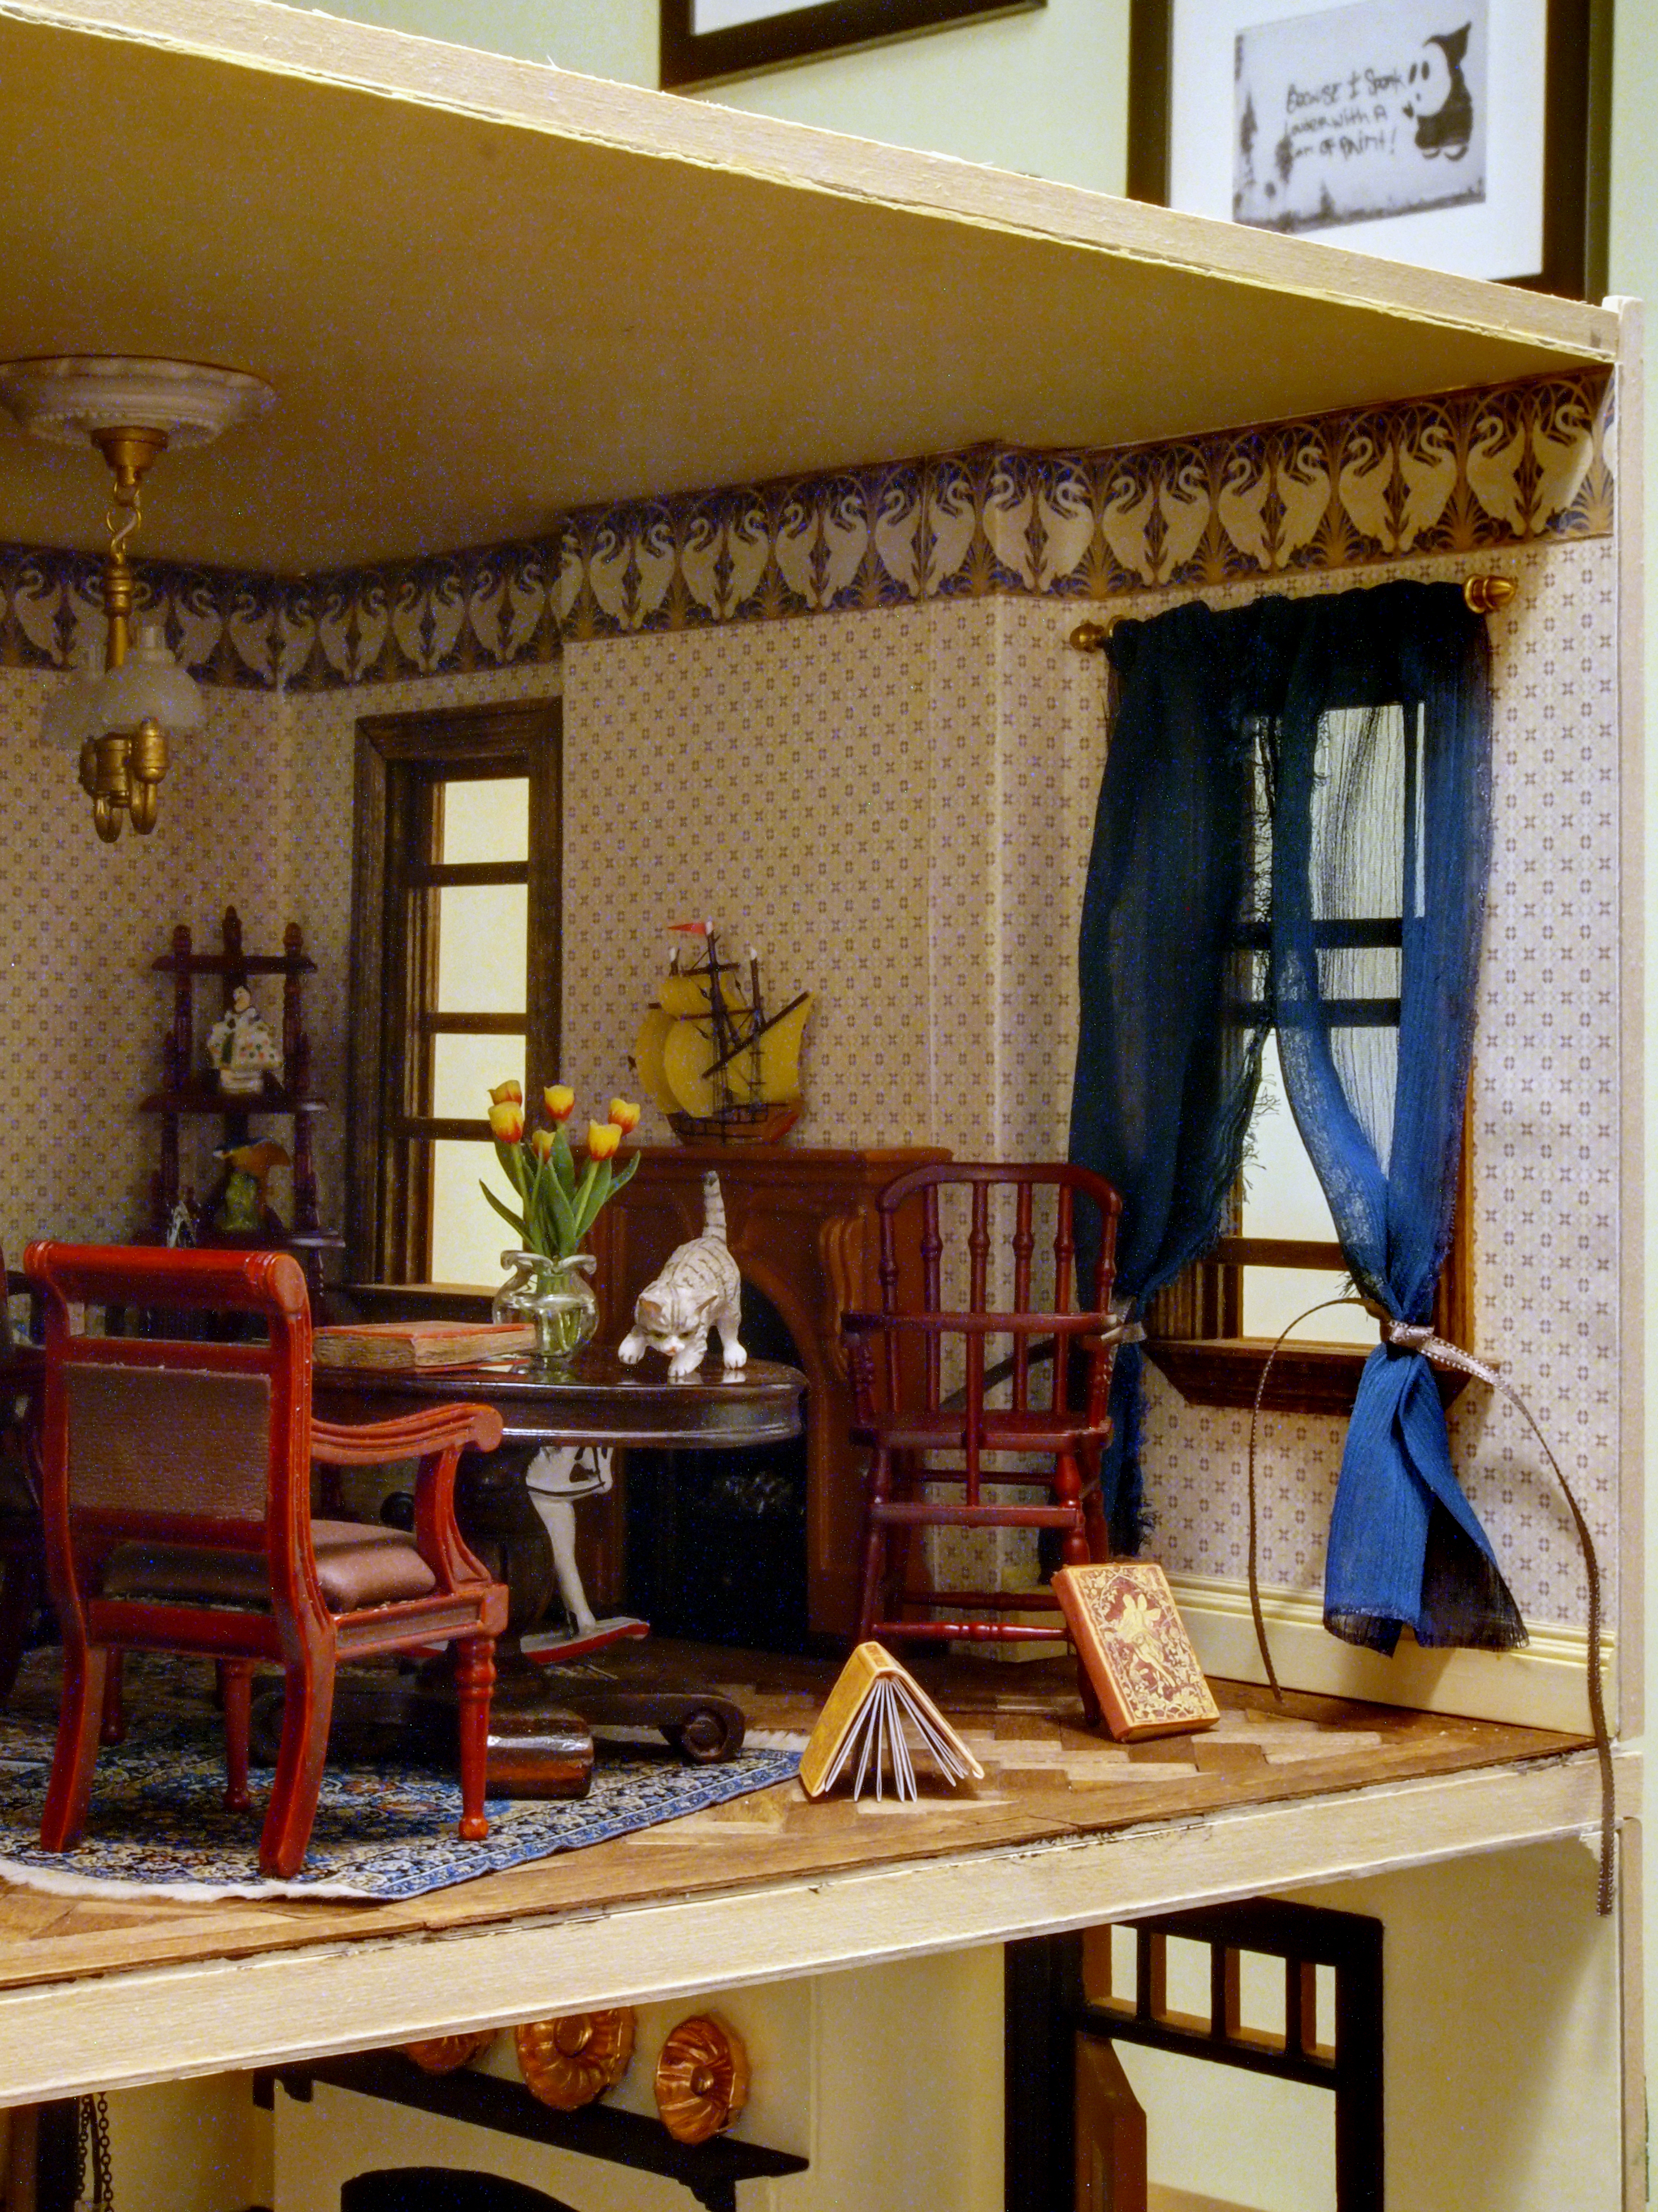
Next I made the second set of nursery curtains and hung them up.

OLYMPUS DIGITAL CAMERA

OLYMPUS DIGITAL CAMERA

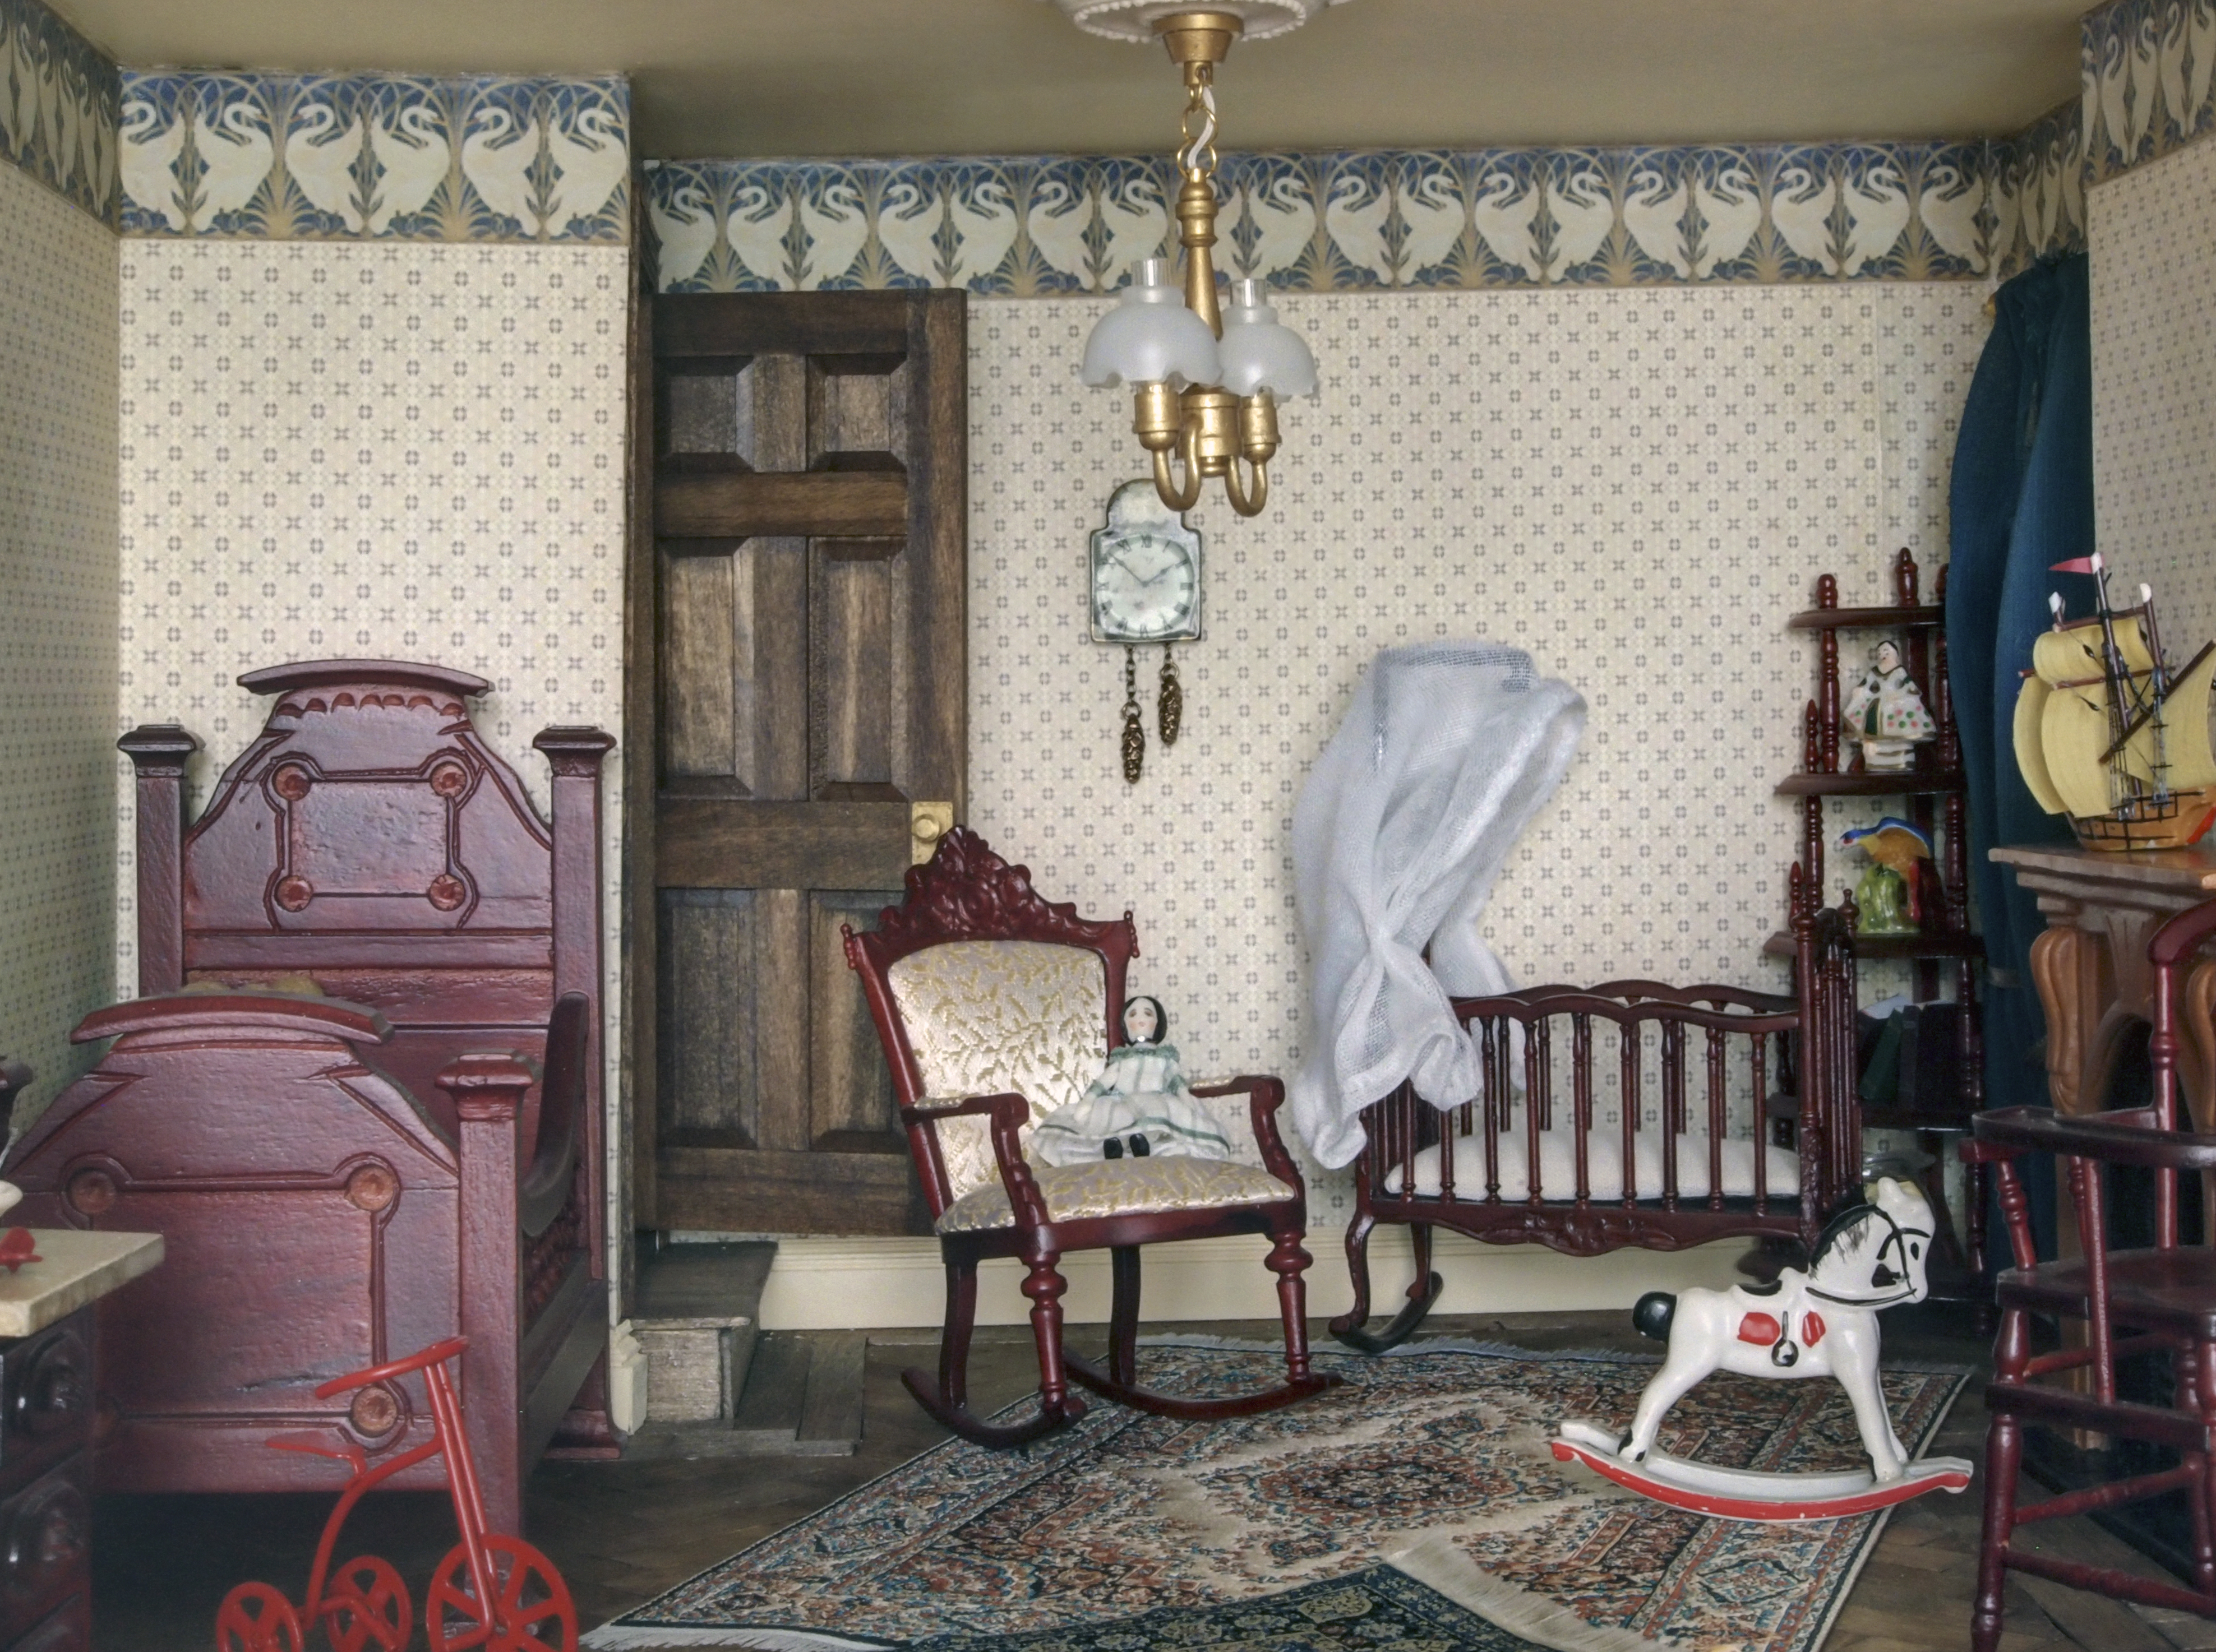
I wanted to add a small canopy on the cradle and I found these plastic pieces that were left over from a set of plastic cups and plates I had bought.  I cut out part of the framework to make the post…

OLYMPUS DIGITAL CAMERA

…painted it black…

OLYMPUS DIGITAL CAMERA

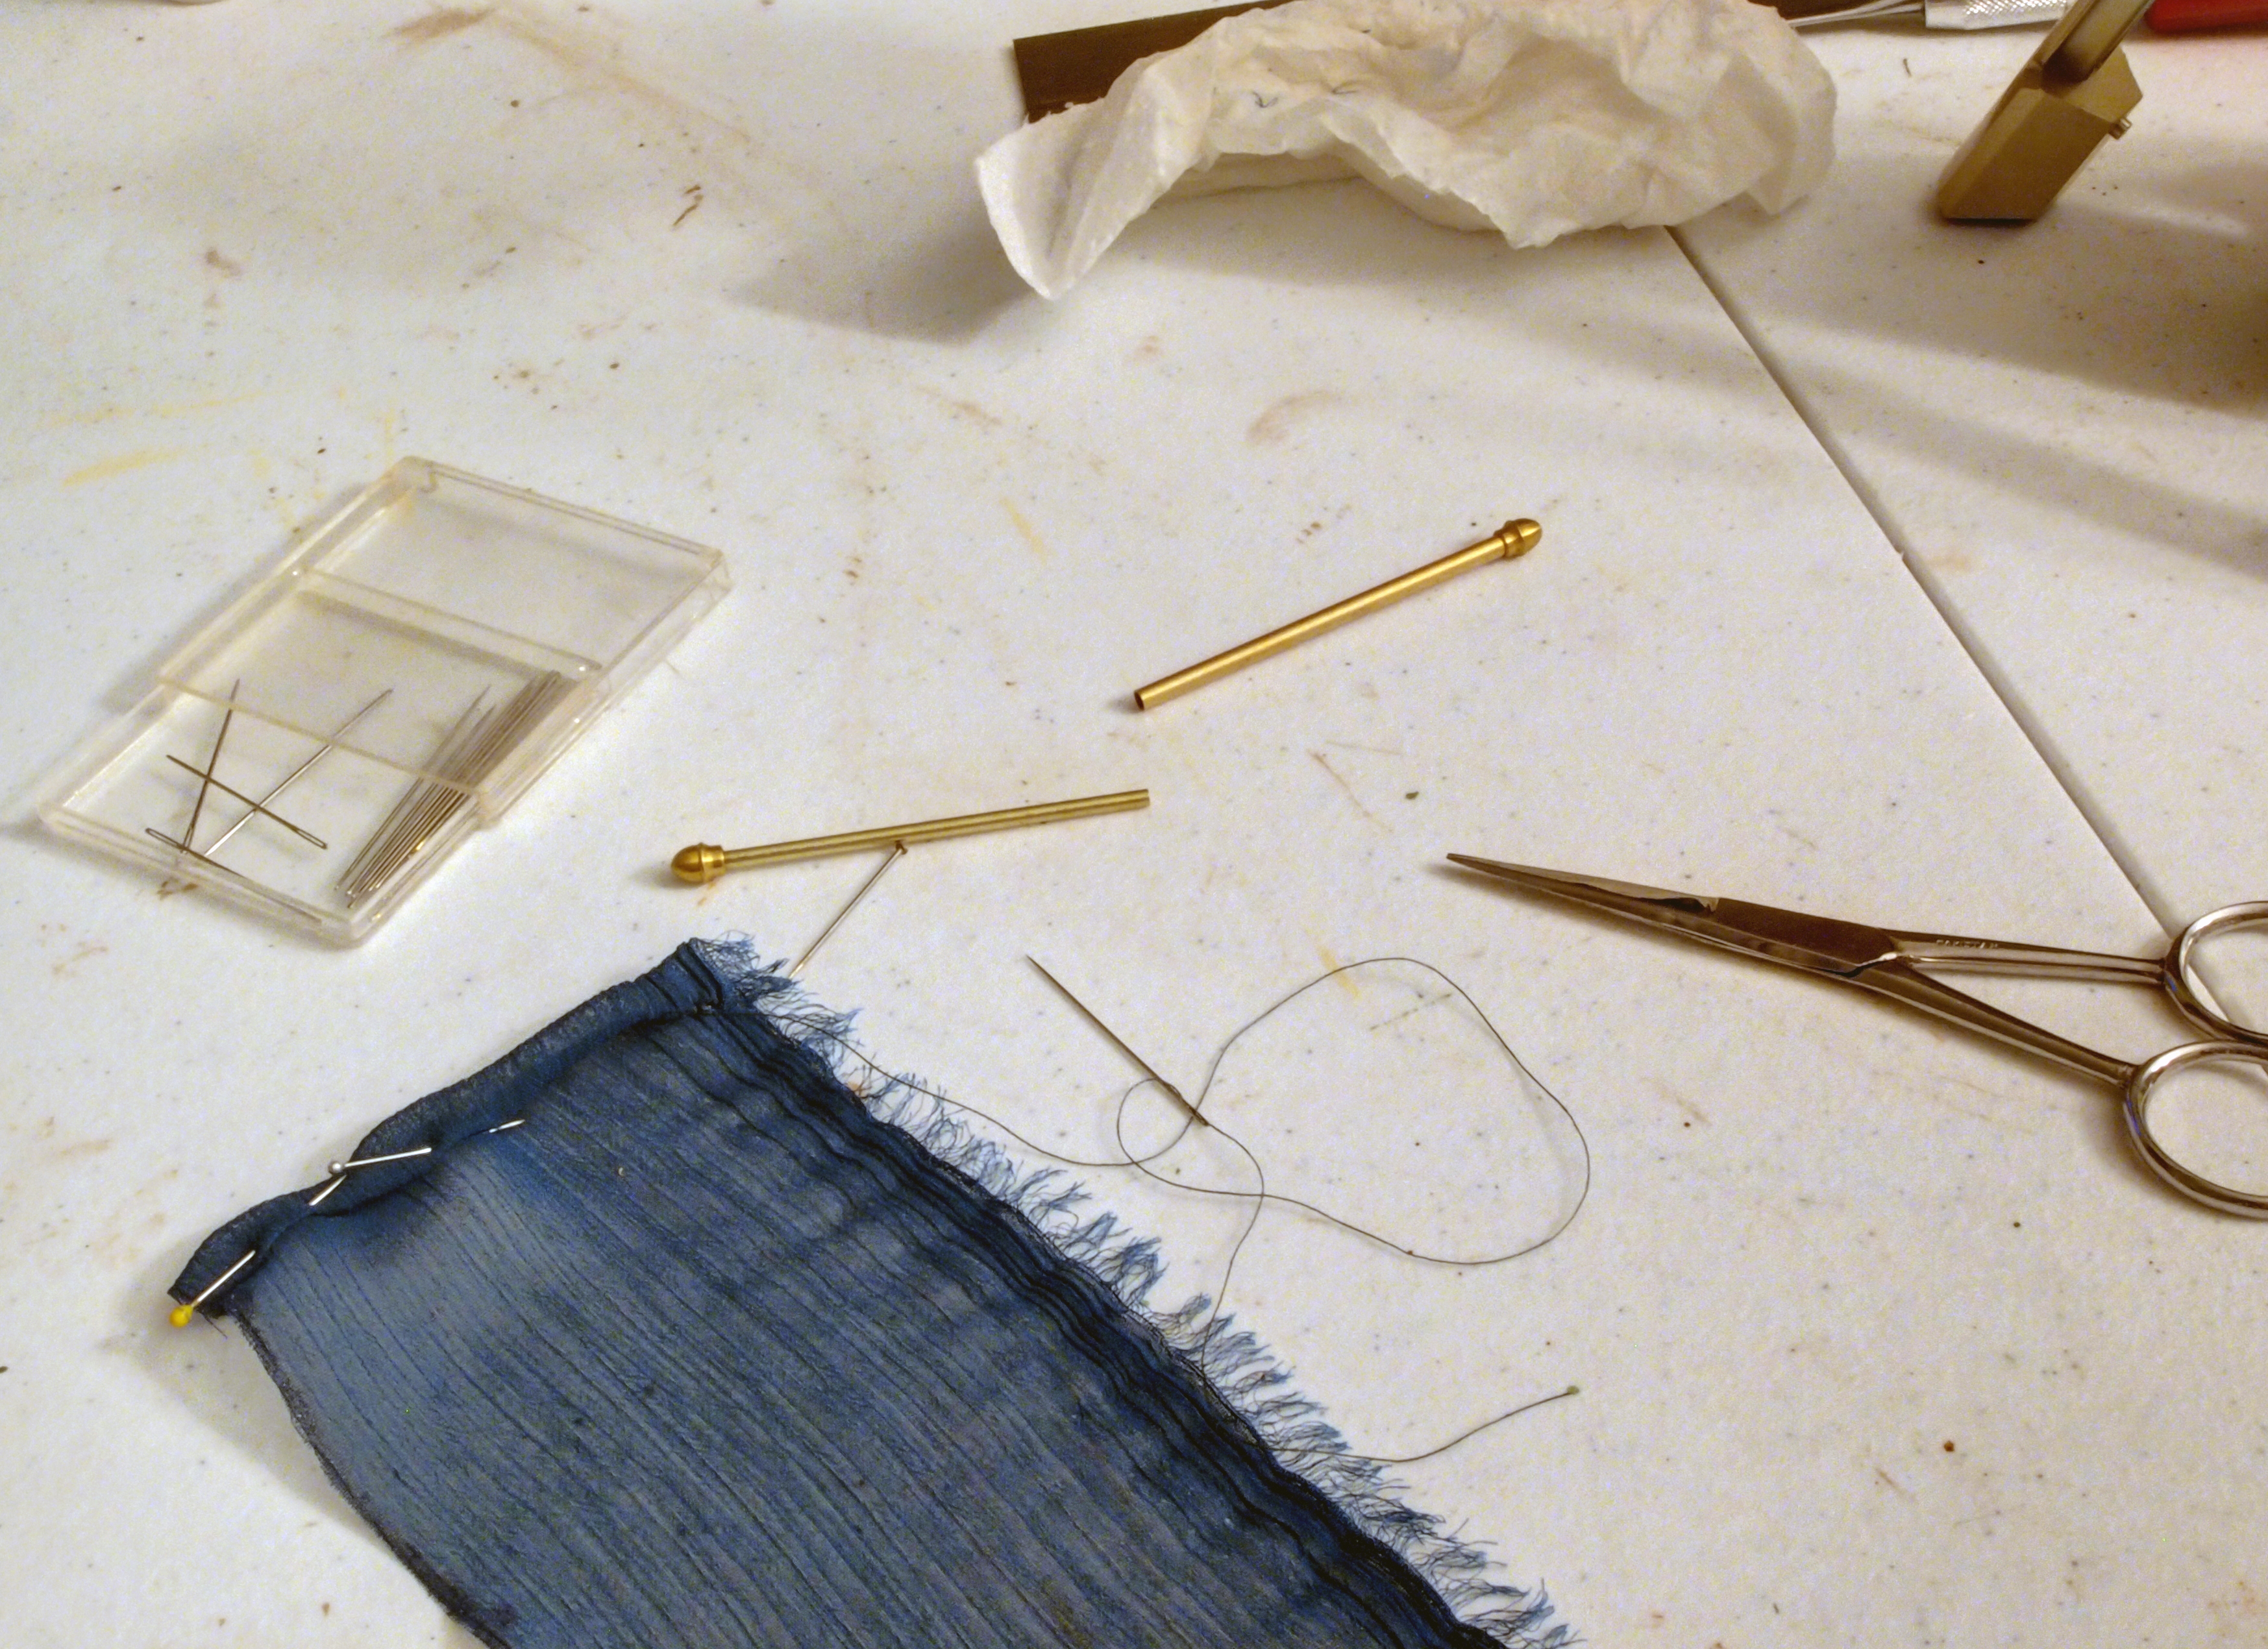
..and cut out the cloth for the canopy.  Couldn’t find a transparent enough cloth at the fabric store, but this scarf was on clearance for $1.50 and it did the trick.

OLYMPUS DIGITAL CAMERA

Had to hem three of the sides…

OLYMPUS DIGITAL CAMERA

And there you go…still needs a little ribbon to tie back the sides here (I added it before some of the later photos).

OLYMPUS DIGITAL CAMERA

Then I started on the tie-backs for the curtains…used a bit of ribbon and a tiny brass nail.

OLYMPUS DIGITAL CAMERA

OLYMPUS DIGITAL CAMERA

OLYMPUS DIGITAL CAMERA

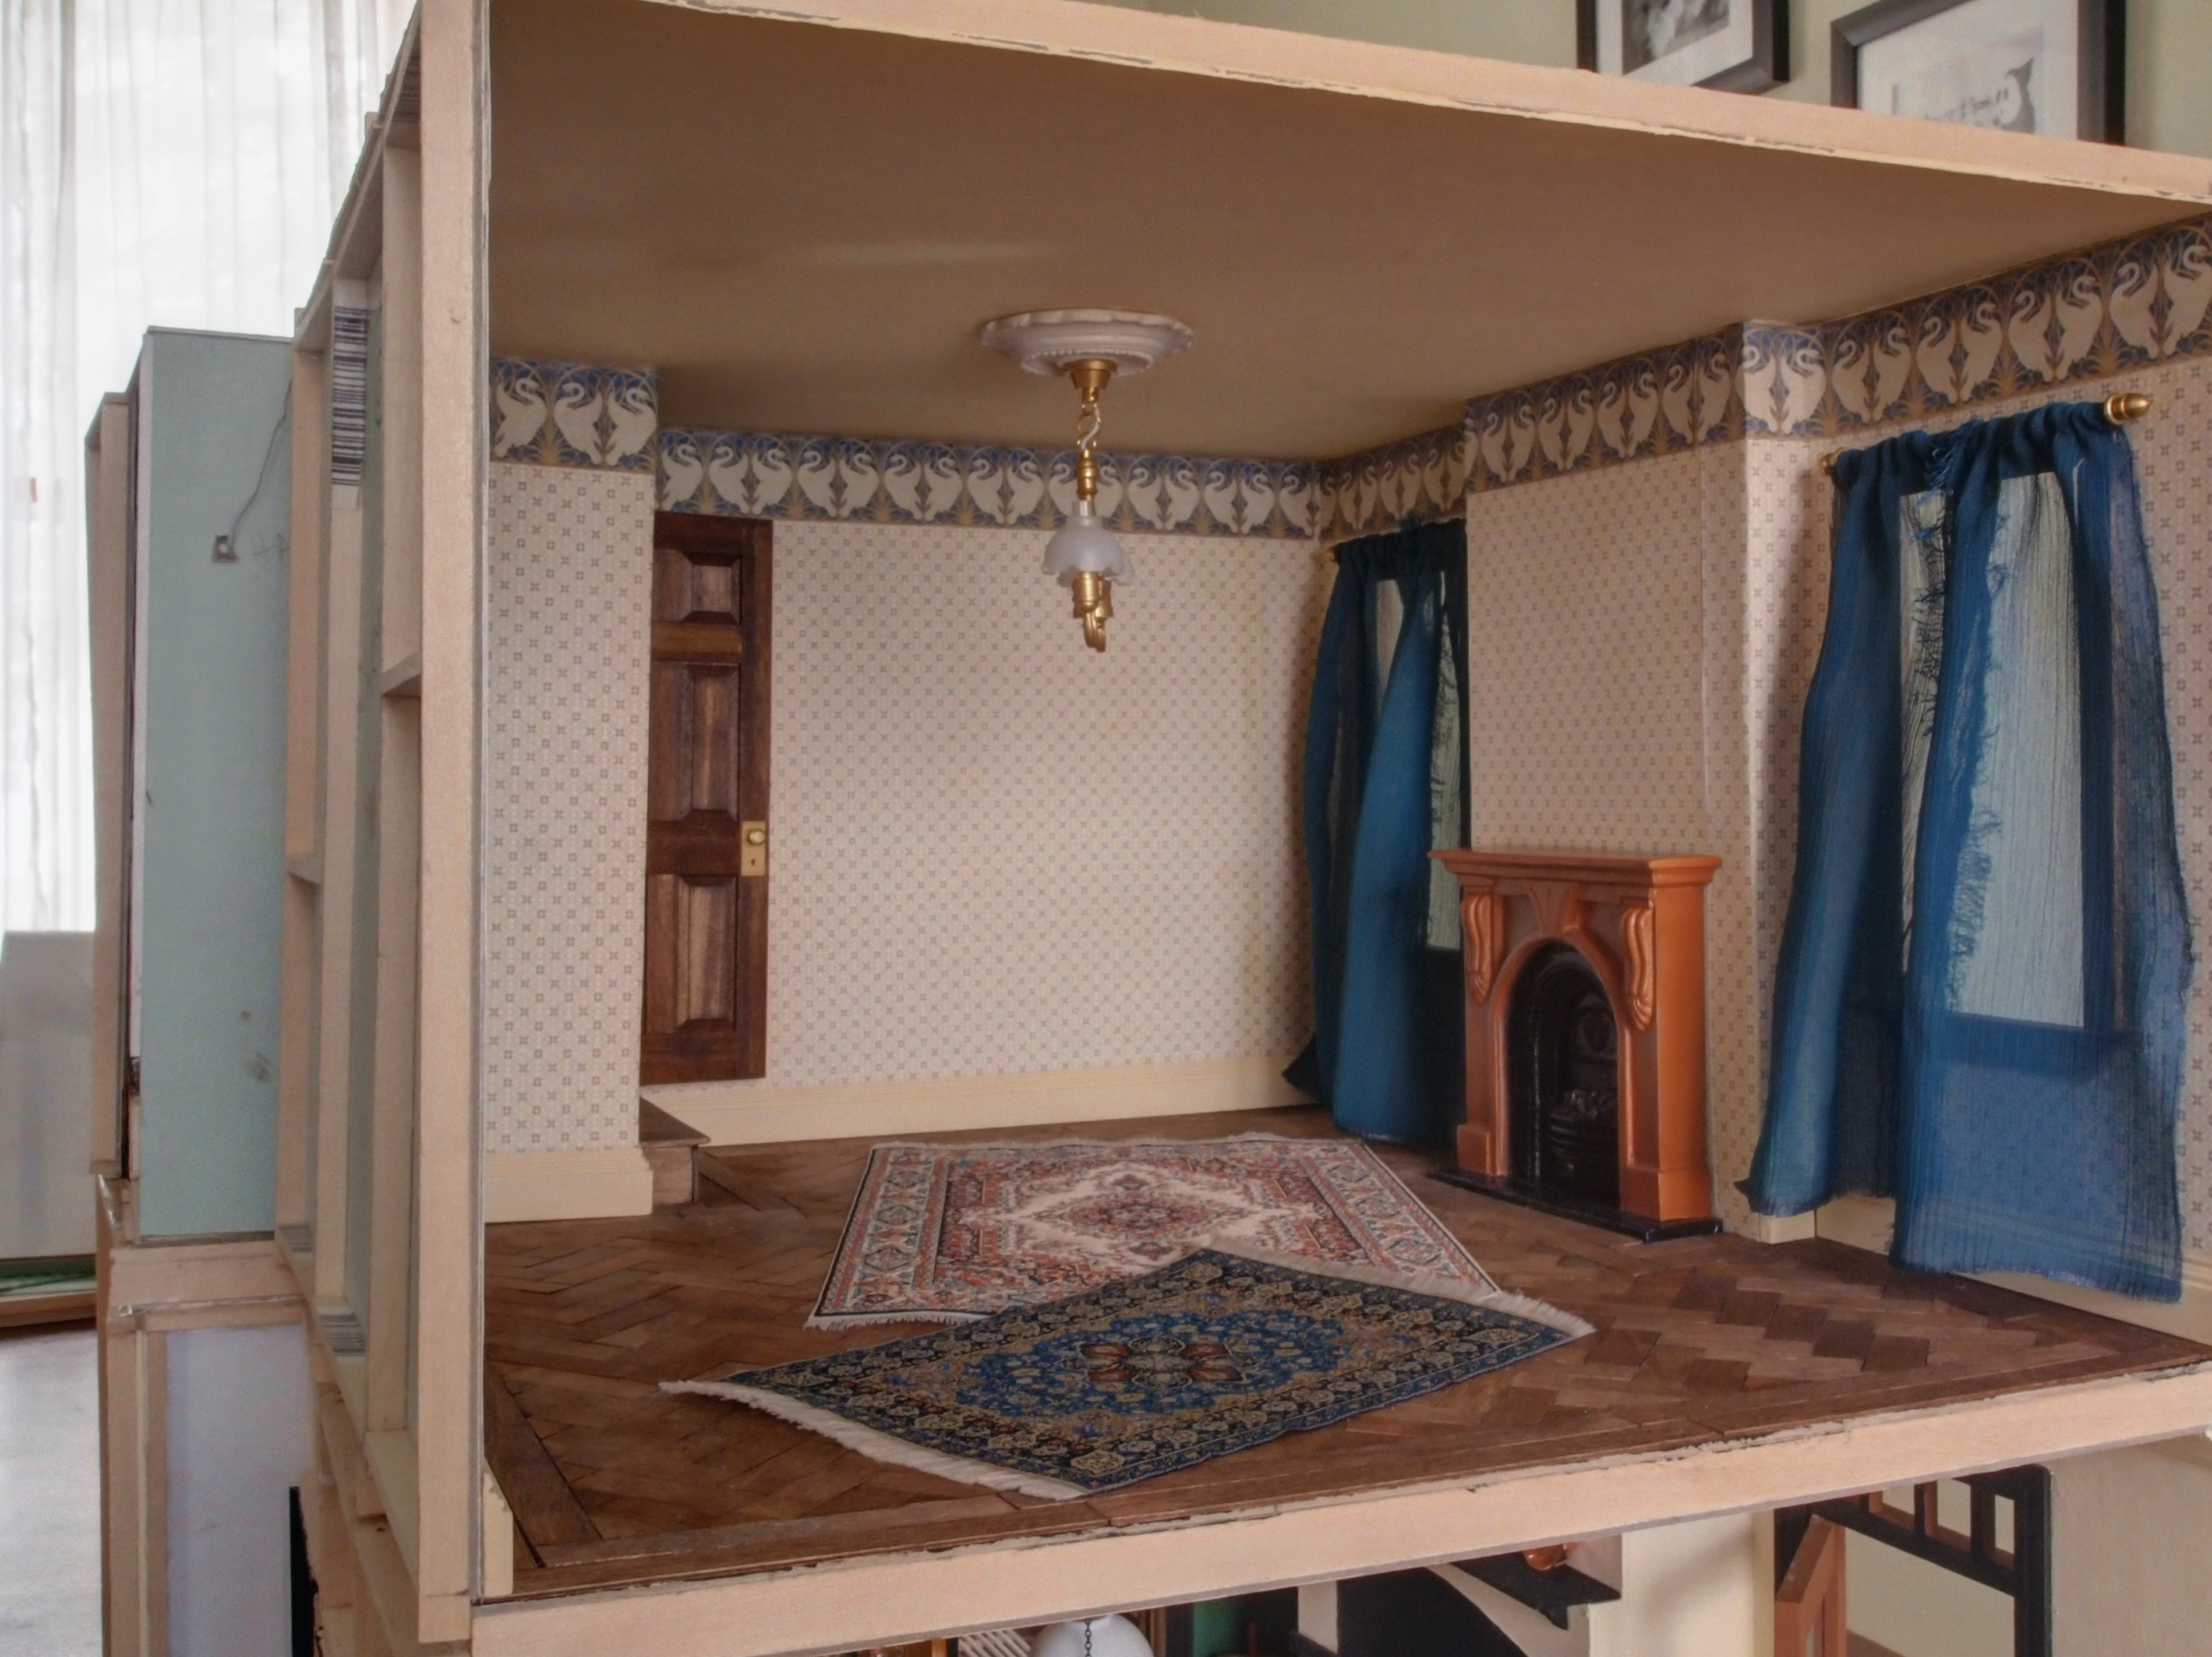
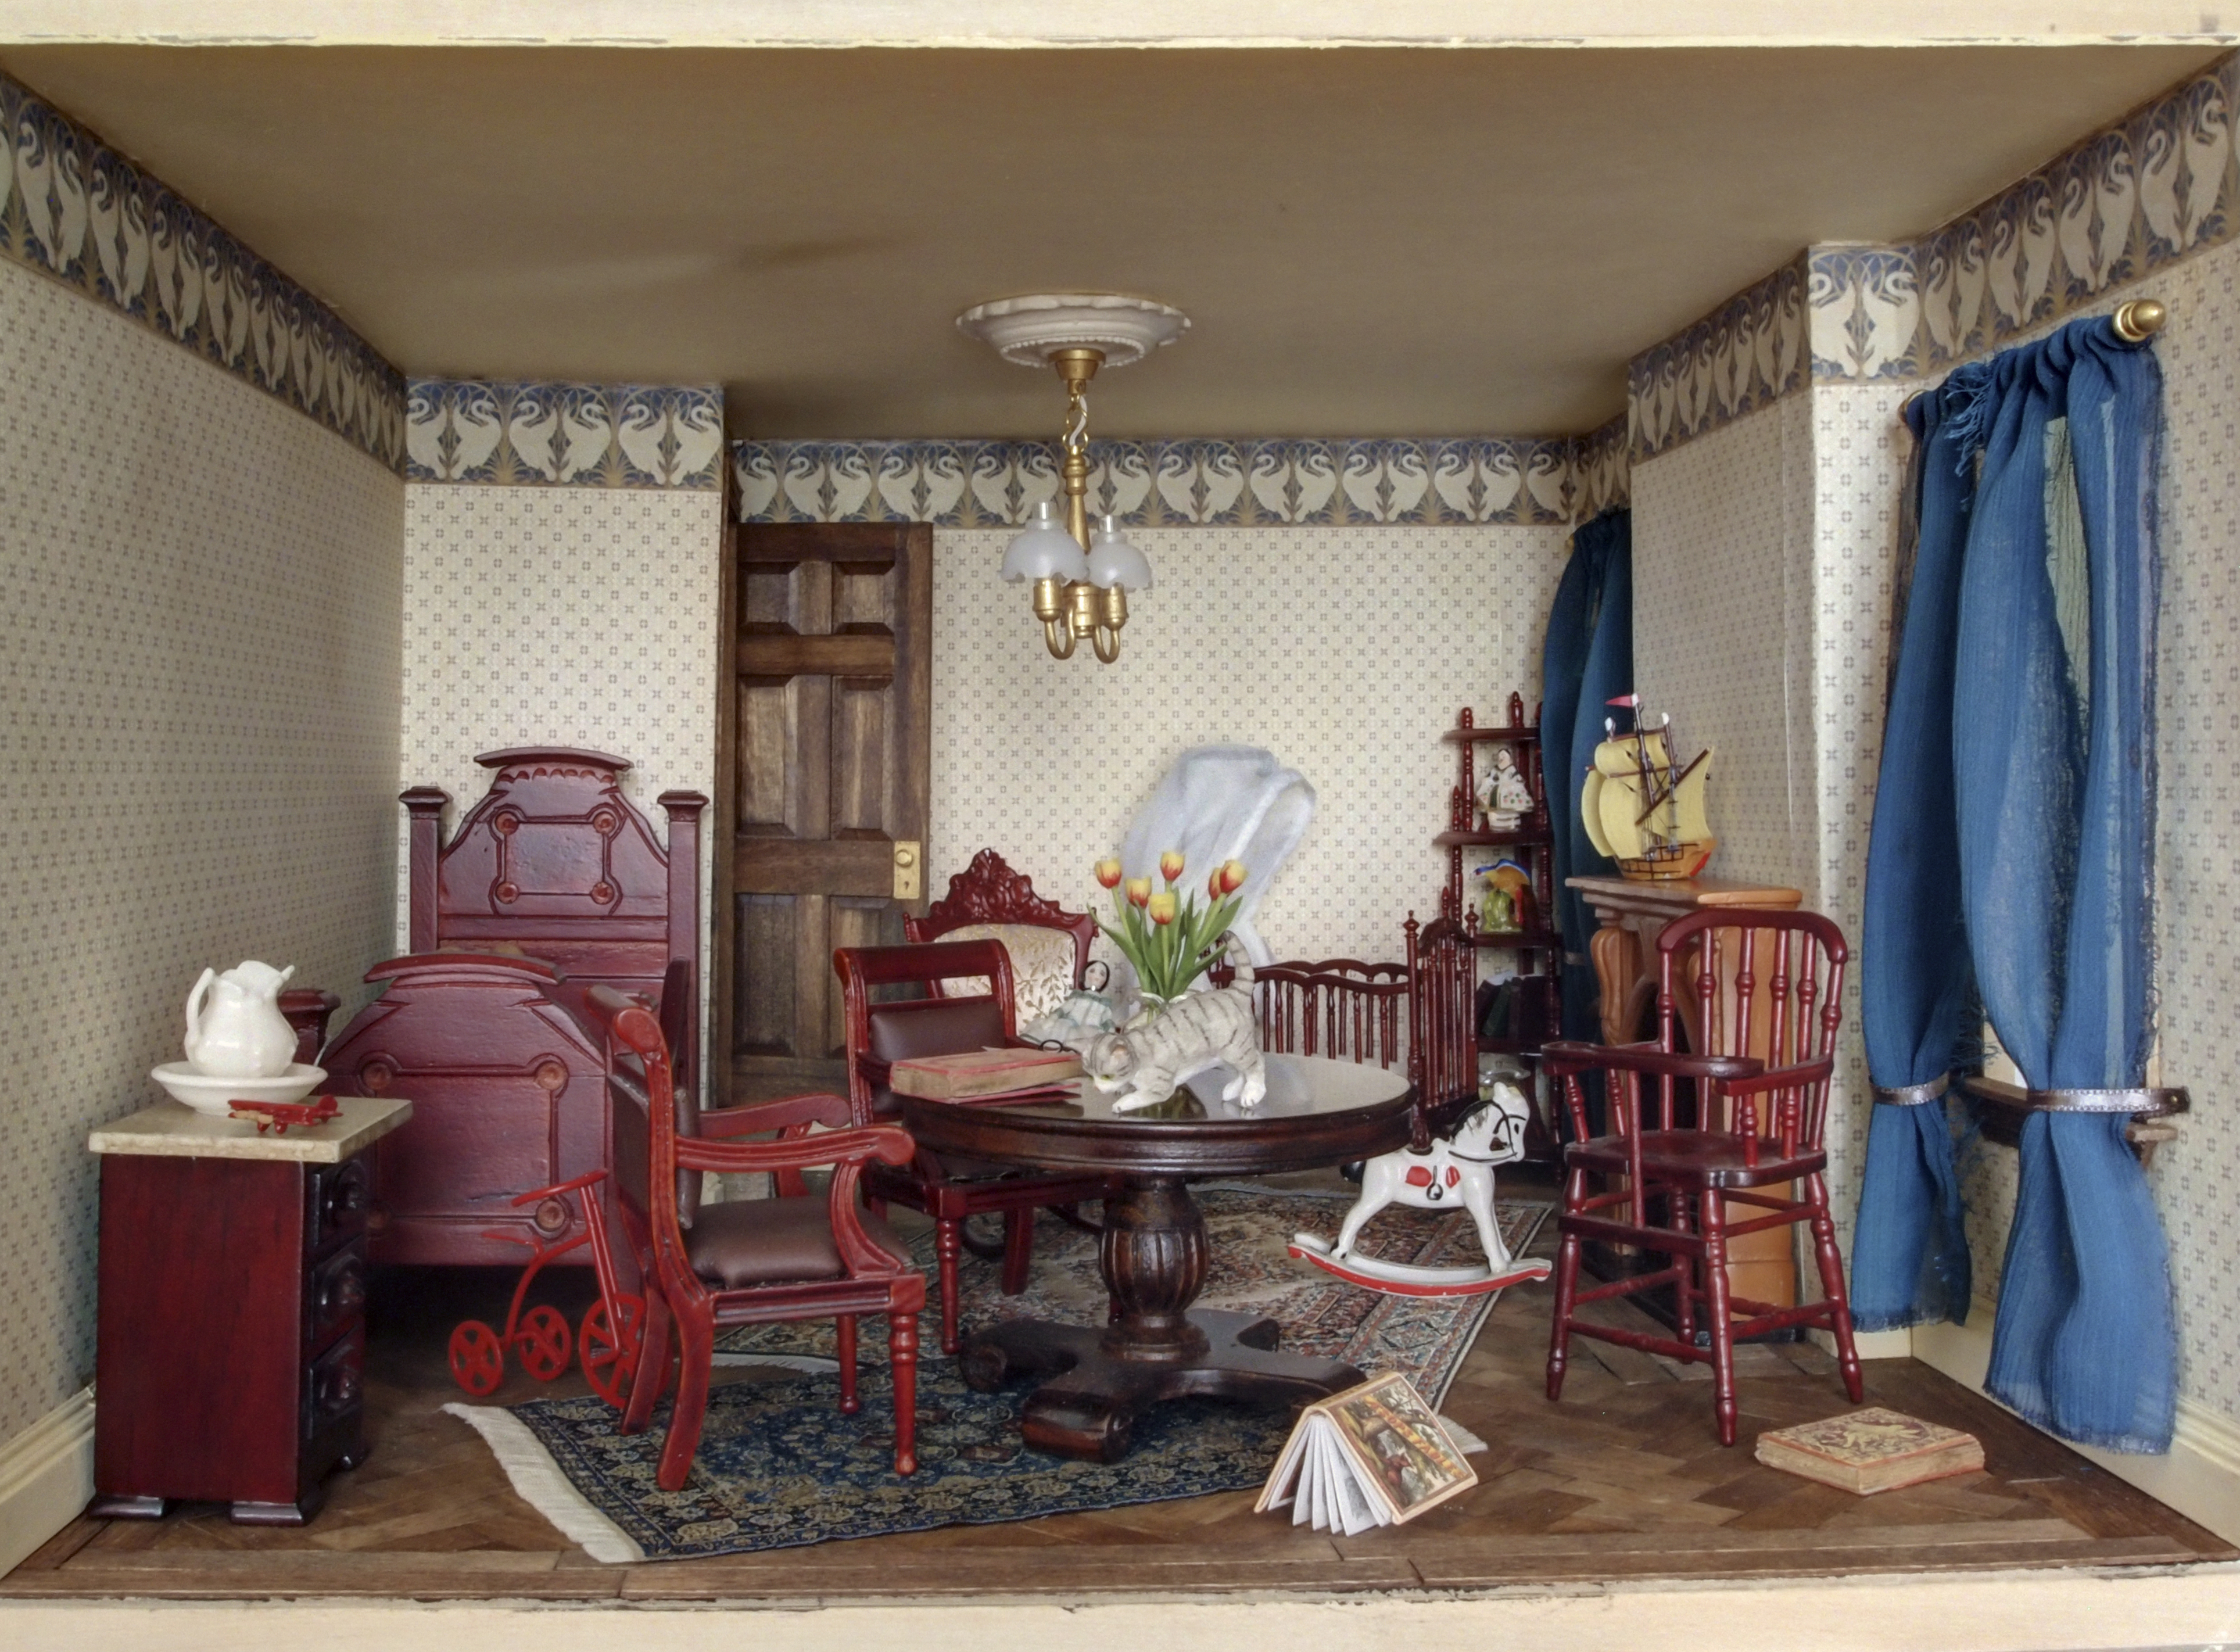
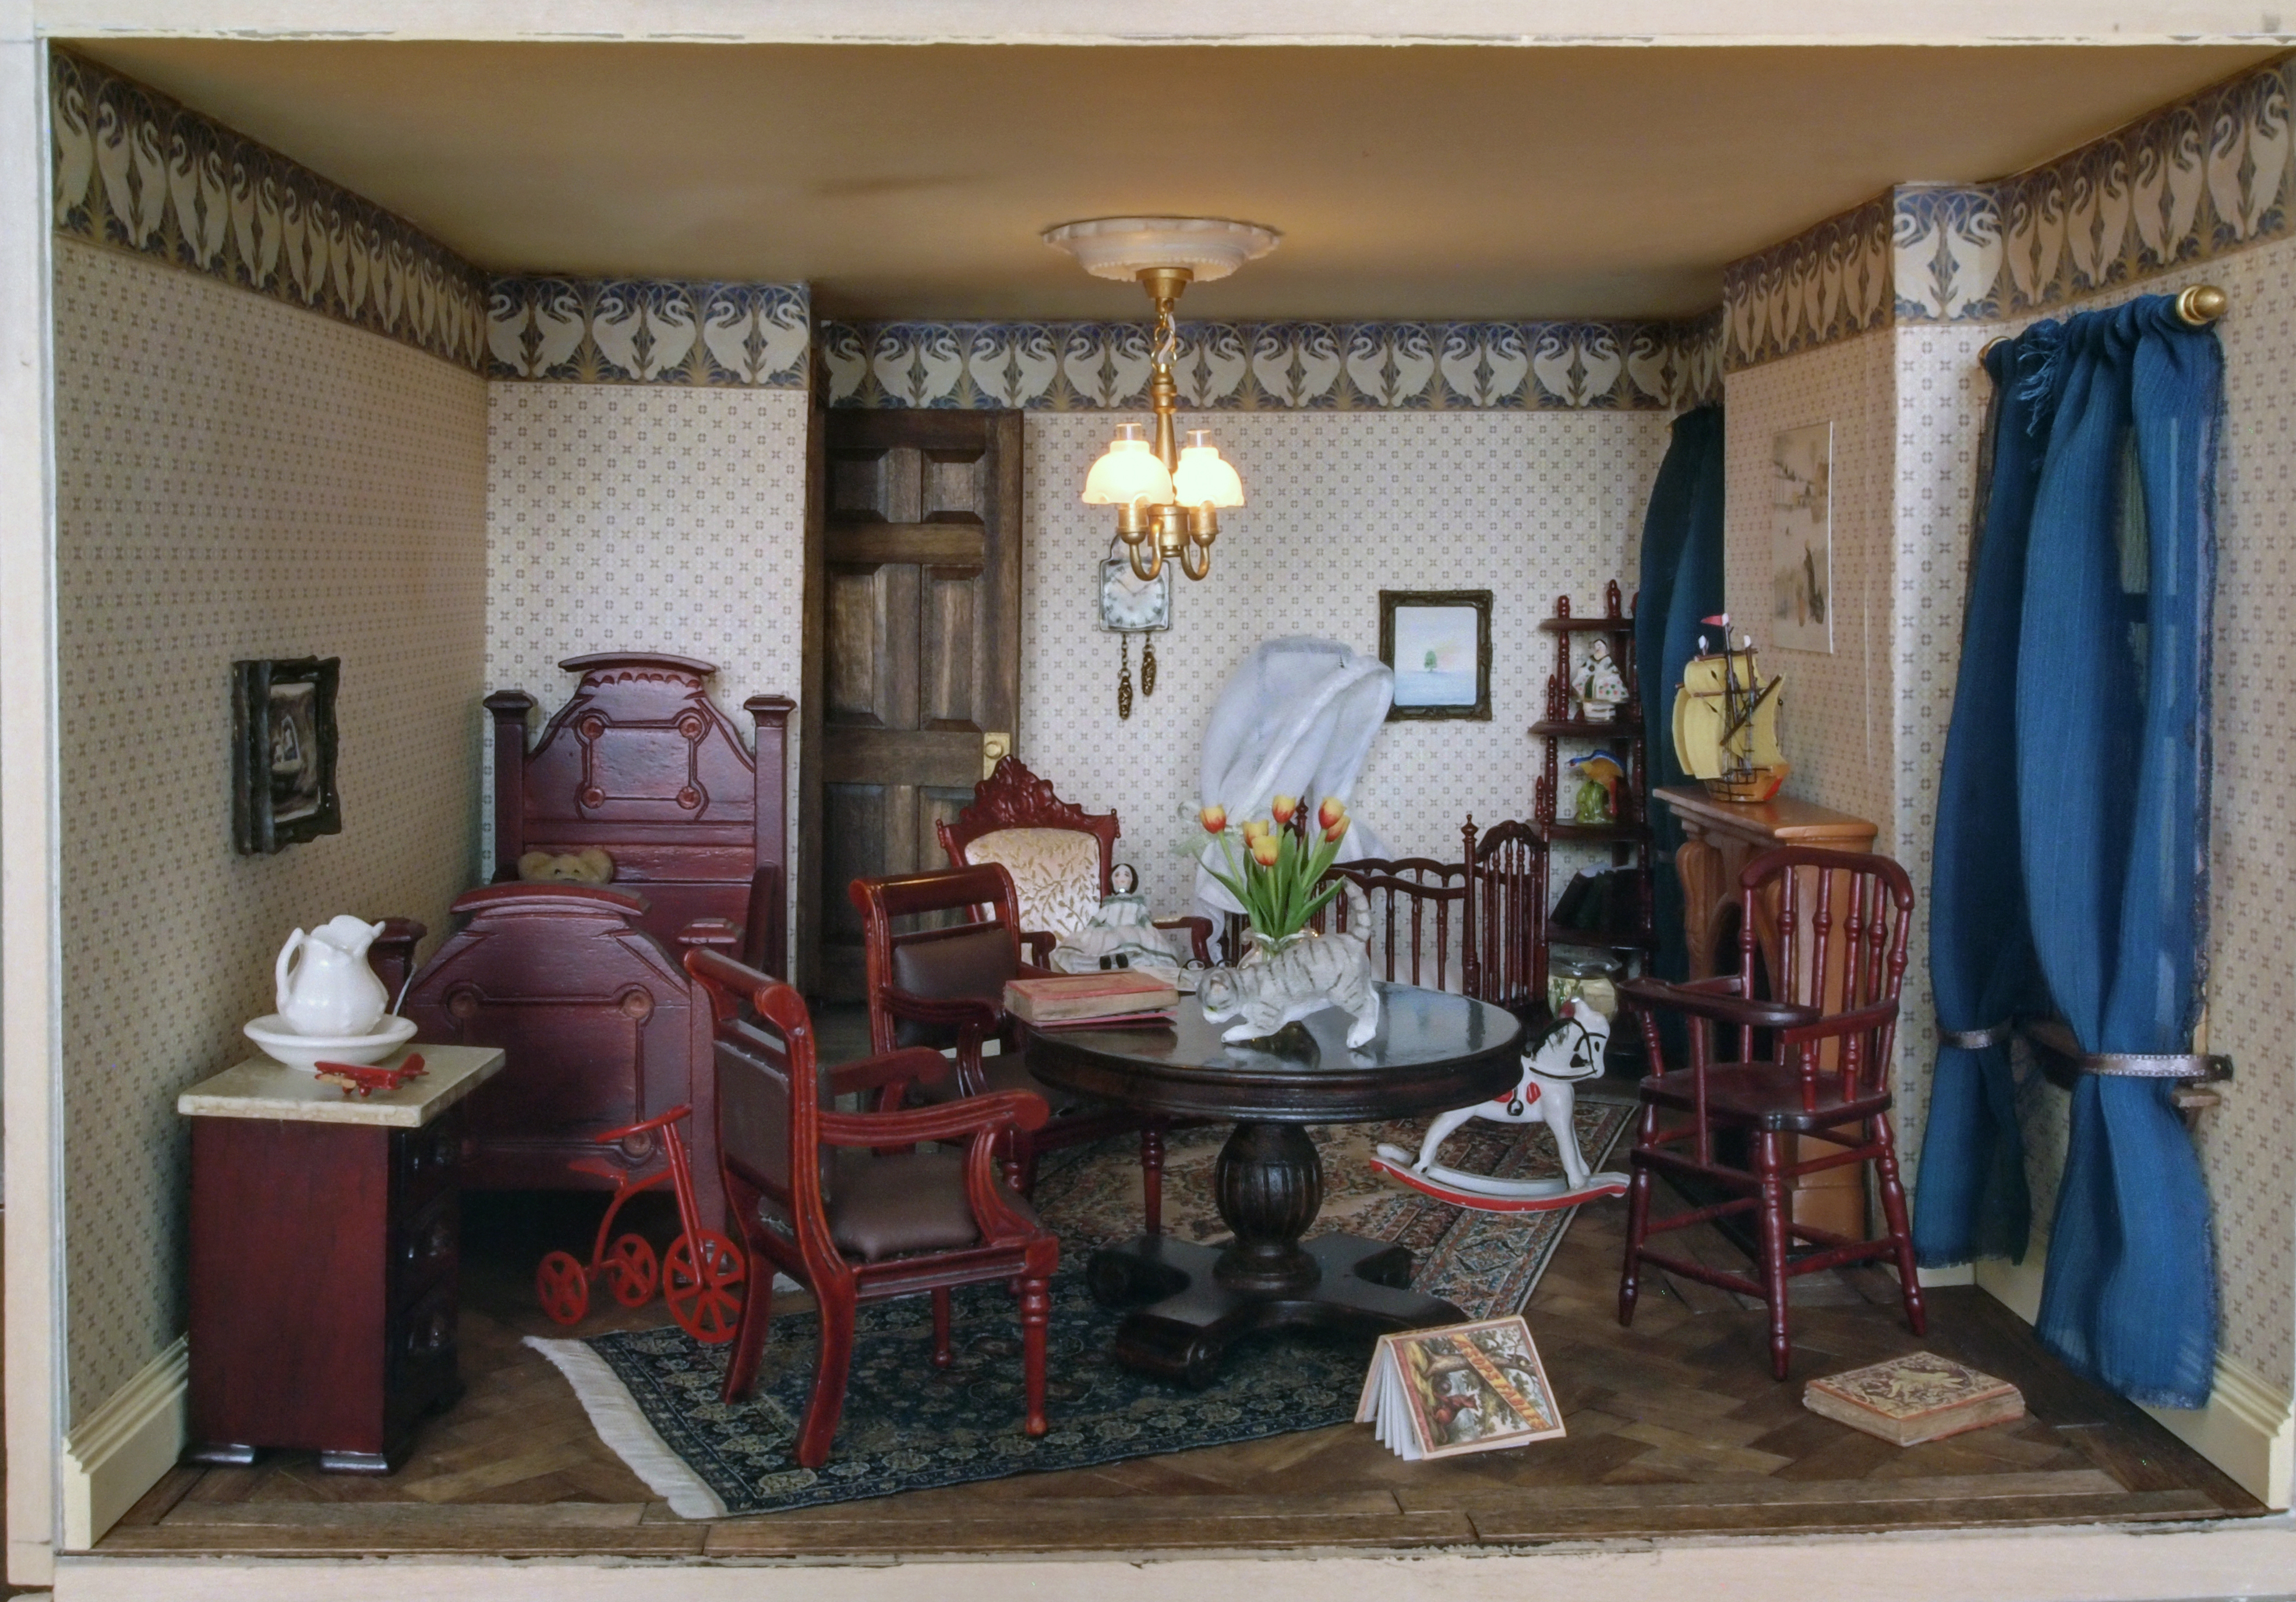
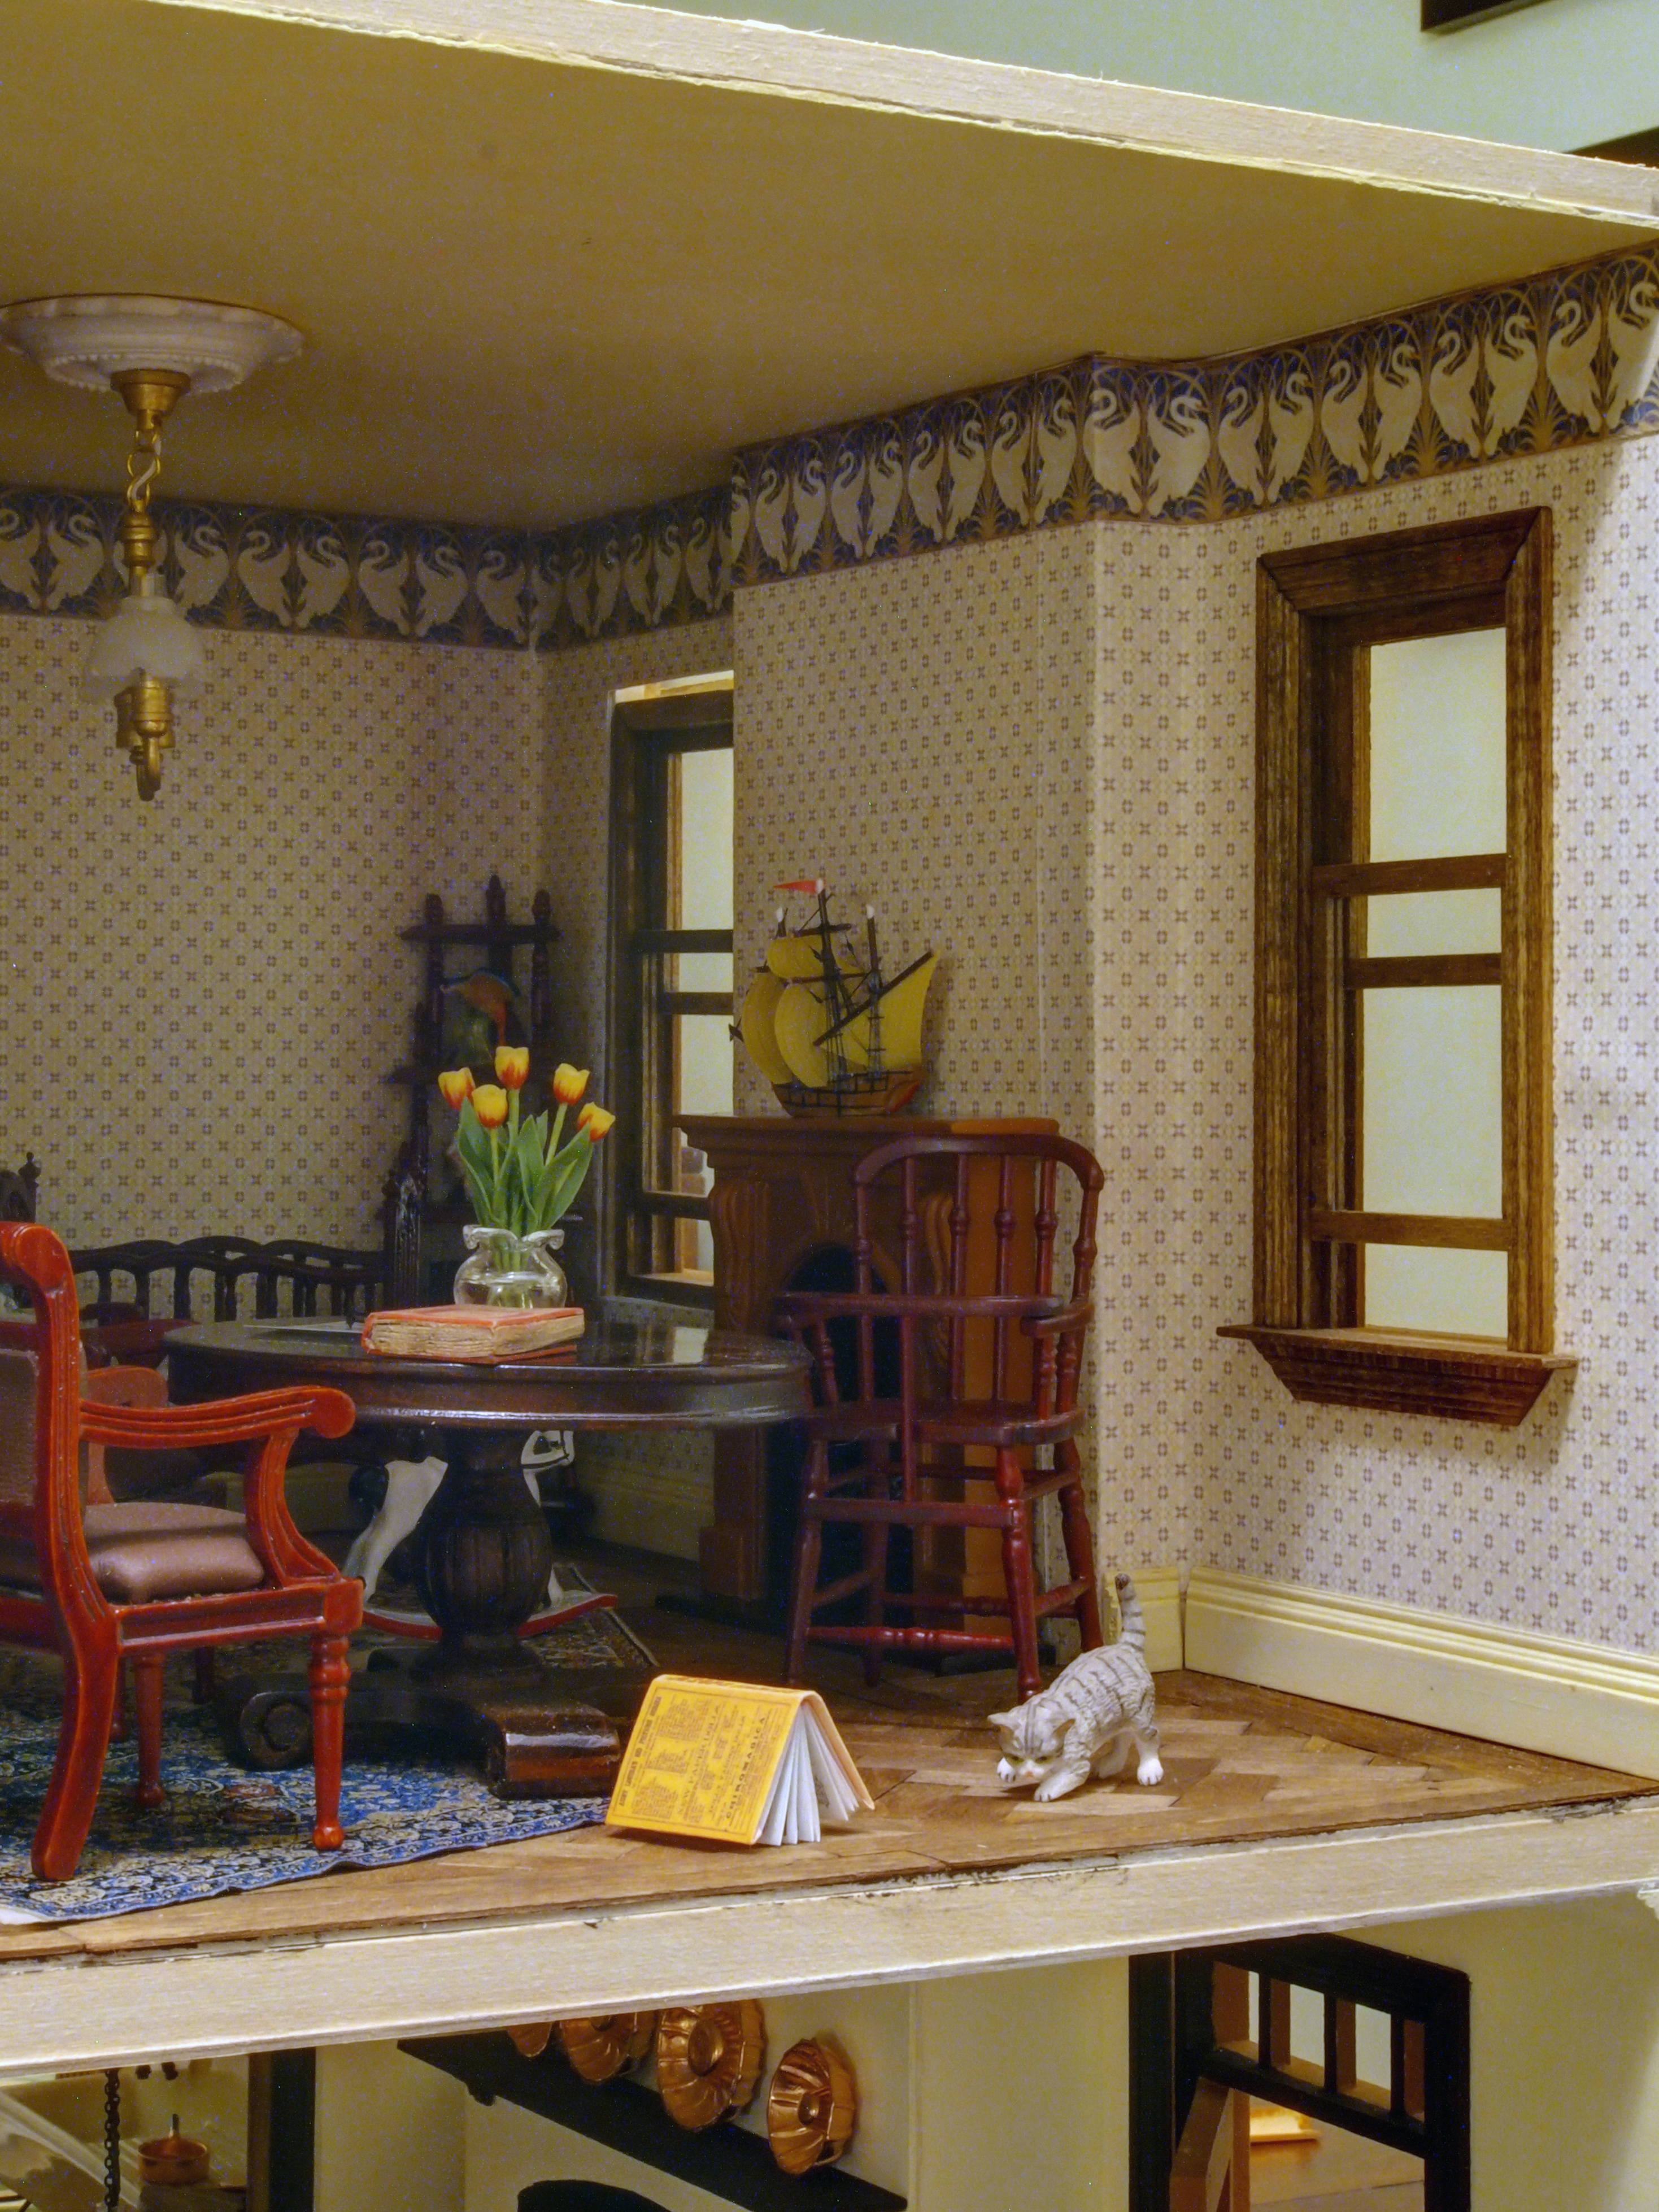
Put the room back together…

OLYMPUS DIGITAL CAMERA

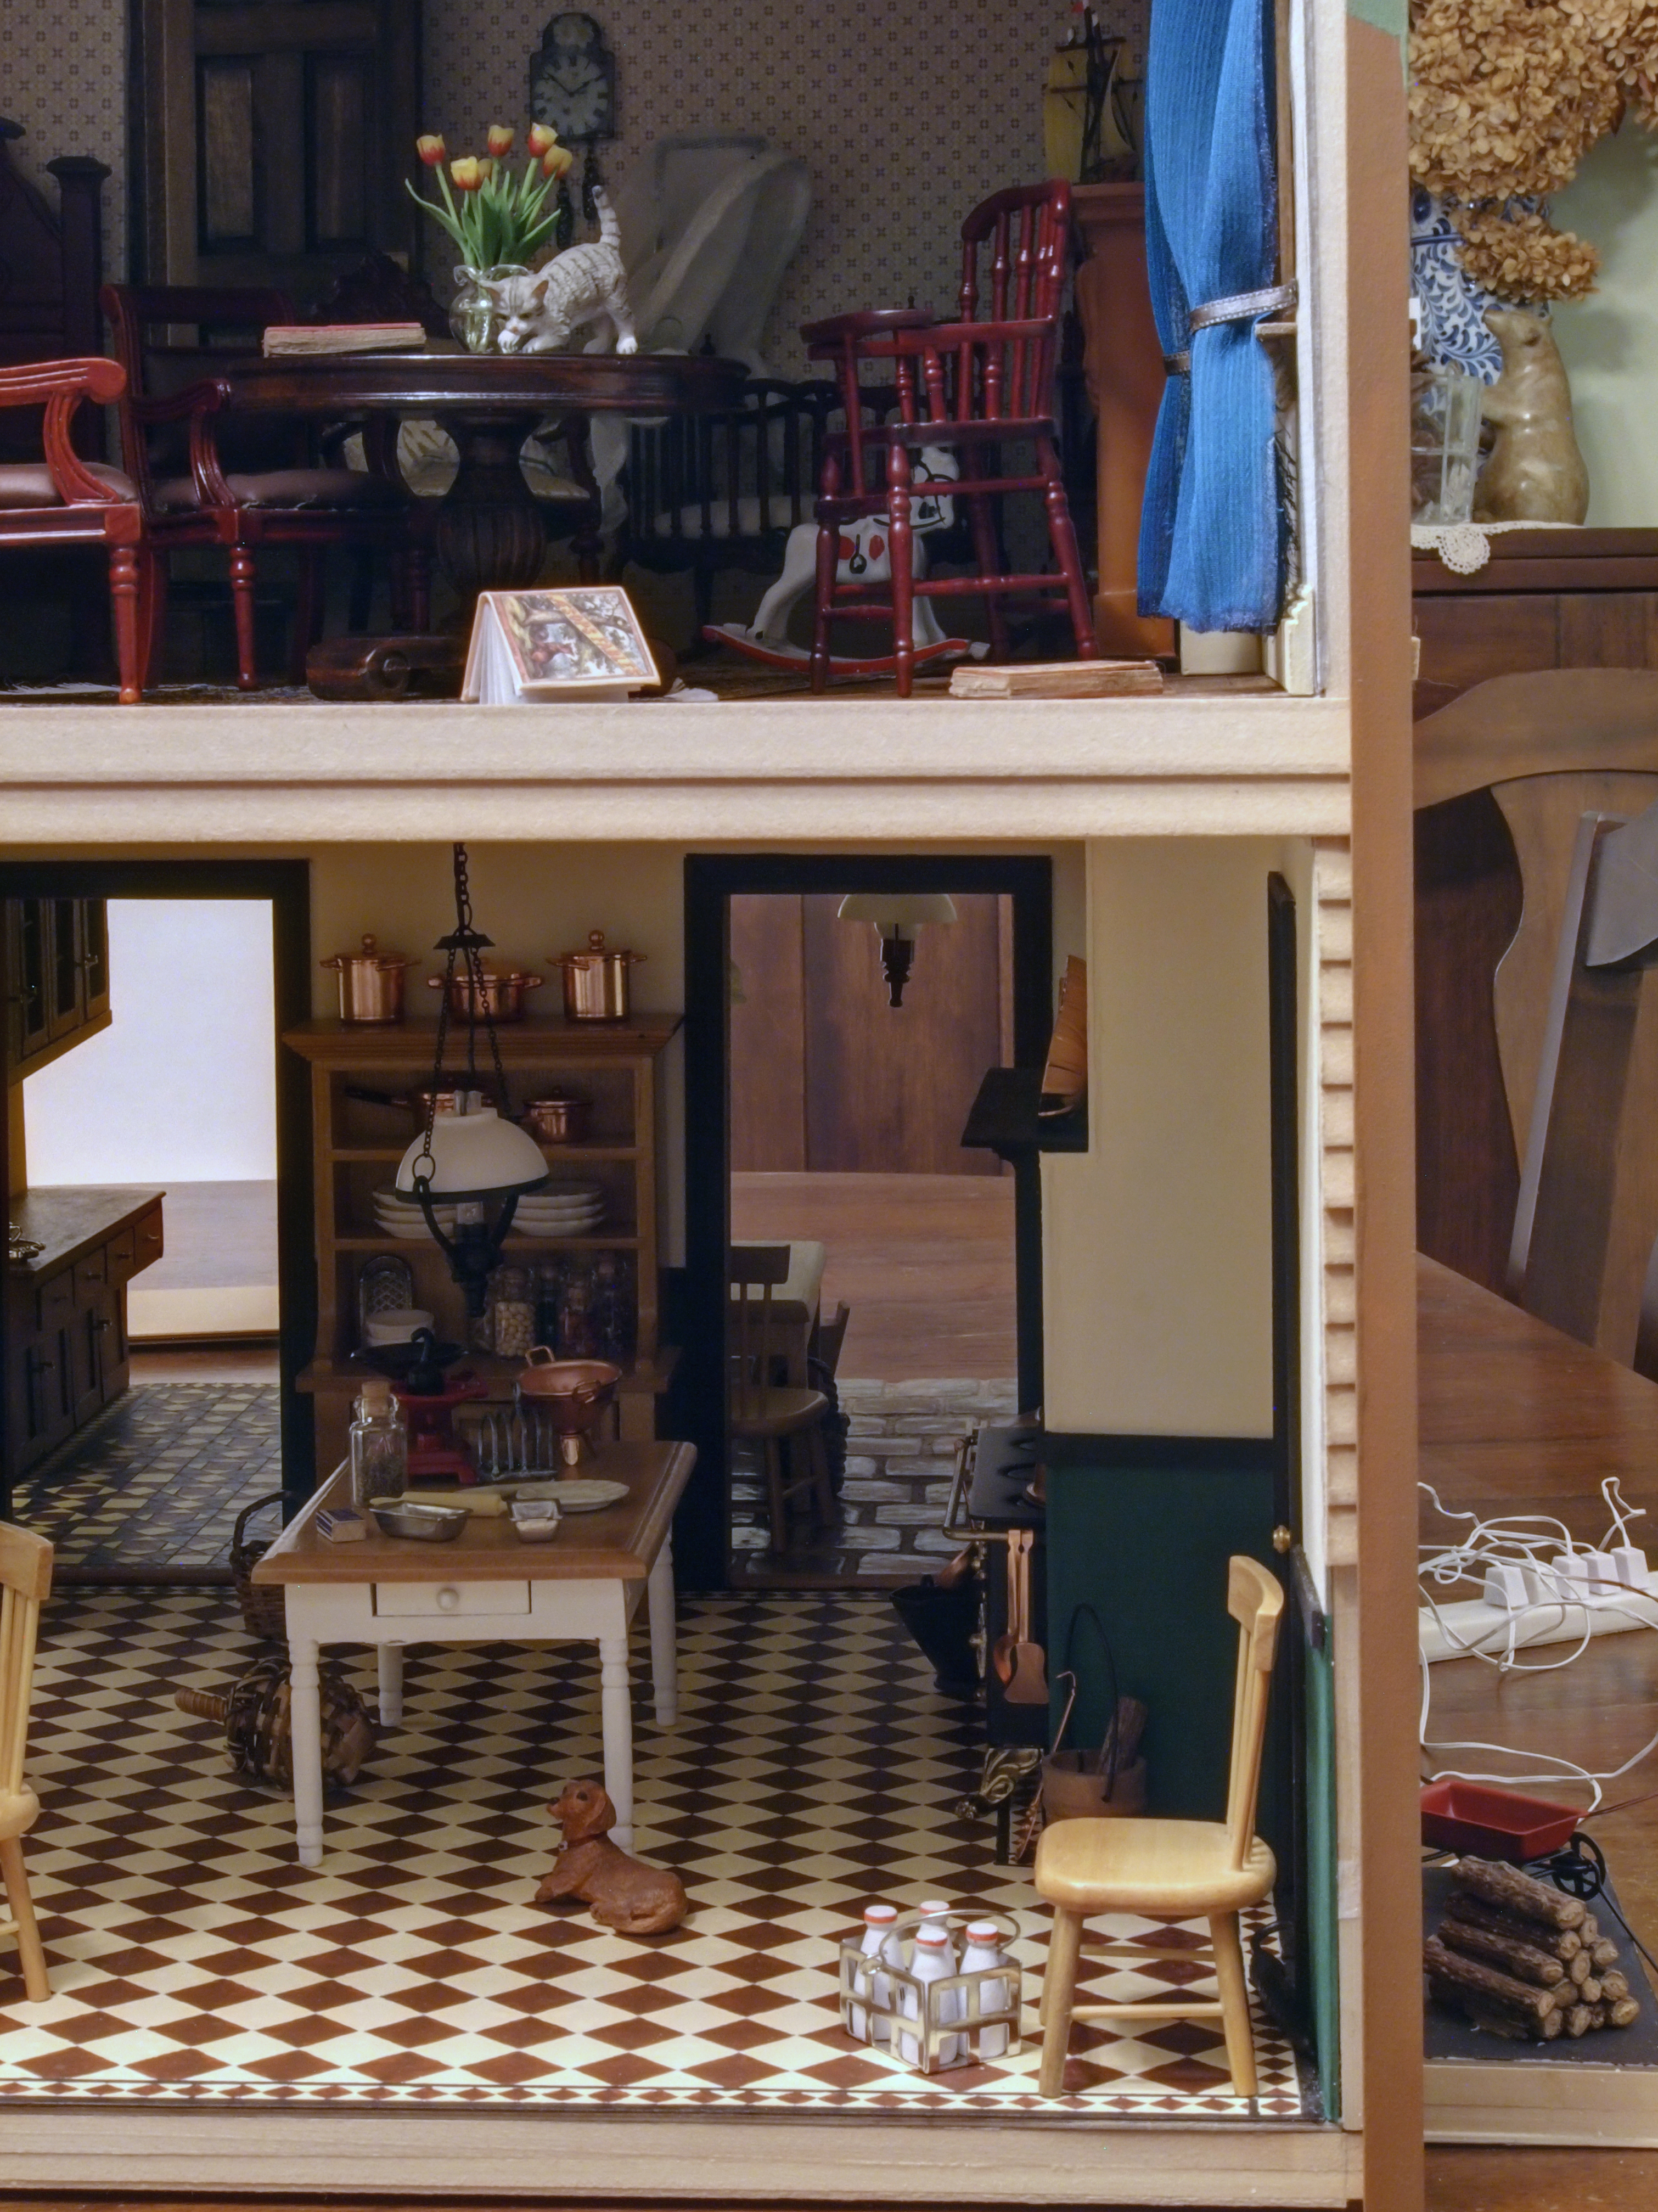
…then added a clock, so the kids could learn to tell time and the nursemaid could keep to some sort of a schedule.

OLYMPUS DIGITAL CAMERA

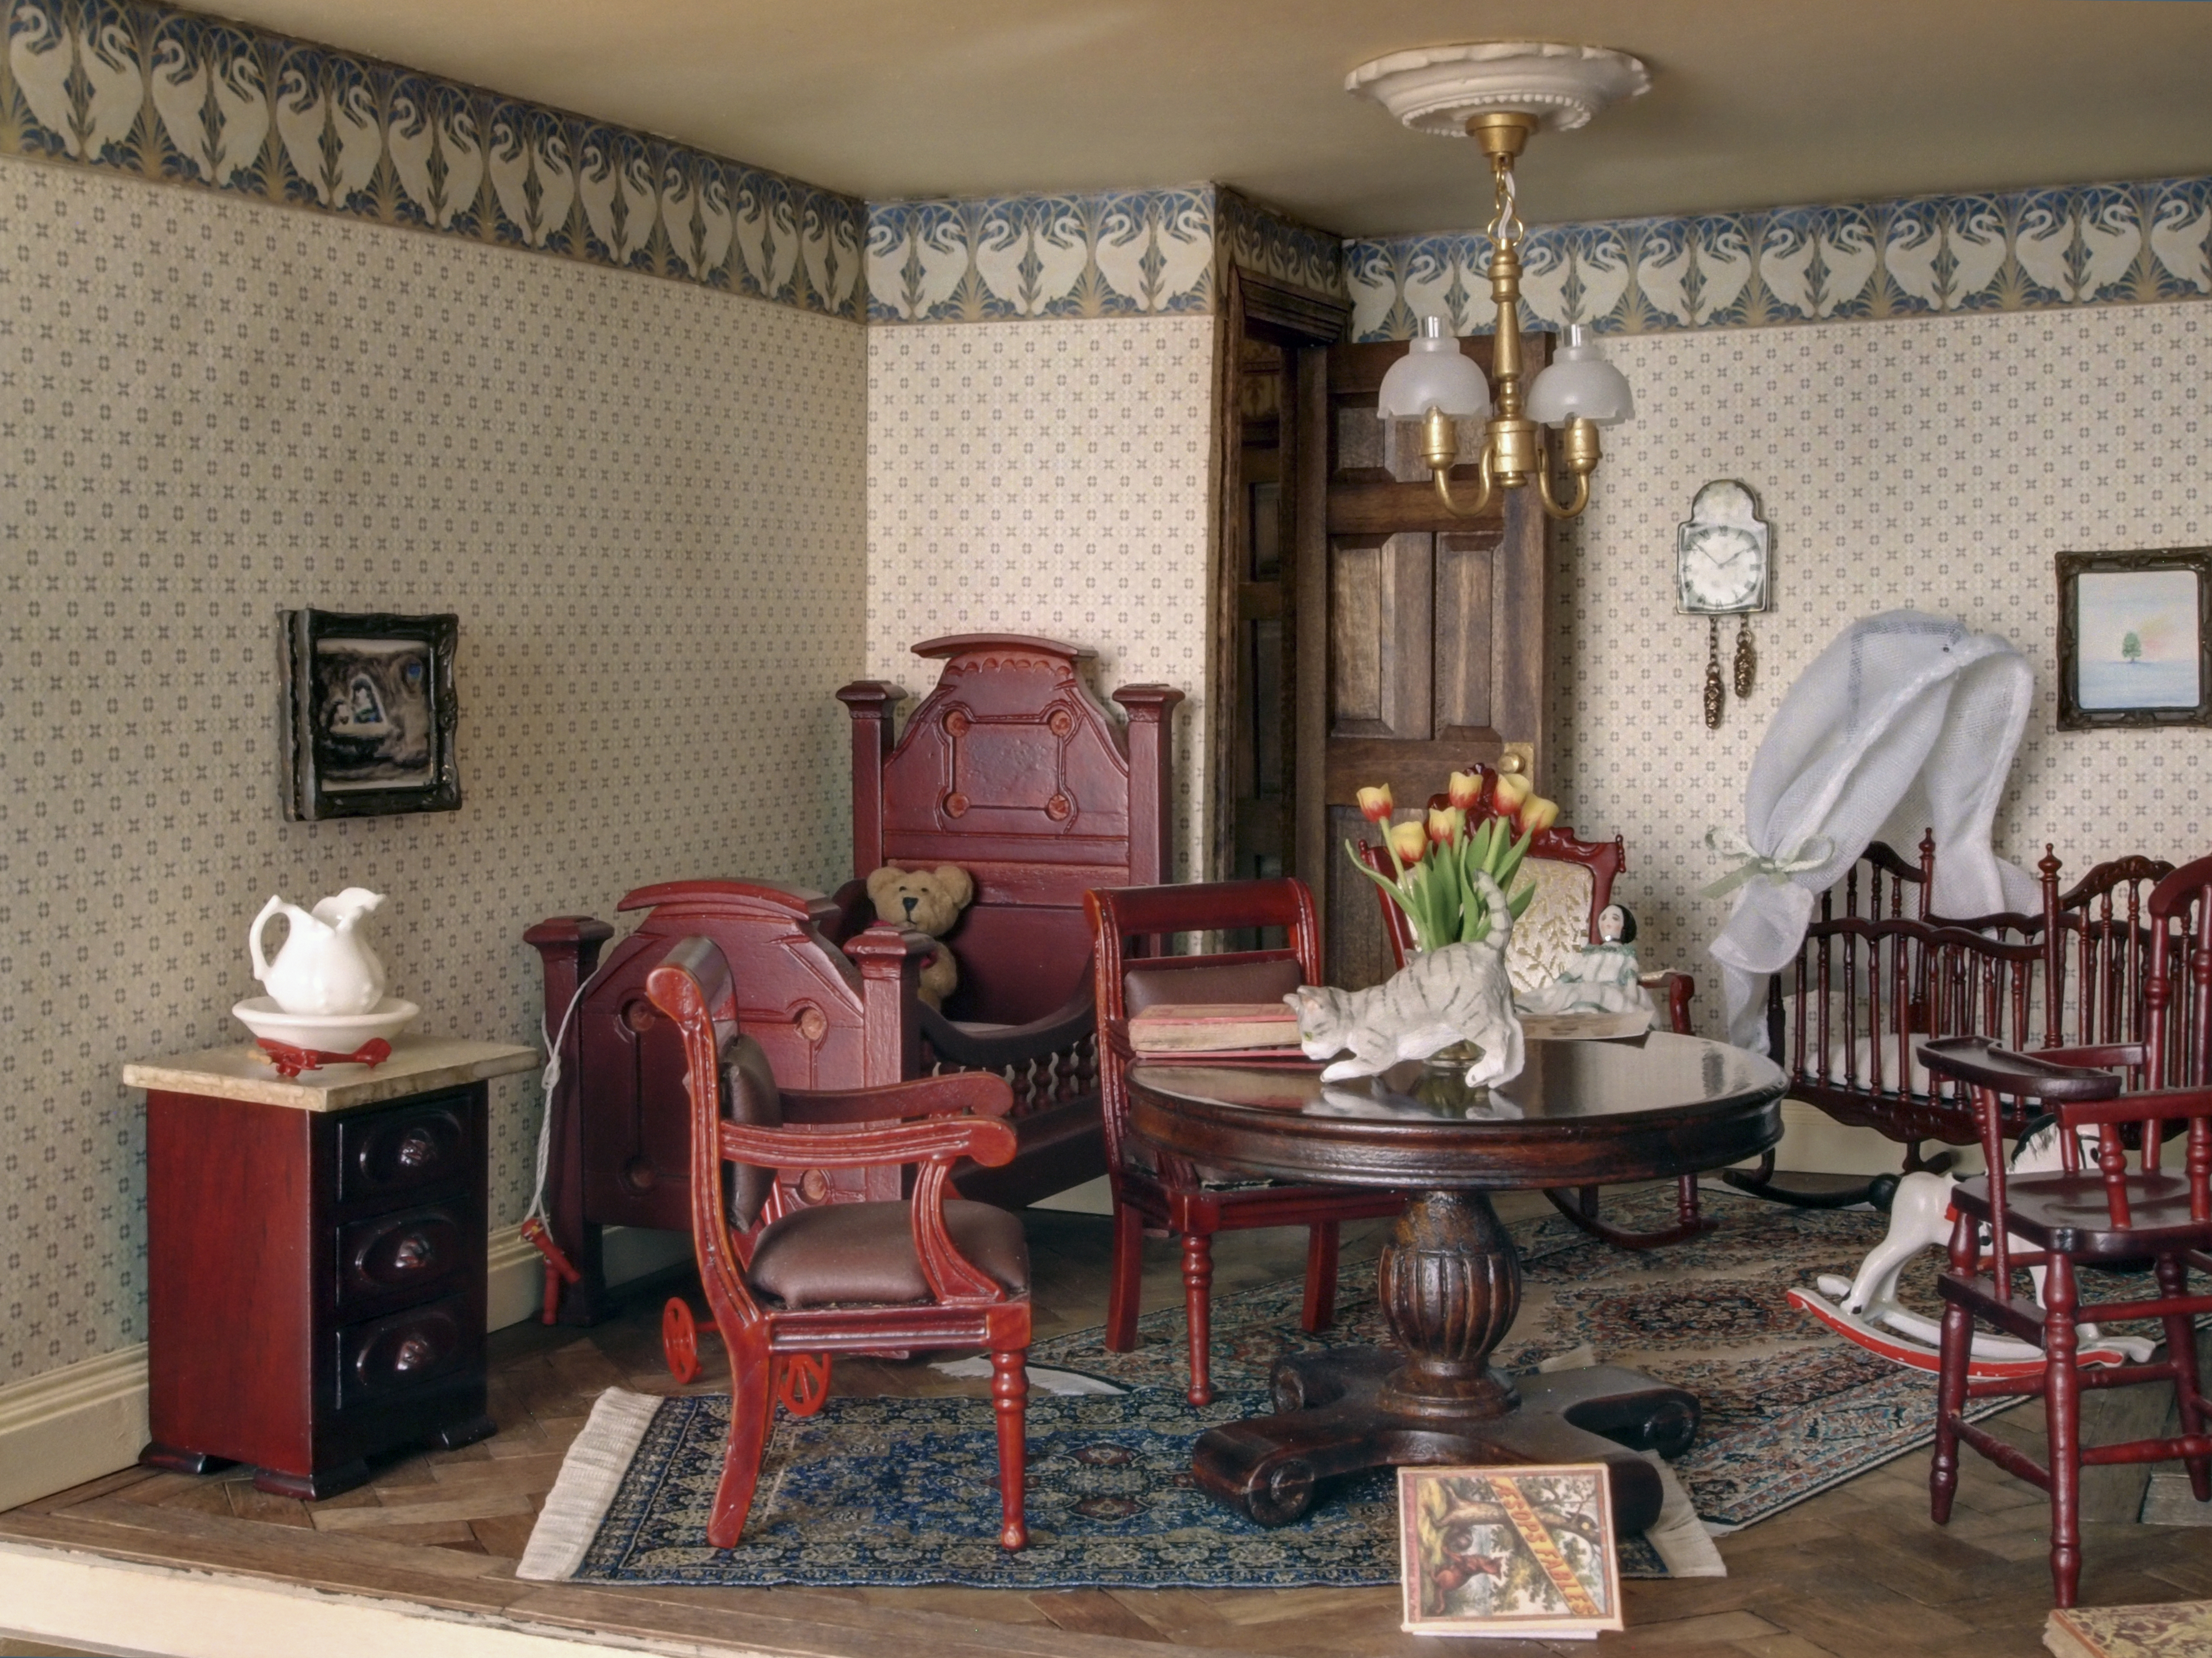
Then I figured it was time to re-frame the watercolor painting I had received as a child…my first miniature ever!

OLYMPUS DIGITAL CAMERA

Likewise, I wanted to add a print by one of my friends, Vincent Desjardins, who is an illustrator of children’s books (http://vincentdesjardins.com/).  He graciously allowed me to chose whichever I wanted, so I took this wonderful image of a mama hedgehog feeding her child at home…

16

…and printed it really small to fit the other frame. Thank you, Vince!

Also painted the frames brown to match the room better.

OLYMPUS DIGITAL CAMERA

The printer was messing up, so I will need to try to print it again later, but for now, this copy is temporarily in the frame and the pictures are up on the wall.

OLYMPUS DIGITAL CAMERA

Finally, I had found this Victorian print of a fowler snare online a while ago…

19 Fowler snare

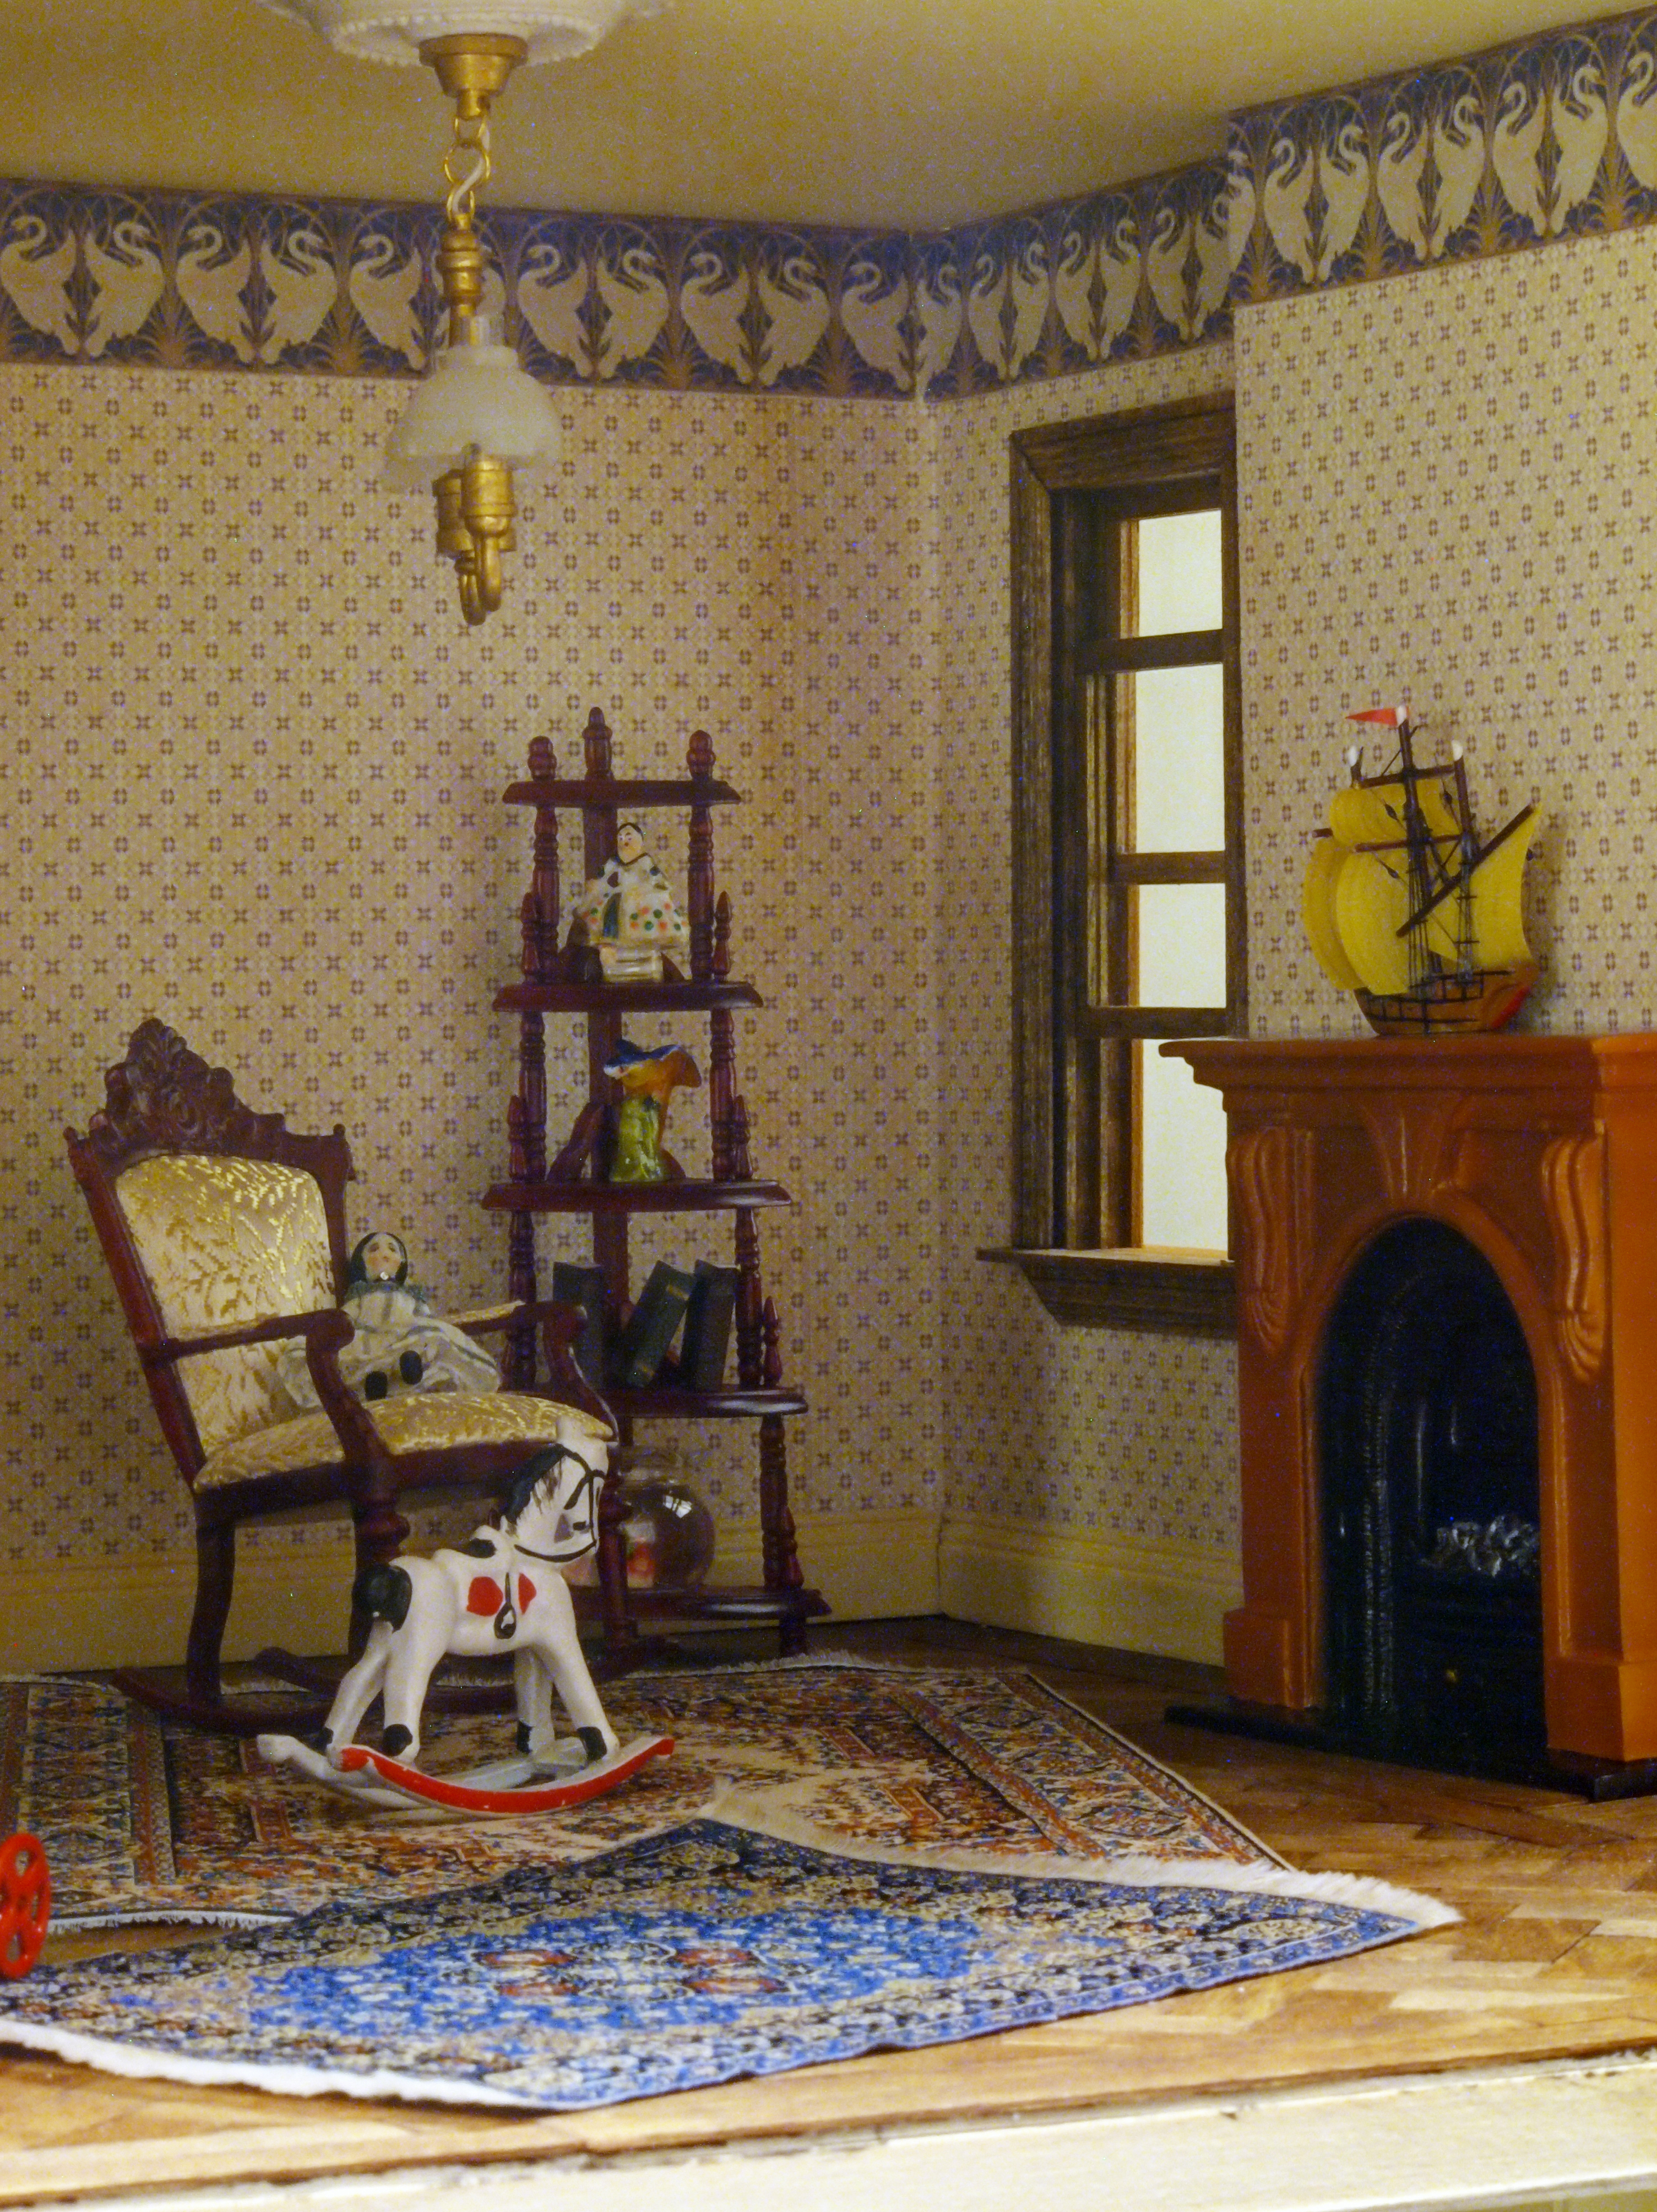
…and thought it would go well in the nursery. Printed it out, but I’m out of frames for now. Nonetheless, I fixed it above the fireplace to show where it will go and I’ll get a frame later.

OLYMPUS DIGITAL CAMERA

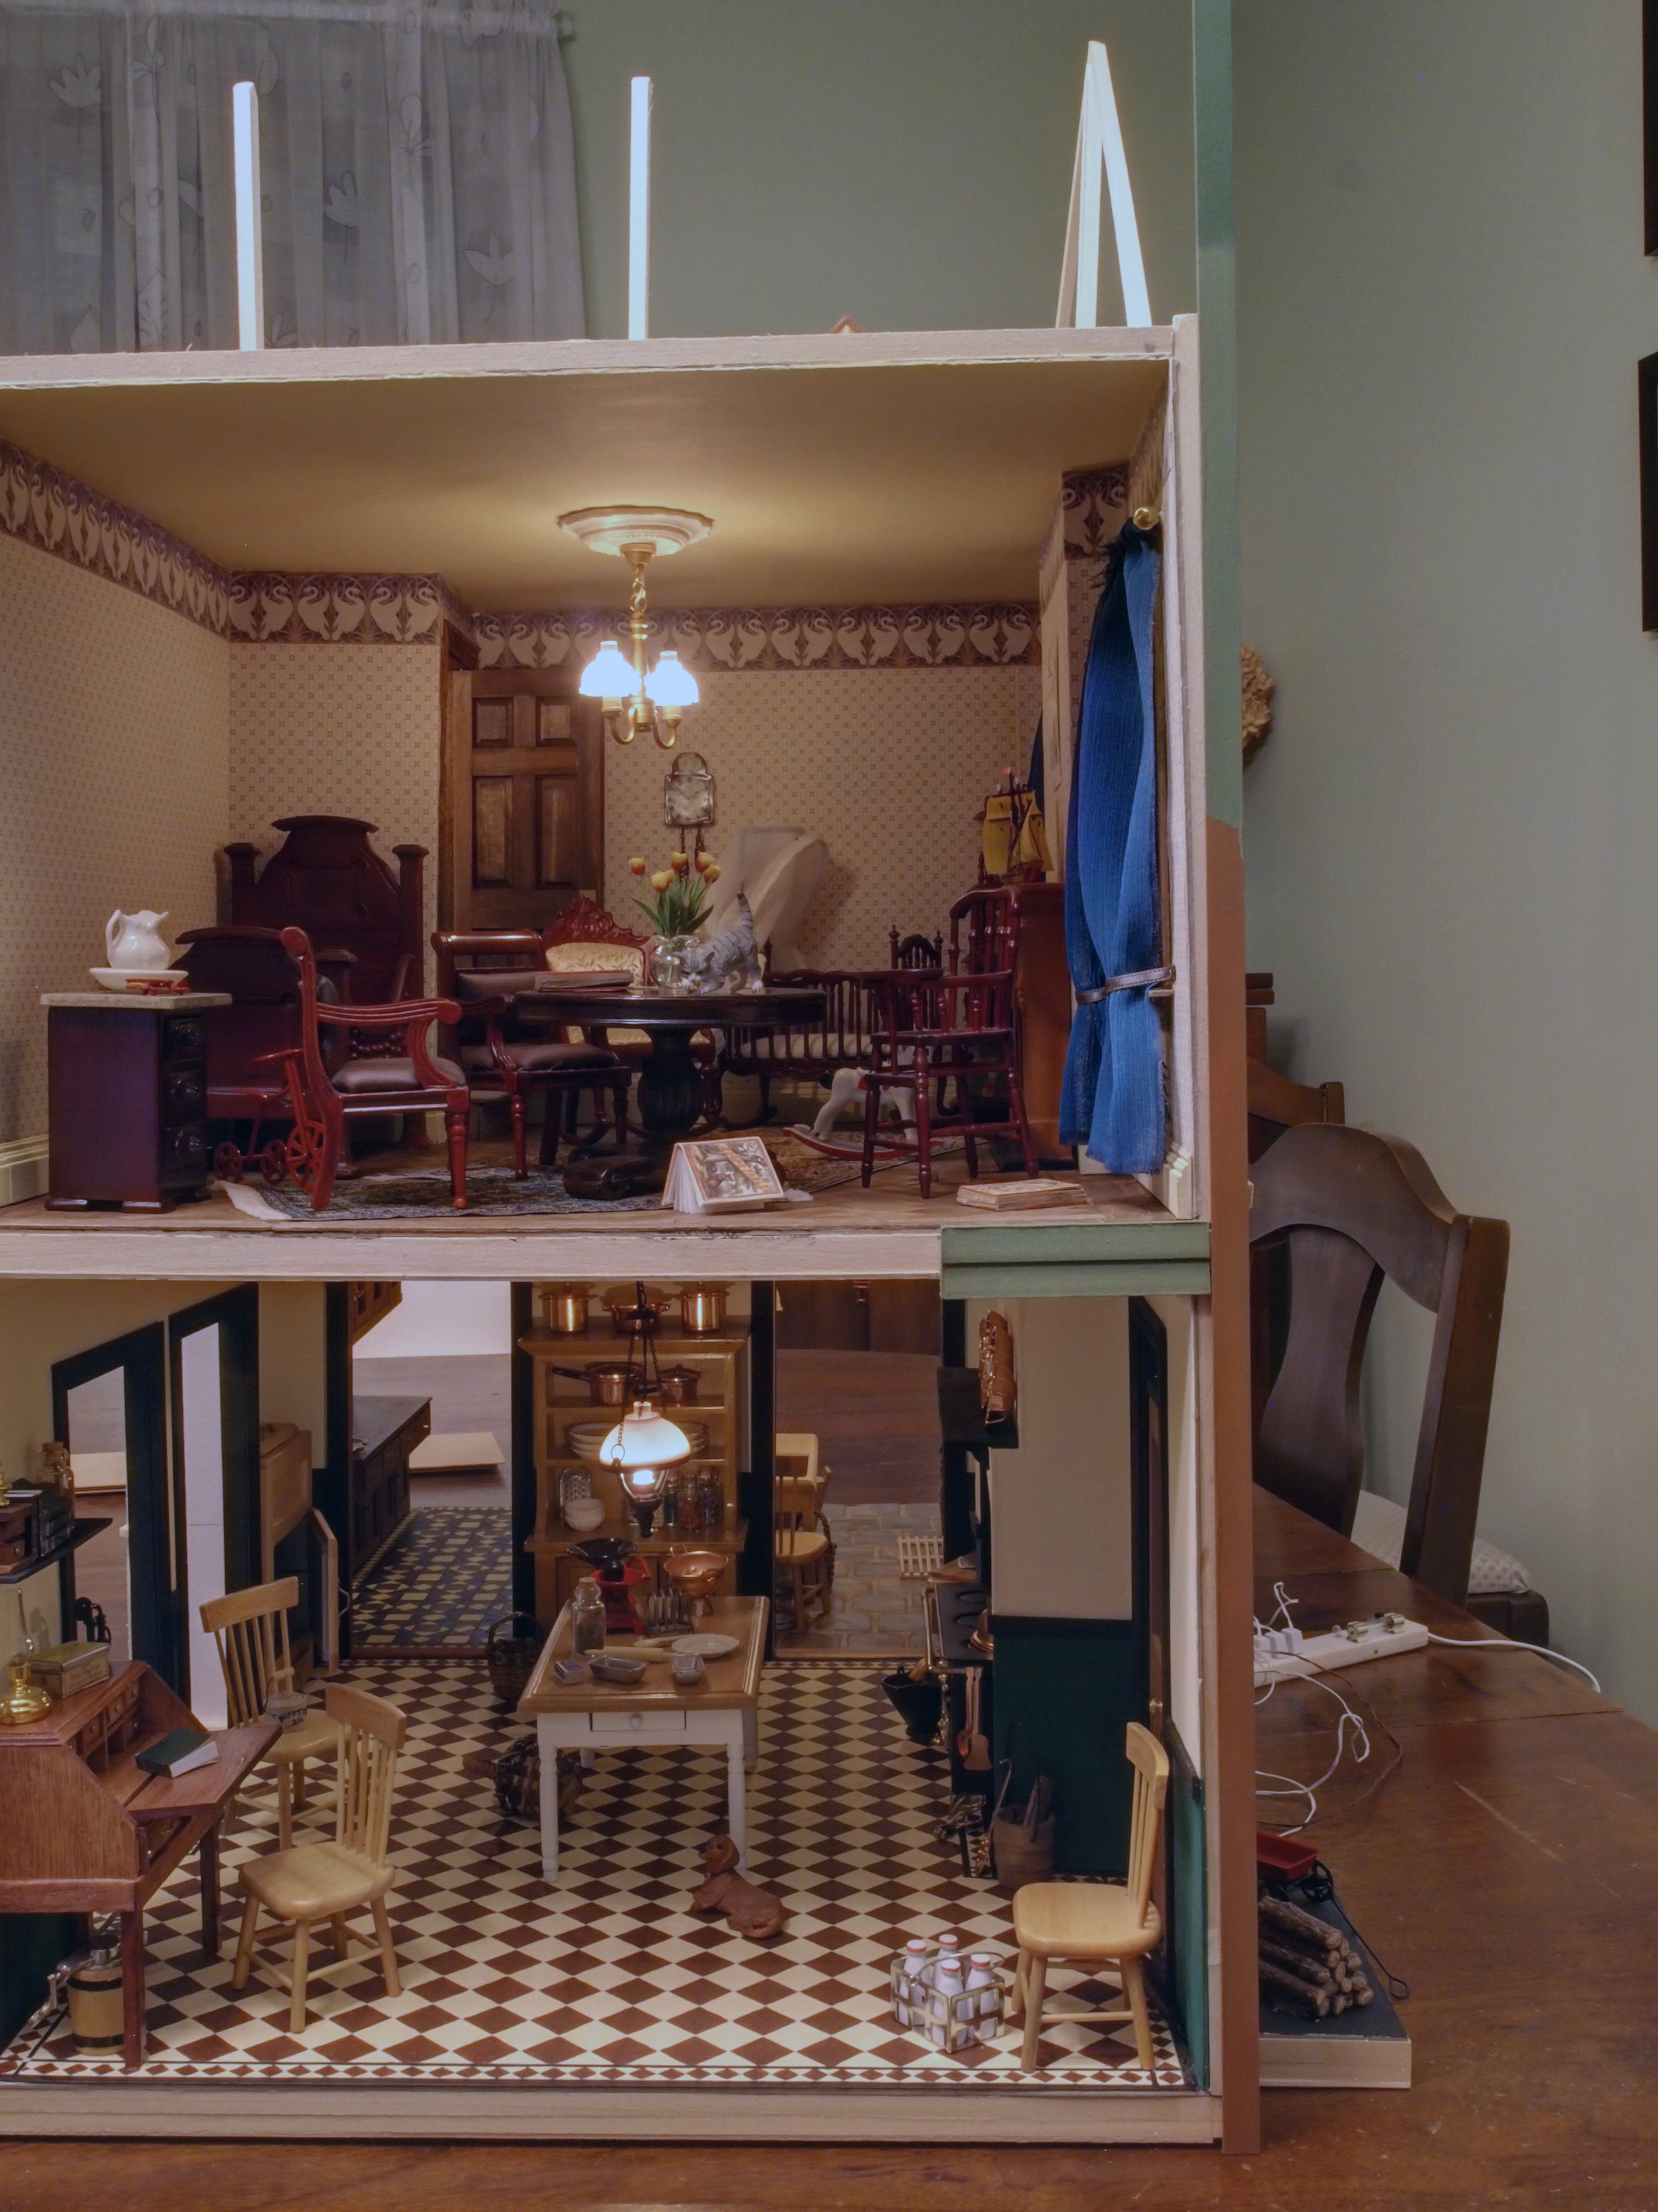
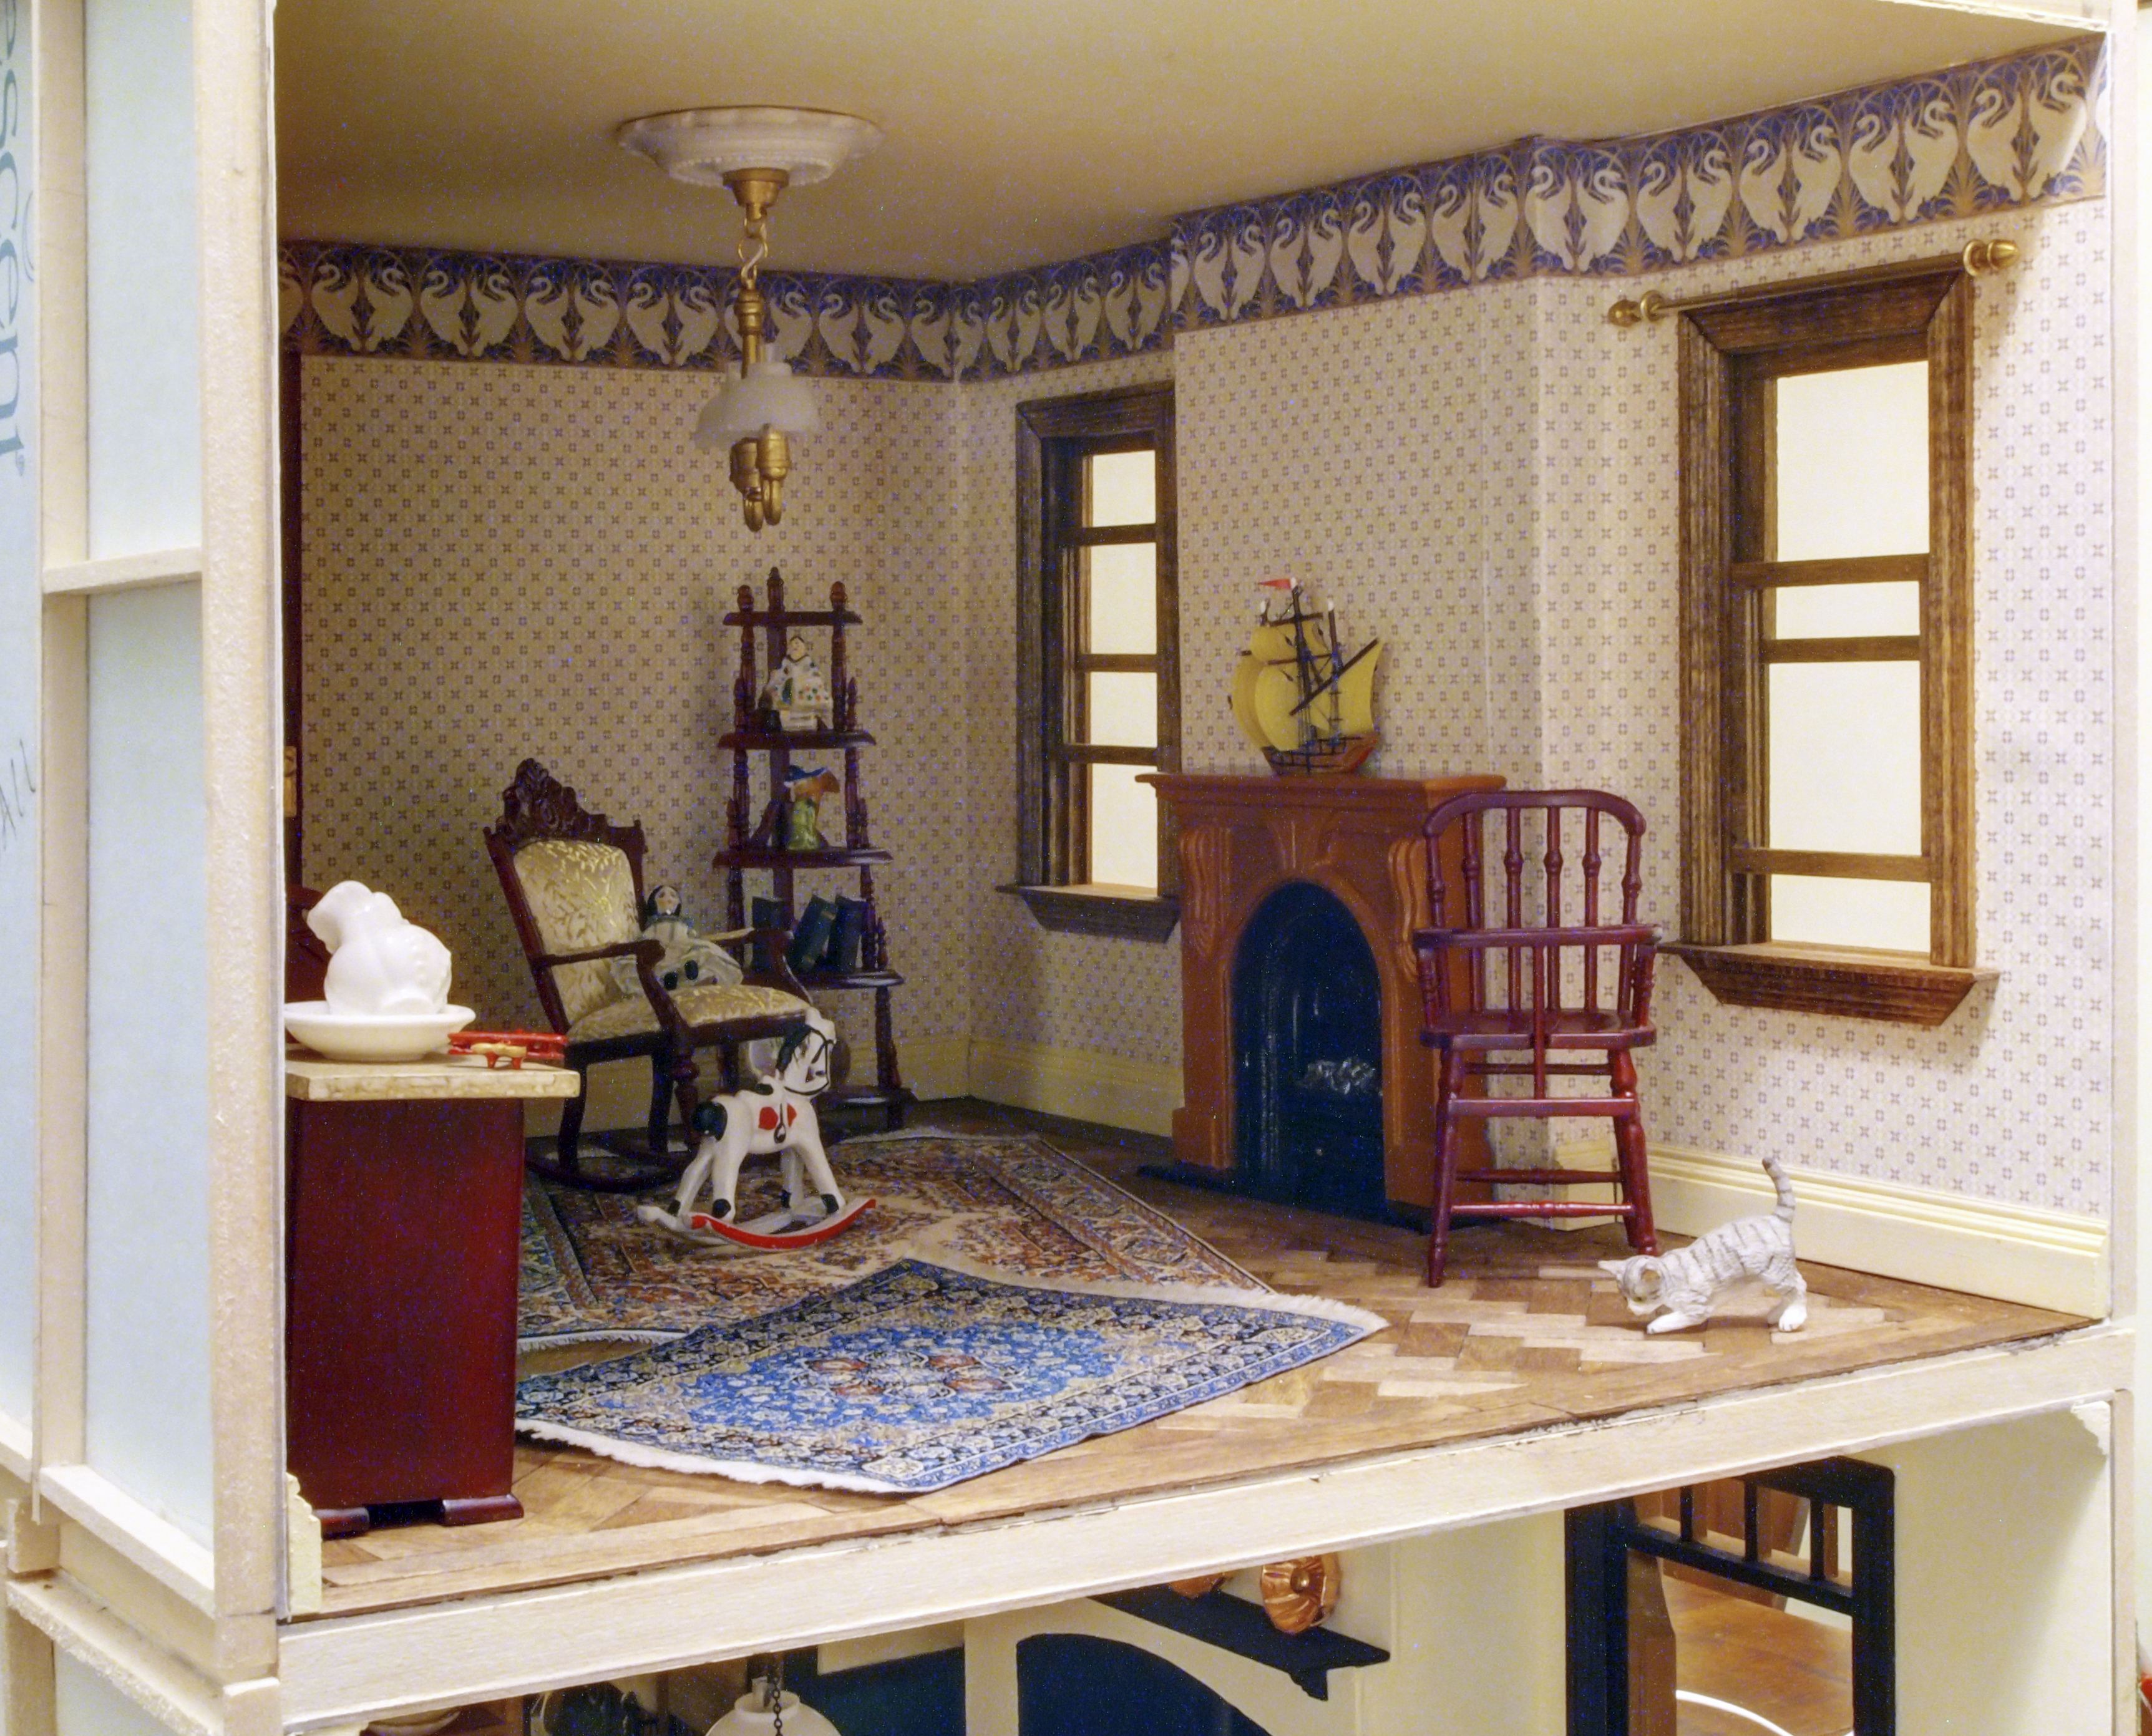
So there you are…looks like the nursery is ready for its tiny inhabitants. Still need to make a quilt and some blankets and a pillow or two when I find the time, but for now…finally…I am declaring this room finished!

OLYMPUS DIGITAL CAMERA

Six rooms down, only 16 to go…

Good night.

Nursery windows

Tags

, ,

Went and bought some fabric for the nursery curtains… (amazing how cheap fabric can be when you only buy 1/2 a foot of it!)

Chose a dark bluish-green to match the swan motif and add a bit more color to the room.

OLYMPUS DIGITAL CAMERA

Started by cutting out some window trim…

OLYMPUS DIGITAL CAMERA

…stained it…

OLYMPUS DIGITAL CAMERA

…created a couple window sills…

OLYMPUS DIGITAL CAMERA

…stained them and started gluing the first sill and trim in.

OLYMPUS DIGITAL CAMERA

OLYMPUS DIGITAL CAMERA

Did the same for the back window.

OLYMPUS DIGITAL CAMERA

Added the curtain rod for the first window…

OLYMPUS DIGITAL CAMERA

Then started to make the curtains. Figured I would use the ‘fringed’ edge as inner trim.

OLYMPUS DIGITAL CAMERA

Realized that if I hemmed the curtains, they would become stiff…so I used some non-fraying liquid instead on the edges.

OLYMPUS DIGITAL CAMERA

Used the tiniest little slip stitch to create the pocket for the rod to go through.

OLYMPUS DIGITAL CAMERA

Tried the first panel on the window…

OLYMPUS DIGITAL CAMERA

Then finished the other one and put it up.

OLYMPUS DIGITAL CAMERA

The tie-backs are just temporary…I will hopefully find something better, as well as arrange the pleats more carefully.

OLYMPUS DIGITAL CAMERA

But for now, one of the sets of curtains is almost done, and they can blow in the breeze while the kids play with the cat and toss more books on the floor.

OLYMPUS DIGITAL CAMERA

Good night.